Making DFV parts on my lathe

About making you own...

Topic author
Howie
Formula e
Formula e
Posts: 39
Joined: Tue Sep 27, 2005 7:10 am
Status: Offline

Making DFV parts on my lathe

Post by Howie »

Hi all,

Well... after many years adding to my 1/12th "to do" pile... I`m finally off and running. First one off the blocks is the JPS Lotus 72D.

I thought you might like to see my first efforts with my new mini lathe. At 49, my eyesight isn`t what it used to be, and the camera is very cruel... but hopefully my technique will improve in the months to come.

The "velocity stacks" and fuel induction system are the first thing I`m working on, so here goes with a little taster...

Image
Aluminium stock faced and turned to 7.5mm dia.

Image
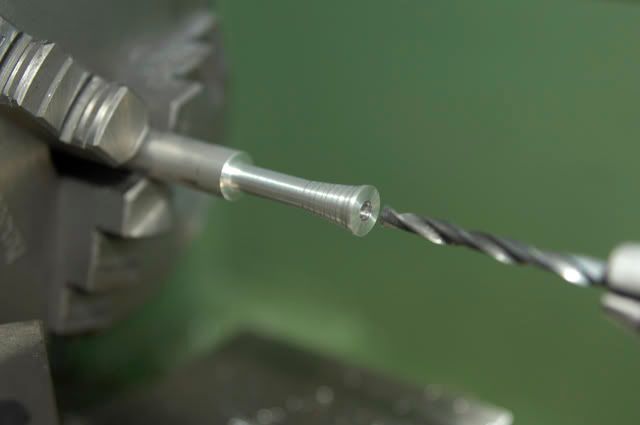
End drilling with 3.5mm bit... after roughly turning to shape

Image
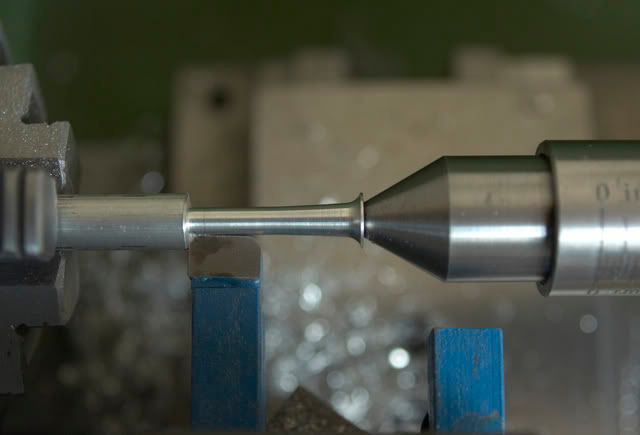
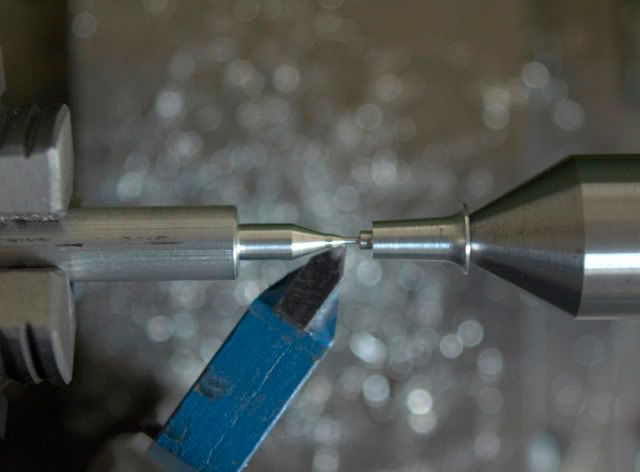
Using a specially ground/shaped tool for the final shaping

Image
Inside drilled and sanded to shape... not perfect but won`t be seen anyway!

Image
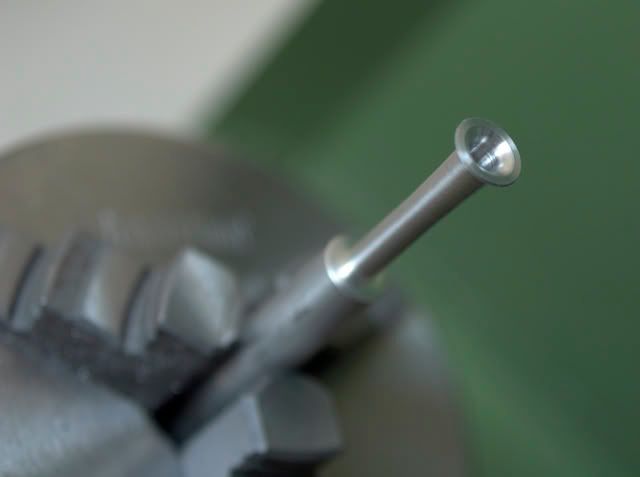
Parting off... the lathe work is now finished

Image
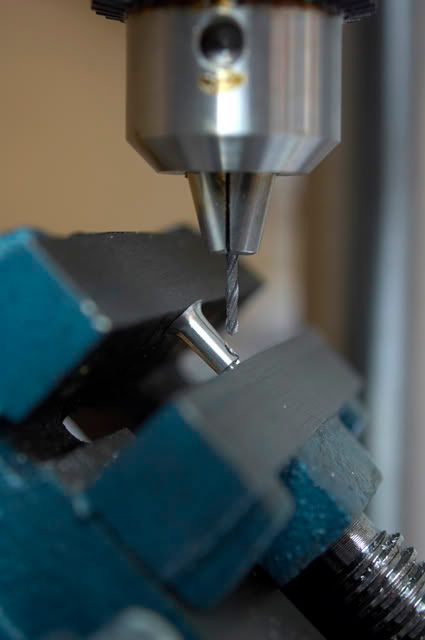
Into the drill press for an accurate 45 degree cut

Image
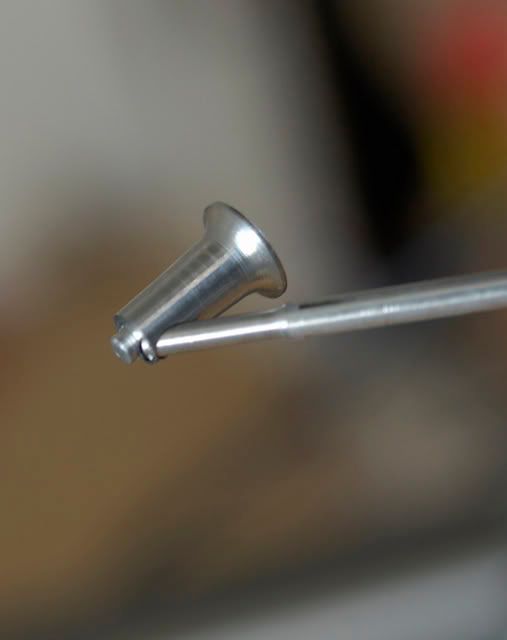
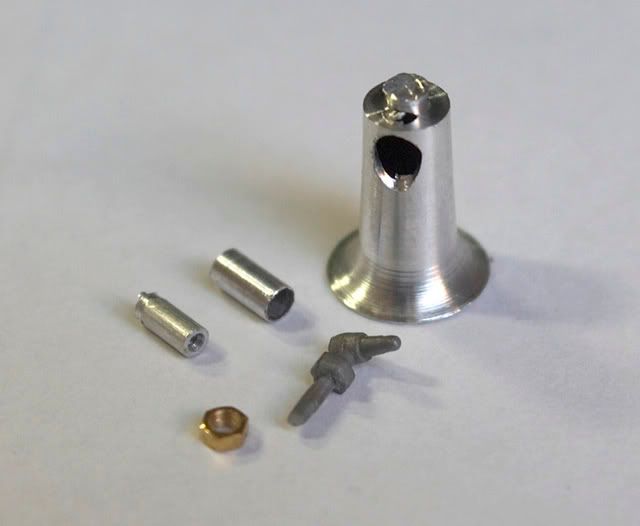
... and a test fit onto the 1.8mm dia fuel inlet pipe

Image
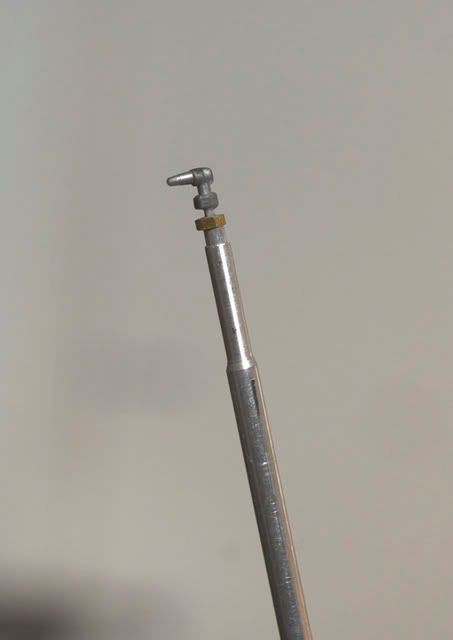
Test assembly of outer and inner pipes, locknut and... errm... modified kit part !! Well... I know my limitations :) Maybe one day I can aspire to making the whole thing !!

Image
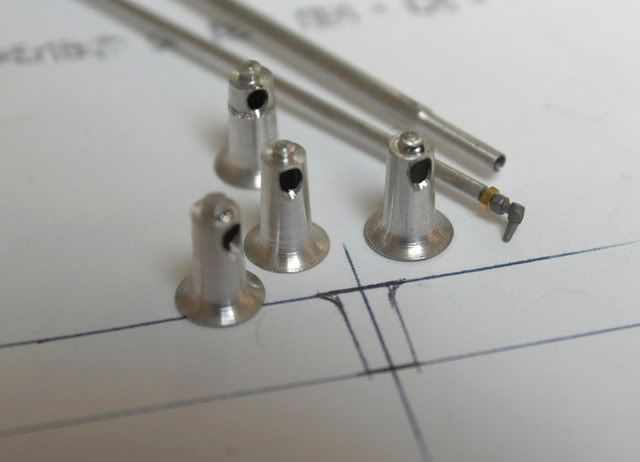
A collection of "work in progress"

Image
One complete kit of parts, ready for painting and assembly... yahoooooo !

Image
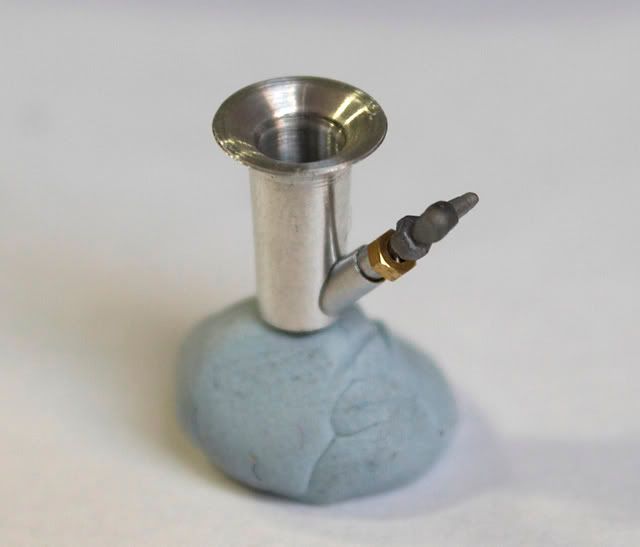
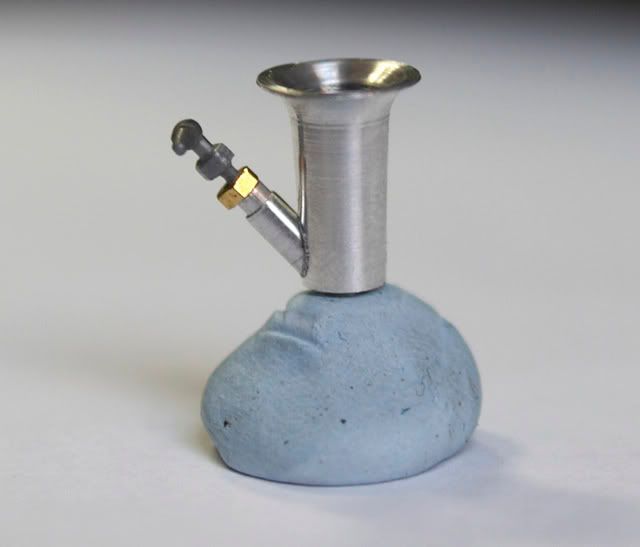
Test fit with a little blu-tak

Image
The brass nut will be positioned properly on final assembly... promise !!


O.K.... I know what you`re all thinking. Why not just buy it all??? For sure... the stuff that`s out there at the moment is WAY beyond my capabilities, and the guys who sell their stuff have my undying admiration. BUT... I just have an insane desire to create, with my own hands, a DFV that is a real peice of "jewellery"... and who cares if I`m wearing rose tinted spectacles :lol:

Just for info... the inner sleeve and nut will be Alclad Jet Exhaust, and the remaining kit part Chrome Silver... the rest will be polished up and left as is.

Hope someone gets a little inspired to try this out... you`ll need a lathe, some tools... and endless cups of tea !!!

Cheers,

Howie

P.S. The more I look at that kit part... the more I want to make my own :roll:
Last edited by Howie on Wed Jan 09, 2013 6:04 am, edited 8 times in total.
User avatar

Mr.Grumpy
FOTA Vice Chairman
FOTA Vice Chairman
Posts: 1901
Joined: Sun Apr 18, 2004 3:38 am
Favorite F1 Team or Driver: Jacques Villeneuve
Location: Toronto, Canada
Status: Offline
Canada

RE: Making DFV parts on my lathe

Post by Mr.Grumpy »

wow, great stuff.
User avatar

De21
Major Constructor
Major Constructor
Posts: 1096
Joined: Thu Jun 03, 2004 9:53 am
Favorite F1 Team or Driver: Williams
Location: Germany
Status: Offline
Germany

Post by De21 »

That looks really good!! I got a mini lathe too and I love seeing how you guys make these nice parts!

daniel
FOTA Chairman
FOTA Chairman
Posts: 2617
Joined: Wed Aug 07, 2002 4:49 am
Favorite F1 Team or Driver: Schumacher
Location: Cologne/Germany
Contact:
Status: Offline
Germany

Post by daniel »

wonderfull, could you please show me the complete tool setup you used in the sixths picture , where you drilled that 45 degree hole ?

Did you make that "ground shaped tool" by yourself ?

thanks

daniel
-germany-

Topic author
Howie
Formula e
Formula e
Posts: 39
Joined: Tue Sep 27, 2005 7:10 am
Status: Offline

Post by Howie »

Hi Daniel,

I`ll shoot a picture of the drill press setup and post it tomorrow.

I used a bench grinder to shape the lathe tool. I just did it by "feel", and it ended up with more taper than I wanted. The grinding angle was important, because I wanted to be able to set up the lathe tool "square" in the toolpost every time (ie. at an exact right angle to the work)... you will know how important it is to get "repeatability" !!

Also, as you can see in the pictures, because the tool is very "flat" to the work, every ridge and imperfection in the tool shows up in the finished part... nicht so gute :cry:

By the way... I was inspired by your RA273, and made myself some new rear shock absorbers as my first lathe project... THANKS :D

Cheers,

Howie
User avatar

Lew
Formula e
Formula e
Posts: 29
Joined: Sun Dec 30, 2001 6:14 pm
Location: Idaho
Status: Offline

Post by Lew »

Excellent craftsmanship Howie! Just curious, how long does it take you to make a single velocity stack and injector assembly? It probably goes faster once you get going and get the process down doesn't it?

Best,
Lew

mikemechanic
Status: Offline

Post by mikemechanic »

Great job Howie. I've been working on mine since I got my lathe. I learned from a member here to use center drill bits for the drilling the inside. They have a nice taper and work almost perfect. Might be worth trying. Great job on the drilling at a 45 degree angle. Might have to try that myself.

Here is a picture of the center drills

Mike

43rdMichael
FOTA Chairman
FOTA Chairman
Posts: 2610
Joined: Thu May 12, 2005 9:43 pm
Location: Melbourne, Australia
Status: Offline

Post by 43rdMichael »

Awesome work Howie. !!!

Its a bonus for us all that you have mastered the "black art" of posting photos, because you sure have mastered the "black art" of turning up welocity stacks!!!

This build is going to be awesome. Good luck with it all.
User avatar

steveoccc
F1 Test Driver
F1 Test Driver
Posts: 279
Joined: Wed Oct 11, 2006 11:39 pm
Location: In a truck somewhere in the US
Status: Offline

Post by steveoccc »

If you want to make extras of everything you make, I'll buy them from you. :D :D
"Never underestimate the power of human stupidity" - Robert A. Heinlein
User avatar

billgtp
FOTA Chairman
FOTA Chairman
Posts: 2409
Joined: Sat Jan 26, 2002 5:27 pm
Favorite F1 Team or Driver: Chapmans Lotus, James Hunt
Location: Anza ca.
Status: Offline
United States of America

Post by billgtp »

Great work.I do have a lathe etc. but no time to use them
I would say your work is real coles to someone I pruchase parts from
Post Reply