
Bigduke6 - Modeling Update
-
43rdMichael
- FOTA Chairman

- Posts: 2610
- Joined: Thu May 12, 2005 9:43 pm
- Location: Melbourne, Australia
- Status: Offline
Re: Bigduke6 - Modeling Update
Yep, one of his best. If you've seen the kit he started with, its even more impressive...
-
 BigDuke6
Topic author - Major Constructor

- Posts: 1185
- Joined: Sun Feb 10, 2008 10:15 pm
- Location: Sydney, Aus
- Status: Offline
Re: Bigduke6 - Modeling Update
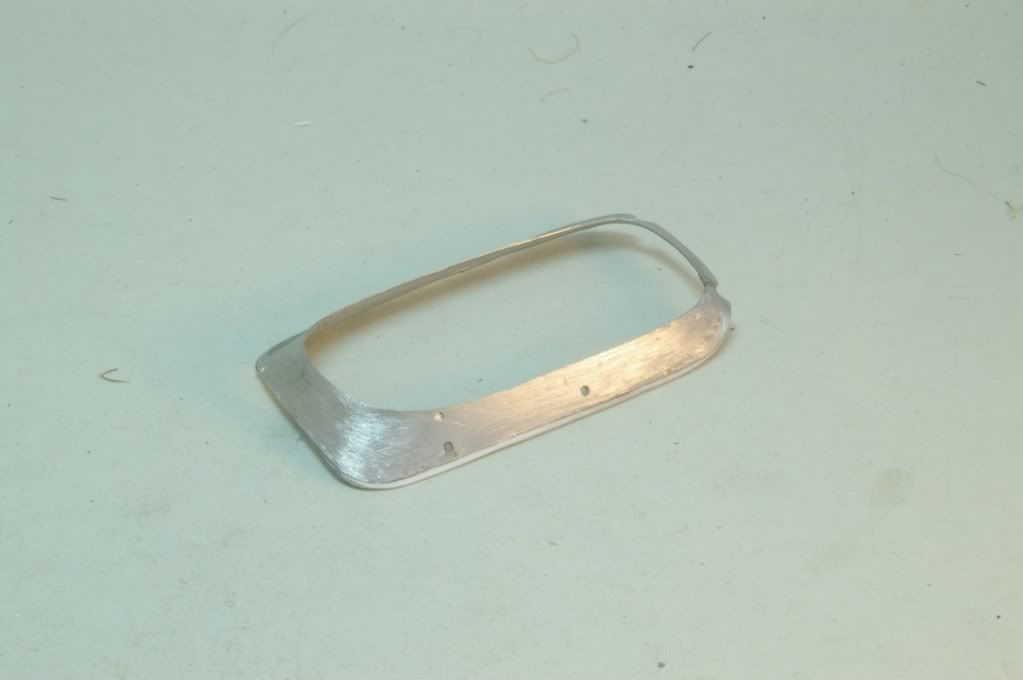
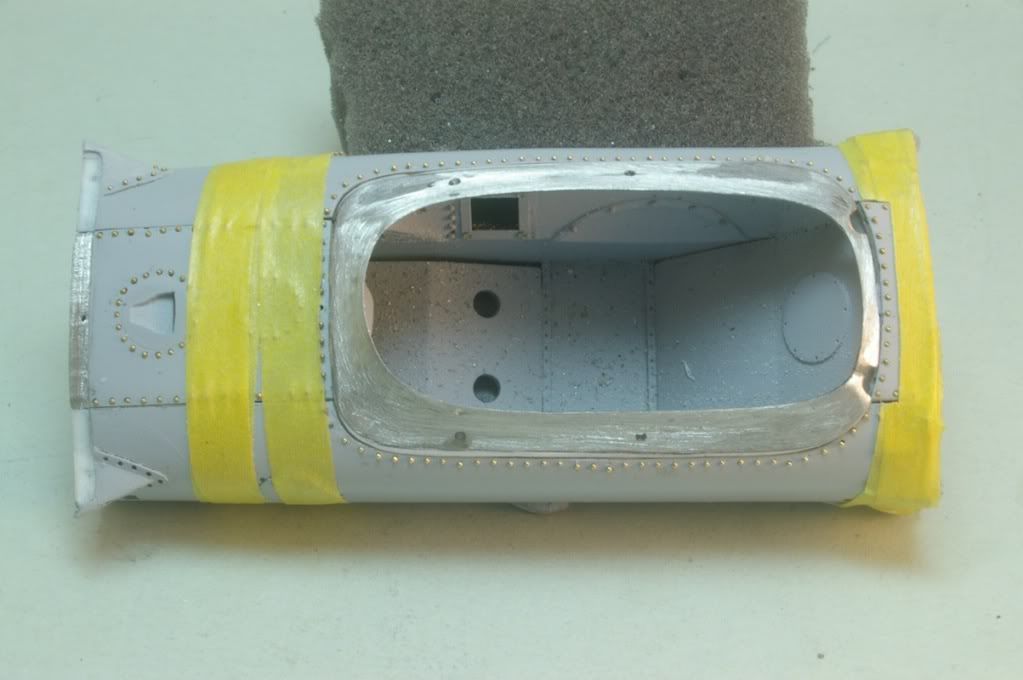
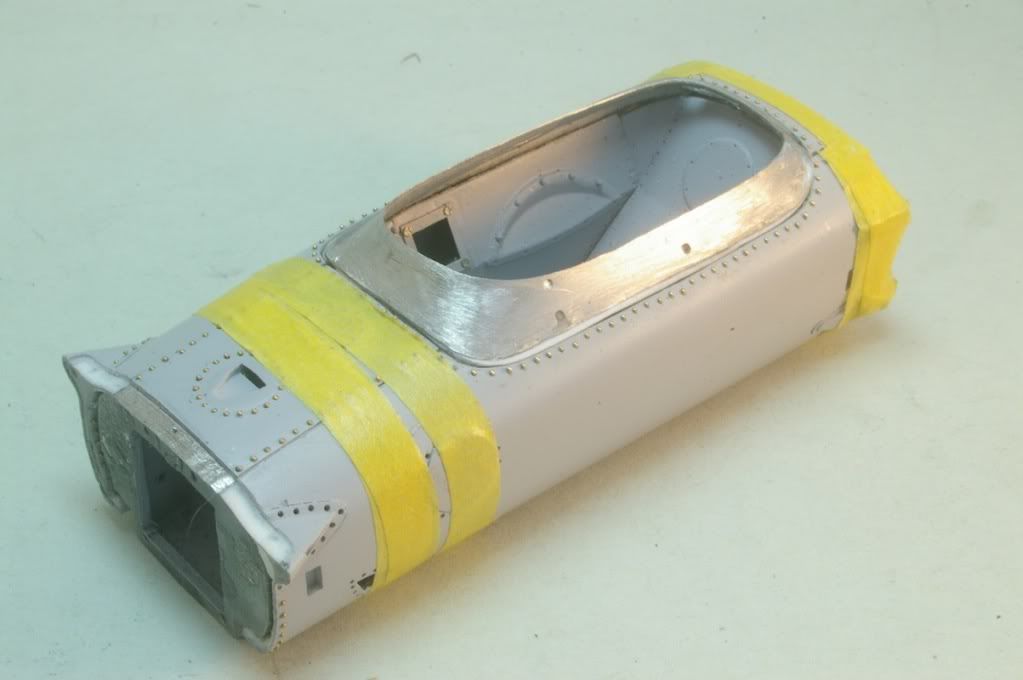
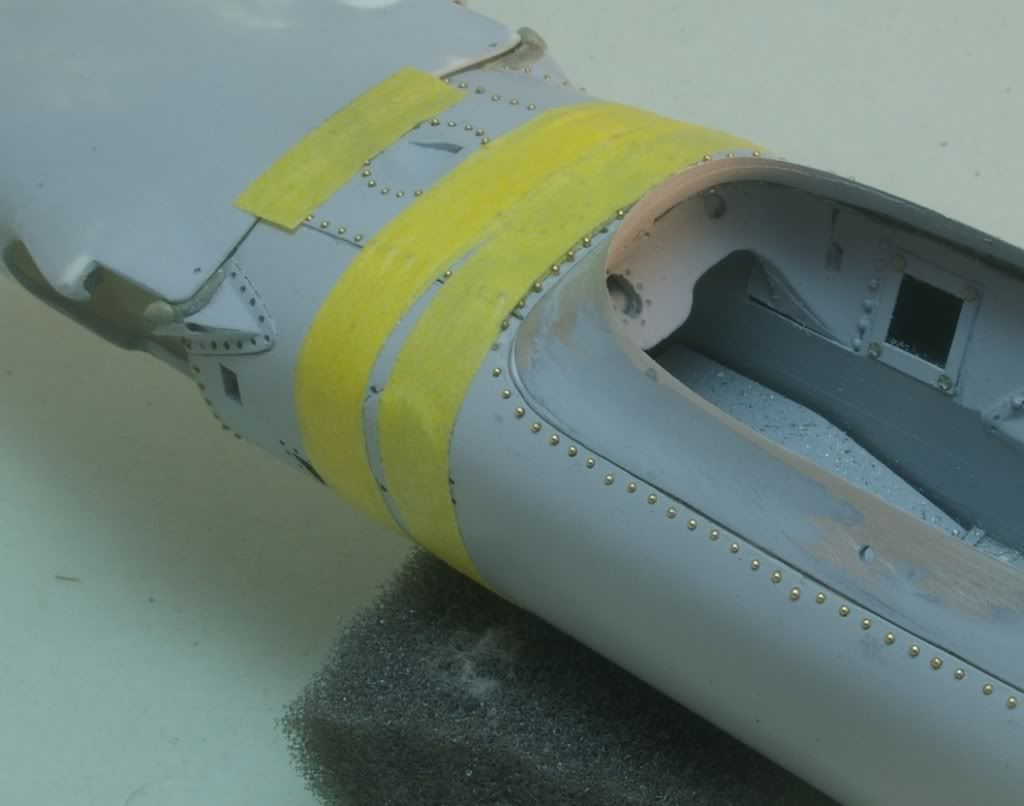
Whilst waiting for rivets, I've worked on the cockpit surround. Ever feel like you spend all weekend working on get nowhere?! Well I had to increase the size of the surround to improve the fit.
1st try was with putty, but this was WAY too messy, so I stripped it back and glued tiny strips of styrene to the edge and then sanded down by hand.
Added putty to the front of the cockpit to tidy up the join with the nose.

1st try was with putty, but this was WAY too messy, so I stripped it back and glued tiny strips of styrene to the edge and then sanded down by hand.
Added putty to the front of the cockpit to tidy up the join with the nose.
-
 Shunter
- FOTA Chairman
- Posts: 2906
- Joined: Sat Sep 20, 2003 12:38 am
- Favorite F1 Team or Driver: Alfa Romeo, McLaren, Williams
- Location: Melbourne, Australia
- Contact:
- Status: Offline

Re: Bigduke6 - Modeling Update
I know abou what seems like no progress oe hours of work, but what you have done looks great. You must have gone batty with those rivets...
-
 De21
De21
- Major Constructor
- Posts: 1096
- Joined: Thu Jun 03, 2004 9:53 am
- Favorite F1 Team or Driver: Williams
- Location: Germany
- Status: Offline

Re: Bigduke6 - Modeling Update
Ohh those rivets must have been annoying 
-
 Jeff
Jeff
- FOTA Chairman
- Posts: 2774
- Joined: Wed Jan 25, 2006 1:36 am
- Location: Melbourne, Australia
- Status: Offline
Re: Bigduke6 - Modeling Update
Very impressive skills Duke - the time spent on improving the fit will be worth it, even though at the time it makes you feel that you have gone nowhere!
-
 Dede
Dede
- FOTA Chairman
- Posts: 2082
- Joined: Sat Aug 02, 2008 4:52 pm
- Your Name: Dede
- Favorite F1 Team or Driver: ....
- Location: Ireland.
- Status: Offline

Re: Bigduke6 - Modeling Update
Big D,
That most certainly looks like a lot of work, You're heading in the right direction though, keep the updates coming, very good to see whats involved in the build of this kit,
Thanks.
That most certainly looks like a lot of work, You're heading in the right direction though, keep the updates coming, very good to see whats involved in the build of this kit,
Thanks.
Dede.
-
 garymc
- World Champion

- Posts: 641
- Joined: Fri May 12, 2006 4:41 pm
- Your Name: Gary McIntyre
- Favorite F1 Team or Driver: Mclaren, Senna
- Location: hinesville,ga
- Status: Offline

Re: Bigduke6 - Modeling Update
All them rivets are looking great,I can imagine how it will look with paint 
Regards,Gary
Regards,Gary
-
BigDuke6
Topic author - Major Constructor
- Posts: 1185
- Joined: Sun Feb 10, 2008 10:15 pm
- Location: Sydney, Aus
- Status: Offline
Re: Bigduke6 - Modeling Update
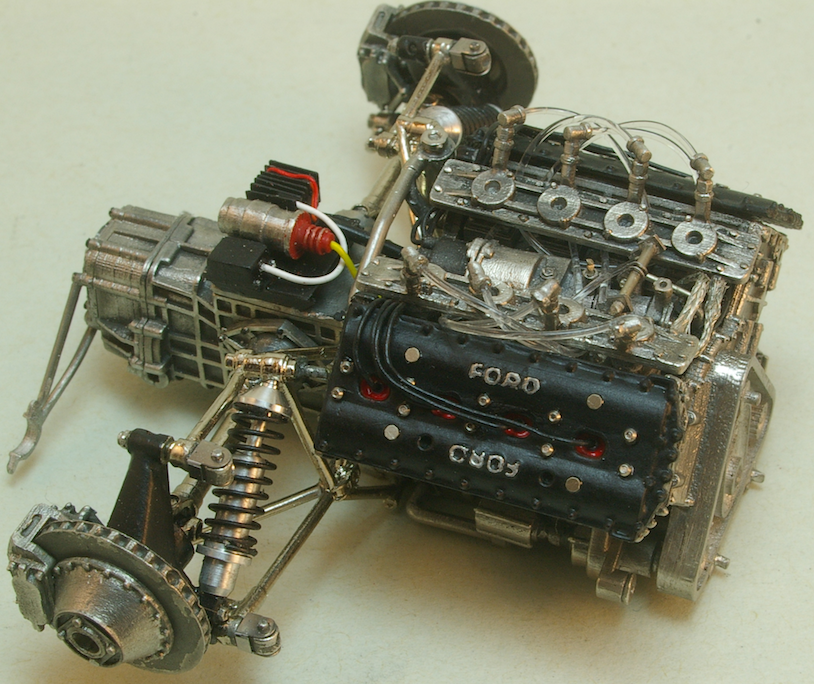
Thanks to Mac for getting me some Turner Model Factory parts - I've used these on the cam covers + SMS pe pieces. Dry fit at the moment. Also added fuel lines with bead wire... excellent stuff, stong bond with ca glue and very very flexible.
(still a few touchups around the ford logos - but this can wait)
(still a few touchups around the ford logos - but this can wait)
-
Jeff
- FOTA Chairman
- Posts: 2774
- Joined: Wed Jan 25, 2006 1:36 am
- Location: Melbourne, Australia
- Status: Offline
Re: Bigduke6 - Modeling Update
Looks fab - nothing beats real metal to represent the metal parts of the real car!
-
BigDuke6
Topic author - Major Constructor
- Posts: 1185
- Joined: Sun Feb 10, 2008 10:15 pm
- Location: Sydney, Aus
- Status: Offline
Re: Bigduke6 - Modeling Update
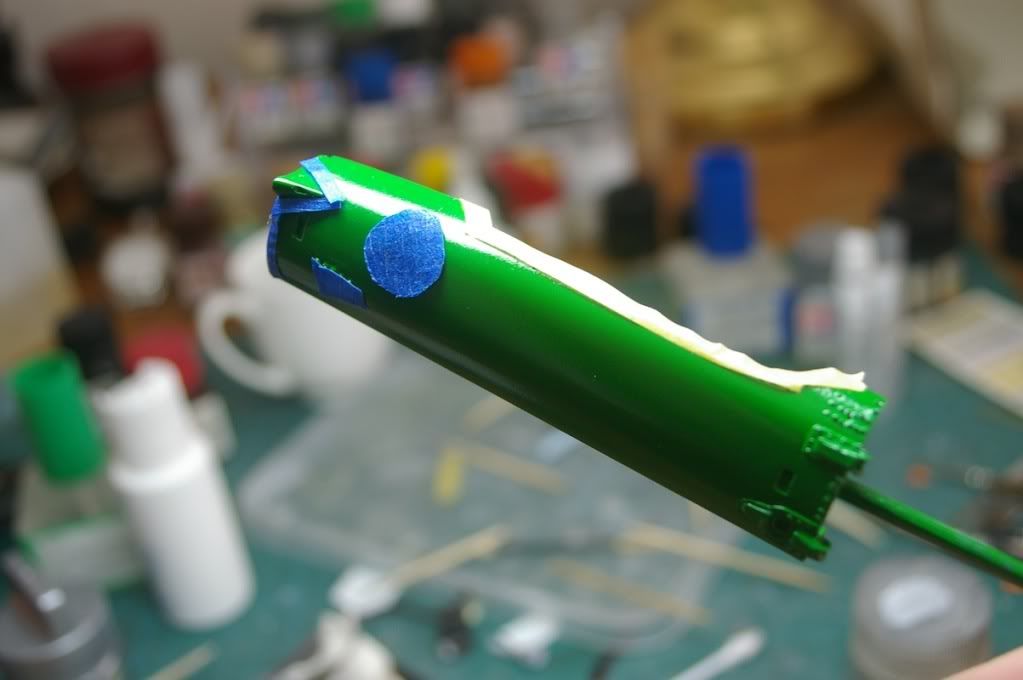
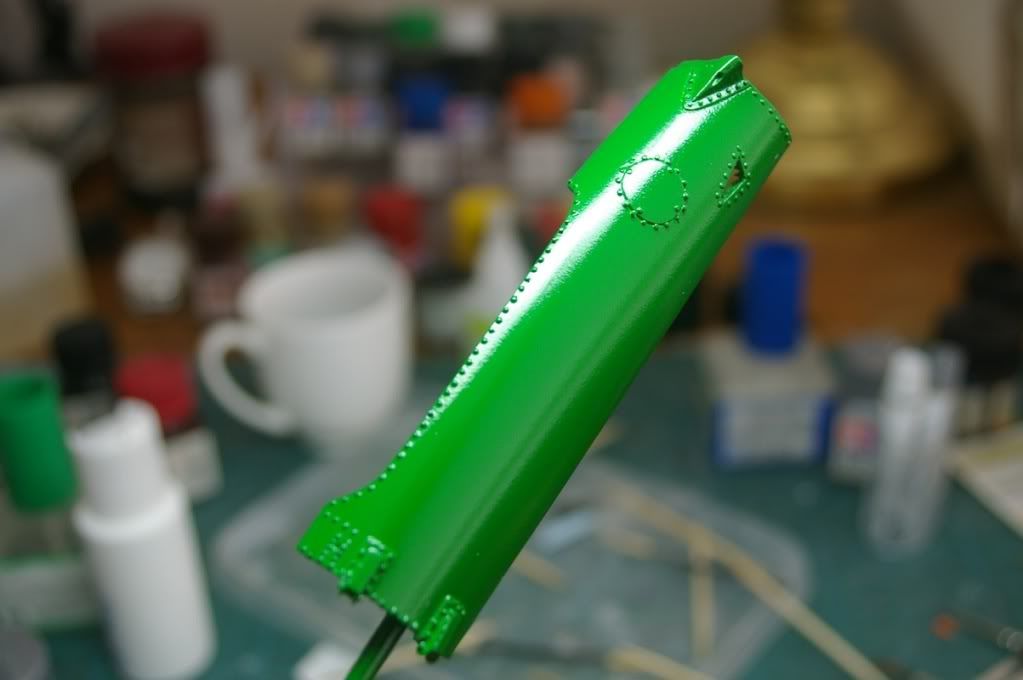
Moving forward with this one - all rivets in & primed. layed down a few mist coats of green & masked off the rivets whilst sanding. There will probably end up being some orange peel in and around the rivets, but this is probably reminiscent of the time.
Plan with the yellow is the same as the RB5 - lay down decals & see how they go.... then if needed, sand back to smooth and mask using decals as a guide. Lets hope the decals work out =)
Plan with the yellow is the same as the RB5 - lay down decals & see how they go.... then if needed, sand back to smooth and mask using decals as a guide. Lets hope the decals work out =)