
Coming along nicely .......... hanginnere!
Cheers,
-me-
BAR003 - GB2009
-
 CBartholomew4677
- FOTA Chairman

- Posts: 3178
- Joined: Sat May 14, 2005 8:50 am
- Your Name: Chris Bartholomew
- Favorite F1 Team or Driver: Forza Ferrari!!!
- Location: Michigan, USA
- Status: Offline

Re: BAR003 - GB2009
Looks very cool!! You are very correct that the kit exhausts are NG, and should be replaced with aluminum tube. Looking forward to seeing it finished.
Cheers,
Chris
Cheers,
Chris
-
 rollover
- F1 Test Driver

- Posts: 277
- Joined: Tue May 06, 2008 10:01 pm
- Location: St.Louis, Mo
- Status: Offline
Re: BAR003 - GB2009
It looks great so far, you have recovered from the spraying accident very nicely. I can go to school on your mistake and be sure of the colors I'm spraying!
Jeff Grebe, Plasticrastinator
Not finishing kits, my specialty
Not finishing kits, my specialty
-
 CaptainMark
- Top Designer

- Posts: 757
- Joined: Sat Nov 27, 2004 7:20 pm
- Location: Brisbane, Australia
- Status: Offline


-
 BigDuke6
Topic author - Major Constructor

- Posts: 1185
- Joined: Sun Feb 10, 2008 10:15 pm
- Location: Sydney, Aus
- Status: Offline
Re: BAR003 - GB2009
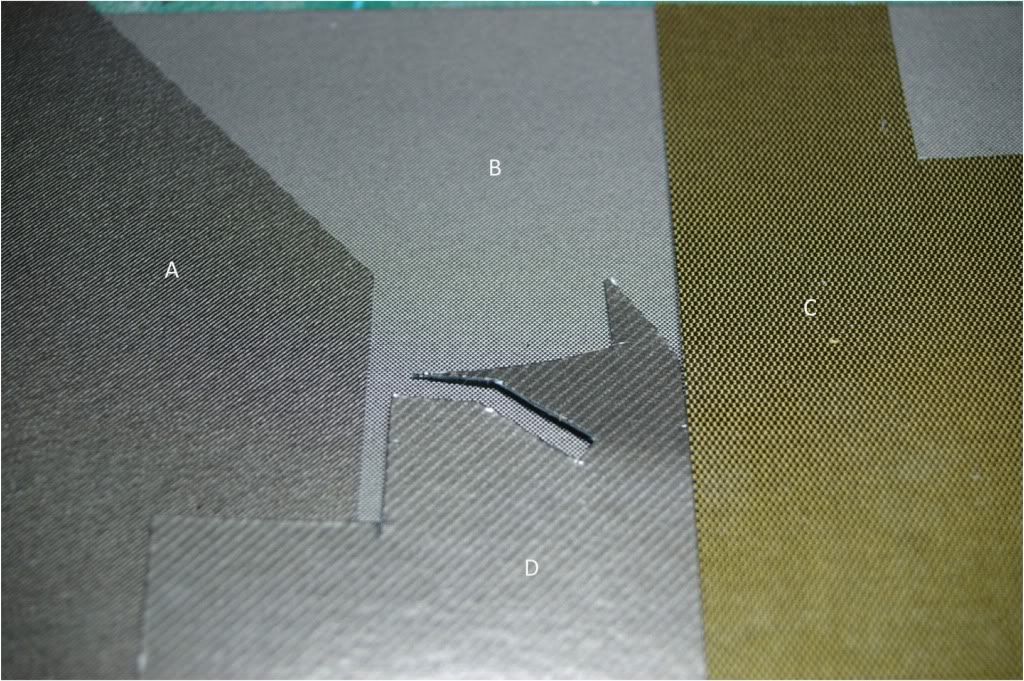
90% of all CF work is now done.. I'm using Studio27 "S" carbon decals and I have to say, they are the best CF I've ever used. I'd even go the "SS" size on some parts if I could start again...
Here's a comparison of the different types used so far -
A: SMS Twill
B: Museum Collection
C: Crazy Modeler
D: S27 "s".
C was used on the undertray,
D on the suspension & wings
A was used on the gearbox & lower rear wing element + seat.
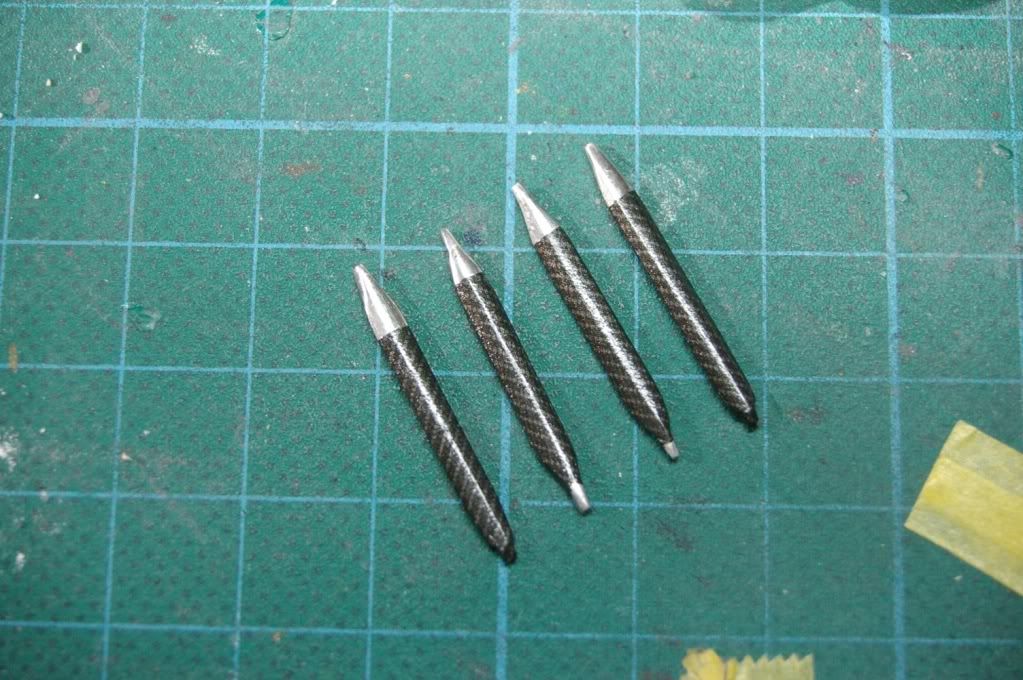
Front pushrods & steering arm have been polished first then CF'd leaving the shiny metal part where the arm joins the nose.
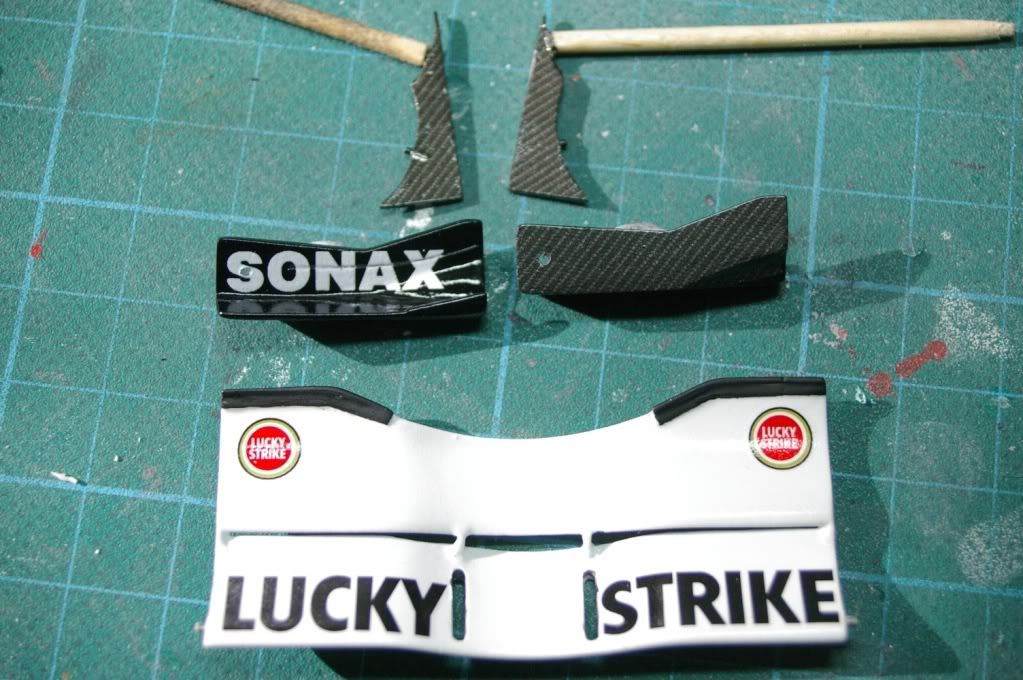
Front wing prior to assembly with the bottom vanes & end plates. Undecided if I'll add the clear plastic pieces to the edge of the wing, sorta looks OK as it is.
Here's a comparison of the different types used so far -
A: SMS Twill
B: Museum Collection
C: Crazy Modeler
D: S27 "s".
C was used on the undertray,
D on the suspension & wings
A was used on the gearbox & lower rear wing element + seat.
Front pushrods & steering arm have been polished first then CF'd leaving the shiny metal part where the arm joins the nose.
Front wing prior to assembly with the bottom vanes & end plates. Undecided if I'll add the clear plastic pieces to the edge of the wing, sorta looks OK as it is.
-
BigDuke6
Topic author - Major Constructor
- Posts: 1185
- Joined: Sun Feb 10, 2008 10:15 pm
- Location: Sydney, Aus
- Status: Offline
Re: BAR003 - GB2009
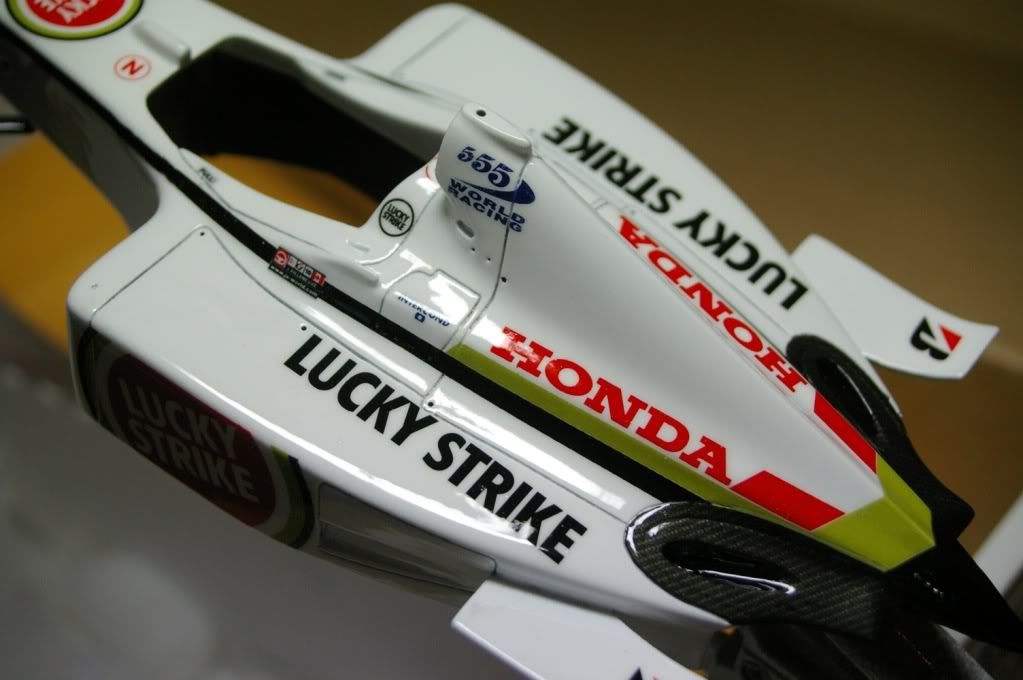
Sanded down the body and applied another layer of clear - mmmm, shiny =)
-
 alexpayne
- FOTA Chairman
- Posts: 3361
- Joined: Mon Apr 14, 2003 4:17 pm
- Location: Oxford. UK
- Status: Offline
Re: BAR003 - GB2009
Hi ,This is looking very good and the final clear coat looks great.Out of interest what clear do you use 
Regards,Alex.
Regards,Alex.
-
CBartholomew4677
- FOTA Chairman
- Posts: 3178
- Joined: Sat May 14, 2005 8:50 am
- Your Name: Chris Bartholomew
- Favorite F1 Team or Driver: Forza Ferrari!!!
- Location: Michigan, USA
- Status: Offline
Re: BAR003 - GB2009
Beautful finish on that body!! I second the above, what clear did you use?
Have you had any problems with decal adhesion to the polished metal suspension pieces? I've had problems in the past when I didn't paint the part first, but it was a plastic part.
One more thing: What are you planning to use for the body fasteners? I used "Flat Rivets" (0.5mm, 0.75mm) from Hobby Design for the first time on my Ferrari F2004. They have a post, so they line up well, and are textured, so you can wash them. I was really happy with the outcome.
Cheers,
Chris
-
BigDuke6
Topic author - Major Constructor
- Posts: 1185
- Joined: Sun Feb 10, 2008 10:15 pm
- Location: Sydney, Aus
- Status: Offline
Re: BAR003 - GB2009
Thanks for the comments all - I wish I had a photo to show after the white \ clear mixup! Coming along nicely.
The clear is Duplicolour clear with light sanding between layers which is new for me as I usually just lay down the layers and sand like crazy at the end. Sanding between layers is definatly the way to go =)
As for the body fasteners, I've pre-drilled all the holes and intend on using Scale Hardware rivets.. I looked at the SMS p\e stuff but the set from the SMS website only has a small number of 1/20 scale fasteres & I thought I'd give the rivets a try.

Will let you know how they end up working out - fingers crossed.
The clear is Duplicolour clear with light sanding between layers which is new for me as I usually just lay down the layers and sand like crazy at the end. Sanding between layers is definatly the way to go =)
As for the body fasteners, I've pre-drilled all the holes and intend on using Scale Hardware rivets.. I looked at the SMS p\e stuff but the set from the SMS website only has a small number of 1/20 scale fasteres & I thought I'd give the rivets a try.
Will let you know how they end up working out - fingers crossed.
-
ziggy
- Midfield
- Posts: 435
- Joined: Wed Dec 14, 2005 3:57 am
- Location: Granollers-Barcelona
- Contact:
- Status: Offline
Re: BAR003 - GB2009
Hi Duke!
Wow! that bar is looking fantastic! (I really love the shine you have achieved with the clear coat!)
can't wait to see it finished!
Wow! that bar is looking fantastic! (I really love the shine you have achieved with the clear coat!)
can't wait to see it finished!