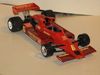
Leyton House CG 901B
-
 dlphnfn
- Backmarker

- Posts: 328
- Joined: Tue May 13, 2008 1:22 pm
- Favorite F1 Team or Driver: Walter Wolf Racing
- Location: Central Iowa
- Contact:
- Status: Offline

Re: Leyton House CG 901B
Good start on that CG901B. I'll be watching as I have one in waiting as well. Good to see those CF decals too...
My Builds > https://public.fotki.com/BuiltByErick/
-
Mikey123Go.
- Spectator

- Posts: 5
- Joined: Sun Mar 29, 2020 3:03 pm
- Your Name: Mike
- Favorite F1 Team or Driver: BENETTON,...LOTUS..Andretti
- Status: Offline
Re: Leyton House CG 901B
Nice job for sure..just finished this build. Nice car when finished keep up the good work
-
wadny
Topic author - F2 Champion

- Posts: 117
- Joined: Sun Nov 10, 2002 4:00 pm
- Your Name: Larry Osolkowski
- Favorite F1 Team or Driver: Red Bull, Max Verstappen
- Location: North Tonawanda, NY
- Contact:
- Status: Offline
Re: Leyton House CG 901B
Thanks for the comments, gentlemen. I'm not sure about this kit being the only one not reissued, although it certainly has never been reissued. It is a good looking car. It's hard to imagine there would be licensing issues for a team that hasn't existed for years, but you never know.
-
 vekkuli
- FOTA Chairman

- Posts: 4446
- Joined: Wed Dec 21, 2005 3:20 pm
- Favorite F1 Team or Driver: Stake Sauber
- Location: Oulu-Uleåborg Finland
- Status: Offline

Re: Leyton House CG 901B
Ahh, the holy Grail...Please Tamiya-San, re-release this wonderful Model Kit, even without Baddies' & British Petroleum Decals. Good Work so far, keep 'Em comin'wadny wrote:Thanks for the comments, gentlemen. I'm not sure about this kit being the only one not reissued, although it certainly has never been reissued. It is a good looking car. It's hard to imagine there would be licensing issues for a team that hasn't existed for years, but you never know.
My completed Models:
https://www.flickr.com/photos/150229040 ... 3349714787
https://www.flickr.com/photos/150229040 ... 3349714787
-
wadny
Topic author - F2 Champion
- Posts: 117
- Joined: Sun Nov 10, 2002 4:00 pm
- Your Name: Larry Osolkowski
- Favorite F1 Team or Driver: Red Bull, Max Verstappen
- Location: North Tonawanda, NY
- Contact:
- Status: Offline
Re: Leyton House CG 901B
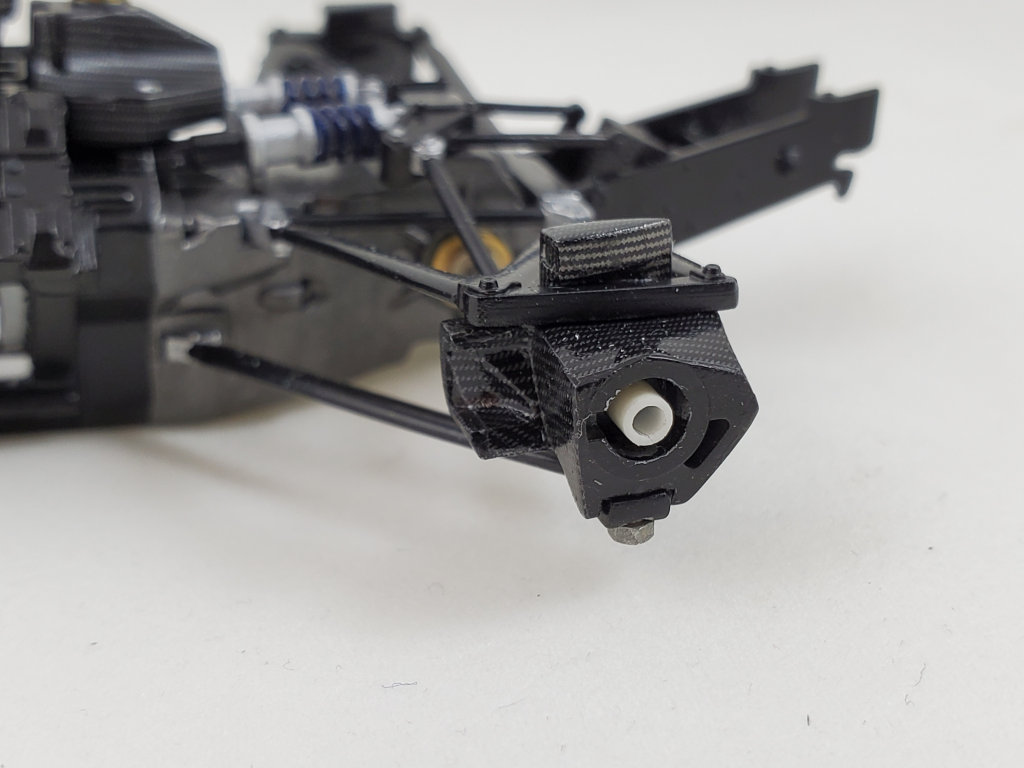
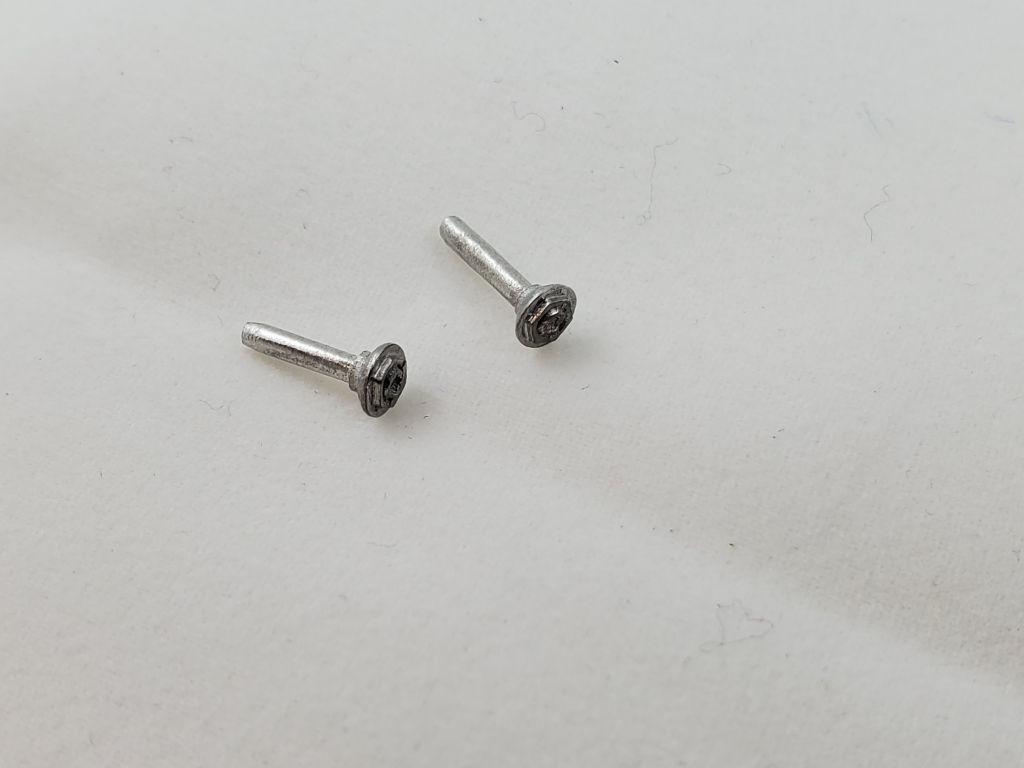
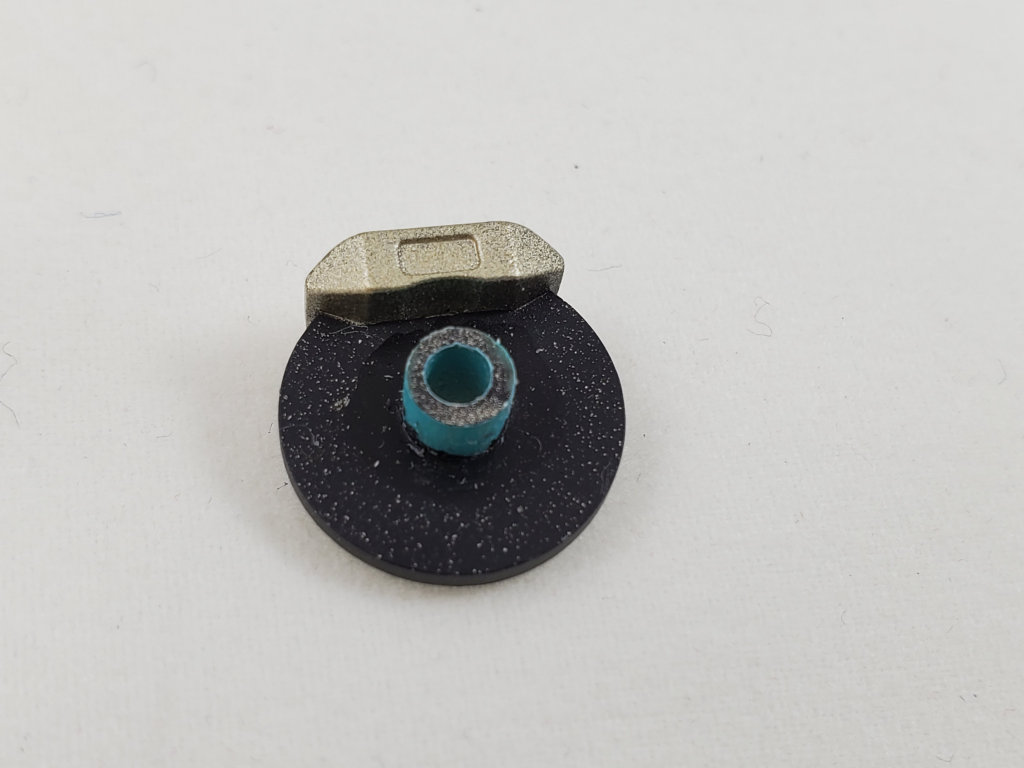
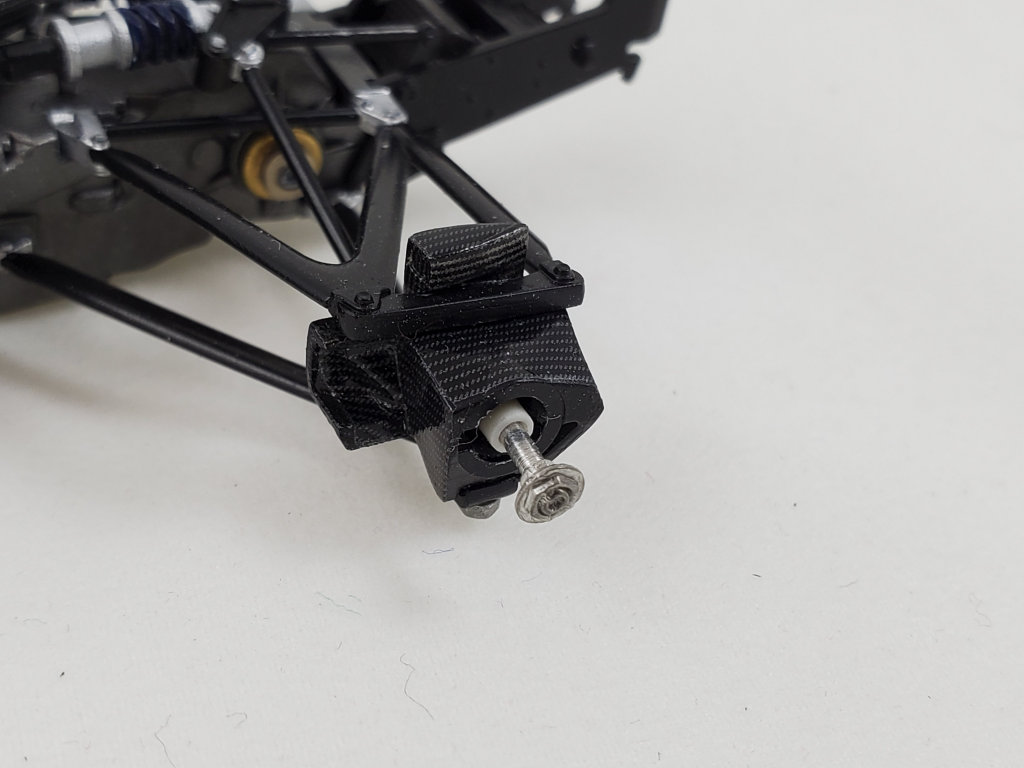
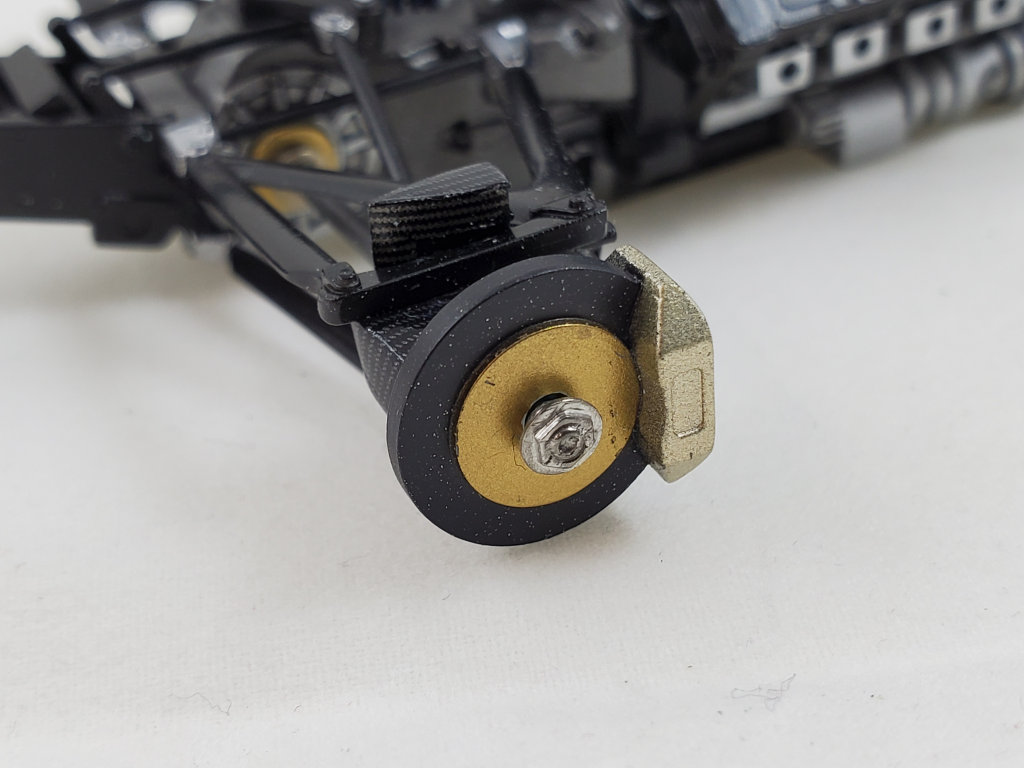
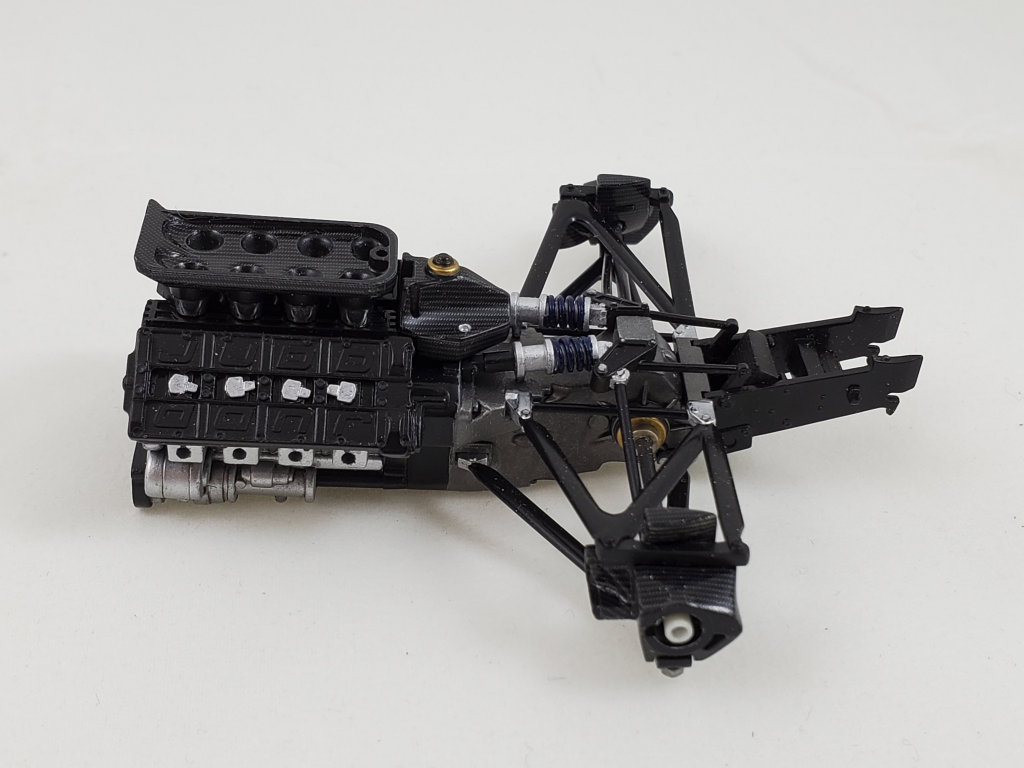
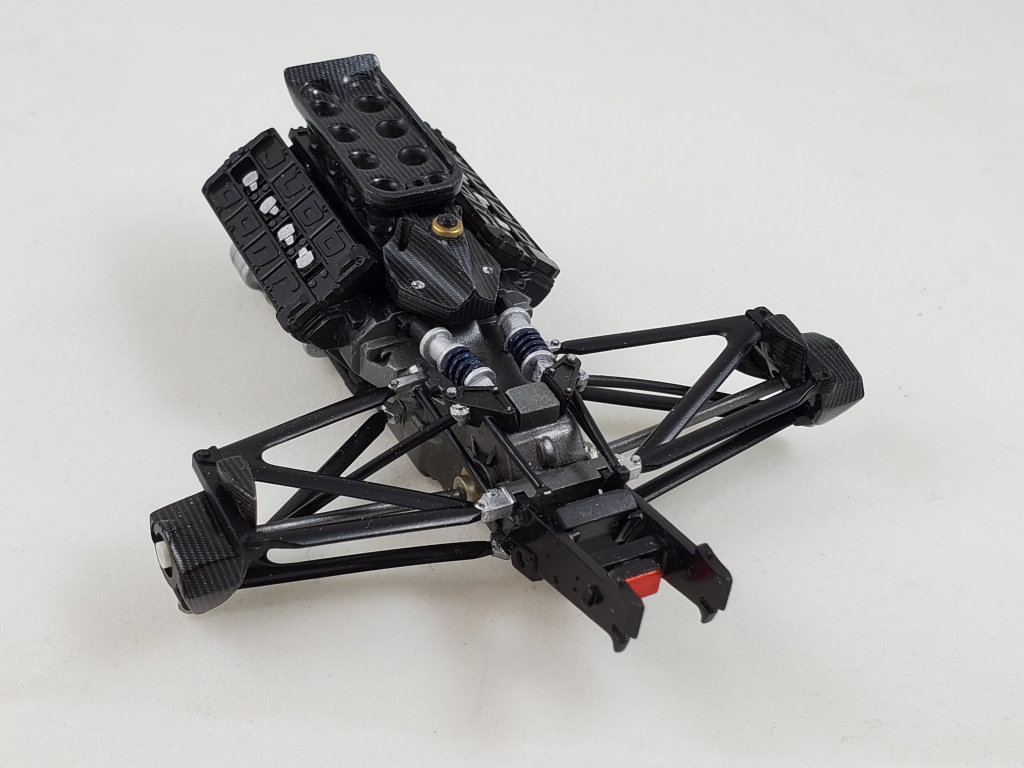
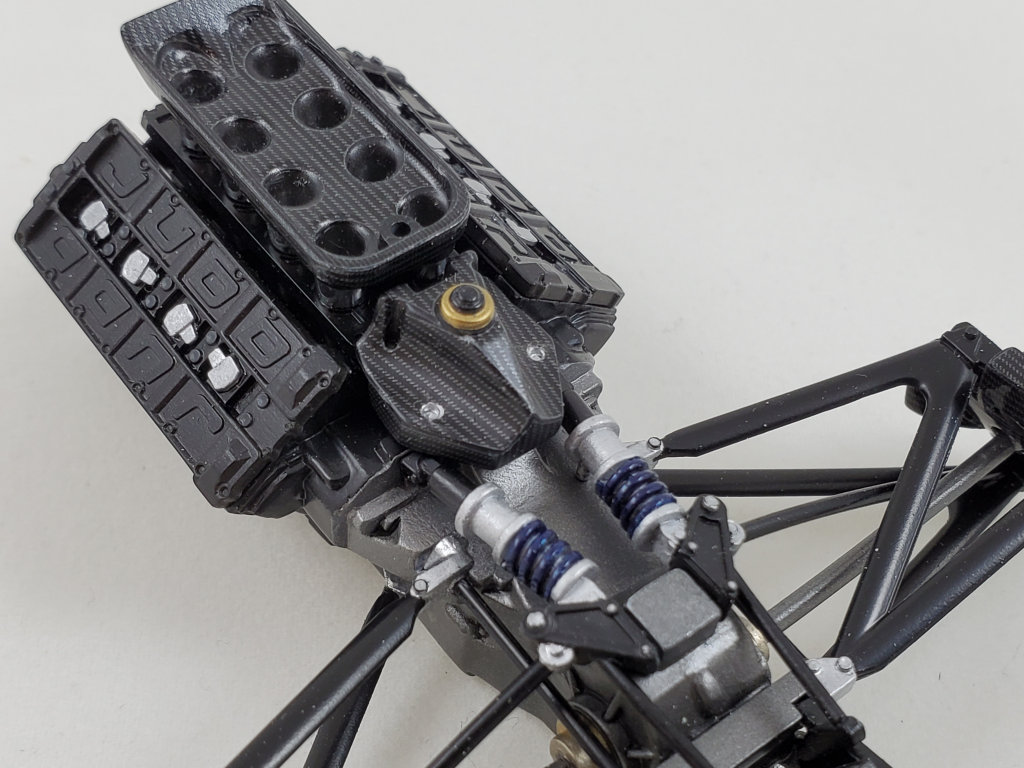
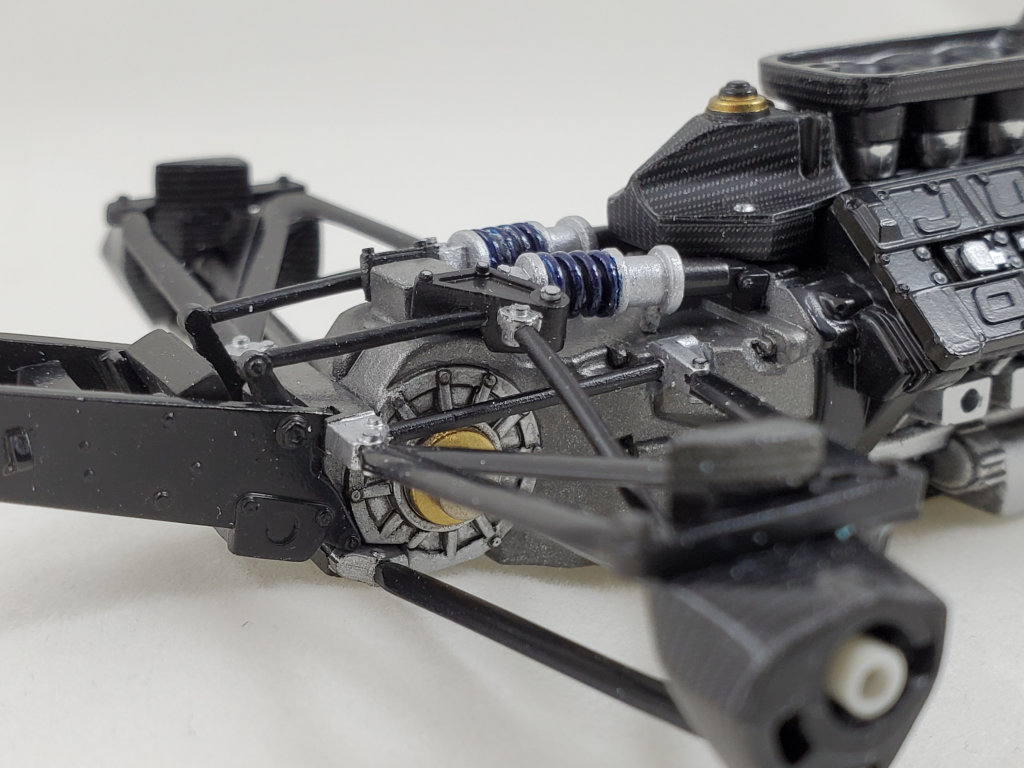
The engine/gearbox/rear suspension assembly is coming together. I didn't like the fit of the rear axles at the outside end - they weren't long enough to contact the inside of the uprights, and just kind of hung in the air. I also discovered that my kit was missing the wheel attachment screws and the tires! I had some spare wheel nuts from an S27 set for another kit, so I decided to use those. I drilled out the uprights and inserted some styrene tubing to support the ends of the axles, and drilled the inside of the tubing to fit the wheel nut shafts. I had to drill out the brake disks to fit the tubing. I also didn't like the attachment method for the bottom of the uprights (a very tight snap fit with a ball on the end of the upright), so I cut the pins from the uprights, drilled them, and used small brass bolts to mount the uprights to the suspension arms.


-
wadny
Topic author - F2 Champion
- Posts: 117
- Joined: Sun Nov 10, 2002 4:00 pm
- Your Name: Larry Osolkowski
- Favorite F1 Team or Driver: Red Bull, Max Verstappen
- Location: North Tonawanda, NY
- Contact:
- Status: Offline
Re: Leyton House CG 901B
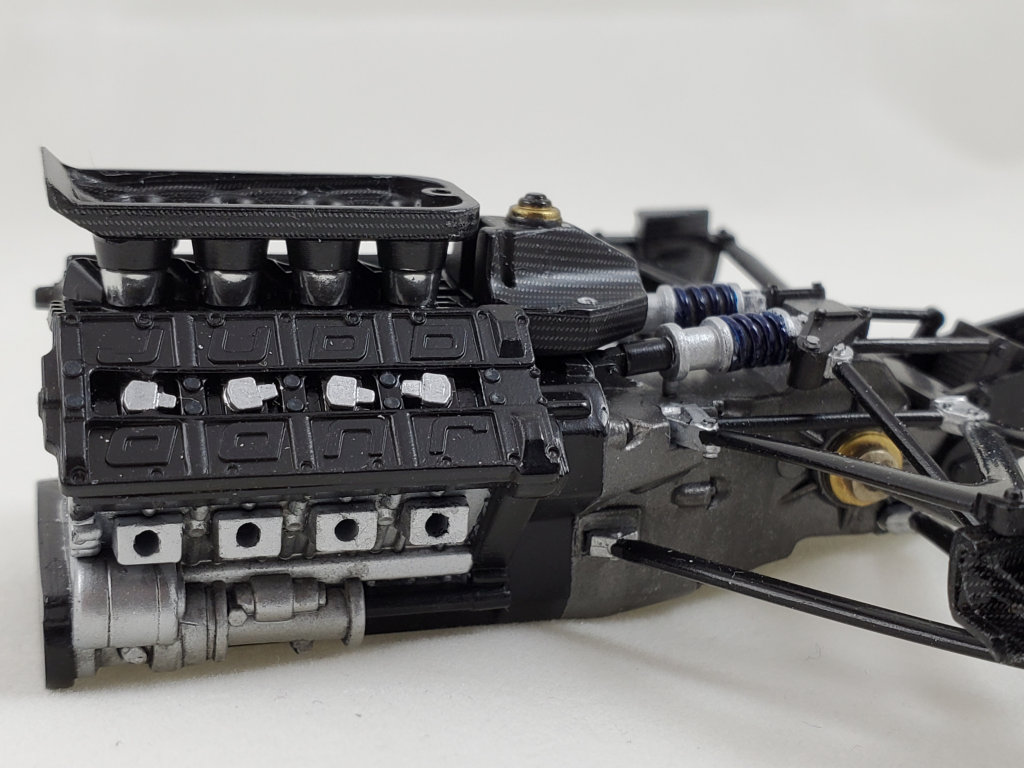
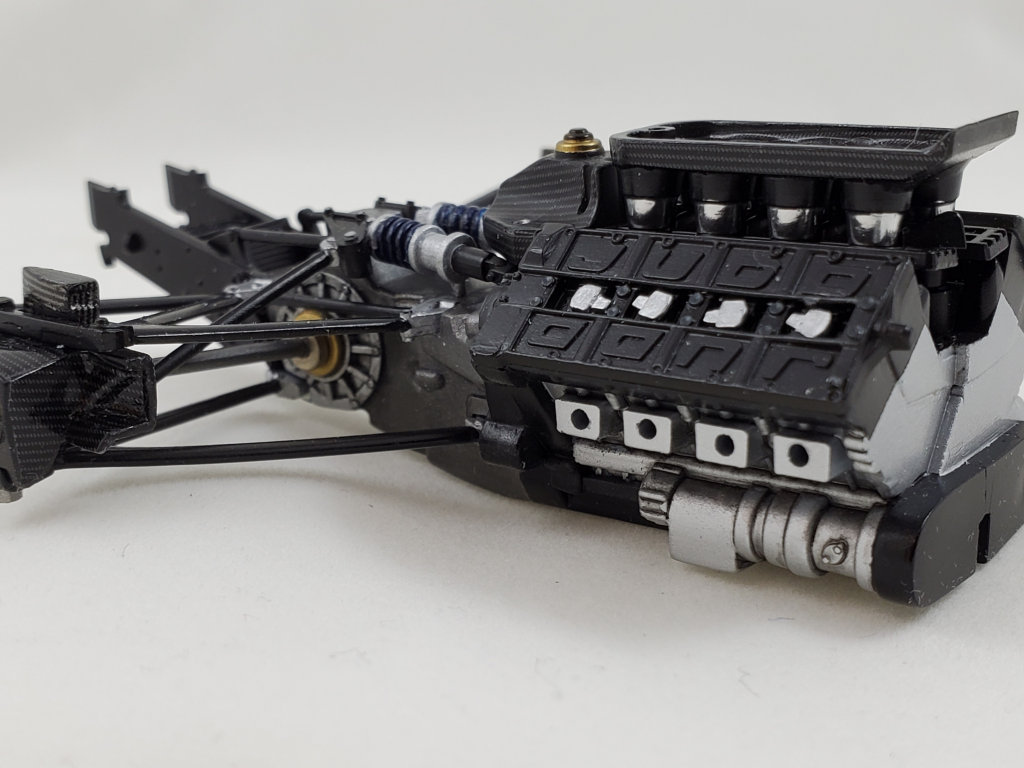
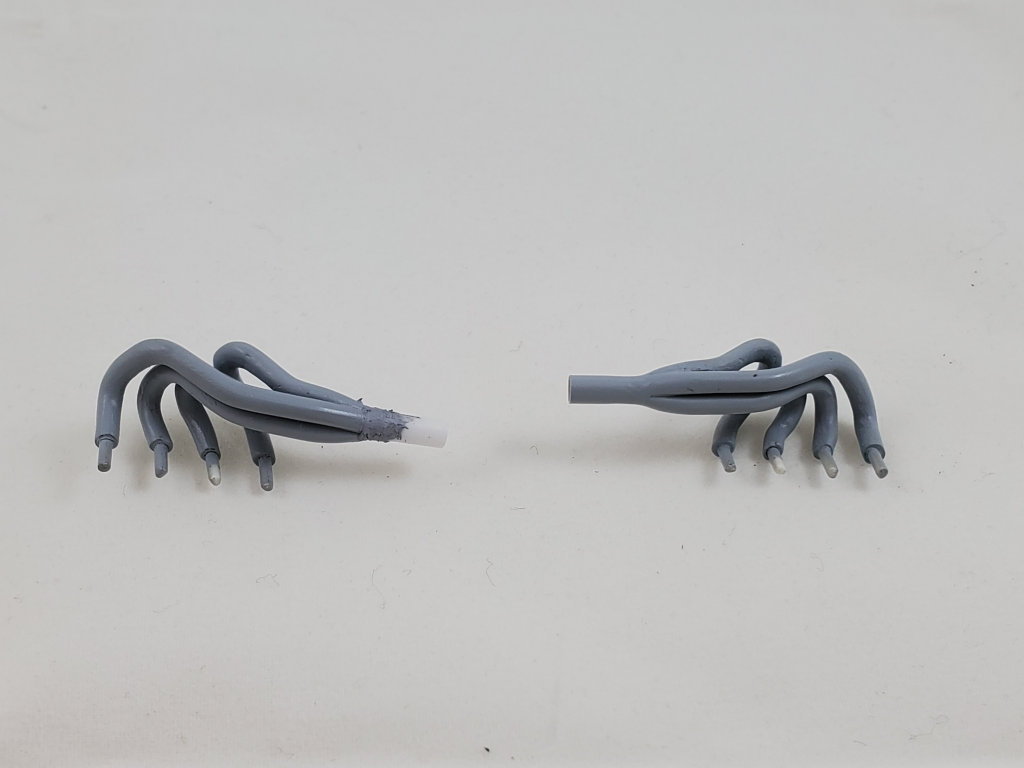
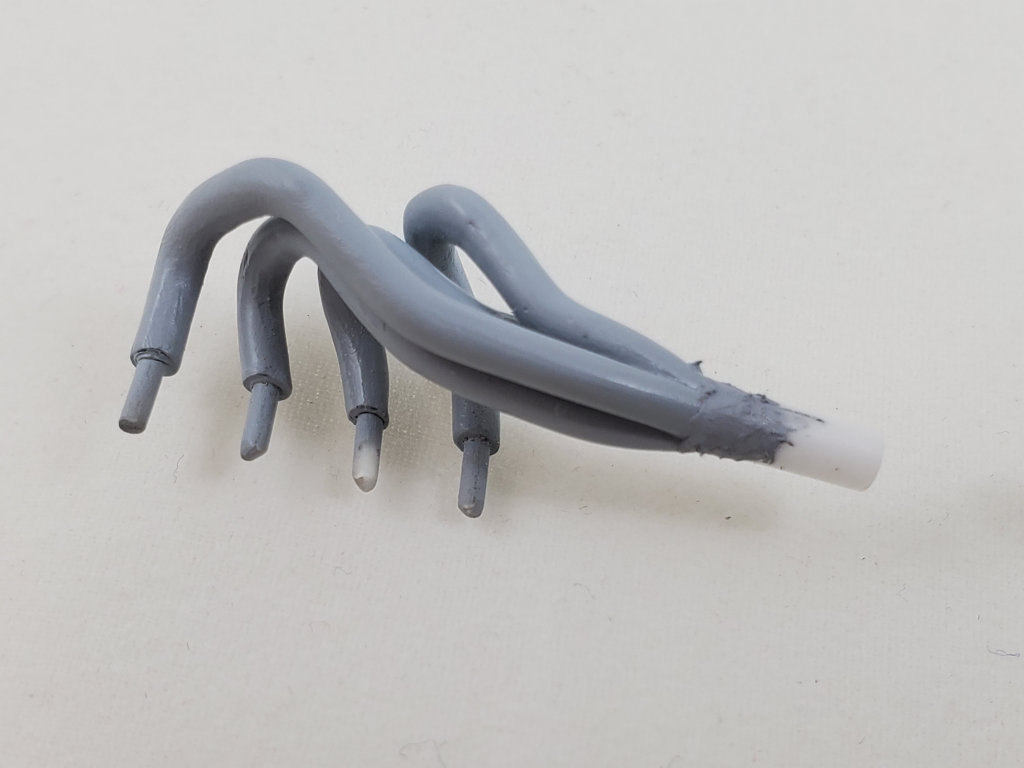
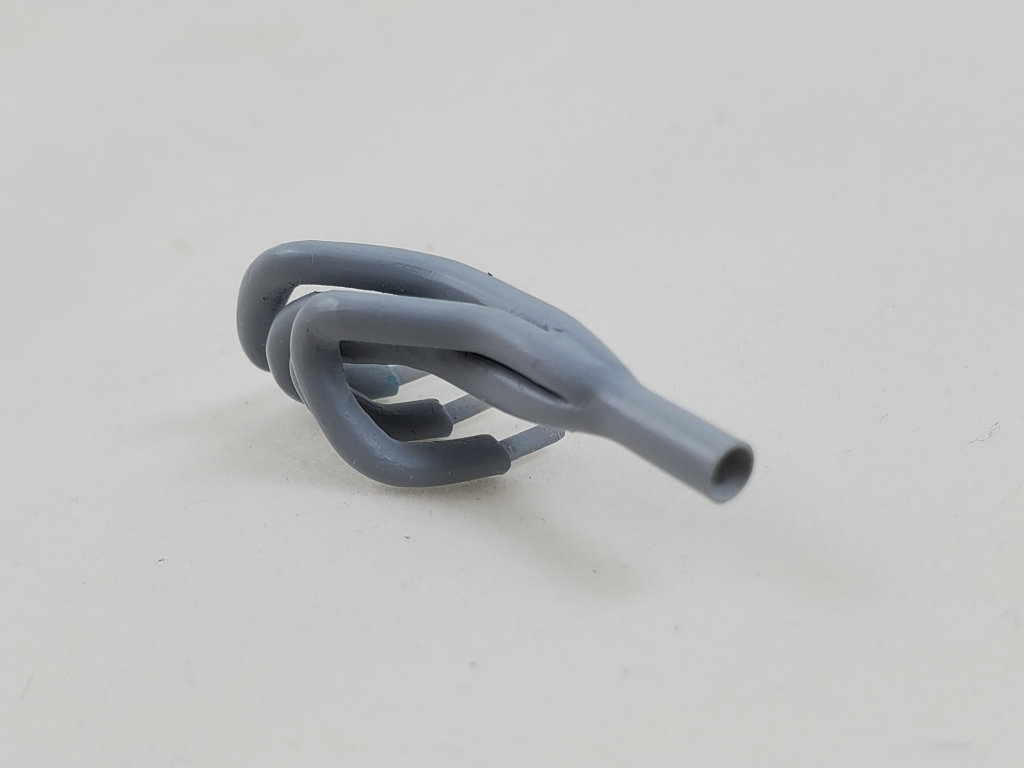
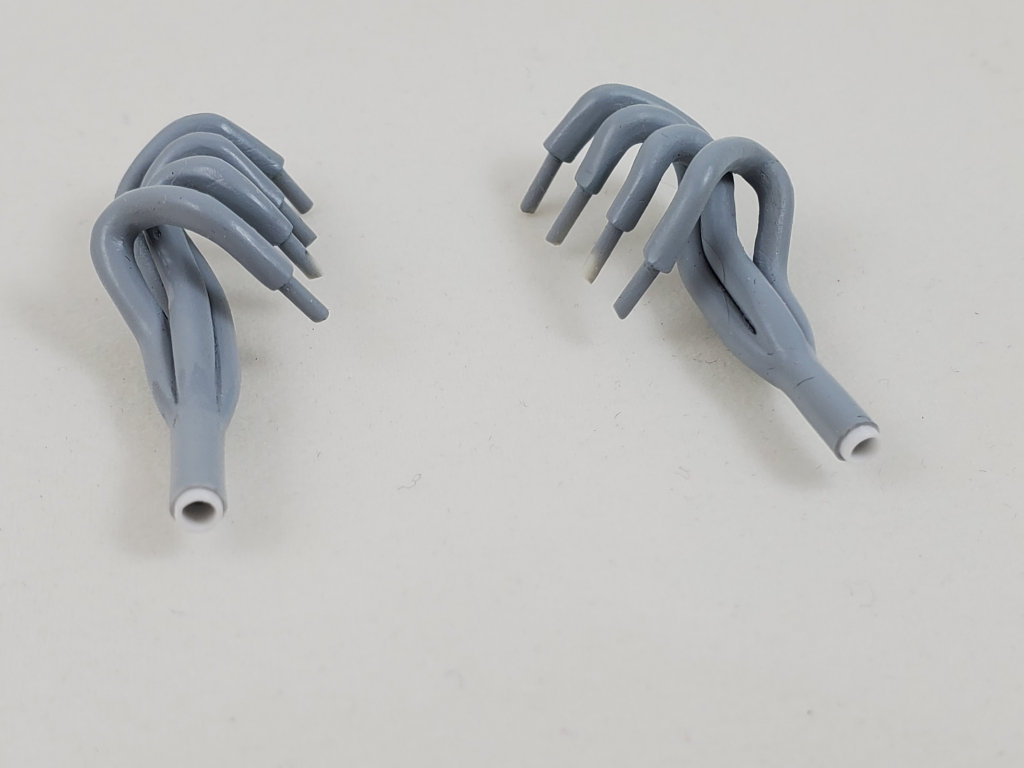
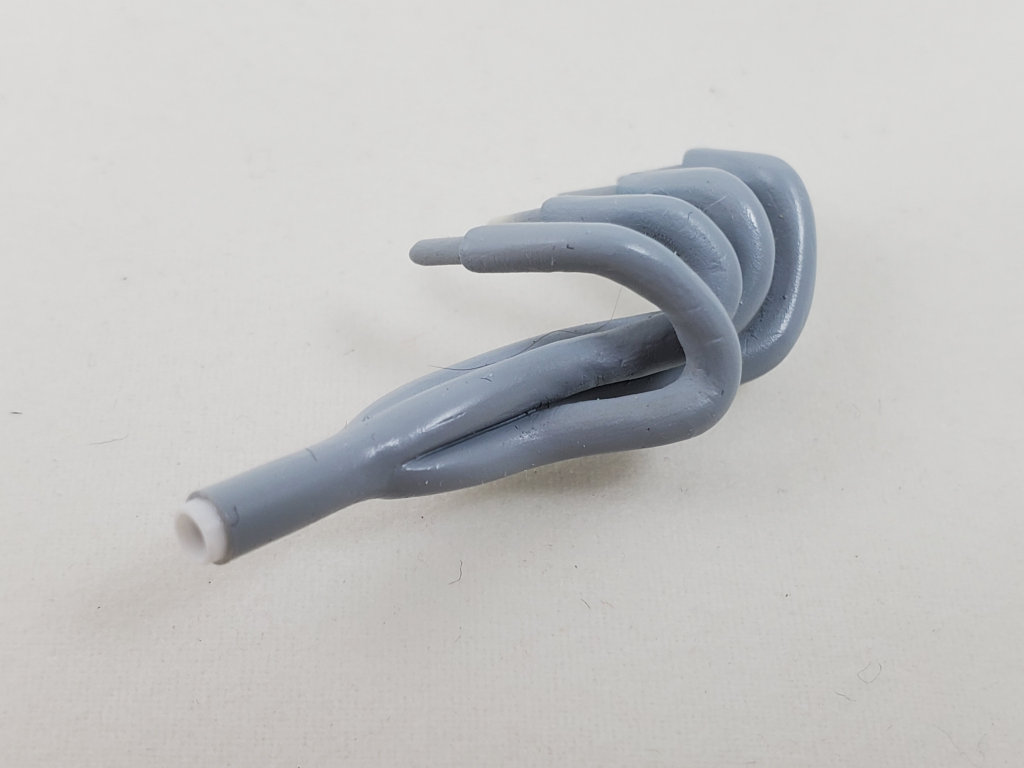
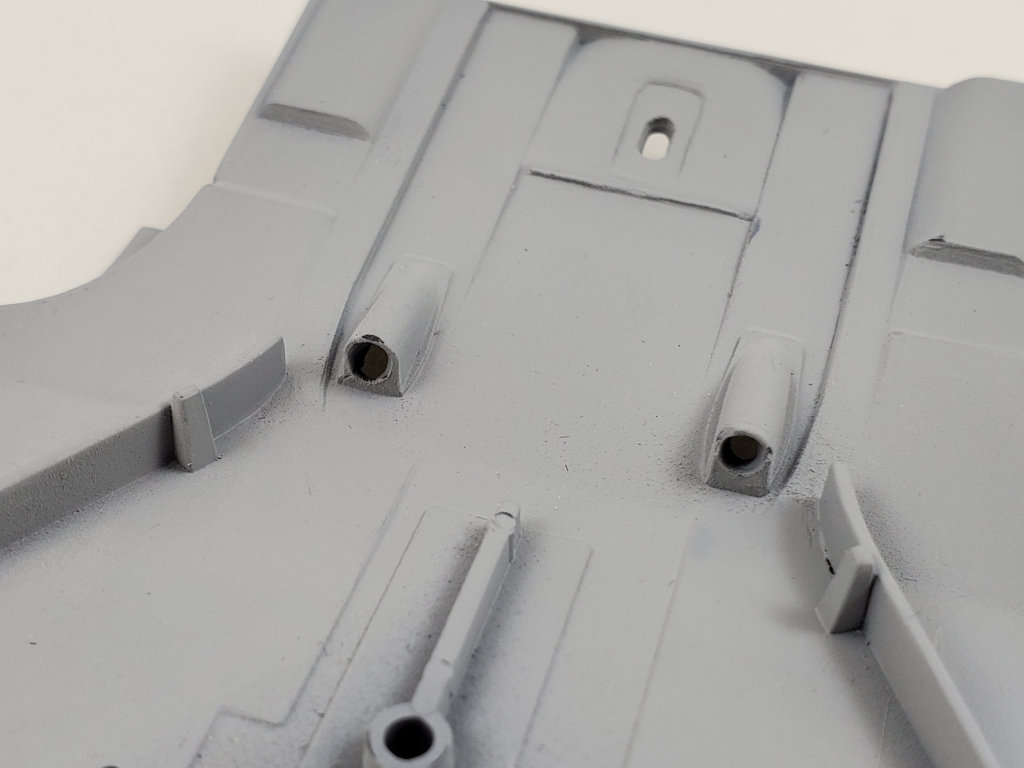
I did some more work on the exhaust system. I didn't like the shape of the output ends of the headers (not round), and wanted a way to ensure alignment with the exhaust outlets molded into the floorpan. I cut off the header ends next to the collectors and turned some appropriate size pieces from styrene tubing. I also opened up the inside of the tubing to fit a smaller size tube for alignment. I drilled out the exhaust outlets on the bottom of the floorpan, and opened up the inside ends to fit the modified headers. Hopefully this will all fit together when the engine and gearbox are mounted to the floorpan.

-
wadny
Topic author - F2 Champion
- Posts: 117
- Joined: Sun Nov 10, 2002 4:00 pm
- Your Name: Larry Osolkowski
- Favorite F1 Team or Driver: Red Bull, Max Verstappen
- Location: North Tonawanda, NY
- Contact:
- Status: Offline
Re: Leyton House CG 901B
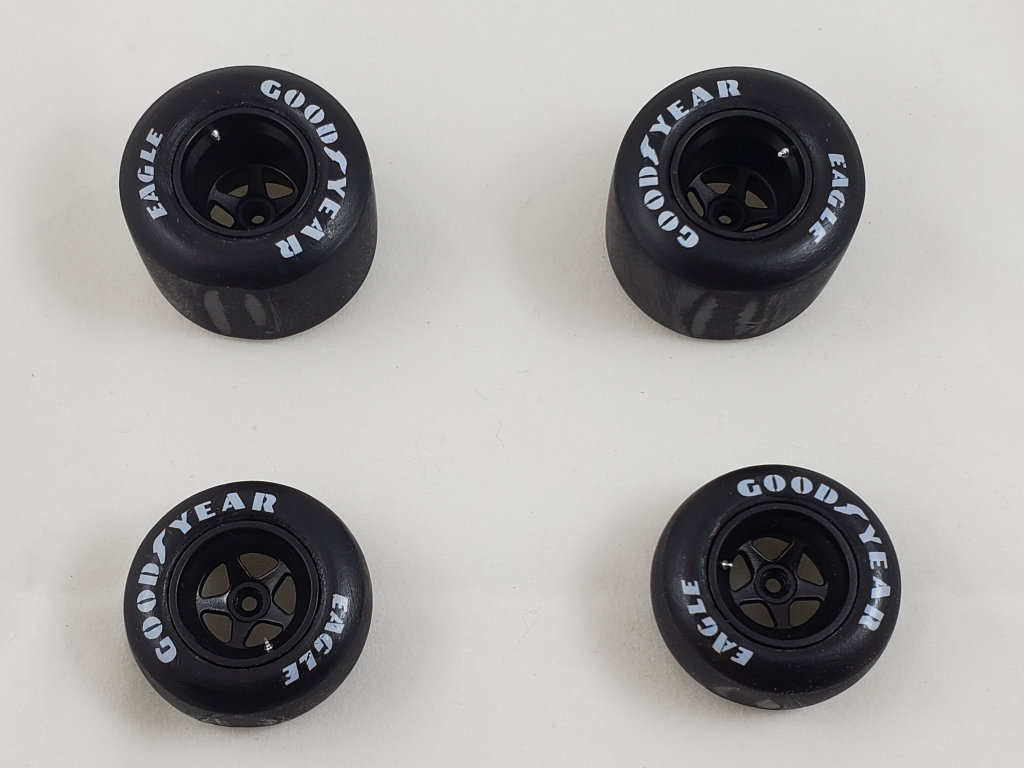
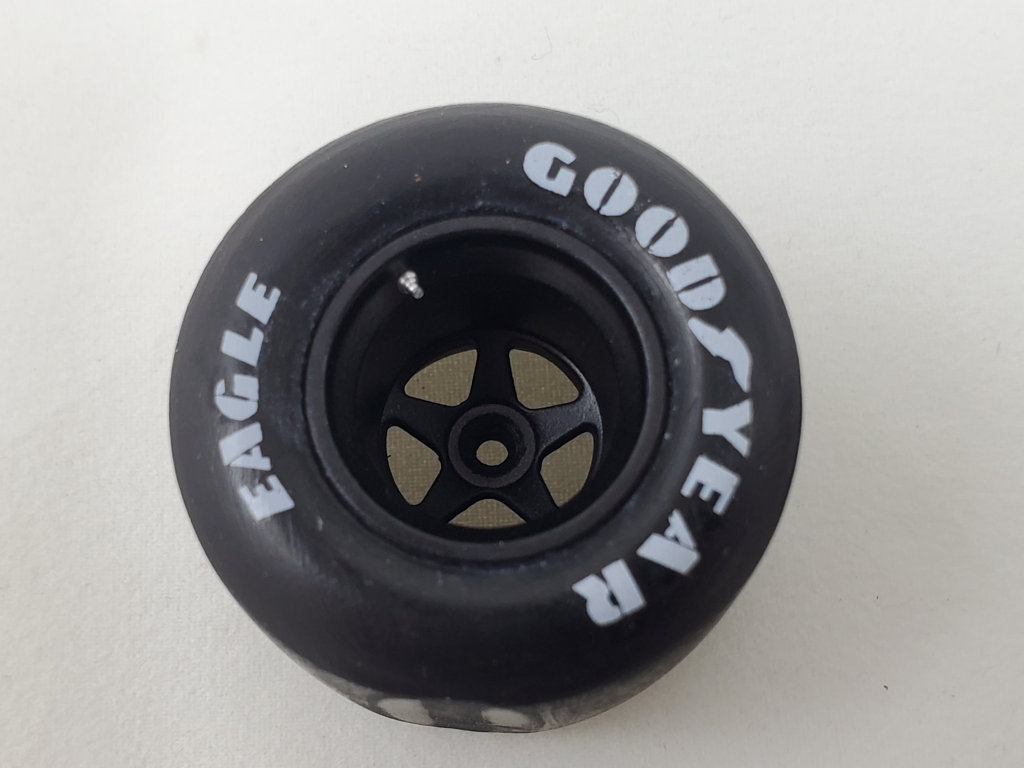
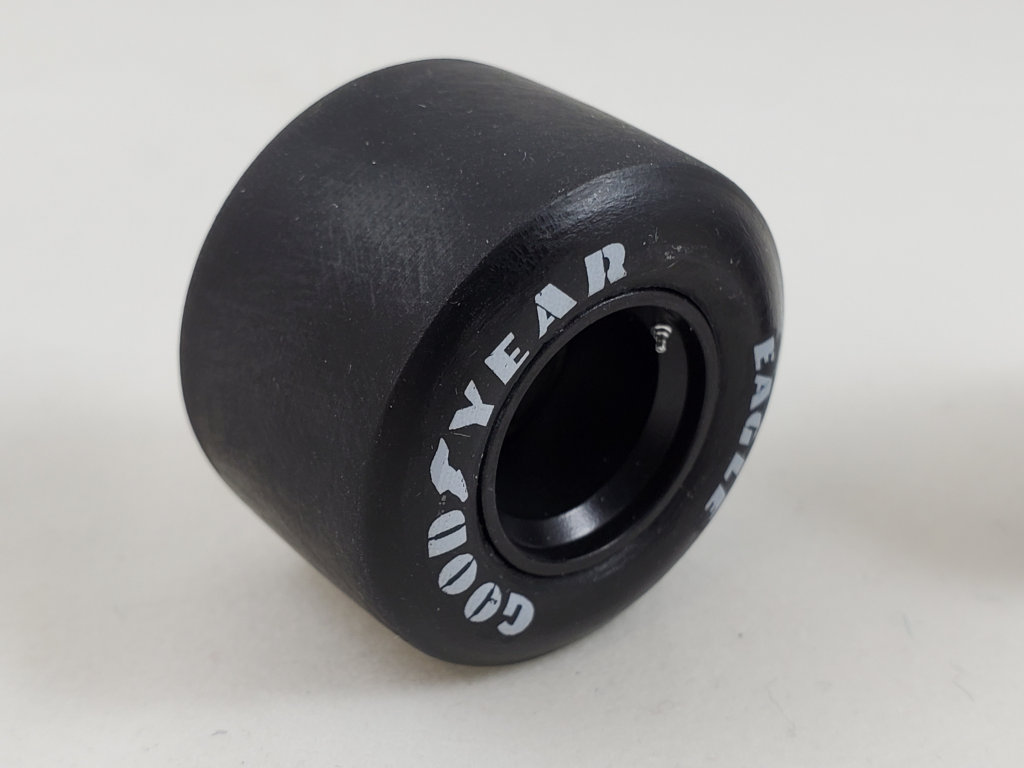
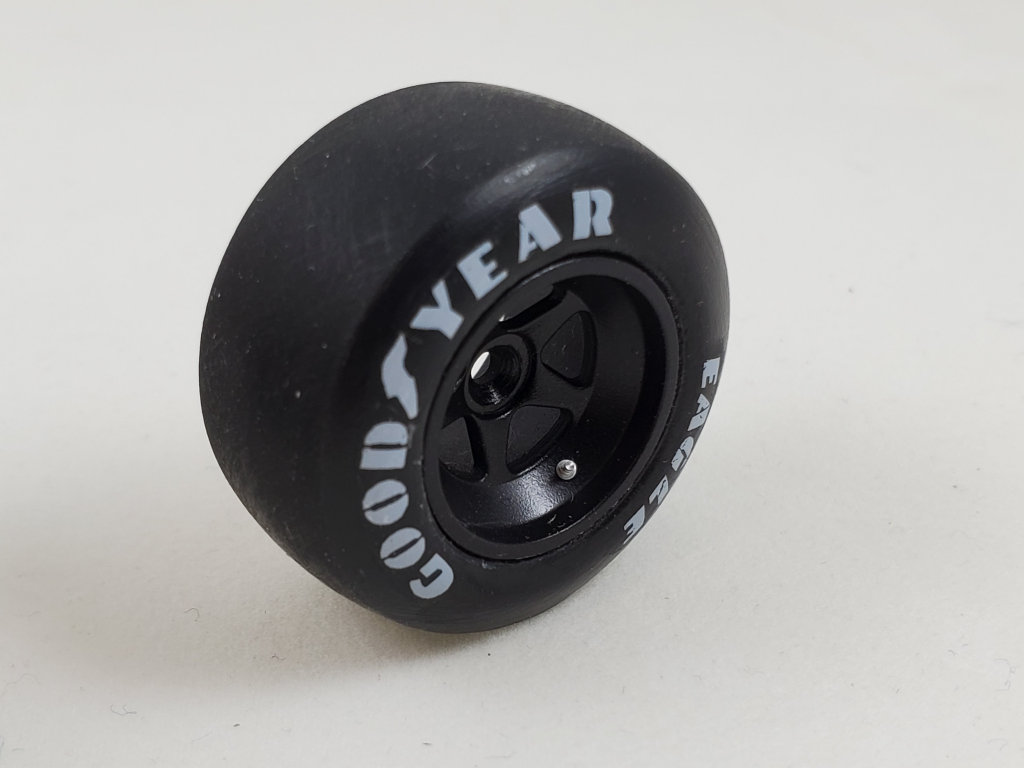
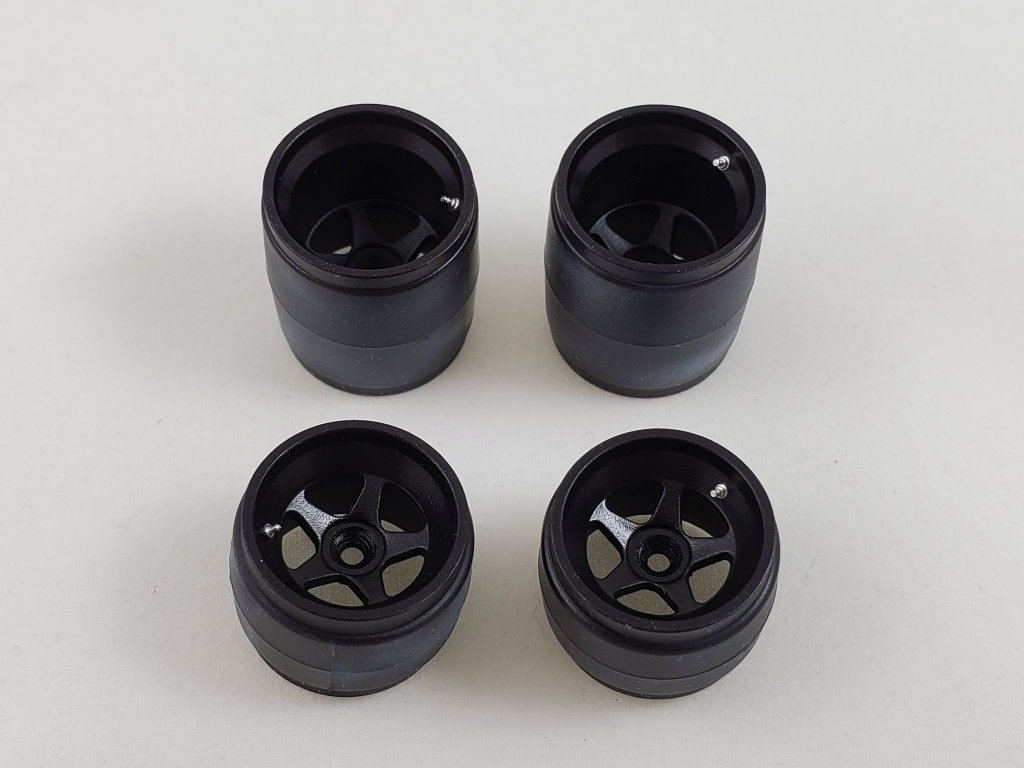
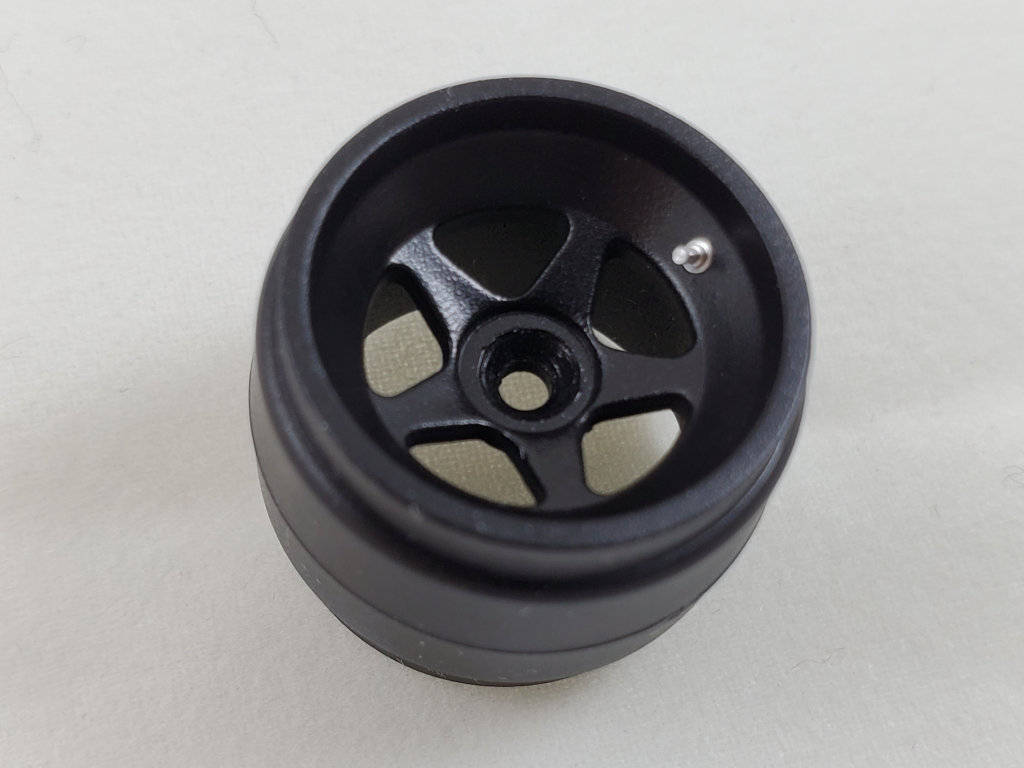
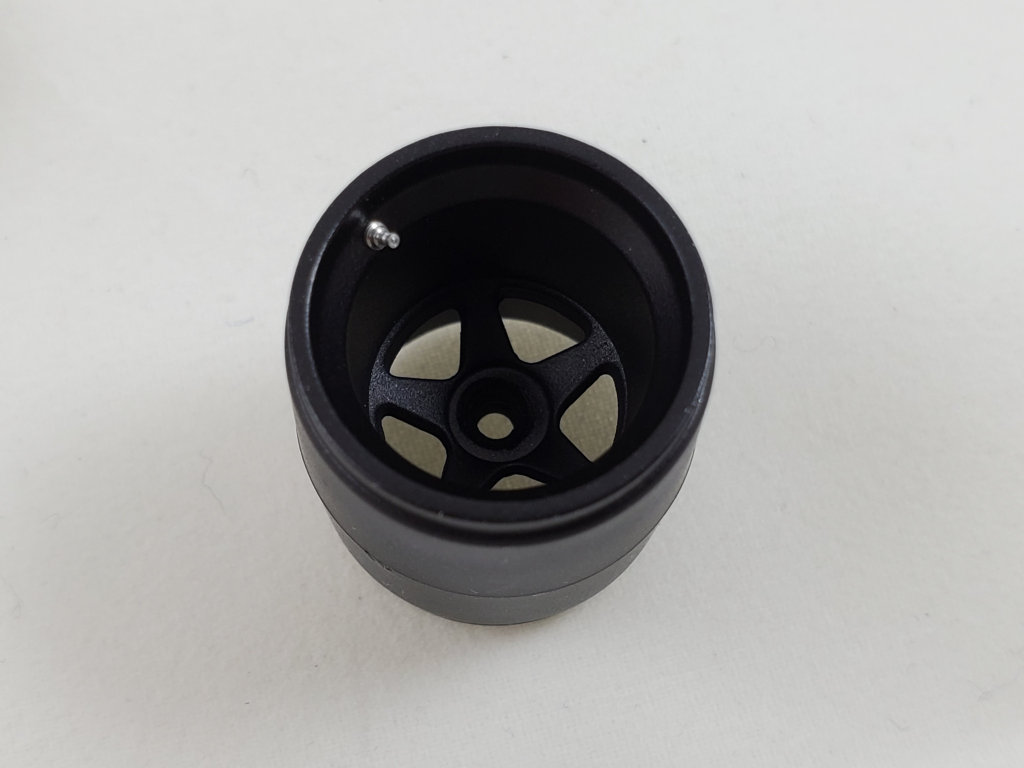
I primed and painted the wheels, using Alclad gunmetal, which is more of a metallic black. I think it looks good on wheels. I added some turned valve stems. I also mentioned that the tires were missing from the kit, so I ordered some replacements from Icon Automotive Miniatures, and Derek sent them on their way.
-
wadny
Topic author - F2 Champion
- Posts: 117
- Joined: Sun Nov 10, 2002 4:00 pm
- Your Name: Larry Osolkowski
- Favorite F1 Team or Driver: Red Bull, Max Verstappen
- Location: North Tonawanda, NY
- Contact:
- Status: Offline
Re: Leyton House CG 901B
Incidentally, I'm the webmaster and newsletter editor for my local club, https://www.ipmsniagarafrontier.com/. Our club website is hosted by a company called Startlogic. We've been with them for many years and I recommend them, but the reason I mention it is that the hosting we have includes unlimited storage. I'm using a folder on the site server to store my photos for this WIP, and have made folder space available to members of the club. If you are a member of a local club, you might mention this to your webmaster to see if that's a possible option.
-
 Jeff
Jeff
- FOTA Chairman
- Posts: 2771
- Joined: Wed Jan 25, 2006 1:36 am
- Location: Melbourne, Australia
- Status: Offline
Re: Leyton House CG 901B
great updates, lovely work
-
wadny
Topic author - F2 Champion
- Posts: 117
- Joined: Sun Nov 10, 2002 4:00 pm
- Your Name: Larry Osolkowski
- Favorite F1 Team or Driver: Red Bull, Max Verstappen
- Location: North Tonawanda, NY
- Contact:
- Status: Offline
Re: Leyton House CG 901B
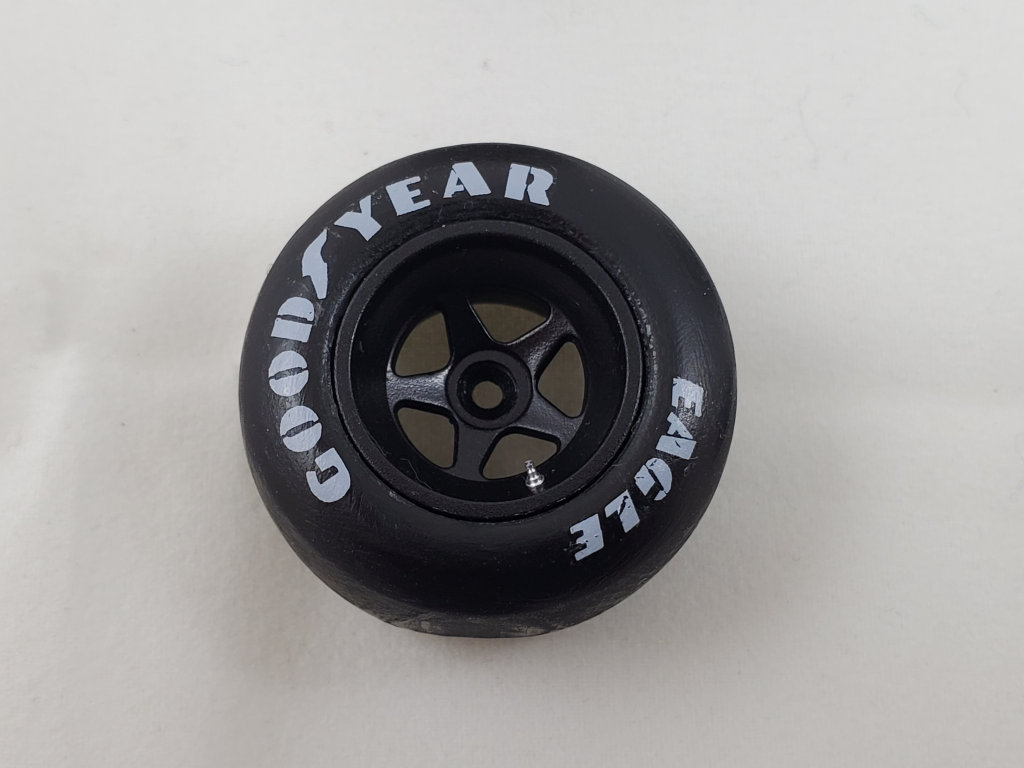
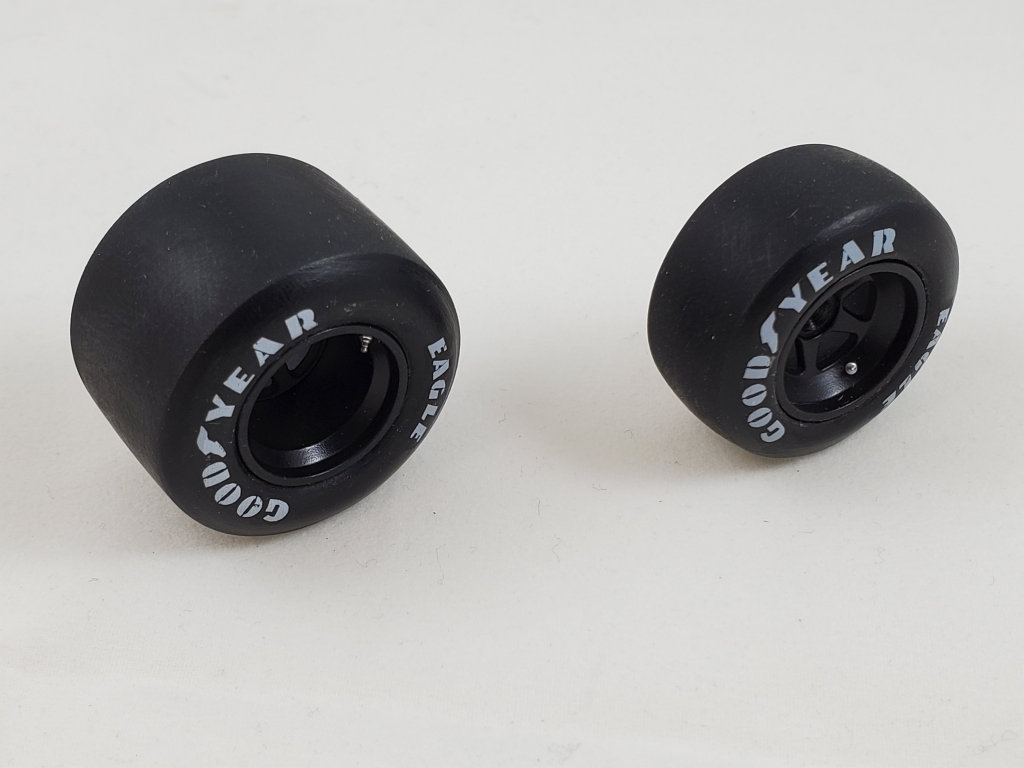
I mentioned earlier that the tires were missing from the kit. Thanks to Derek at Icon Automotive Miniatures I was able to obtain a replacement set of tires. They are cast using a flexible resin that's almost like a hard rubber, and fit the kit wheels perfectly. They also included a set of Goodyear decals. I cleaned up the mold seams, which were near the edge of the tread and sidewall rather than in the middle of the tread, using a fairly coarse sanding stick followed by a finer stick. The tires also have flat spots molded on them to give the appearance of some weight (aircraft guys do this all the time). After washing them off, they looked pretty good. The decals went on easily with some Microscale Soft setting solution to help, and then I had some problems. I first painted a sidewall on a couple of tires using a brushed-on coat of Floquil Flat Finish, which I've used successfully before on rubber tires. It went on and dried OK, but it wasn't flat enough to look right. I then masked the wheels and tread areas and airbrushed a coat of Microscale Micro Satin which, in retrospect, I realized I had never actually used before. Disaster struck when, after the coat dried, it appeared cracked and fuzzy. I wish I had taken some photos, because it was a real mess. Fortunately, it came off with some isopropyl alcohol without damaging the decals, and I brushed on some old, trusty Testors Dullcoat over the decals which worked fine.