Page 3 of 15

Re: 1/12 Ferrari 330P4

Posted: Sat Apr 15, 2017 5:29 pm
by jordan
Superb work !

Alex.

Re: 1/12 Ferrari 330P4

Posted: Sun Apr 16, 2017 6:16 am
by allnie
LOVE IT :D :D :D

Re: 1/12 Ferrari 330P4

Posted: Thu Apr 20, 2017 4:36 pm
by mvc
Thanks Alex, Allnie!

Today I finished chapter 1 (of 20) of the manual :)

I could use some help: does anyone have a picture or a diagram of the front part, showing brake lines and other hydraulics? Best I could find on the net is pic 29 of http://ruotevecchiedb.altervista.org/ferrari-330-p4/...
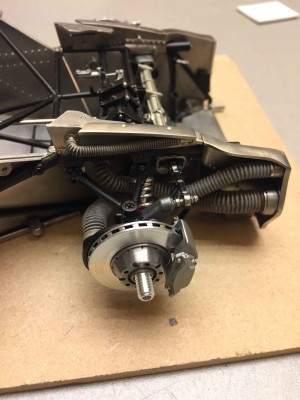
The chrome-like rings around the hoses are done with a Molotov pen, which was recenty discussed in a topic on the forum. I bumped into it in my artist supplies store, so I thought I should give it a try. Great stuff!
The hoses themselves are primered, brush painted Tamiya medium grey (XF-20), deeper parts covered in alkyd paint burnt umber + Davy's grey (don't know Davy but that's his grey :)), removed the alkyd from the higher parts, and after drying covered them in powdered artist pastel light grey. In other words, messed around a lot till they looked good enough. I wrote it all down because I need to do the same procedure later when I'll be working the rear parts, so I can always browse back here if I need to.
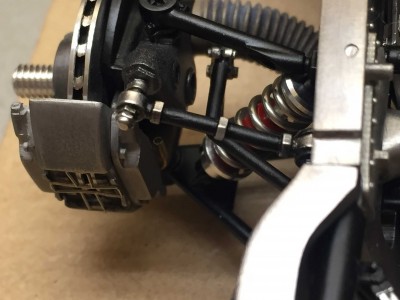
Added some brass fittings where the brake lines will go. Brakes are polished bare metal covered in Tamiya flat clear (TS-80). I had not expected that results (quite dark!) but I like it.
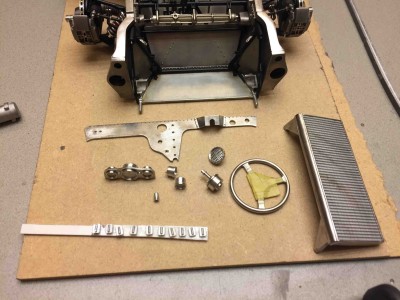
Next up will be oil cooler and radiator, but I already worked ahead a little bit and cleaned some more parts.

More soon!

Cheers,
Marcus

Re: 1/12 Ferrari 330P4

Posted: Fri Apr 21, 2017 2:47 pm
by gp-models
Very nice work Marcus, lovely detail work on the fron suspension! The polished parts looking awesome, still love it :)

Re: 1/12 Ferrari 330P4

Posted: Sat Apr 22, 2017 4:24 am
by gtziaf
Excellent!!

Re: 1/12 Ferrari 330P4

Posted: Sat Apr 22, 2017 6:19 pm
by mvc
Thanks guys!

More work on the interior today.
Airbrushed the dashboard with decanted but undiluted TS-29, way too thick for normal use, but it gives that 'flaky' texture. Did the same with the primer, but I'm not sure if that's necessary.
The rivets are 0.6mm solder balls (one size smaller than the rivets used on the chassis), flattened.
Gave the dashboard switches the 'dremel/lathe' treatment, works great for the parts that will not be painted.
A little test fit..
A little test fit..
This adds nothing, but I just love these shots :)
I like the quality of the MFH decals, for their sharpness anyway! (not sure if I'll repeat this statement after I've done my Porsche 917 LH #3...)
Today's work
Today's work
Thanks for watching,

Marcus

Re: 1/12 Ferrari 330P4

Posted: Sun Apr 23, 2017 5:05 pm
by mvc
More work on the dash...
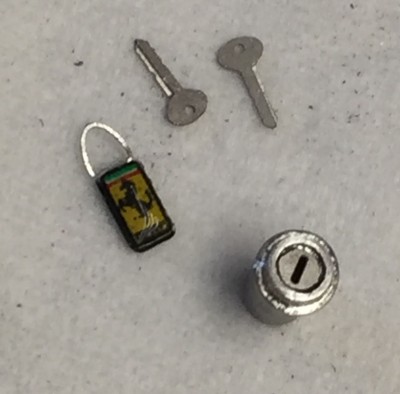
What use is a beautiful car if you don't have the keys :)
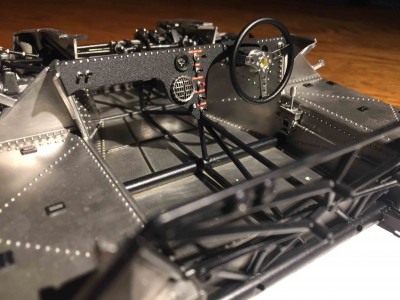
All temporarily in place
IMG_2699.jpg
Cheers,
Marcus

Re: 1/12 Ferrari 330P4

Posted: Sun May 14, 2017 3:49 pm
by mvc
Hi all,

I've been doing some other things in the meantime, but I'm glad to be back with an update.

I decided to upgrade the Ferrari's oil cooler with "some" custom parts made by Brian Fedoroff, a fellow forum member. He sent me the necessary PE sheets of his own design and was kind enough to include the 14 center rods and 28 end pieces. The amount of work needed looked pretty terrifying at first, but this weekend turned out to be one of my most fulfilling modeling experiences, because everything I made up to facilitate the process actualy worked! :D
That's 4.5 sheets of oil cooler parts...
... so lots of cutting coming up
I started by cutting out all parts individually, slow but precise
Cut up the big sheets to smaller parts with a decent pair of kitchen scissors. With a little bit of practice, half of the cutting work could be tackled much faster this way.
The remaining strips are too fragile for the kitchen scissors, so they have to be cut individually.
All the gold after cutting...
IMG_8350.jpg
Part II coming soon.

Re: 1/12 Ferrari 330P4

Posted: Sun May 14, 2017 4:07 pm
by gtziaf
Very exciting. Is this set available for order?

Re: 1/12 Ferrari 330P4

Posted: Sun May 14, 2017 4:13 pm
by mvc
Part II...
Next step is to move all parts onto a wire, so they are easier to handle later. I didn't want to handle each part individually, so I experimented with a plastice pipette slices in halves. When you throw a bunch of parts in there and start tapping the plastic, all parts line up magically so it's easy to insert the wire through them.
Once on the wire, it's very easy to slide the parts onto a 1.6 mm rod.
After a while I got tired of tapping, and looked for some vibrating source. Not having the obvious device for the job :) I used a previously dismantled shaver that I saved for it's rechargable batteries and motor.
Does the job much faster :)
All parts on wire!
All parts on wire!
Now it's easy to transfer a batch to a 1.6 mm rod. I used small pieces of plastic to secure the lot and some spacers of 2.1mm brass. Time to remove all these cutting marks with a file.
All clean!
All clean!
The next monster job is to rearrange both strands, one with the "big" parts, the other with the small ones, to one big strand. I need them in the order big-small-big-small (x 2.800) and after that I can slide them onto the center rods. I'm afraid that's going to be hours of brain-killing manual labour -- I'll be glad to hear suggestions to automate the process...

Thanks for watching!

Marcus