
Oh gosh! I have lots of those jewlry things and they can be really usefull for that kind of details. Keep the good work.
Starr
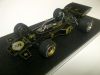
1976 WC - 1/20 Tamiya McLaren M23 - FINISHED
-
 Starr
Starr
- Major Constructor

- Posts: 1060
- Joined: Fri Mar 18, 2011 2:31 pm
- Location: New Hampshire - USA
- Status: Offline
Re: 1976 WC - 1/20 Tamiya McLaren M23
Classic Plastic Model Club - Lowell, MA
-
 alfye
alfye
Topic author - F2 Champion

- Posts: 129
- Joined: Mon Nov 09, 2009 10:13 am
- Location: Madrid - Spain
- Status: Offline
Re: 1976 WC - 1/20 Tamiya McLaren M23
Hi all,
Thanks for the great words that make me work with more desire!
Round of thanks:
OK, today has been a day of new techniques for me. Im not very proud of the results, but im happy with the methods and steps, because in the future i will be able to refine it.
Fisrt, i worked on cam covers trying a tip that I read here some time ago. Basically they are covered with metal foil, then painted, and the last step is to sand the FORD lettering an some bolts.
Step 1: Conform with cotton swab

Step 2: Detail with toothpick

Step 3: When paint is dry, sand carefuly to highlight wanted spots (ive used diamond file)

Back to painting procces. Flat black primer from Vallejo (spray can) It will give a good base for metallic paints

Trying to achieve a chrome silver finish with MrColor SM06. Enamel gloss black:


With SM06 on (chrome was a bit flat, but it was because I used to much pressure on the airbrush)

Next, rear springs. Tamiya XF16 base coat

Then, i put masking tape to paint the springs in gloss black

Done (needs a wash)

Engine mock up, ready for wires and other stuff

Bye!
Thanks for the great words that make me work with more desire!
Round of thanks:
Thank you so much! I dont paint it yet but ´ll keep your advice.CBartholomew4677 wrote:...The exhausts should be black, as far as I know. I used Tamiya SGB, weathered with Tamiya weathering sets, then sealed somewhere between semi-gloss and flat...
Done, thanks!pgarat wrote:...Try Alcohol applied with cotton swabs to clean your parts when using epoxy bi-component glue...
Ohohoh!!! Great addition because original clear plastic is too thick and, in the end, it would ruin all the lovely work. Its on my wishlist, thank you verrrrrry much!!!pgarat wrote:...If you want a nice and far more realistic windshield, try to find one from Modelcraft & Hobbies:
http://www.modelcraftsandhobbies.co.nz/ ... 41e5ea103&
I used them for years (built 4 M23) and love that stuff!
Also exists for the 1/12 and the 1/24 M9 from Accurate...
Pascal
OK, today has been a day of new techniques for me. Im not very proud of the results, but im happy with the methods and steps, because in the future i will be able to refine it.
Fisrt, i worked on cam covers trying a tip that I read here some time ago. Basically they are covered with metal foil, then painted, and the last step is to sand the FORD lettering an some bolts.
Step 1: Conform with cotton swab
Step 2: Detail with toothpick
Step 3: When paint is dry, sand carefuly to highlight wanted spots (ive used diamond file)
Back to painting procces. Flat black primer from Vallejo (spray can) It will give a good base for metallic paints
Trying to achieve a chrome silver finish with MrColor SM06. Enamel gloss black:
With SM06 on (chrome was a bit flat, but it was because I used to much pressure on the airbrush)
Next, rear springs. Tamiya XF16 base coat
Then, i put masking tape to paint the springs in gloss black
Done (needs a wash)
Engine mock up, ready for wires and other stuff
Bye!
-
 Eagle50
- FOTA Chairman

- Posts: 4038
- Joined: Sun Apr 03, 2011 12:05 pm
- Location: Tokyo Japan
- Status: Offline
Re: 1976 WC - 1/20 Tamiya McLaren M23
Nice work! (Note to self: pick up some of those cheap, hex jewelry beads, the next time you see them. In every size & colour available.)
Chris
Chris
-
 Terry
Terry
- FOTA Chairman
- Posts: 2514
- Joined: Fri Dec 19, 2008 10:09 pm
- Favorite F1 Team or Driver: Chris Amon
- Location: New Zealand
- Status: Offline

Re: 1976 WC - 1/20 Tamiya McLaren M23
Some good old fashioned modelling skills going on here and I do like it. This M23 is going to look great.
-
Starr
- Major Constructor
- Posts: 1060
- Joined: Fri Mar 18, 2011 2:31 pm
- Location: New Hampshire - USA
- Status: Offline
Re: 1976 WC - 1/20 Tamiya McLaren M23
Thanks for the springs tip, it is awesome simple!  I have to try that!
Starr
Starr
Classic Plastic Model Club - Lowell, MA
-
 turboF1
- FOTA Vice Chairman

- Posts: 1521
- Joined: Tue Dec 17, 2013 9:10 pm
- Favorite F1 Team or Driver: Renault Sport
- Status: Offline

Re: 1976 WC - 1/20 Tamiya McLaren M23
A lot of good tips here. I'm learning how important it is to develop good airbrushing skills. That DFV looks fantastic!
-
alfye
Topic author - F2 Champion
- Posts: 129
- Joined: Mon Nov 09, 2009 10:13 am
- Location: Madrid - Spain
- Status: Offline
Re: 1976 WC - 1/20 Tamiya McLaren M23
Hi all!
A big update today. During these days I worked on many things, sometimes several at once, so I'll try to keep steps in order.
Assembling the exhausts is a must to continue with the engine, so I worked on them simulating soldering lines with stretched plastic, then primed in flat black, and finally Burnt Iron (MrHobby H76) drybrushed


I almos forgot! Rear suspension install is compromised by the exhaust, i have to redo the right one because it was bending the suspension arm. Also changed kit parts D2 using 1mm solderline for the same reasson

Brake disks are finished, Tamiya PE fits well, nearly all of them. Rear parts dont cover as intended, the smallest ones.

Detailing a DFV
Im not following any manuals or instructions here, only Tamiya 1/12 routing and others builds. Ill take some artistic licenses with colours and routing because after all she will go to my restored cars Museum
I use this to simulate braided hoses, is a metallic finish rubber band from a paper folder

Definitive fittings, 0.8 brass tube with hex jewelry things, the bad coloured one is the prototipe hehehe


Springs to clamp the exhausts, 0.5 brass rod and thread of multicore wire

Tamiya kit doesnt come with gear mechanism to the tranny. Ive done it soldering 0.8 brass tubes. Is the first time that I do it on a model, and im pleased because now i knwon that is more easy than I thought, it takes a strong bond and can be sanded without to much trouble. Sorry , but pic only for the finished part (not too well finished eheheh)

Now, all mixed in an engine!


I have a question to end with the engine, what is part C45? How can I connect it? and where?

The body
I have had many fitting problems with my model, maybe an old kit, thats all... Airbox is tricky. Apart for the fitting between B( & B9 parts, my biggest problem was the fit with chassis and canopy. Not too visible in this pic, but there is a huge gap between clear part/canopy and airbox:

So i made changes that are not in the real car to keep the line as smooth as possible. MP4-4 rear wing endplate to add the new wall, then the part is shaped with some sandpaper play


Finished


To do the last rivets this time i used a mask still not centered but they keep the correct distance


Front wing endplates, attached with 1mm brass rod and epoxy glue, then i used a square box to align it


Next step, body painting

Bye!
A big update today. During these days I worked on many things, sometimes several at once, so I'll try to keep steps in order.
Assembling the exhausts is a must to continue with the engine, so I worked on them simulating soldering lines with stretched plastic, then primed in flat black, and finally Burnt Iron (MrHobby H76) drybrushed
I almos forgot! Rear suspension install is compromised by the exhaust, i have to redo the right one because it was bending the suspension arm. Also changed kit parts D2 using 1mm solderline for the same reasson
Brake disks are finished, Tamiya PE fits well, nearly all of them. Rear parts dont cover as intended, the smallest ones.
Detailing a DFV
Im not following any manuals or instructions here, only Tamiya 1/12 routing and others builds. Ill take some artistic licenses with colours and routing because after all she will go to my restored cars Museum
I use this to simulate braided hoses, is a metallic finish rubber band from a paper folder
Definitive fittings, 0.8 brass tube with hex jewelry things, the bad coloured one is the prototipe hehehe
Springs to clamp the exhausts, 0.5 brass rod and thread of multicore wire
Tamiya kit doesnt come with gear mechanism to the tranny. Ive done it soldering 0.8 brass tubes. Is the first time that I do it on a model, and im pleased because now i knwon that is more easy than I thought, it takes a strong bond and can be sanded without to much trouble. Sorry , but pic only for the finished part (not too well finished eheheh)
Now, all mixed in an engine!
I have a question to end with the engine, what is part C45? How can I connect it? and where?
The body
I have had many fitting problems with my model, maybe an old kit, thats all... Airbox is tricky. Apart for the fitting between B( & B9 parts, my biggest problem was the fit with chassis and canopy. Not too visible in this pic, but there is a huge gap between clear part/canopy and airbox:
So i made changes that are not in the real car to keep the line as smooth as possible. MP4-4 rear wing endplate to add the new wall, then the part is shaped with some sandpaper play
Finished
To do the last rivets this time i used a mask
Front wing endplates, attached with 1mm brass rod and epoxy glue, then i used a square box to align it
Next step, body painting
Bye!
-
 f1fan
f1fan
- Backmarker

- Posts: 308
- Joined: Sun Jun 26, 2011 11:17 am
- Location: Mesa, AZ USA
- Status: Offline
Re: 1976 WC - 1/20 Tamiya McLaren M23
Excellent work!! I like your techniques and modeling skills.
Cheers, Jere
Cheers, Jere
-
 harveyb258
- FOTA Vice Chairman
- Posts: 1950
- Joined: Wed Dec 19, 2012 4:36 am
- Location: UK
- Status: Offline
Re: 1976 WC - 1/20 Tamiya McLaren M23
Great work Alfye! I think the part in question (C45) is a compressed air bottle for the starter, which should be attached to the
lower left side of the gearbox spacer. I think it plumbs into the spacer but not sure where
Cheers, H
lower left side of the gearbox spacer. I think it plumbs into the spacer but not sure where
Cheers, H
-
 rtedore
- World Champion

- Posts: 664
- Joined: Wed Jun 23, 2010 2:41 am
- Location: Columbus, GA
- Status: Offline
Re: 1976 WC - 1/20 Tamiya McLaren M23
Simply stunning work. Keep it up.
BEST REGARDS
ROY TEDORE
"I BUILD FOR REFLECTION, NOT FOR PERFECTION"
ROY TEDORE 1993
ROY TEDORE
"I BUILD FOR REFLECTION, NOT FOR PERFECTION"
ROY TEDORE 1993
