Page 8 of 11

Re: Renault RE20 1_12 Shelf of Doom WIP

Posted: Wed Jul 20, 2016 6:28 pm
by mazyen
Lots of good tips learnt from your WIP. It's looking amazing too.

Re: Renault RE20 1_12 Shelf of Doom WIP

Posted: Sun Jul 24, 2016 10:58 pm
by ModelTime
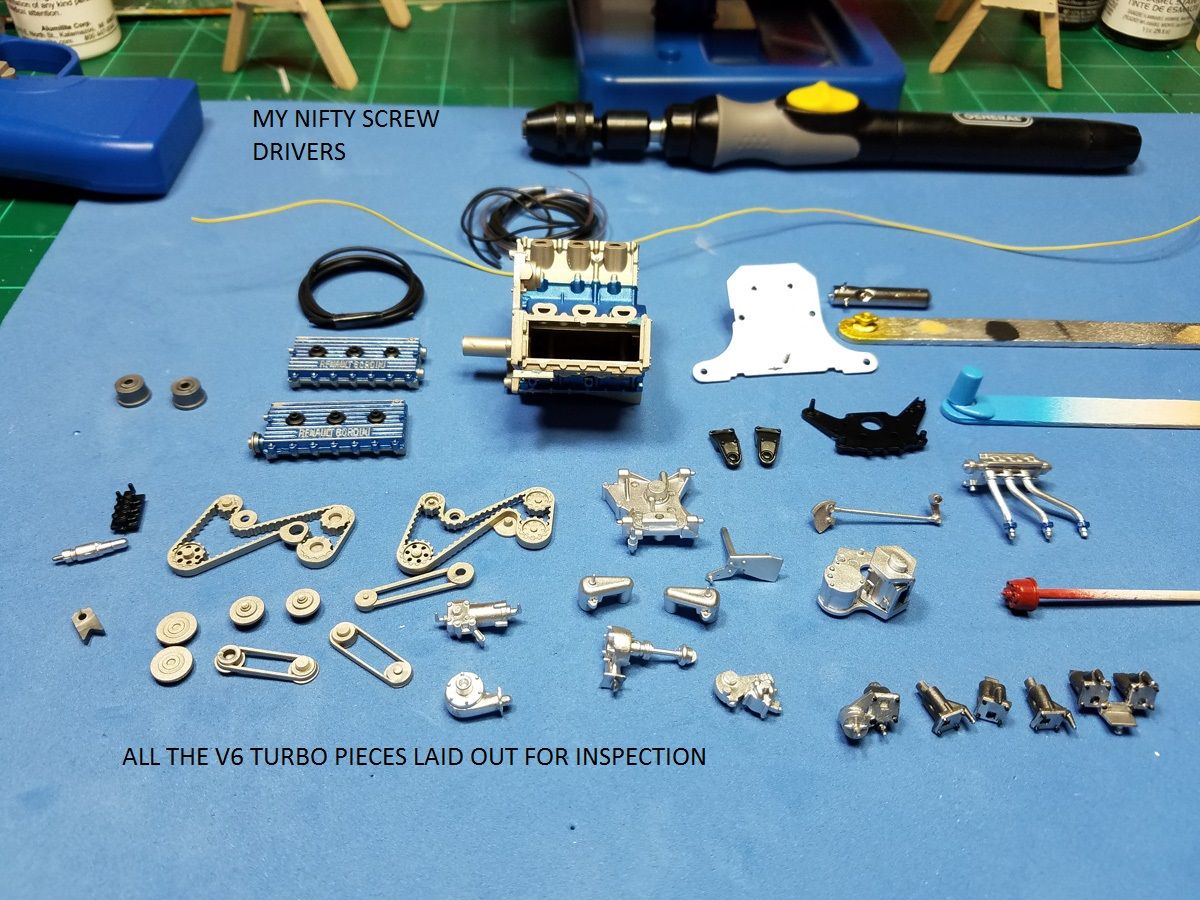
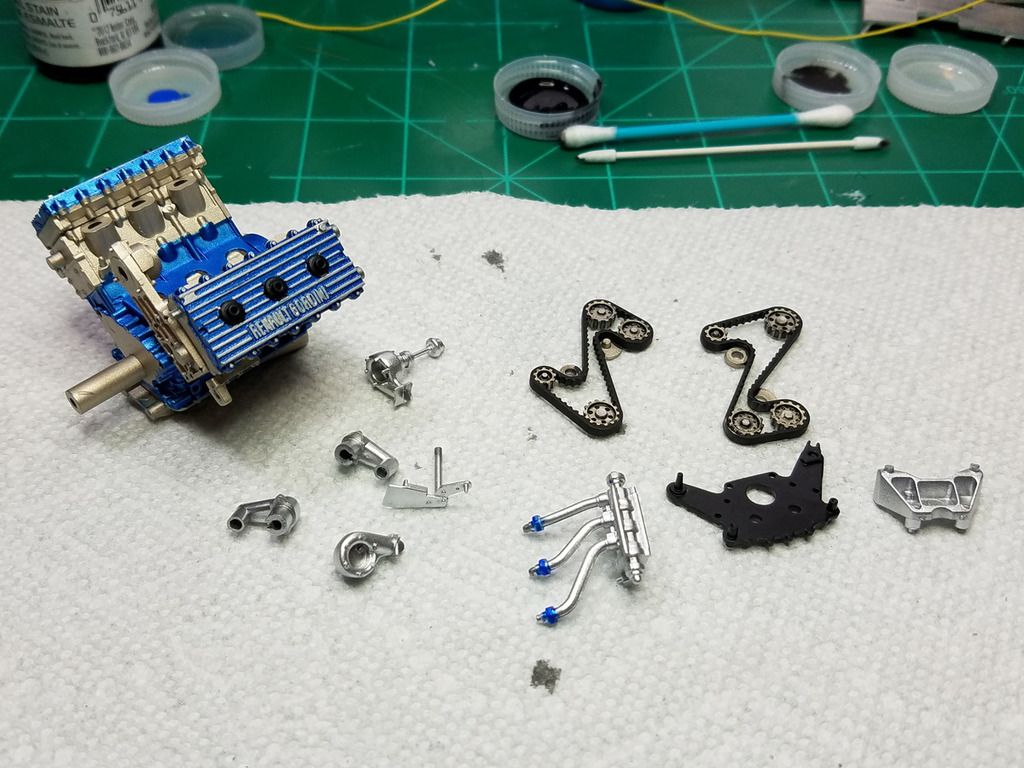
Thanks again for the great comments. While I had the Nurburgring 6 HR WEC race on I decided to press on with the RE20's V6 turbo. What a fun little motor to build. I really like the colors and it looks more lively than the ubiquitous Ford DFV! Here is everything I picked out of the parts box and laid out since its been months since I even looked at this stuff.....
Image

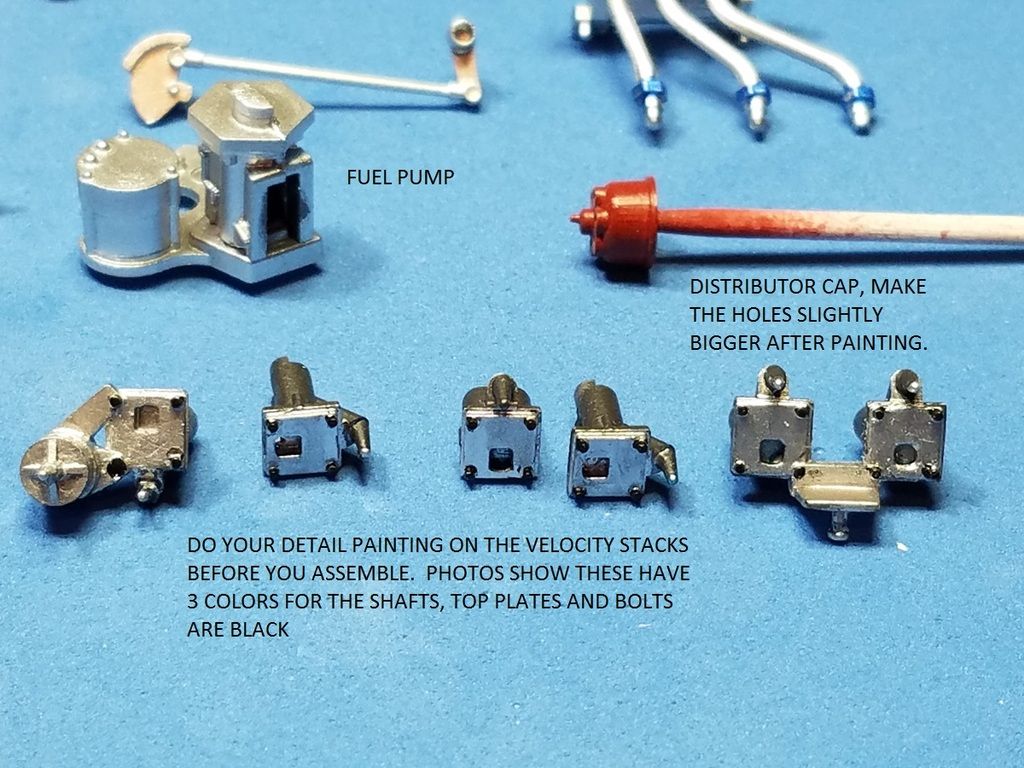
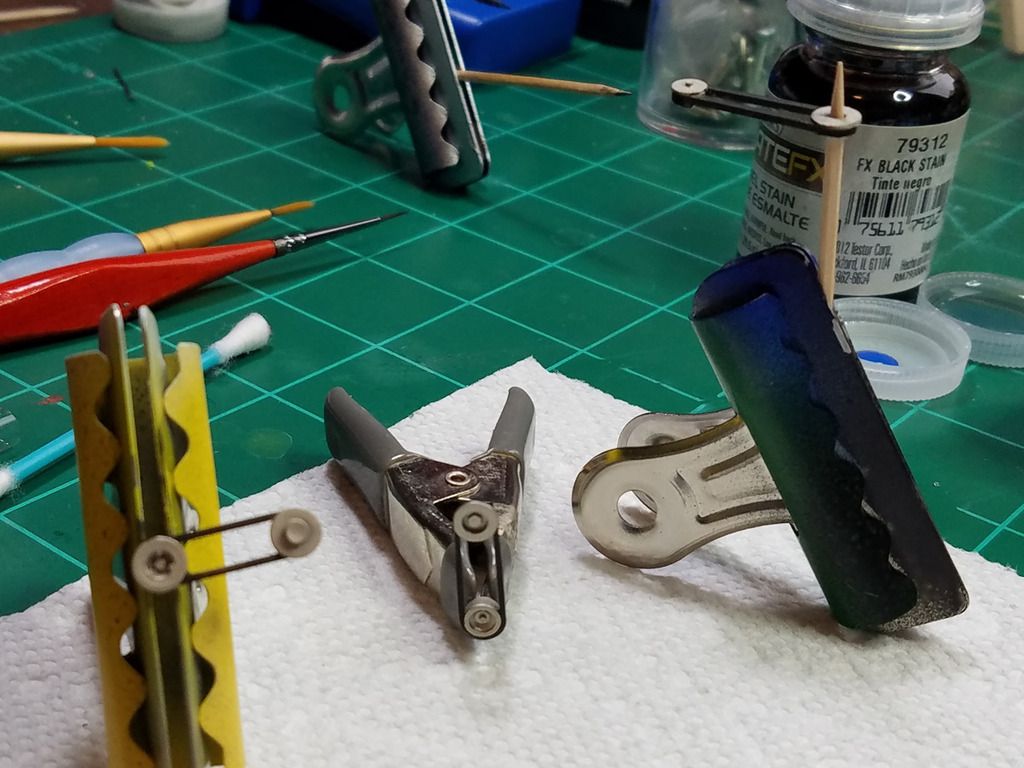
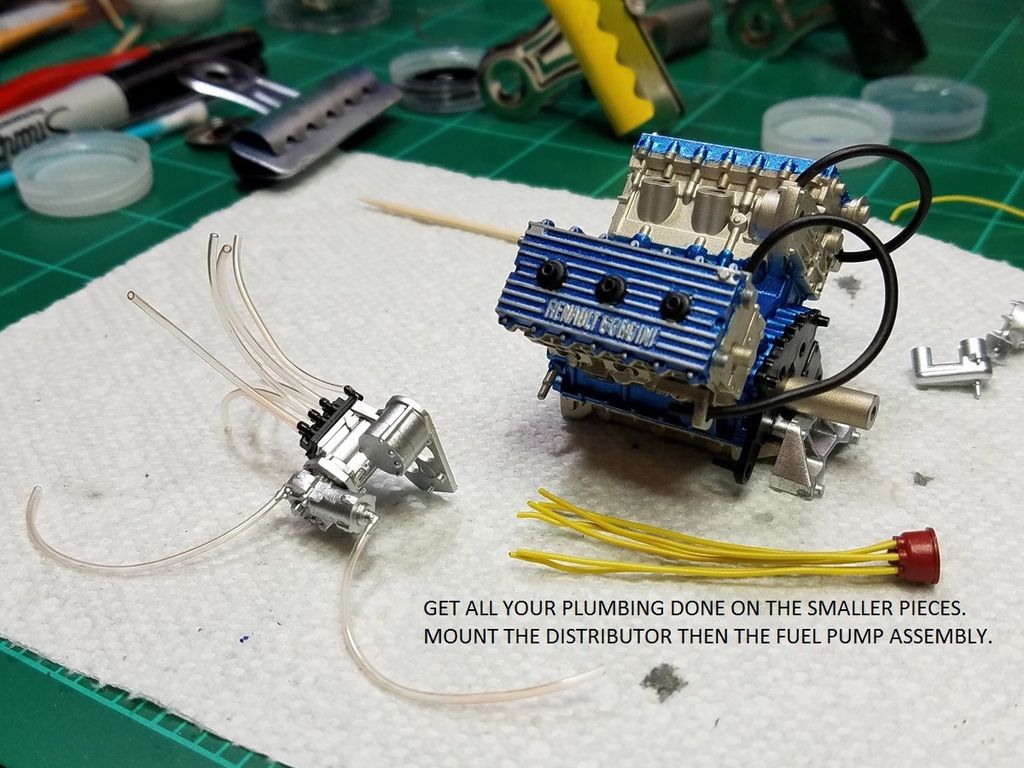
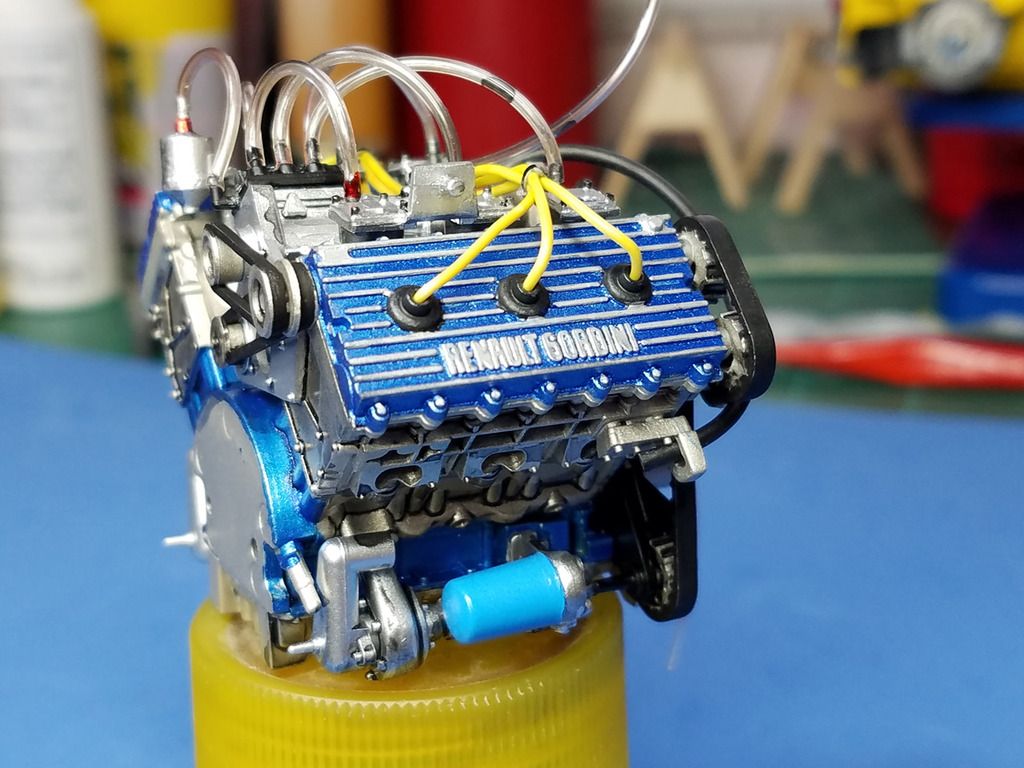
Some detail views of the velocity stacks, fuel pump and distributor.....
Image

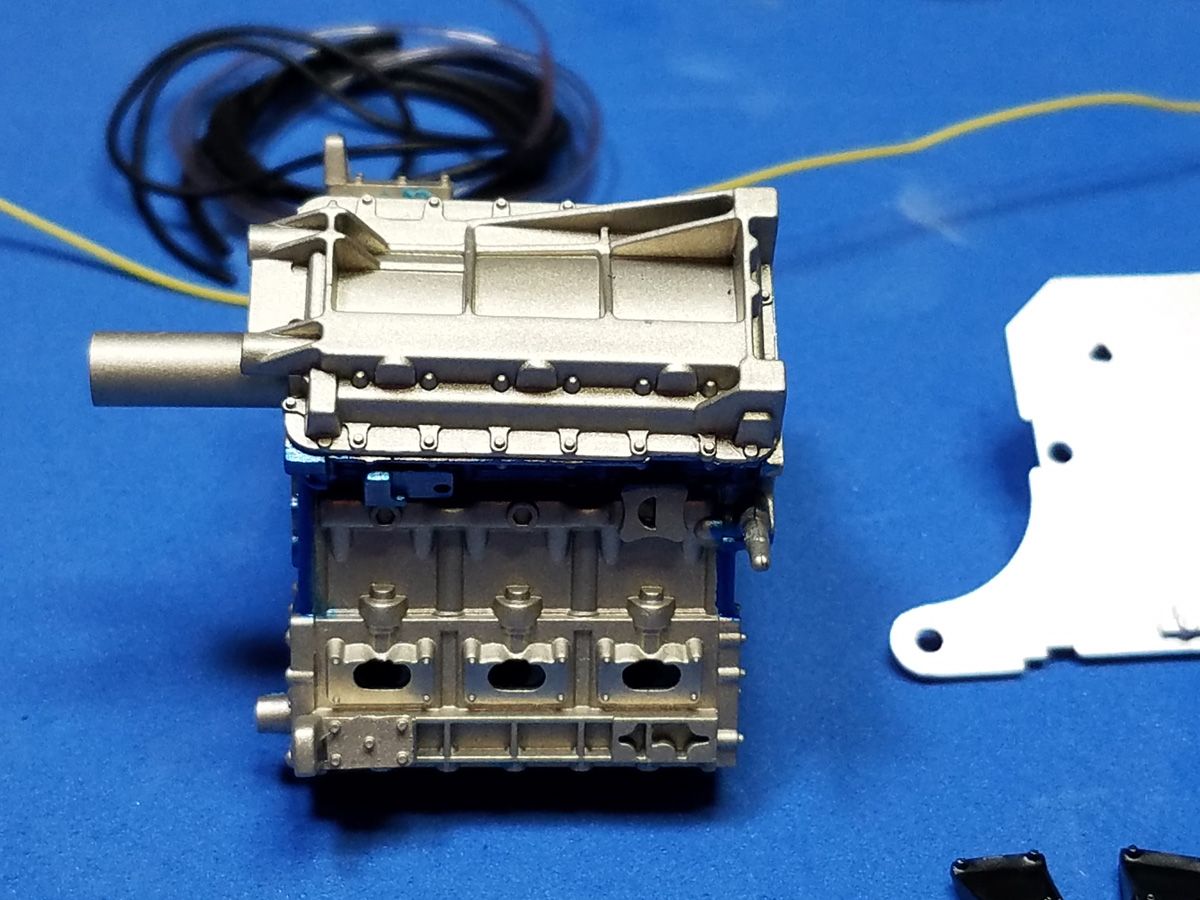
The underside of the crank case sprayed Krylon Nickel Silver previously....
Image

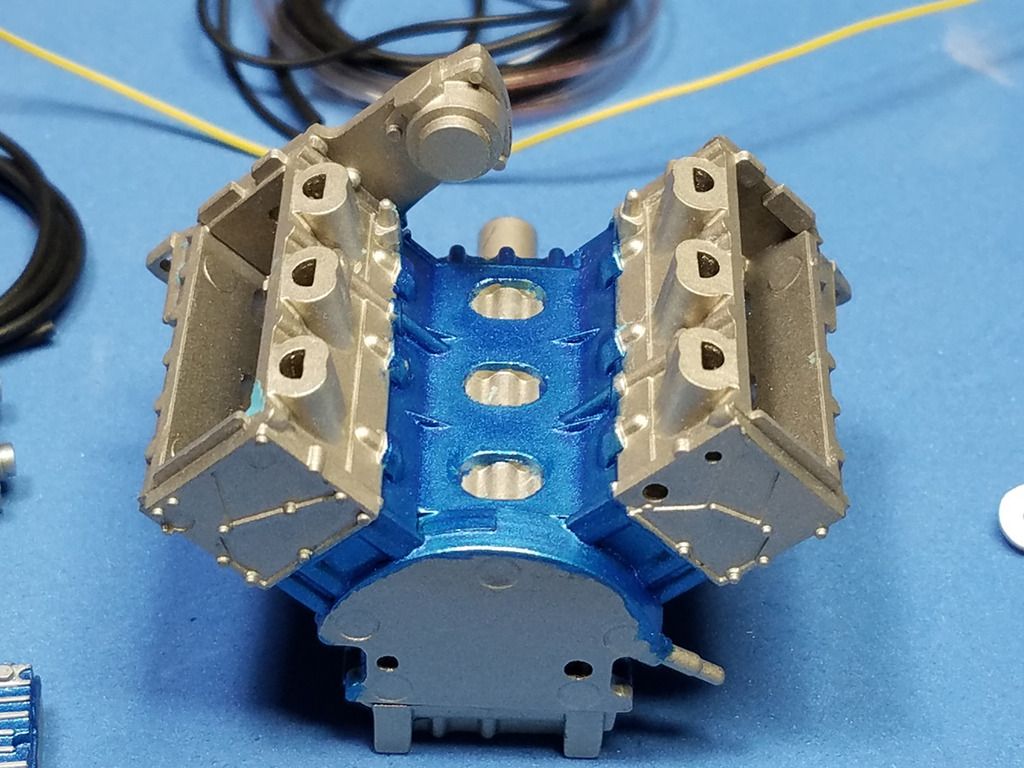
And the top side with the anodized blue sprayed in acrylic metallic blue.
Image

Heads are on, belts detailed, underside pieces ready to go....
Image

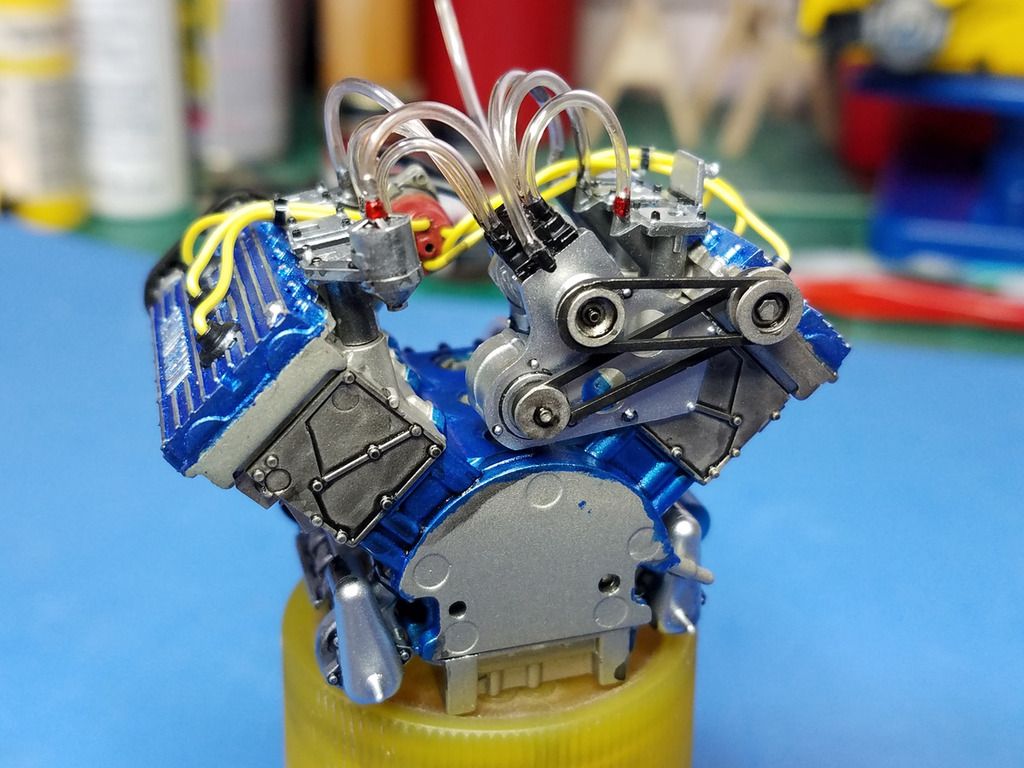
Belts will be hidden later, too bad.
Image

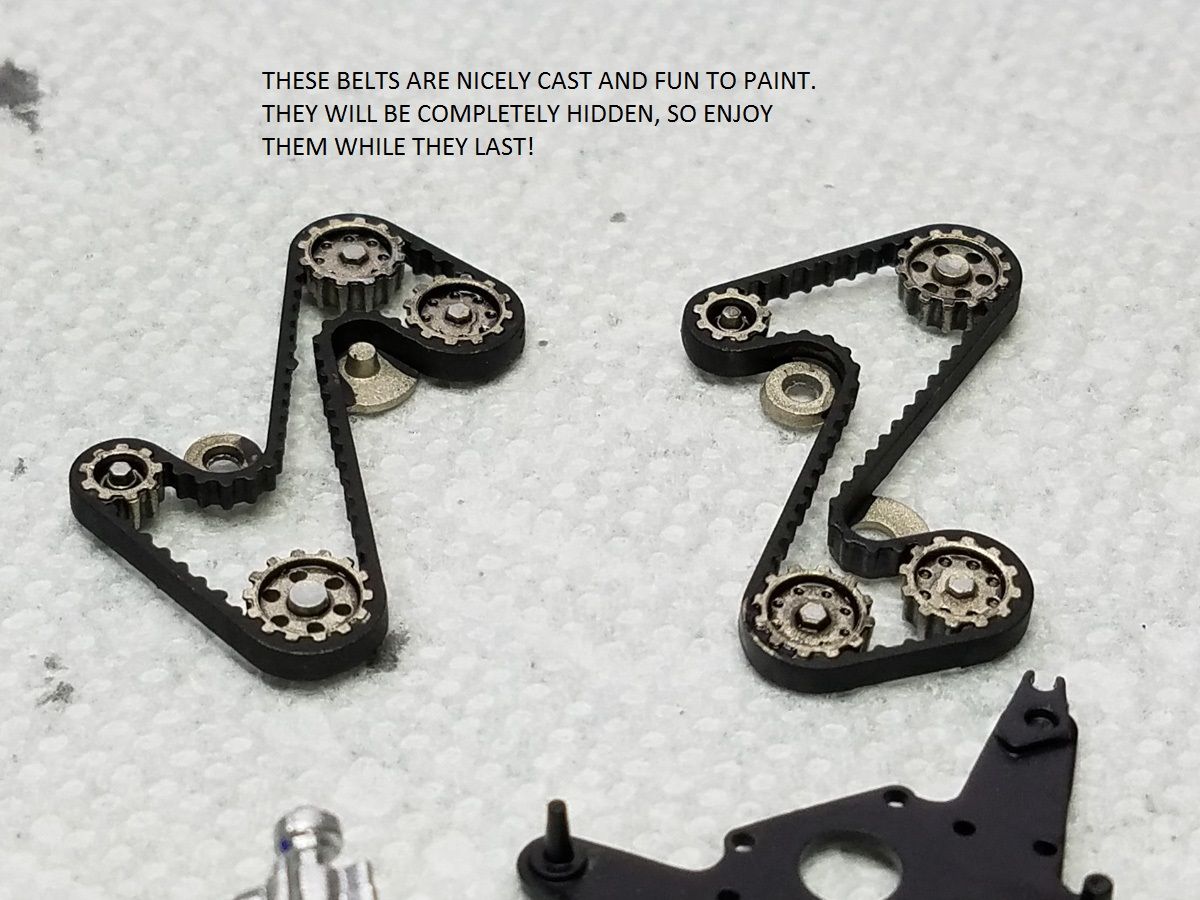
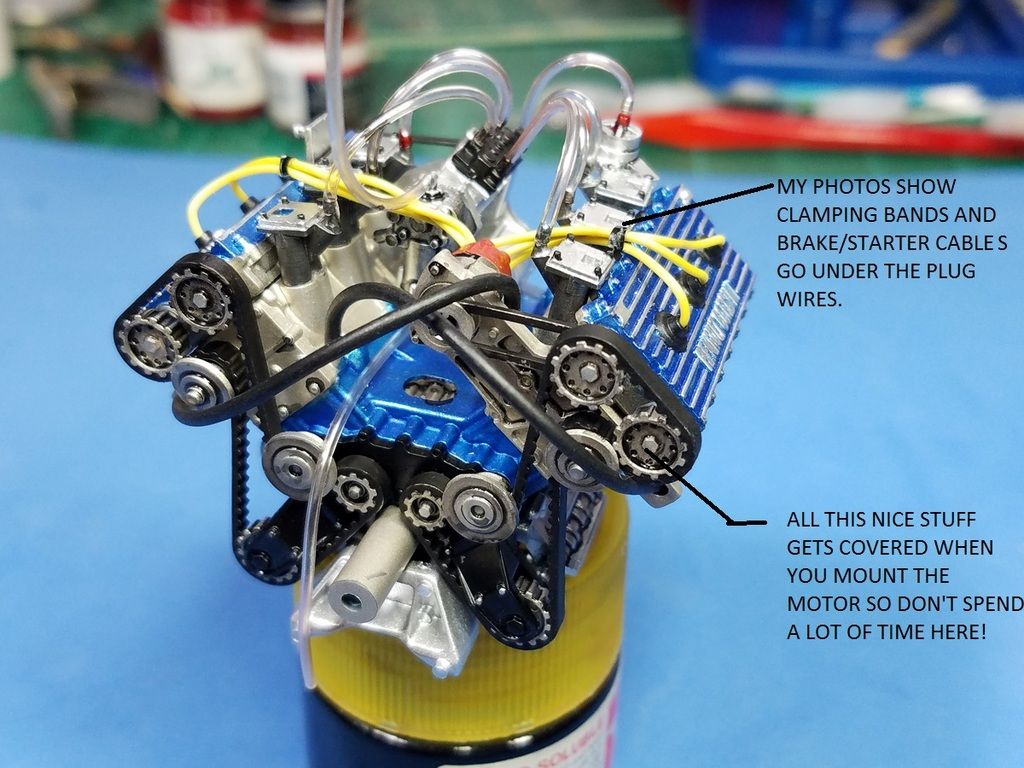
Lots of belts on this little motor....
Image

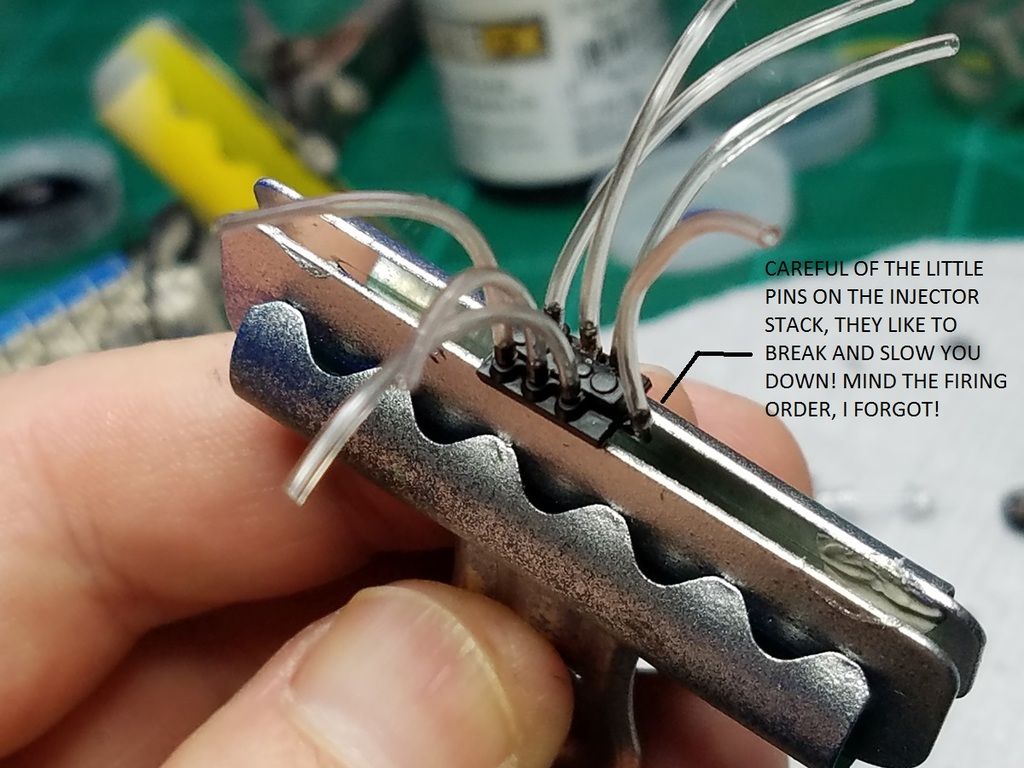
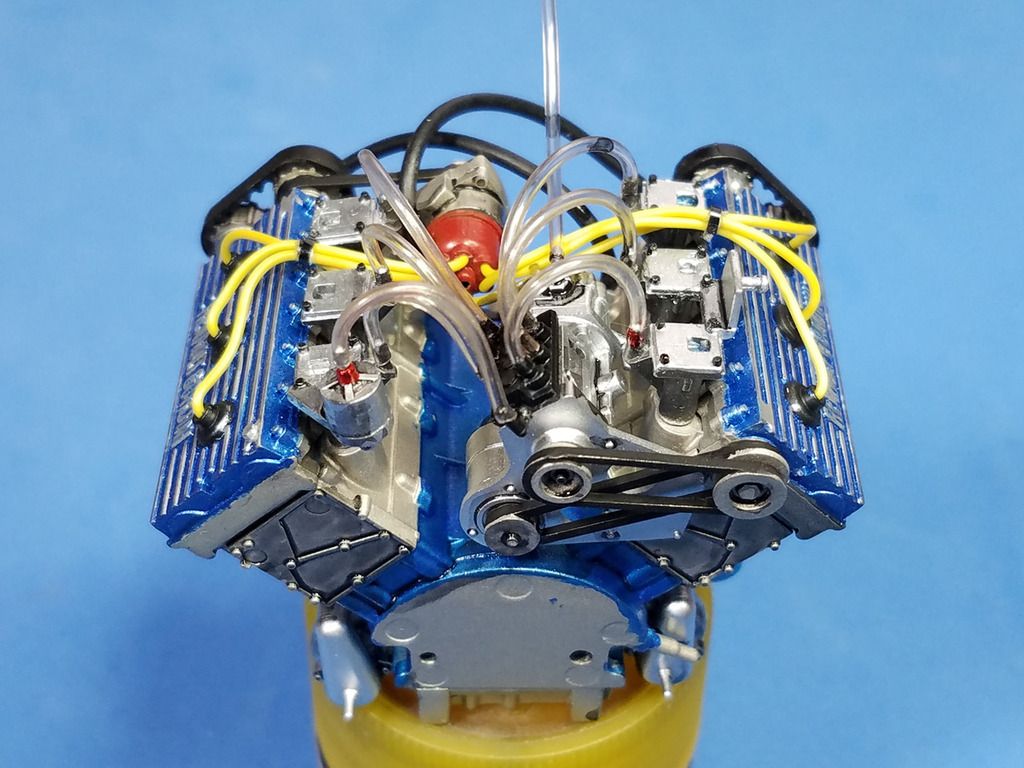
I started plumbing the fuel injector stack as prescribed in the instructions. Just when you think you won't break the little pins that mount the clear hoses.....you will. Be careful. Use a light touch and tweezers. Cut the cords a little longer.... you can cut them shorter later.
Image

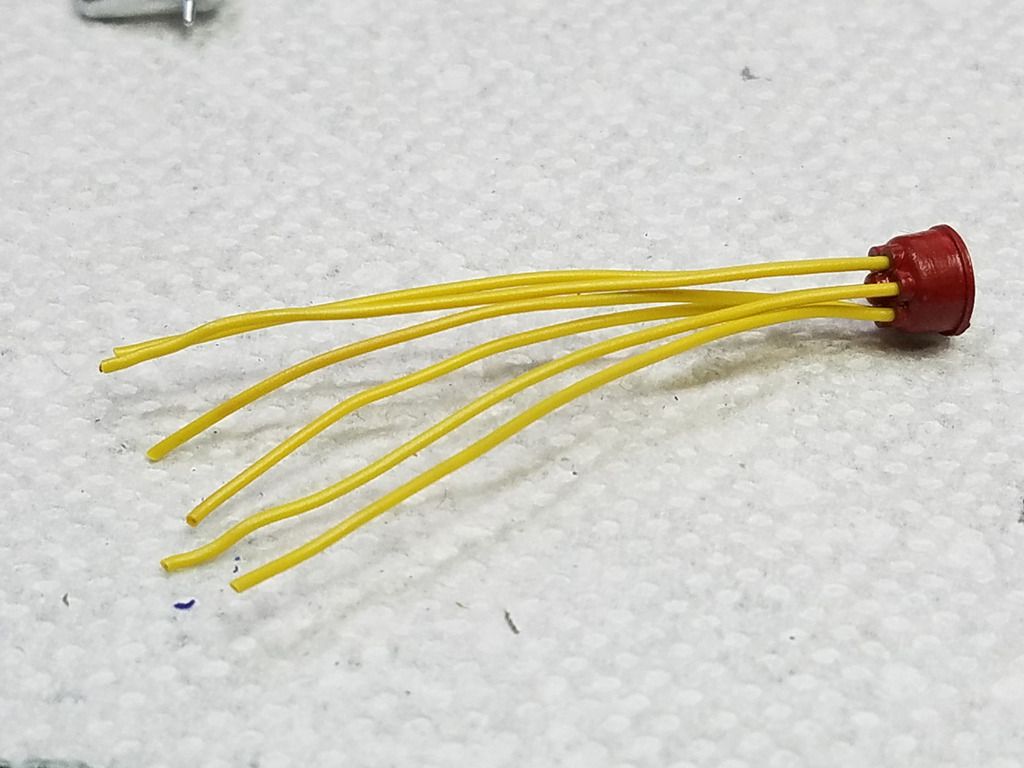
The distributor wiring is easy. I mounted the center coil wire to the car first. It will be easier to mount it once the motor is on the car vs on the coil.
Image

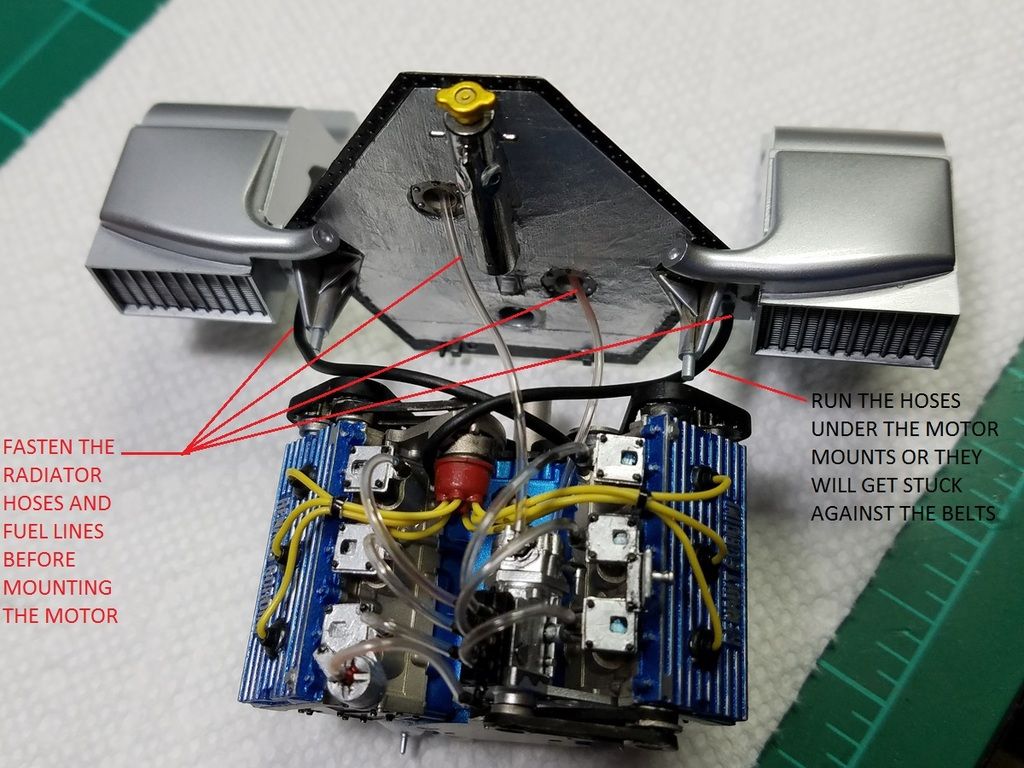
Radiator hoses are next. All of the plumbing is easier to do off the motor first then mount everything and run the wires when the glue is dry.
Image

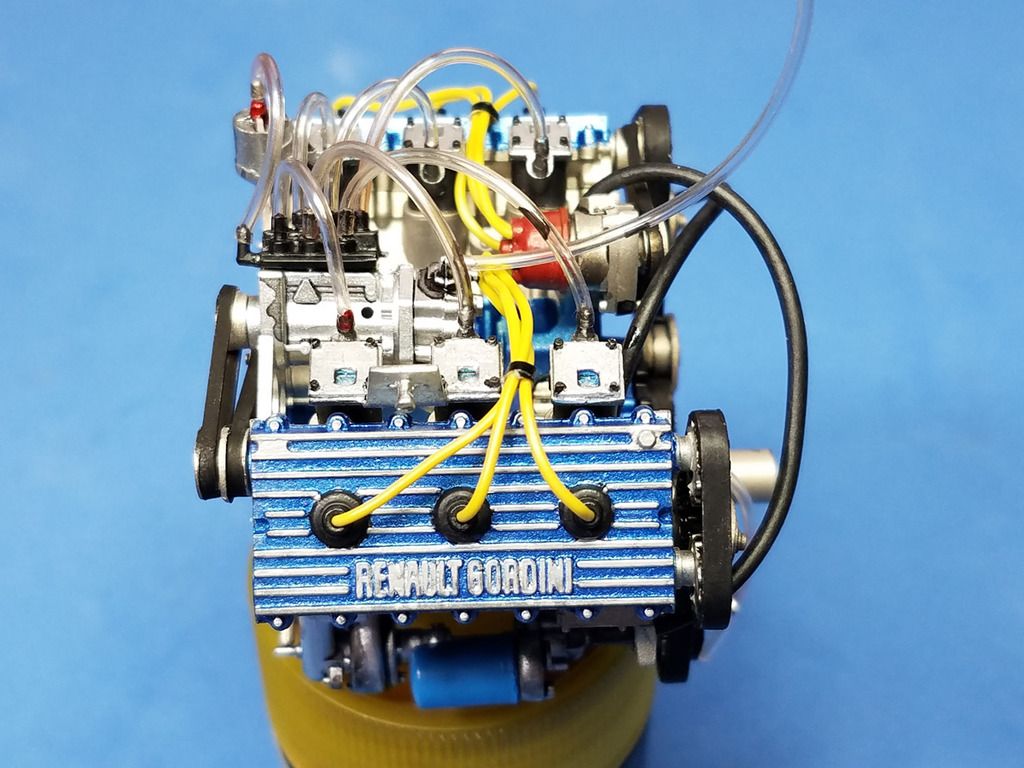
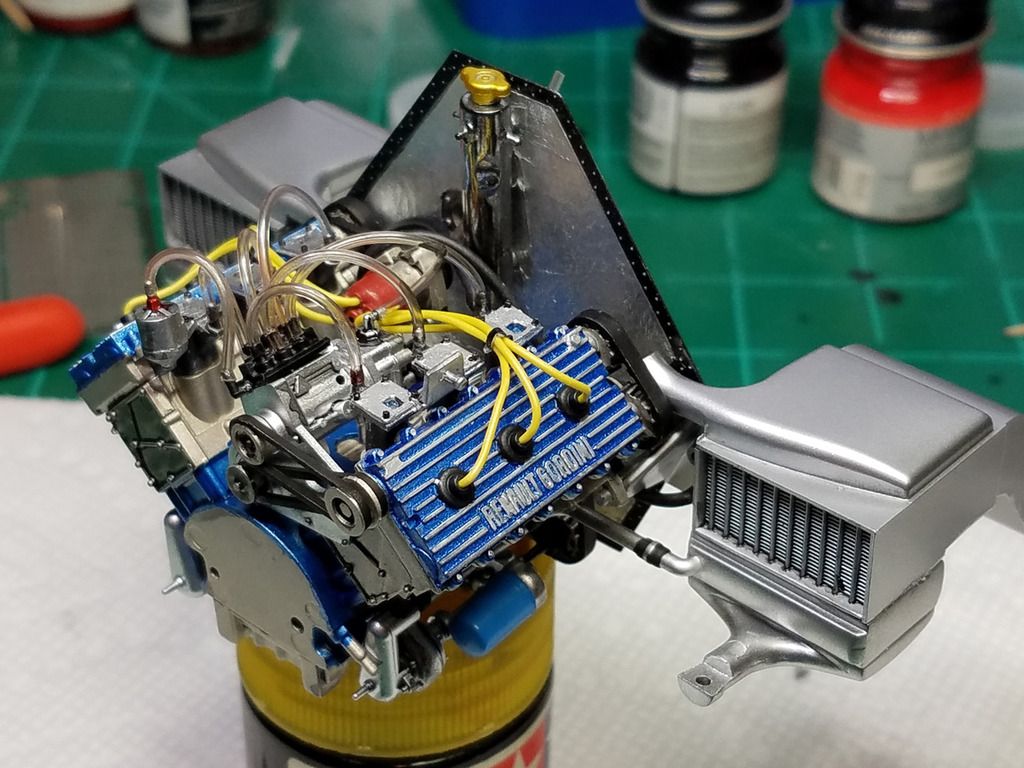
I tied up the plug wires with thin strips of black tape and ran some light wash around the motor to tone it down and highlight some of the details.....
Image

A light wash down the sides.... I didn't put a wash on the heads. They look clean in my photos.
Image

A little wash on the front and back.... I missed a few spots. I will go back later....
Image
Image

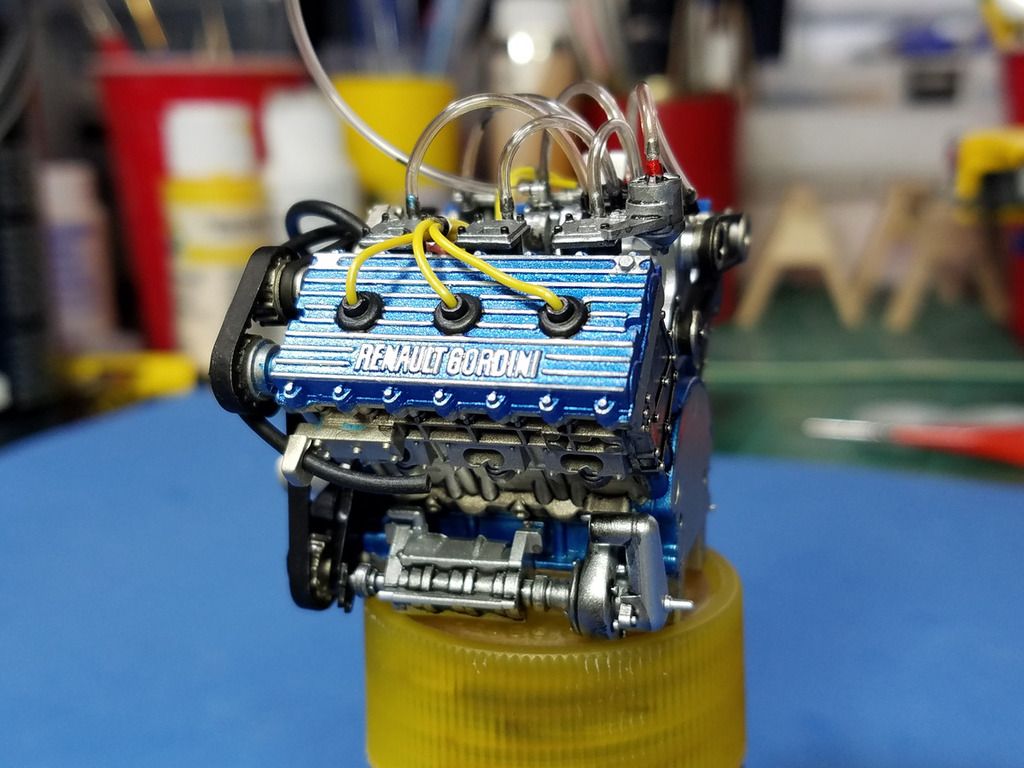
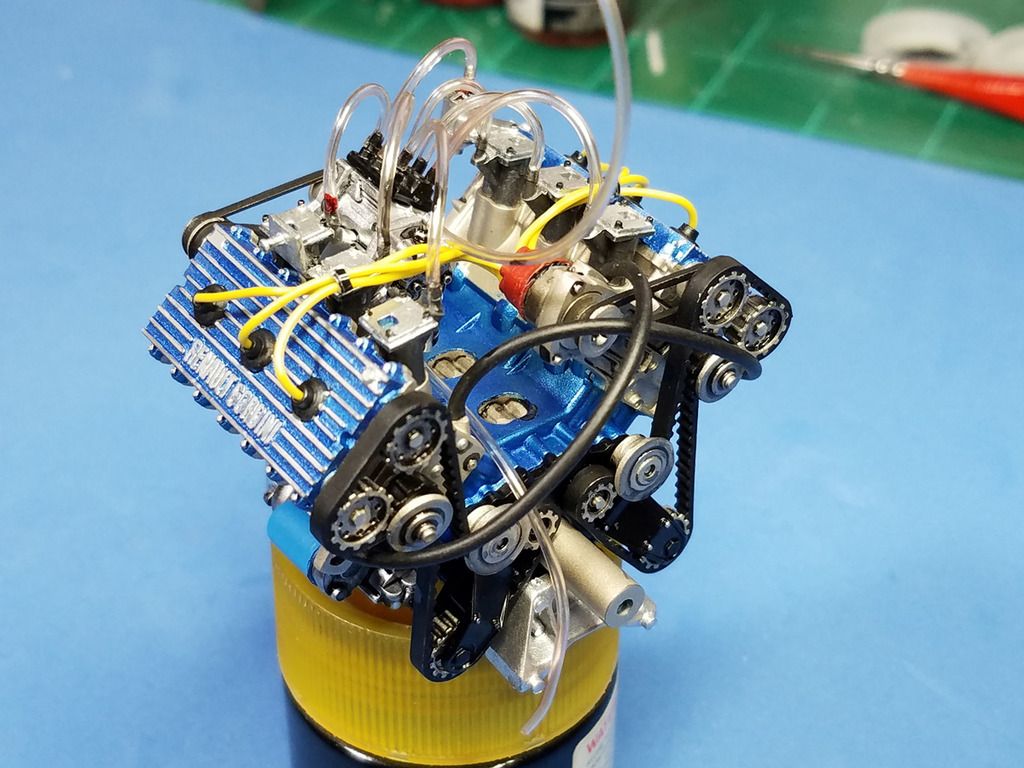
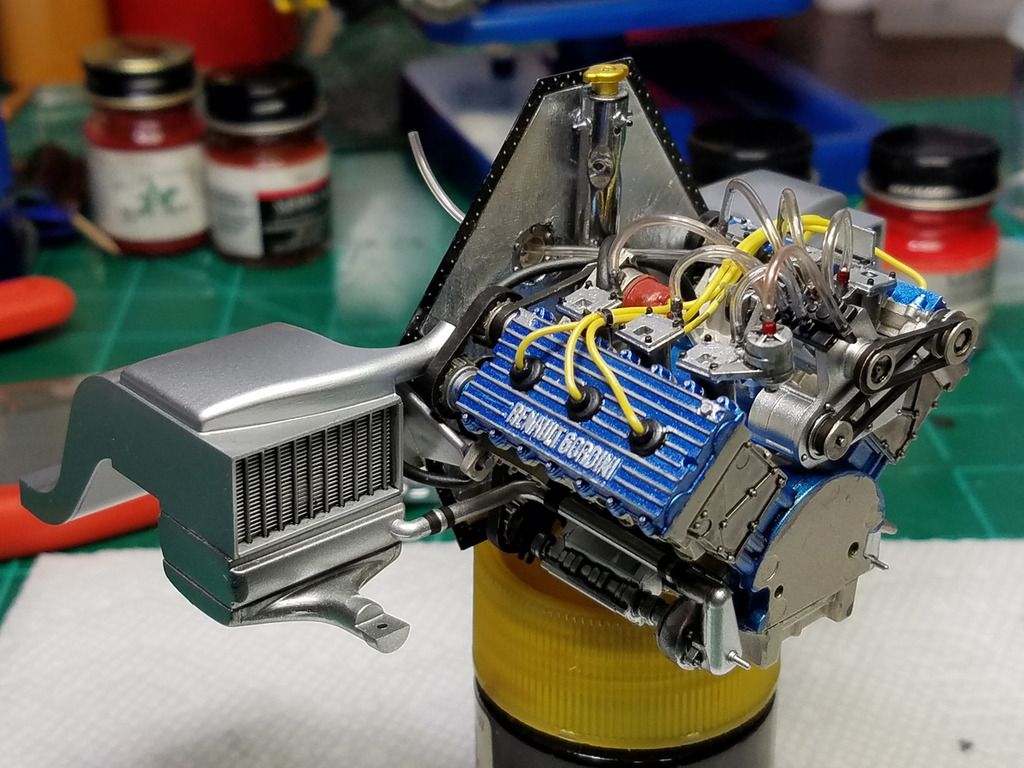
The motor is pretty convincing for a 33 year old Tamiya design....plenty of opportunity for fanatics!
Image

Ready to mount to the bulkhead.....
Image
Image

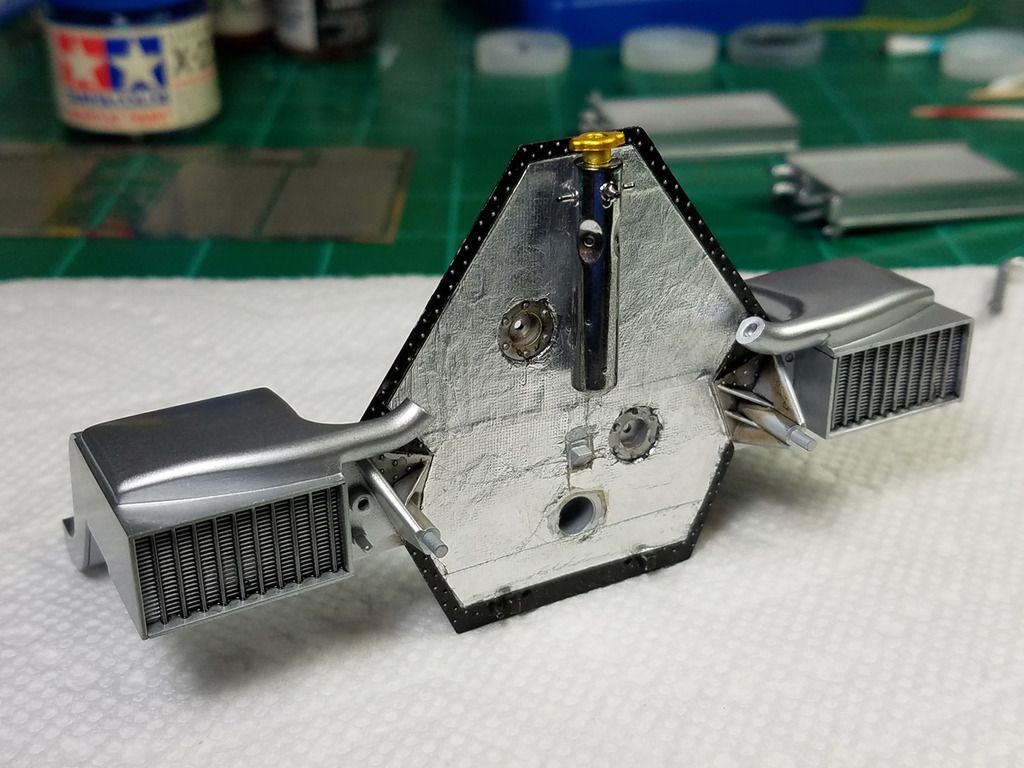
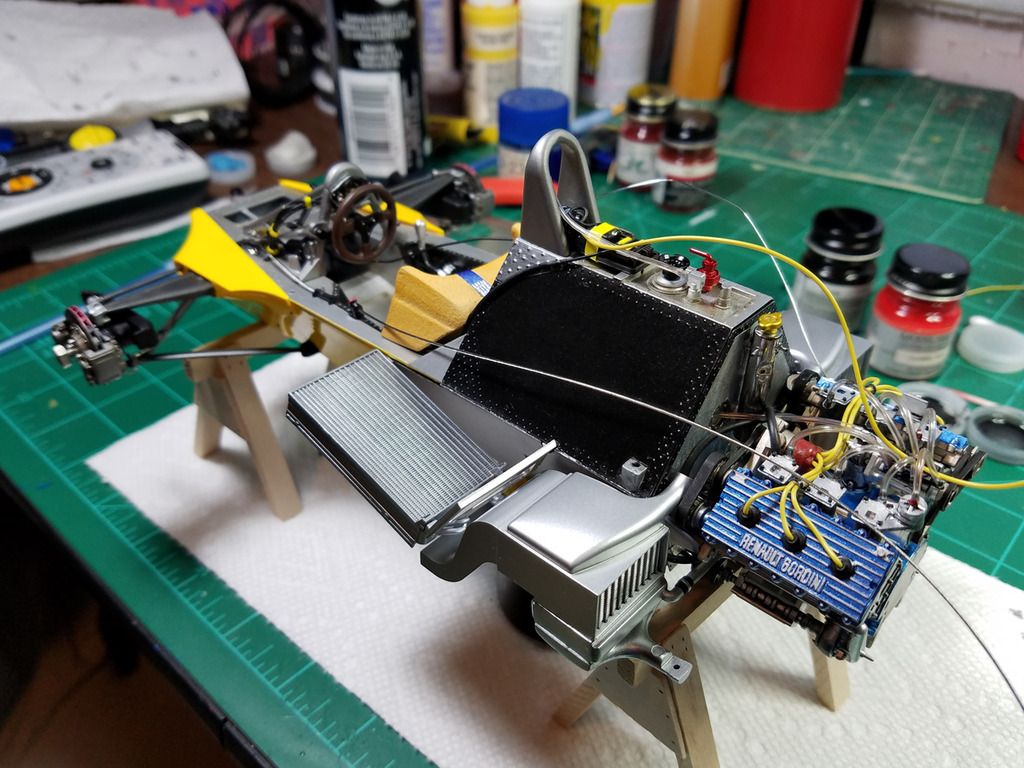
I detailed the rear bulkhead with a bubble gum wrapper heat shield, chrome water tank, light wash on the intercoolers and fuel inlets. I also paid attention to the carbon fiber and bolts on the edges which when mounted to the car will complete the monocoque at the corners....
Image

Its a little tricky to mount the motor, but not bad. Just run the radiator hoses in a crosswise pattern like instructed and under the motor mounts. I did not use glue. I snapped it all in place and screwed it on the back so I would not get glue everywhere while fiddling. Its a tight snug fit. Try it a few times and check your work. I left the turbos off at this point so I can detail those separately and attach later with heat shrink tube and PE hose clamps to cover up the ugly joints and sink marks!
Image

Just a peak underside. This too sadly will be covered up by the undertray....
Image

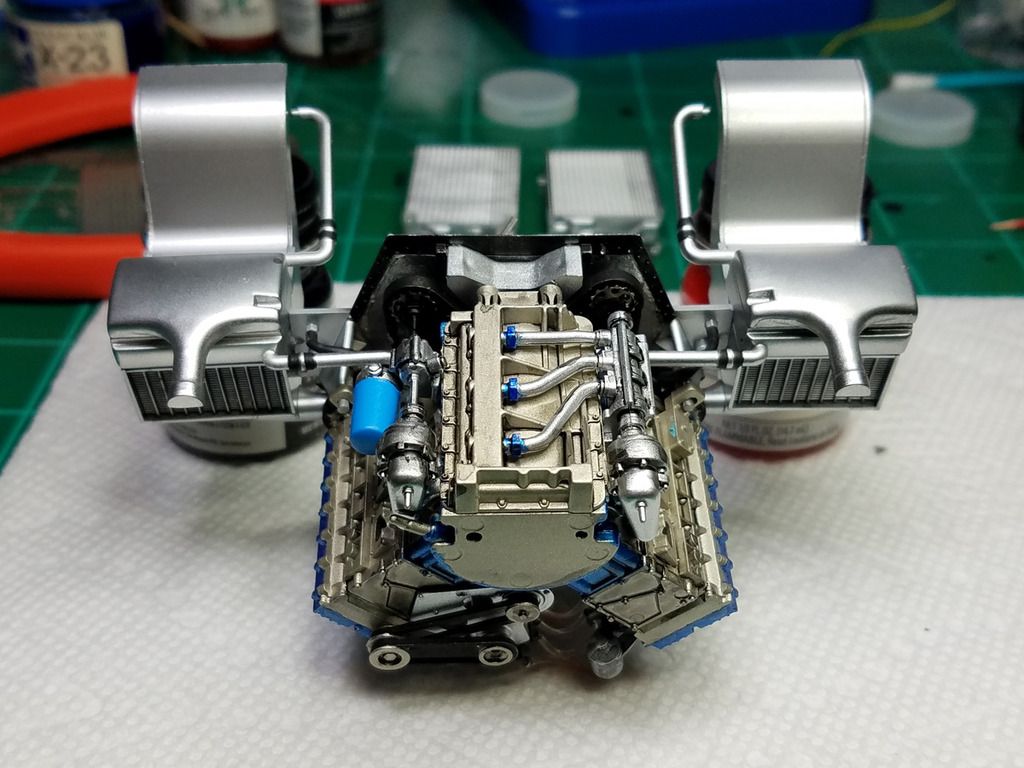
Ready for exhaust and turbos....
Image
Image

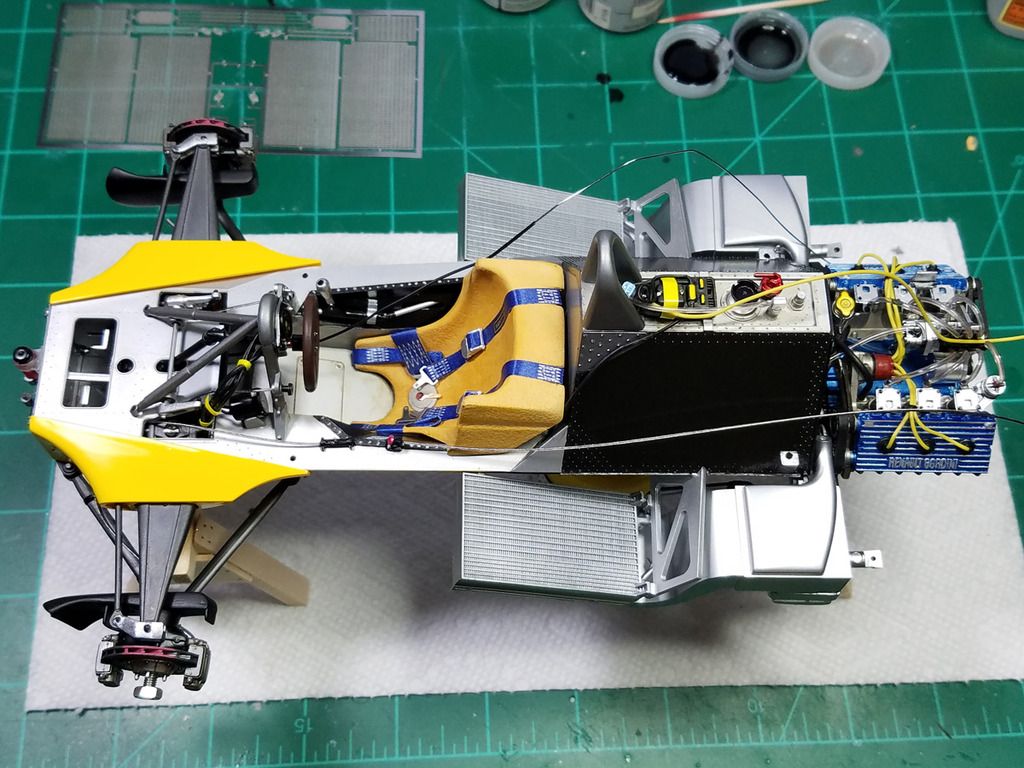
A quick test fit with the rest of the car and radiators just set loosely in place. So far so good..
Image

I dig the Renault engineering. I was really a well conceived design.
Image

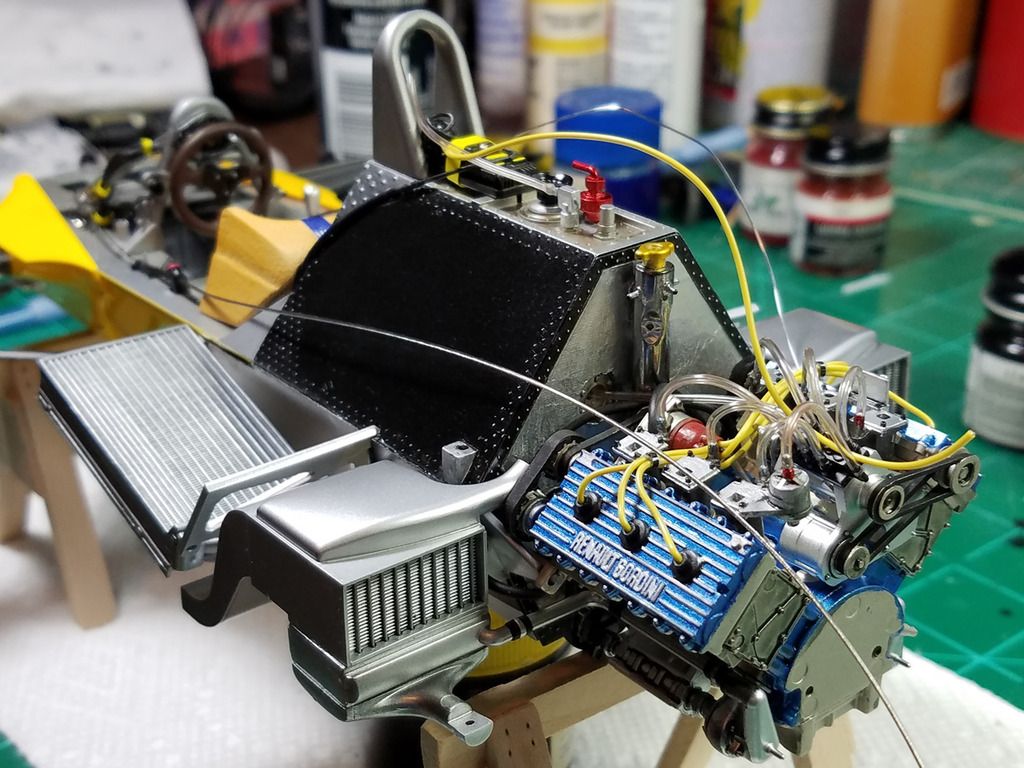
Lots of wires and cables to tie down on this one....
Image

That's it for now, thanks for looking! Turbos, exhaust, oil tank, gearbox and rear suspension next.

Re: Renault RE20 1_12 Shelf of Doom WIP

Posted: Mon Jul 25, 2016 11:34 am
by wadny
Great work and lots of useful tips on paints and materials - thank you!
One tiny observation - if the "brake fluid" in the reservoir is orange, it should also be orange in the tubes feeding down to the master cylinders. You might want to run a little paint through them. I wouldn't bother mentioning it except that your attention to detail is so good. Keep posting your progress!

Re: Renault RE20 1_12 Shelf of Doom WIP

Posted: Mon Jul 25, 2016 2:54 pm
by gp-models
Awesome!!! :D

Re: Renault RE20 1_12 Shelf of Doom WIP

Posted: Mon Jul 25, 2016 4:38 pm
by ModelTime
@ wadny: Yes, good point! I was looking at that the other day and thinking of changing the clear brake lines to braided like my photos show or injecting some clear orange in there....I'm also not too thrilled with the oversized Tamiya clear fuel lines, but they will get covered mostly by the intake plenums. Thanks for looking, its not the best effort I've seen on this board, but its been fun to share.

Re: Renault RE20 1_12 Shelf of Doom WIP

Posted: Thu Aug 18, 2016 12:33 am
by ModelTime
Hello fellow F1 modelers, I've made some steady but slow progress on the RE-20. I managed to get all four corners built and its on to final assembly, plumbing and body work. I have a goal to show up at a local contest in 30 days, so lets see if I can manage that!

So, after some engine work (which still needs exhaust, turbos and some wiring/plumbing) Here I am piecing together the exhaust headers before painting them gunmetal for starters.....because the turbos have to line up with the headers, test fit, tape things in place and glue them all together without gluing them to the engine block. They will line up later after paint then. This was not too fun.
Image

Topside test fit:
Image

I focused then on the rear end. Here are the major pieces spread out:
Image

Image

I decided to put some bolt detail on the transmission case, not sure this was better than just using a silver sharpie on the molded detail, this is all hard to see when the suspension is on.
Image

Transmission cooler plumbing and a little wash for the detail. I opted not to use the photo etch grille for this piece.
Image

Image

Image

Image

Top rear suspension frame with a little weathering that promptly rubbed off, I'll save that for later...
Image

Some sort of air tank I think for starting the car? Fire suppression? No clue, but it looks cool. I painted this to look like my photos.
Image

The coil springs are mounted in this silver case. A really strange design with the drive shaft running through it all.
Image

Rough assembly and painting of the rear disk rotors, calipers and spindles/lock nuts I made larger for scale like the front ones.
Image

I put a wash on the turbos. The rear upper arms ready for springs.
Image

Tamiya actually molded in a brake line distribution block and I put it to use when plumbing this shock tower piece...
Image

Coils going together...
Image

Mounted to the transmission case.....
Image

A quick mockup with the motor to see how its all going to fit....
Image

Image

Image

Brake cooling ducts added to the rear uprights. The axels and how they fit with the rest of the drive shafts is a tricky affair of filing, cutting, test fitting, gluing. It will test your patience....
Image

Rear uprights on, lower A-arms left loose up front according to instructions to fit the undertray later....a quick mockup with all assemblies loosely placed together....I can hear the steak sizzling now!
Image

I think I would like this car without all the bodywork!
Image

Image

All the plumbing and exhaust work is going to be fun! Right? Ugghh.... :roll:
Image

I hope you enjoyed this! I am seeing the end!

Re: Renault RE20 1_12 Shelf of Doom WIP

Posted: Thu Aug 18, 2016 9:34 am
by billgtp
Very nice. Looking great

Re: Renault RE20 1_12 Shelf of Doom WIP

Posted: Thu Aug 18, 2016 11:06 am
by imatt88
Wow! Great stuff! Keep it coming :)

Re: Renault RE20 1_12 Shelf of Doom WIP

Posted: Thu Aug 18, 2016 2:26 pm
by Fast289back
Amazing work. I'll be marking this for future reference.

Re: Renault RE20 1_12 Shelf of Doom WIP

Posted: Mon Sep 05, 2016 12:09 am
by ModelTime
Thank you for the encouraging comments! Well, here is a short post dealing with getting the engine mated finally with the chassis. I started by completing some things that will be hard to get to later once the engine and gearbox are on, namely some photo etch on the intercoolers and radiators. Also I added some water lines to the vertical water tank.
Image

Image

Next come the turbos and exhaust headers. I added some shrink tubing and hose clamps which got the job done, but were a bit fiddly.
Image

What things look like underneath
Image

Right side
Image

The three main assemblies I'm dealing with right now.
Image

Had a time getting the driveshafts, my larger axel hubs with larger wheel nut, and suspension to all fit together symmetrically and level, but got her done. I plumbed the brake lines to each caliper originating from a distribution block on the back of the oil tank. I was handling this piece so much the chrome on the oil tank cover started rubbing off and I had to mask the whole thing off and spray another coat. One of those modeling things... uggh.
Image

Engine glued to the chassis, this went pretty well. I will let this set up before mating they gear box assembly. Then time to run all the plumbing terminations. When that's all done I can move on to the exterior body panels and undertray. Whoo hoo!
Image

Image

Image

Thanks for watching!