Page 3 of 5
Posted: Sat Mar 22, 2008 8:39 pm
by CBartholomew4677
Wow, looks great!!
I'm really happy and excited to see this kit being built. I've been back and forth on buying this and you've swayed my decision definitely on the "I'd like to place an order" direction. Keep up the good work and posts.
Chris
Posted: Mon Mar 24, 2008 4:26 am
by CaptainMark
Damn, looks fantastic so far!
Posted: Tue Mar 25, 2008 10:13 am
by EnzoSpirit
Go for it Chris, it's a great kit, and a great subject.
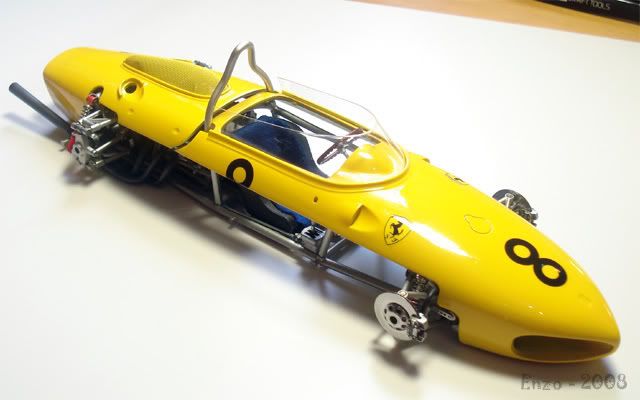
Time for pictures of my work from last weekend.
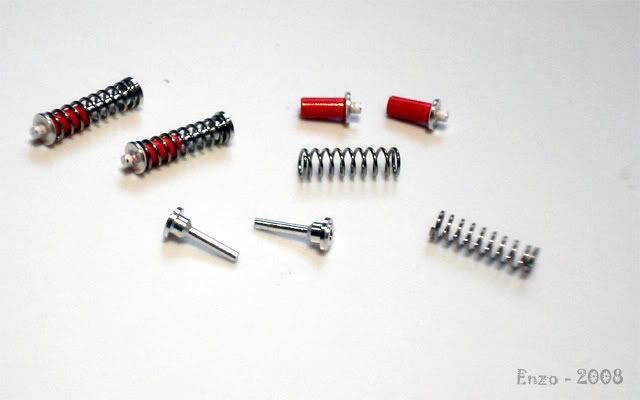
Next step was to finish the suspensions. I started painting the dumpers red.
And here is the rear suspension already assembled. No problems here.
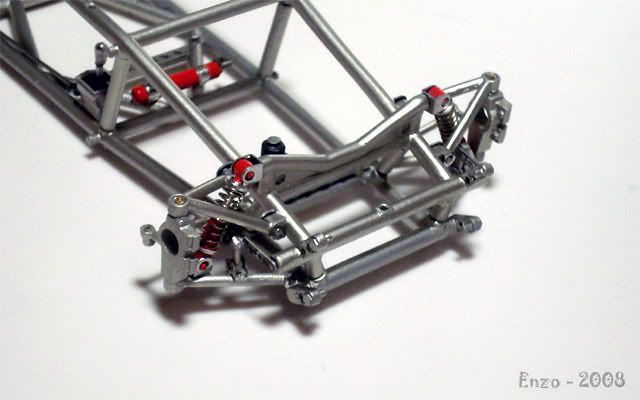
And the front suspensions. Here i had a lot of problems finding a good alignment and placing the roll bar links.
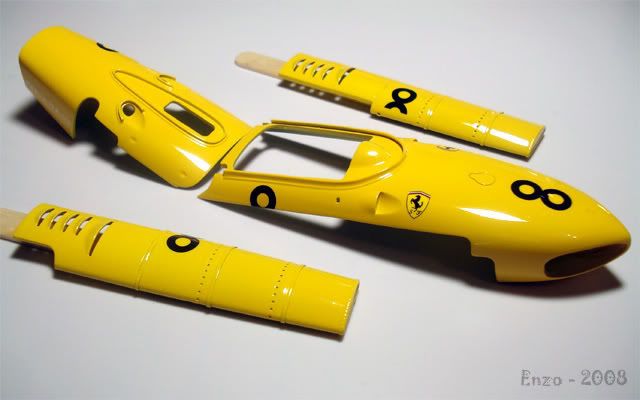
The body parts were clear coated with Zero Paints 2K clear. Amazing product.
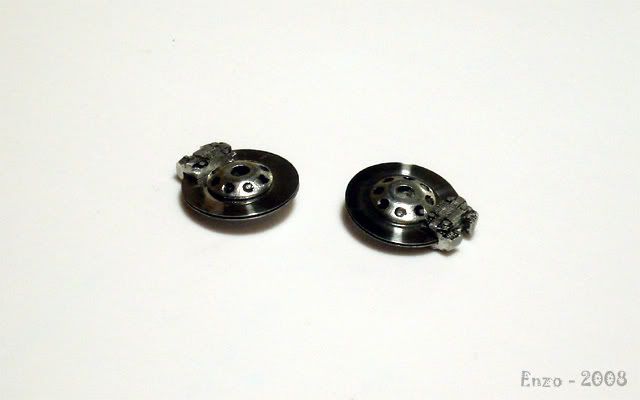
The front brake discs and calipers. The parts were only cleaned, polished and black washed.
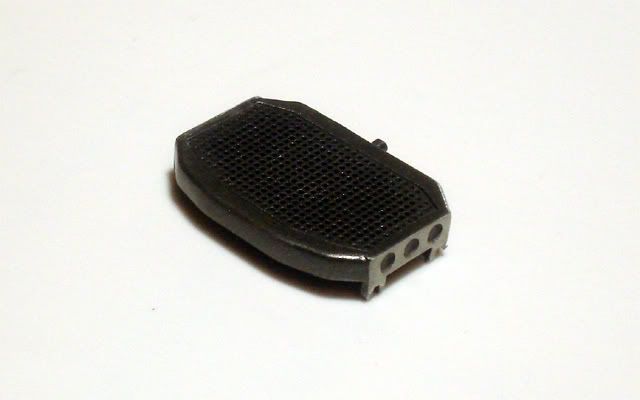
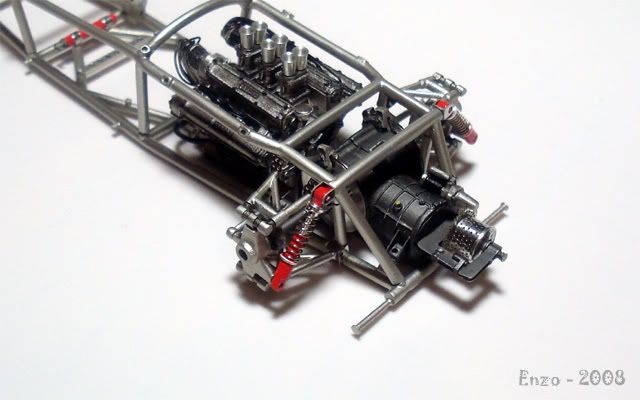
The radiator was cleaned and painted gun metal. The PE meshes were also painted Gun metal and glued.

Water tank, just cleaned and polished, and ready to go.
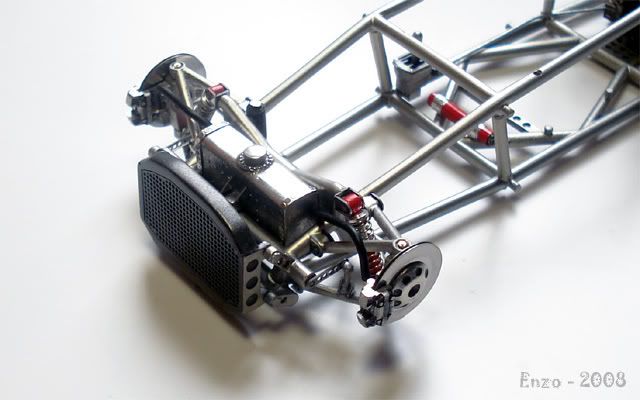
Finally, the radiator, tank, and brakes were atached to the chassis.
The fuel tanks were polished and waxed. The internal part was painted gun metal and the big PE cover and fuel cap were glued.
That's all folks, thanks for following.
Posted: Tue Mar 25, 2008 11:49 am
by Jacques
Nice, nice, nice !!!!
Jacques
Posted: Tue Mar 25, 2008 12:24 pm
by Mr.Grumpy
enzo, looks fantastic so far.
have you checked the fit of the nose over the radiator now that you've assembled the front end. mine didn't fit!!!!!
Posted: Tue Mar 25, 2008 5:31 pm
by jaykay
Wow! That's excellent!! Very clean work!
Posted: Wed Mar 26, 2008 3:37 pm
by EnzoSpirit
Thanks guys.
Mr. Grumpy. So far it's fitting, but I'm concerned about what will hapen after the fuel tanks are in place too, them I may have some problems, and will need to adjust the body parts a bit.
Posted: Tue Apr 01, 2008 5:12 pm
by EnzoSpirit
Hi guys, here I'm again to post some progress on this kit.
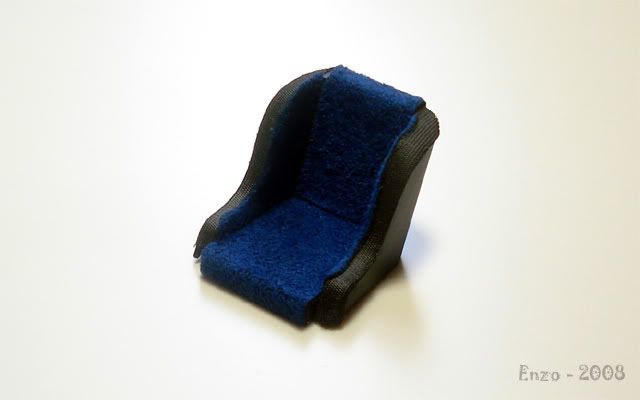
The driver seat was painted semigloss black, and detailed using the Hiro blue self-adesive fabric, unfortunately not included on the kit.
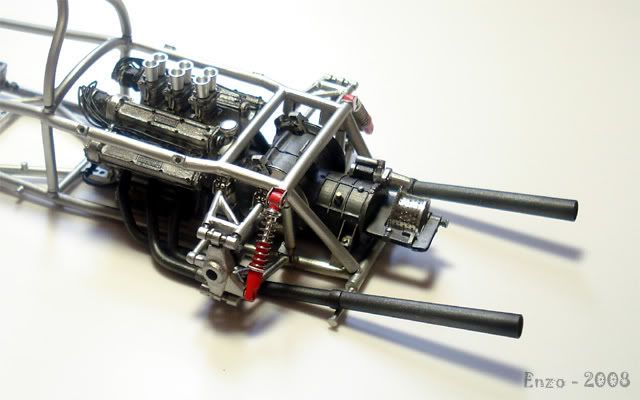
The exhausts were cleaned, primed, and painted with metalizer exhaust. Them a drybrush with aluminum was done at a few spots, and also flat black with the airbrush on the end of the pipes, for a bit of weathering.
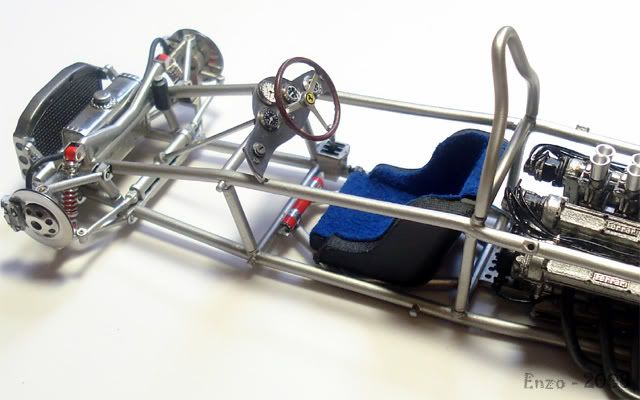
The steering wheel was painted wood-like using a mixture of tamiya brown and red acrilics, with a dry-brush of black, folowed by a clear coat. On the picture a test fit of the dash board with the steering wheel and the driver seat in place.
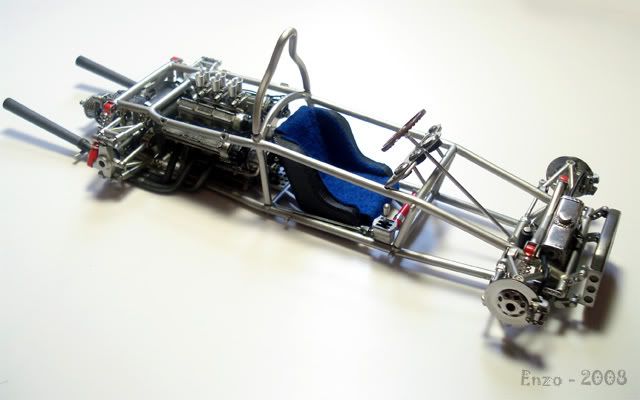
Now, only the water pipes, and some wiring is missing to complete the mechanicals of the car. Also noticed that the kit doesn't have a batery, that sould be in front, next to the driver feet, so I will need to scratch build one too.
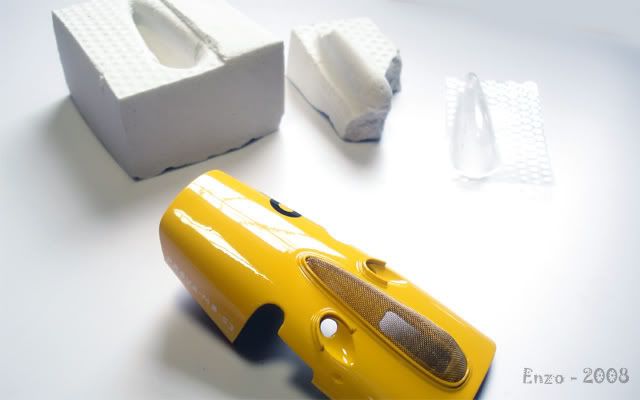
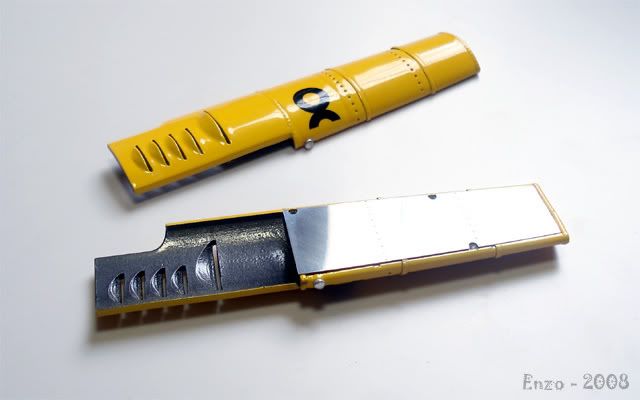
To make the mesh to cover the air intakes, the kit gives you a fine, flat, brass mesh, and the manual asks you to bend it with a metal die. Problem is, the die wasn't included on the kit box

. Instead, they included a clear vacumformed part. I made a mold from plaster using the clear part, and finally bent the mesh to shape.
And a test fit. A few adjustments away from a perfect fitting, but I will hopefully get there.

Regards
Daniel
Posted: Tue Apr 01, 2008 6:15 pm
by Mr.Grumpy
beautiful.
Posted: Tue Apr 01, 2008 6:23 pm
by daniel
supersweet....the yellow looks amazing and your painting skills are even more amazing

daniel
-germany-