
Tamiya 1:12 McLaren MP4/6 Rebuild/Upgrade

Re: Tamiya 1:12 McLaren MP4/6 Rebuild/Upgrade
Won’t you have an issue with the side bodywork that goes through the pushrods?

Re: Tamiya 1:12 McLaren MP4/6 Rebuild/Upgrade
I drilled the hole pairs first, roughly cut the shapes out around them with Xuron cutters, then held each one in some small parallel jaw pliers and sanded to final shape. Once the holes are fixed, it’s surprisingly easy to eyeball the shapes.rjfk2002 wrote:Stunning work. When scratching the brass mount plates how did you cut them to get the even “egg” shape?
Rich
Cheers!
Re: Tamiya 1:12 McLaren MP4/6 Rebuild/Upgrade
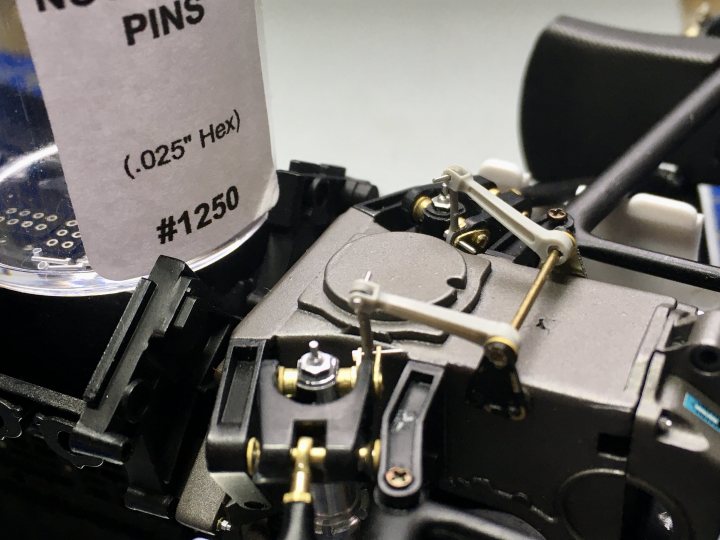
Yes - that’s what I meant about the suspension infill bodywork pieces needing fettling. It seems a minor sanding job though.Jose01jr wrote:Won’t you have an issue with the side bodywork that goes through the pushrods?
Cheers.
Re: Tamiya 1:12 McLaren MP4/6 Rebuild/Upgrade
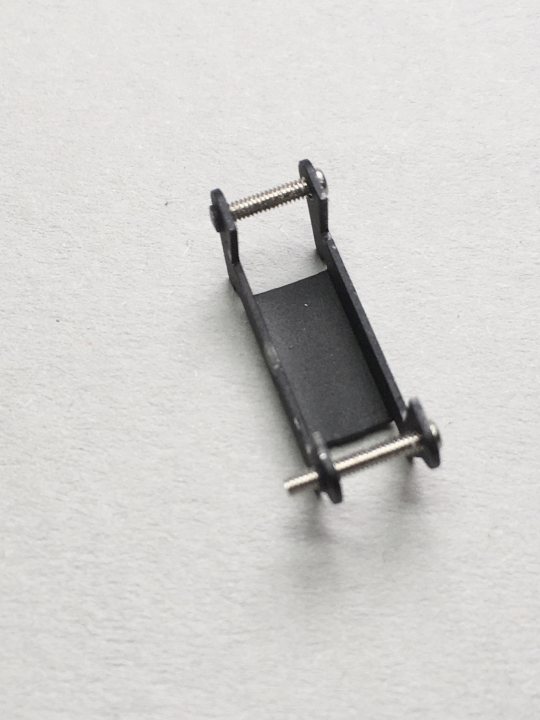
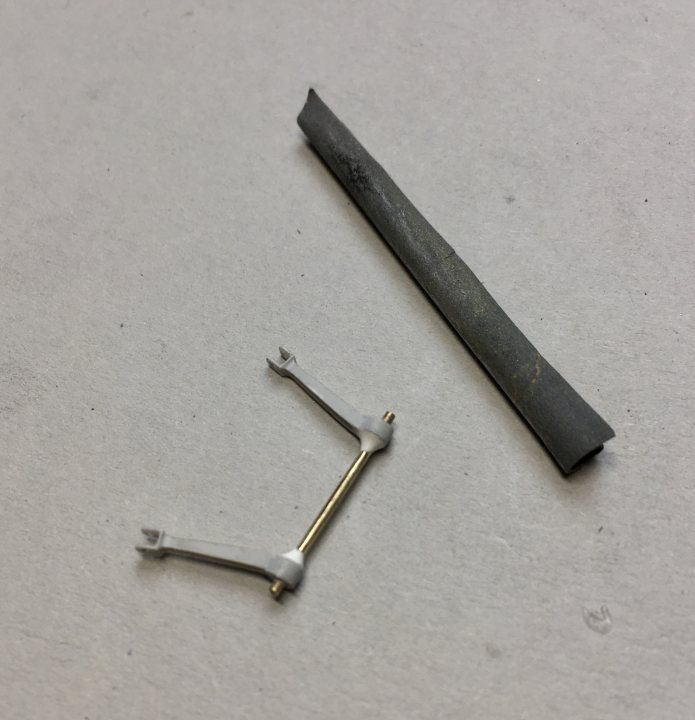
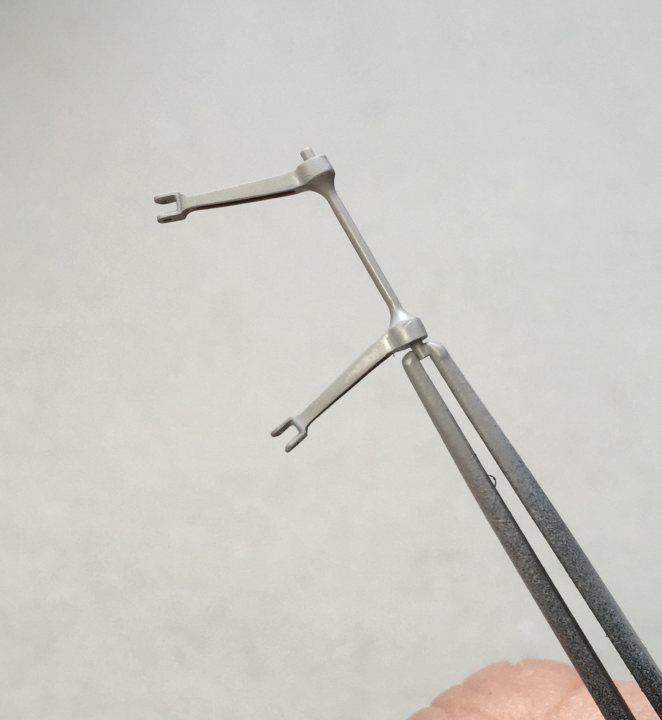
I’ve temporarily assembled the anti roll bar mechanism using PVA and RB motion bolts. It all seems to hang together squarely, so I’ll Araldite the arms to the bar:
Final assembly will have the bolts trimmed, and their washers and nuts attached. The ends of the bar need locally thickening, since they had a significant fillet radius where they meet the arms. I’ll probably do this with with Milliput.
Also looked at the modification required for the suspension infills:
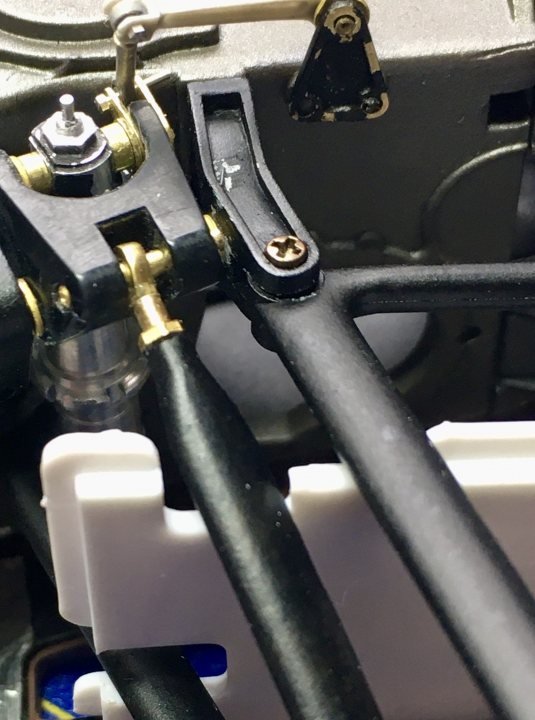
I think about 2mm filed off the back of the pushrod slot, and some 2mm plastic strip glued to the front should just about sort it. Obviously the backing strips need removing and replacing with scale thickness card, but the main infill edges are pretty much to scale - the real car had wide returns on three sides, making them look thicker than they are in the middle.
I’m glad I did a test assembly at this stage. The amount of paint chips that the metal parts are getting is annoying, but at least they’re not finally painted. I also forgot to attach the brake line brackets to the lower wishbones.
Final assembly will have the bolts trimmed, and their washers and nuts attached. The ends of the bar need locally thickening, since they had a significant fillet radius where they meet the arms. I’ll probably do this with with Milliput.
Also looked at the modification required for the suspension infills:
I think about 2mm filed off the back of the pushrod slot, and some 2mm plastic strip glued to the front should just about sort it. Obviously the backing strips need removing and replacing with scale thickness card, but the main infill edges are pretty much to scale - the real car had wide returns on three sides, making them look thicker than they are in the middle.
I’m glad I did a test assembly at this stage. The amount of paint chips that the metal parts are getting is annoying, but at least they’re not finally painted. I also forgot to attach the brake line brackets to the lower wishbones.
-
 daveyman
- FOTA Chairman

- Posts: 4540
- Joined: Sun Jun 24, 2007 11:39 am
- Favorite F1 Team or Driver: Riccardo Patrese
- Location: Hull, England.
- Status: Offline

Re: Tamiya 1:12 McLaren MP4/6 Rebuild/Upgrade
Think you'll be consulting Sennas set up sheets next to get that next level of precision.
Re: Tamiya 1:12 McLaren MP4/6 Rebuild/Upgrade
Ha ha - don't know about that. The Tamiya MP4/6 was always a bit dodgy in the rear suspension department. Not even sure why I chose this one over the Ferrari back in the day when I first got it; it's not a particulalry nice looking chassis, at least OOB.daveyman wrote:Think you'll be consulting Sennas set up sheets next to get that next level of precision.
Re: Tamiya 1:12 McLaren MP4/6 Rebuild/Upgrade
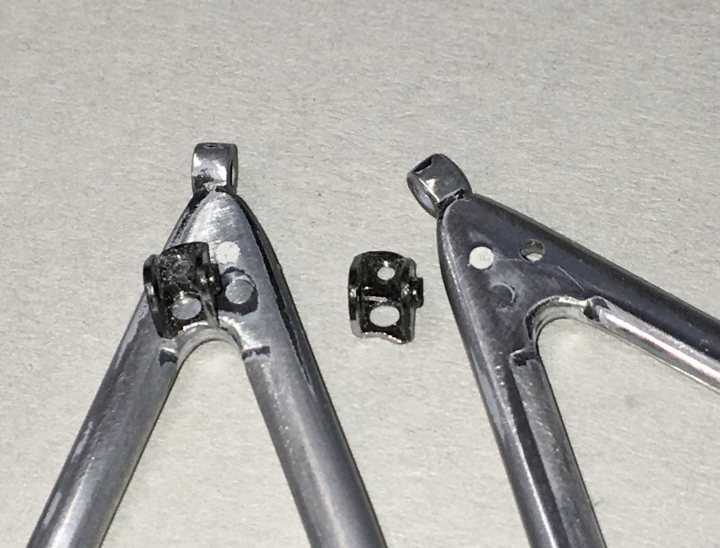
I’ve been addressing a few clunky details like the over-long screws that hold the wishbones and associated brackets together. My plan is to cut them to length, sand the heads down to the absolute minimum, then stick fastener heads on top of them:
This is the rear lower mount for the wishbone and track control arm. I’ve cut some heat shrink tube to cover the exposed central threads on final assembly.
Also the anti-roll bar; I used Araldite to secure in the right orientation, then put Milliput around the joints to represent the dressed fillet welds of the real one:
Did a guide coat of primer. I think it needs a bit more profiling, then it’ll be ready for some pale gold paint:
Re: Tamiya 1:12 McLaren MP4/6 Rebuild/Upgrade
Hob-bits screws have an assortment of brass screws that can be used for 1/12 scale cars. .90 with 1/4” long hex head tiny bolts.
Re: Tamiya 1:12 McLaren MP4/6 Rebuild/Upgrade
Thanks, that's useful to know, I'd not heard of them. I think most of the suspension bolts on the real car have dimpled heads, and some have 12-point flanged heads. I can't remember what Top Studio do for this - I believe they're represented by gold p/e. I'll have to see what they look like.Jose01jr wrote:Hob-bits screws have an assortment of brass screws that can be used for 1/12 scale cars. .90 with 1/4” long hex head tiny bolts.
Re: Tamiya 1:12 McLaren MP4/6 Rebuild/Upgrade
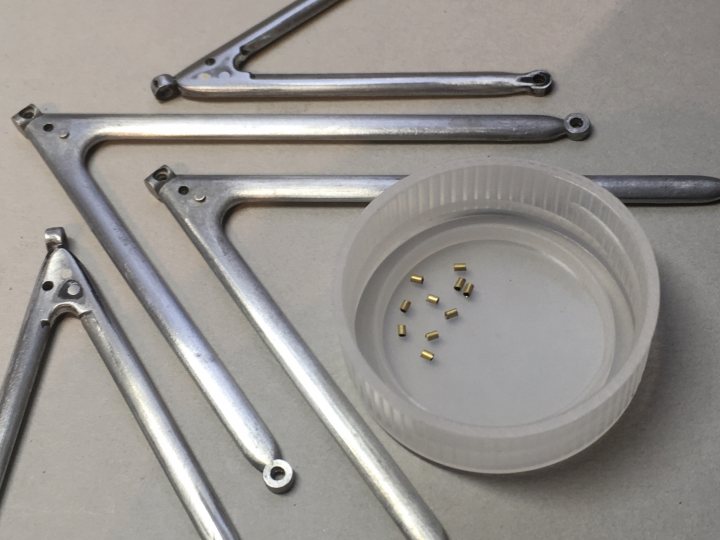
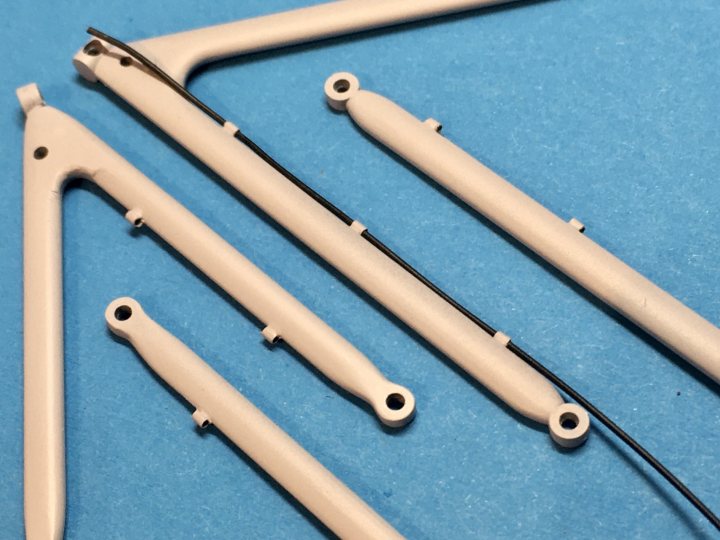
I didn’t intend to go down the front suspension rabbit hole just yet, especially since I’ve gone backwards on the rear of late. However, in the interests of getting things like suspension arms and roll bars the same colour, I opened the box. Although not included in the set, I wanted a robust and realistic enough way of attaching the brake lines to the wishbones. The originals had small saddles welded on, with a zip-tie used to secure. I approximated these with brass tube sections:
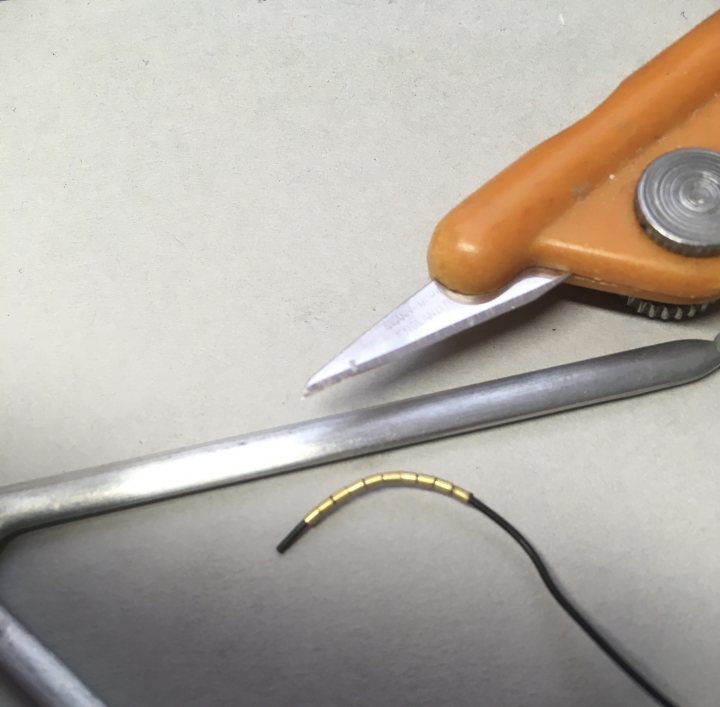
These were jigged in place with stainless wire and tape, and cyano’d:
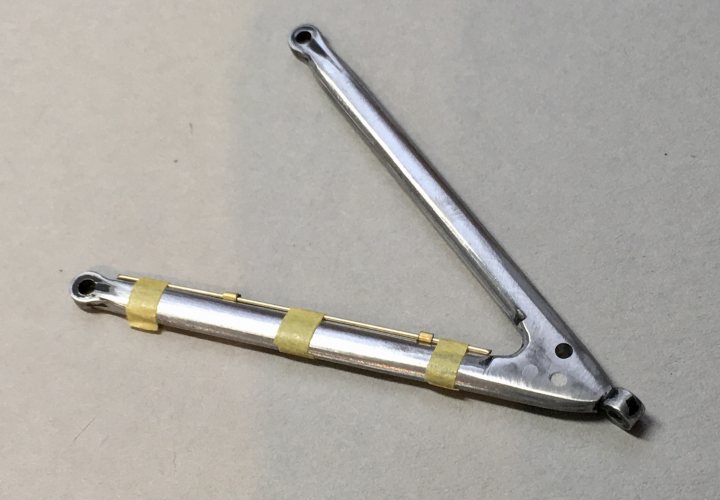
Worked fine:
Once finally in place, I’ll represent the zip ties with strips of matt black painted tape.
Also profiled the re-positioned pushrod mounts to match the wishbones a bit better, not that they are really visible once the uprights are fitted:
These were jigged in place with stainless wire and tape, and cyano’d:
Worked fine:
Once finally in place, I’ll represent the zip ties with strips of matt black painted tape.
Also profiled the re-positioned pushrod mounts to match the wishbones a bit better, not that they are really visible once the uprights are fitted: