A short while ago I received a set of replacement tyres from JamesB for the Heller Ligier JS11. The tyres are moulded in dark grey resin complete with sidewall markings (but not the manufacturers logo which are supplied as a decal), they look superb. So I got down my kit from the SABLE to have a look at them alongside the model and before I knew it I had started the engine……. So to speak.
I can’t believe how much these kits are now fetching on the bay of e, I got mine a looooong time ago in a remainder sale and there it sat on the shelf while I wondered how to handle those epically bad tyres.
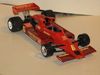
So just to remind everyone of the great box art that promised so much!
A couple of shots of the tyres, epically bad vs. epically good, I will let you decide which is which……
I assembled the basic pieces of the engine and gearbox, ideally you would replace the gearbox with the Tamiya version, but that was not an option I had, to be fair the engine is pretty good, it looks to be a direct copy of the Tamiya block, although the Tamiya ancillaries are better moulded with sharper detail.
The lower rear wishbone attachment plate between the gearbox end casing and main case needed modifying,to add more representative pick up points - and painting blue, so to avoid a difficult masking job I decided to make a new one. So I broke out the razor saw of DOOM.
The slots at the bottom are the original lower rear wishbone attachment points.