
dr_gn,
Your work looks great!!!
Did you remove and flatten the Honda resin logo first and make it a smooth flat surface or did you epoxy the PE logo and strip over top the resin logo?
Thanks for sharing your work with us
BR
Mark
Tamiya 1:12 McLaren MP4/6 Rebuild/Upgrade

Re: Tamiya 1:12 McLaren MP4/6 Rebuild/Upgrade
Thanks!maw2717 wrote:dr_gn,
Your work looks great!!!
Did you remove and flatten the Honda resin logo first and make it a smooth flat surface or did you epoxy the PE logo and strip over top the resin logo?
Thanks for sharing your work with us
BR
Mark
I just Araldited the photo-etch over the existing raised detail.
Re: Tamiya 1:12 McLaren MP4/6 Rebuild/Upgrade
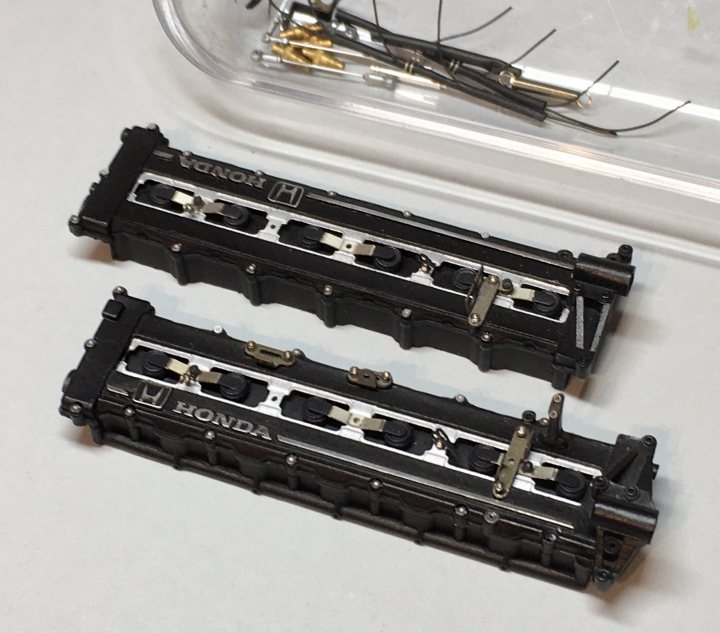
Masked the recesses with Blu-Tack, and sprayed with Vallejo Air Aluminium:
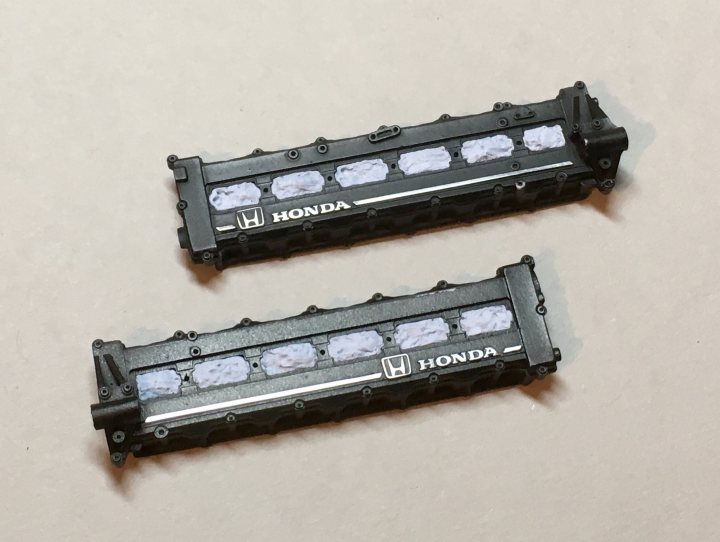
Then masked the flat parts of the aluminium (I wanted to have the edges of the recess black), and over sprayed with Tamiya Satin Black:
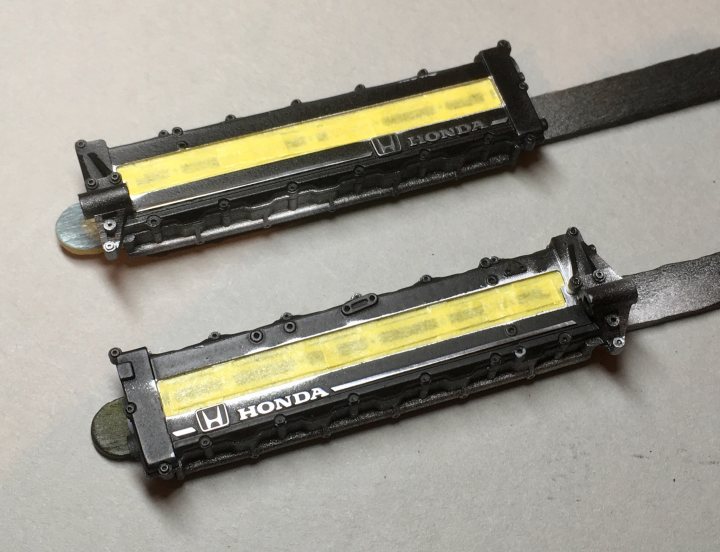
After re-polishing the photo-etch, they look OK:

So far so good for the painting, now to add the rest of the photo-etch and wiring.
Then masked the flat parts of the aluminium (I wanted to have the edges of the recess black), and over sprayed with Tamiya Satin Black:
After re-polishing the photo-etch, they look OK:
So far so good for the painting, now to add the rest of the photo-etch and wiring.
Re: Tamiya 1:12 McLaren MP4/6 Rebuild/Upgrade
Minuscule amount of progress on this one today. I’ve given up on finding a method of chemically darkening the stainless photo etch, and resorted to mixing Vallejo Gold and Black to give the right effect. Also glossed the coil cap retainer insulation, and painted the throttle cable holder NATO Black, and made a start on the ignition loom:

-
 Indy1977TX
- Minor Constructor

- Posts: 945
- Joined: Mon May 13, 2013 11:39 pm
- Favorite F1 Team or Driver: Penske Racing
- Status: Offline

Re: Tamiya 1:12 McLaren MP4/6 Rebuild/Upgrade
Really enjoying the detail work on this build.
Jordan
Jordan
Re: Tamiya 1:12 McLaren MP4/6 Rebuild/Upgrade
Thanks - I'm enjoying building it up. The Top Studio set is really well engineered (so far!).Indy1977TX wrote:Really enjoying the detail work on this build.
Jordan
Re: Tamiya 1:12 McLaren MP4/6 Rebuild/Upgrade
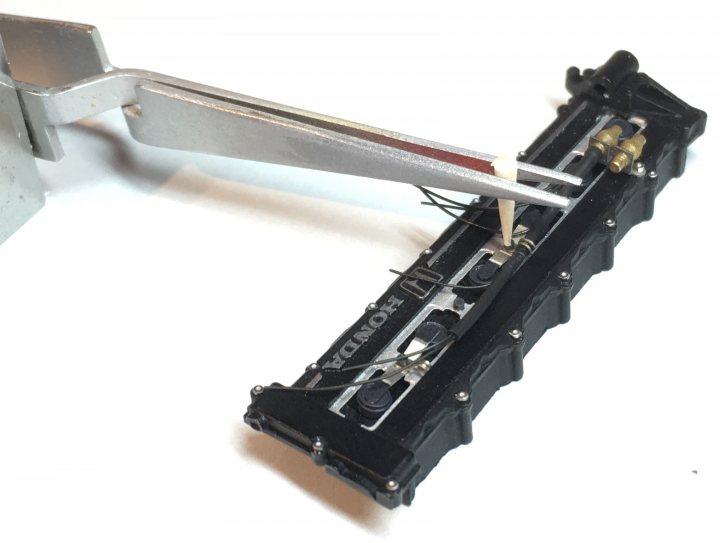
Just ignoring the news and losing myself in concentration - adding the first details to the heads:
Still a lot to add, including the throttle linkages and wiring.
Still a lot to add, including the throttle linkages and wiring.
Re: Tamiya 1:12 McLaren MP4/6 Rebuild/Upgrade
Slow but sure progress. Part of the throttle linkage and rose joints, wiring loom and connectors fitted to the right bank head:
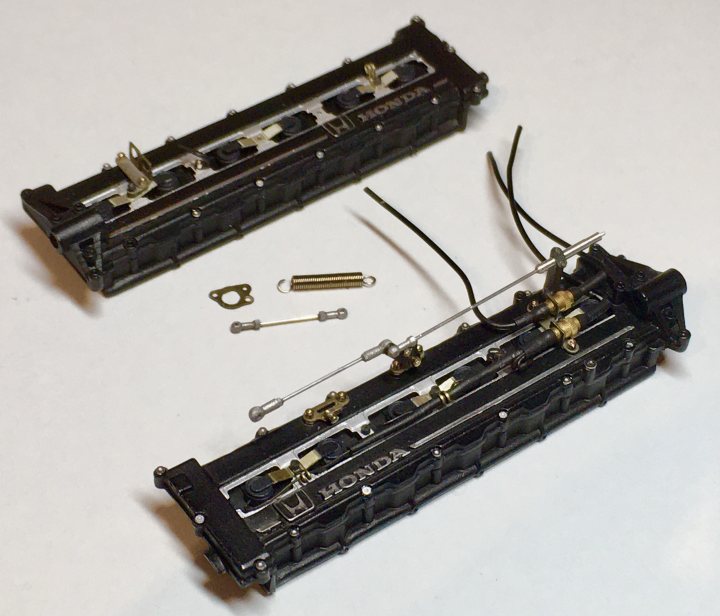
Throttle spring and a few rivets and then on to the other side (of the engine hopefully).
Throttle spring and a few rivets and then on to the other side (of the engine hopefully).
Re: Tamiya 1:12 McLaren MP4/6 Rebuild/Upgrade
Forgive me if I go a bit freestyle with the order of assembly - I’m just doing whatever I think looks interesting while some other sub-assembly dries.
Here’s the parts for the gear selector u/j, shaft, and part of the original left side gearbox end:
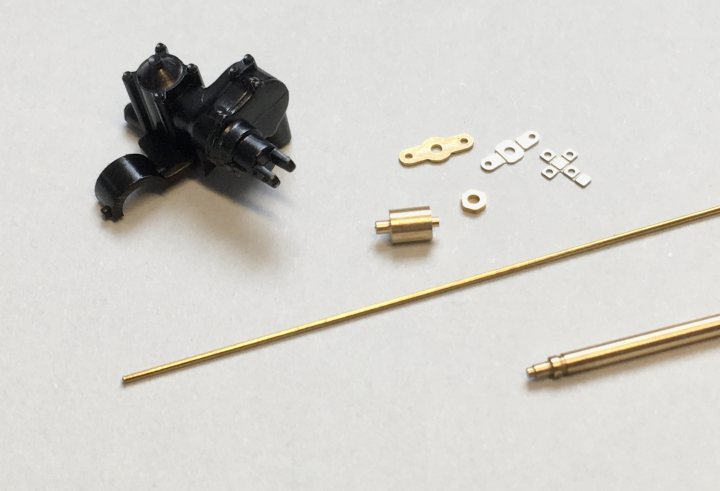
First bits of p/e folding done, and the moulded u/j fork sawn off:
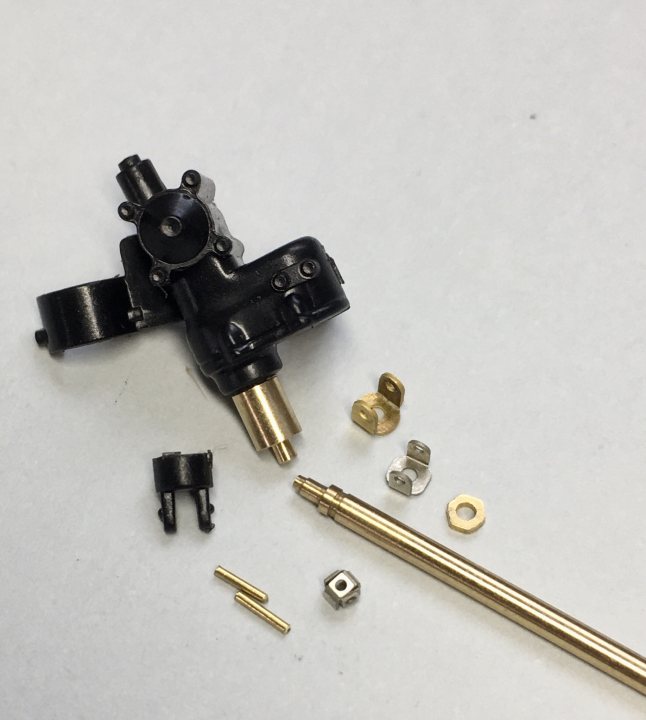
The turned parts are so beautifully machined it seems a shame to paint them, but there we go.
Here’s the parts for the gear selector u/j, shaft, and part of the original left side gearbox end:
First bits of p/e folding done, and the moulded u/j fork sawn off:
The turned parts are so beautifully machined it seems a shame to paint them, but there we go.
Re: Tamiya 1:12 McLaren MP4/6 Rebuild/Upgrade
I’m using Araldite applied with fuse wire to attach most of the TS stuff (and wastin 99% of it). Sometimes requires improvisation to hold tiny pins in place while it sets - p/e is notoriously springy unless it’s annealed: