
M23 1973 Yardley WIP

Re: M23 1973 Yardley WIP
Thank you that means alot this is my first model I started and am yet to finish one, its been a big learning curve but I have learnt a lot from people of this site I couldn't of got this far without everyones input.
-
 harveyb258
- FOTA Vice Chairman

- Posts: 1950
- Joined: Wed Dec 19, 2012 4:36 am
- Location: UK
- Status: Offline
Re: M23 1973 Yardley WIP
You're doing a stellar job Adam  Can't wait to see your next update!!
Cheers, H
Cheers, H

Re: M23 1973 Yardley WIP
Really enjoying your build....looking forward to more.
Rick
Rick
I feel the need, the need for speed.........
Re: M23 1973 Yardley WIP
Thanks for all the positive comments 
made some small progress this morning, drilled all the .5mm holes in the canopy for the rivets to be glued in.
I will be using top studio rivets here to enhance the look of the canopy. I'm lucky the canopy already had dimples molded in to replicate the rivets so i used a scribing tool to mark them and give me a starting point to drill the required holes, the final piece should look good!
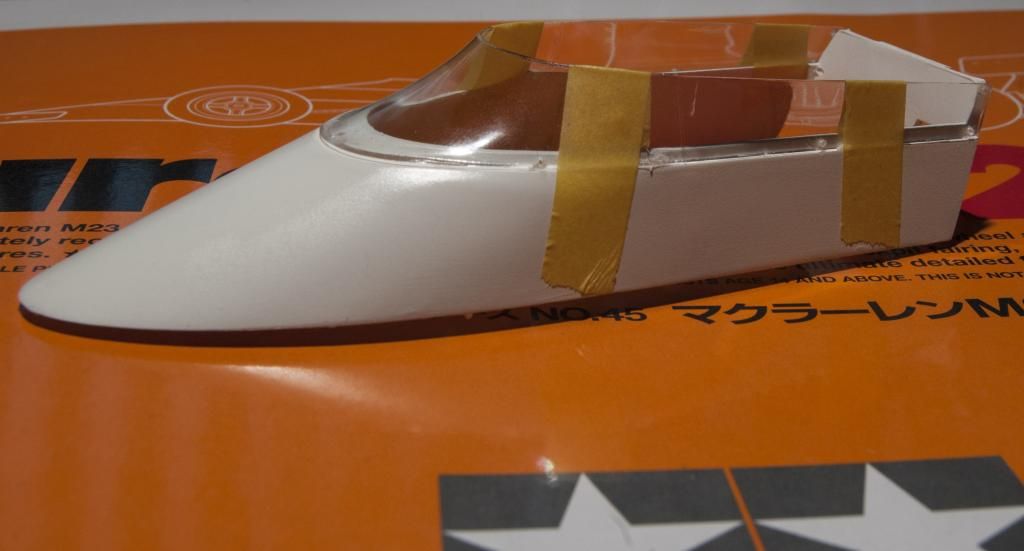
Has anyone got any recommendations for getting rid of the mold lines from manufactures?
made some small progress this morning, drilled all the .5mm holes in the canopy for the rivets to be glued in.
I will be using top studio rivets here to enhance the look of the canopy. I'm lucky the canopy already had dimples molded in to replicate the rivets so i used a scribing tool to mark them and give me a starting point to drill the required holes, the final piece should look good!
Has anyone got any recommendations for getting rid of the mold lines from manufactures?

-
 CBartholomew4677
- FOTA Chairman

- Posts: 3178
- Joined: Sat May 14, 2005 8:50 am
- Your Name: Chris Bartholomew
- Favorite F1 Team or Driver: Forza Ferrari!!!
- Location: Michigan, USA
- Status: Offline

Re: M23 1973 Yardley WIP
For mold lines in the body panels, I use sanding sticks and sanding cloth from coarse to smooth to get a nice finish. After some primer, you can hit it with sanding cloths again to clean up until perfect.adamg1987 wrote:Thanks for all the positive comments
made some small progress this morning, drilled all the .5mm holes in the canopy for the rivets to be glued in.
I will be using top studio rivets here to enhance the look of the canopy. I'm lucky the canopy already had dimples molded in to replicate the rivets so i used a scribing tool to mark them and give me a starting point to drill the required holes, the final piece should look good!
Has anyone got any recommendations for getting rid of the mold lines from manufactures?
For clear parts, I start with sanding cloths, then use Tamiya polish to restore the clarity of the glazing.
Cheers,
Chris
-
 imatt88
- F2 Champion

- Posts: 165
- Joined: Sun Jun 08, 2014 8:15 pm
- Your Name: Ian
- Favorite F1 Team or Driver: Niki Lauda, Alain Prost, Nigel Mansell, Senna, Sir Jackie Stewert, among others.
I followed Lotus, Williams (because I was stationed near their HQ back in the '80s), Mclaren, and a bunch more - Location: Gladstone, Michigan USA
- Status: Offline
Re: M23 1973 Yardley WIP
Adam,
Great job so far. Keep the pics coming!
Cheers, Ian
Great job so far. Keep the pics coming!
Cheers, Ian
-
 crossofiron
- F1 Test Driver

- Posts: 200
- Joined: Sun Jan 26, 2014 6:55 am
- Location: Northampton, United Kingdom
- Status: Offline
Re: M23 1973 Yardley WIP
Looks really great,
Lovely Engine...
Looking forward to the rest
Lovely Engine...
Looking forward to the rest
Whatever you do in life, always give 100%
Unless your giving blood...
Unless your giving blood...
Re: M23 1973 Yardley WIP
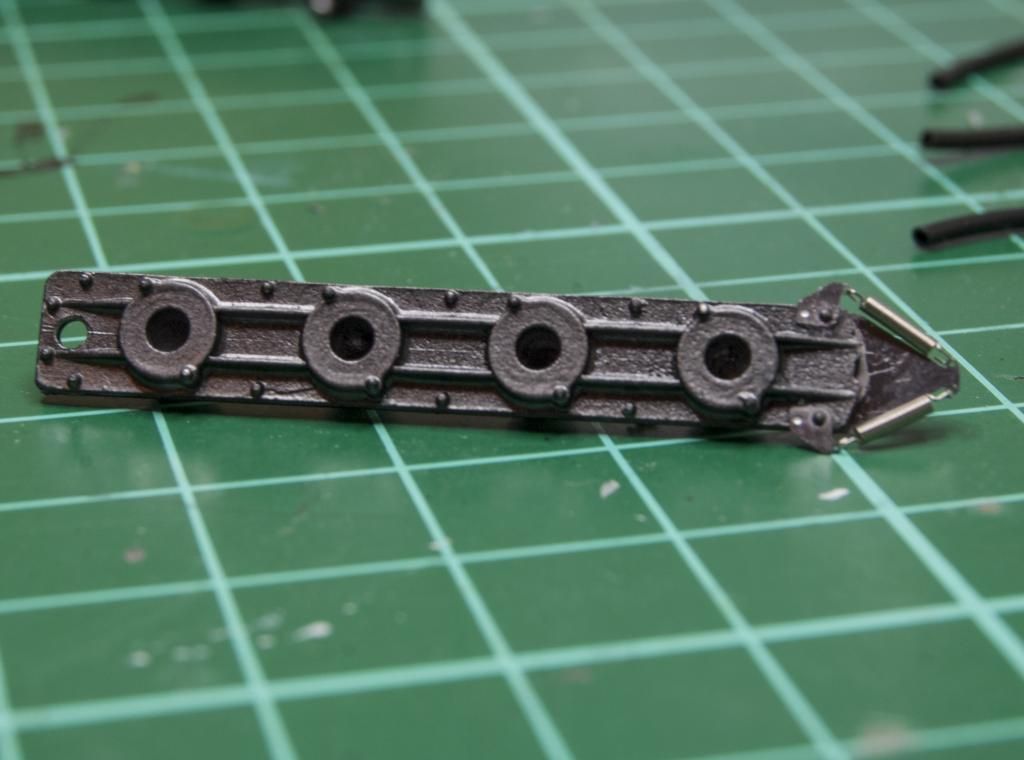
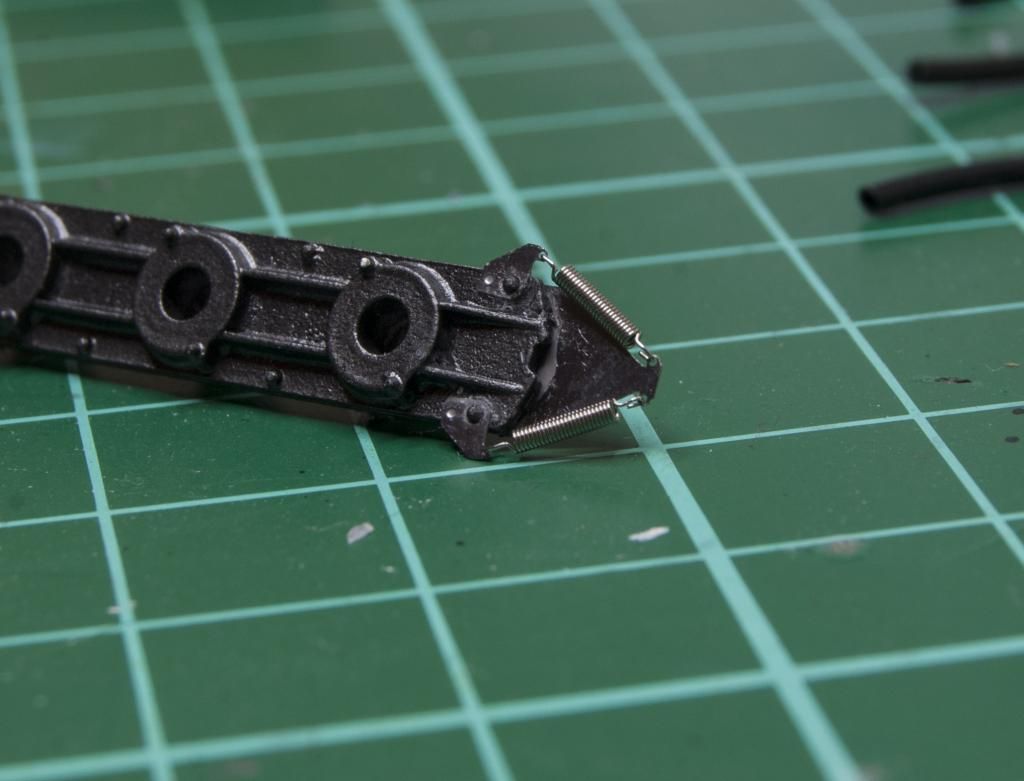
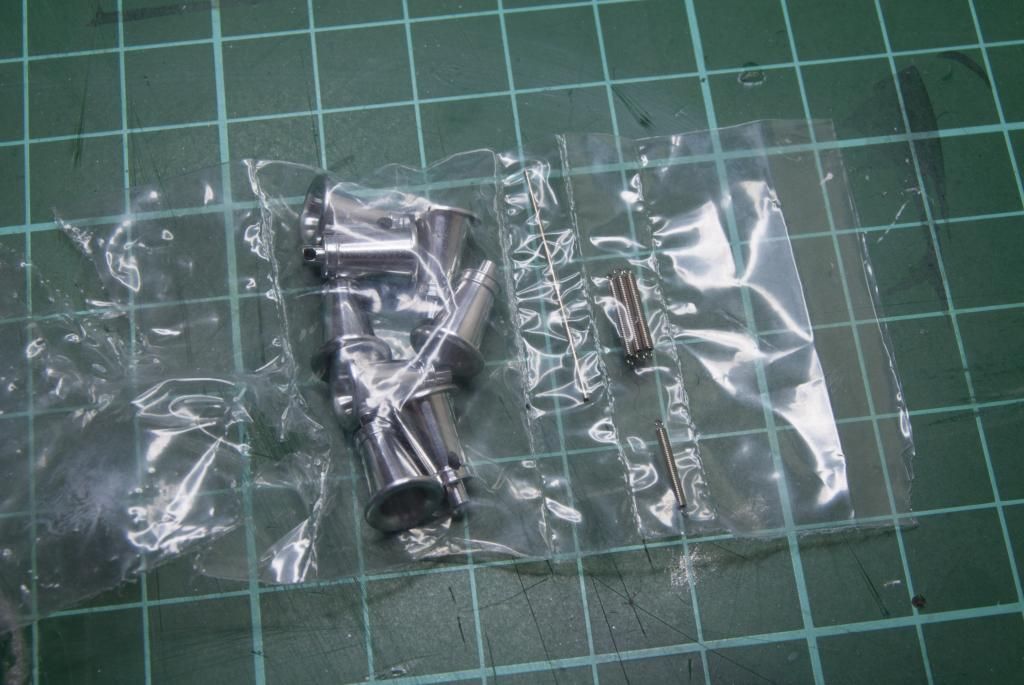
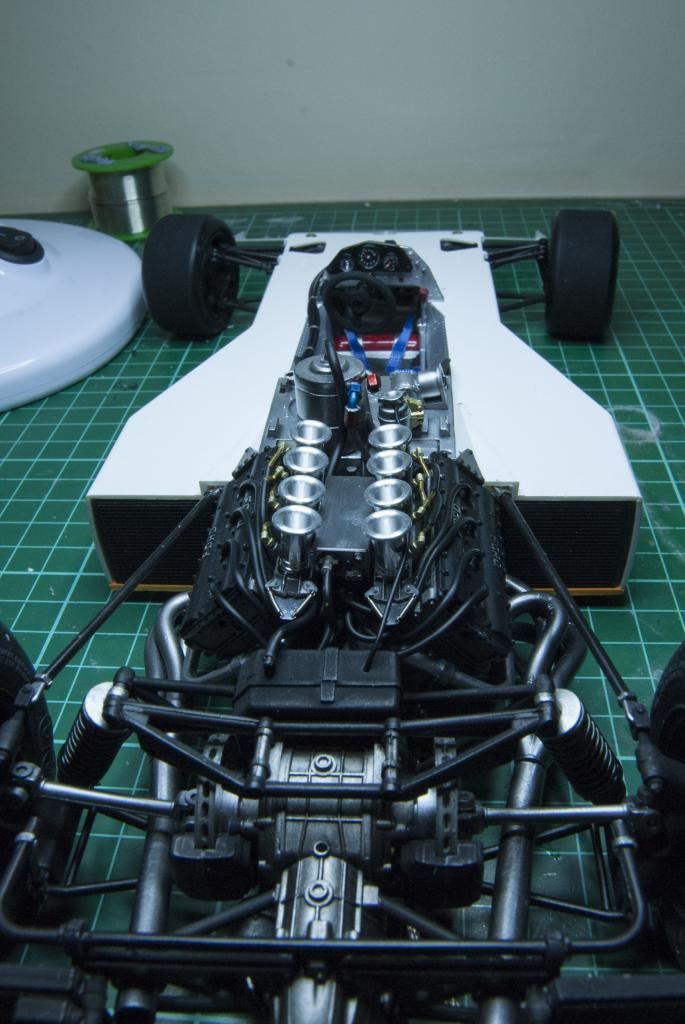
I wasn't happy with the way the fuel injection system came out or the finish on the funnels. I could of been a bit cleaner in my methods. after much deliberation i decided to pull it all apart and start over. This time with the MFH DFV funnel & distributor set. The parts are white metal mostly with aluminum funnels.
Finished throttle bodies awaiting the funnels, the springs are a nice addition but the MFH springs are too long so i used some top studio exhaust springs i had laying around.
Started assembling the fuel injection system the MFH kit provides yellow tubing for the fuel pipes but its too large to fit over the ends on the fuel pump section. I'm going to sleeve the yellow piping inside some larger black piping hopefully this will work out. looking at reference pictures this is similar to the real thing anyway.
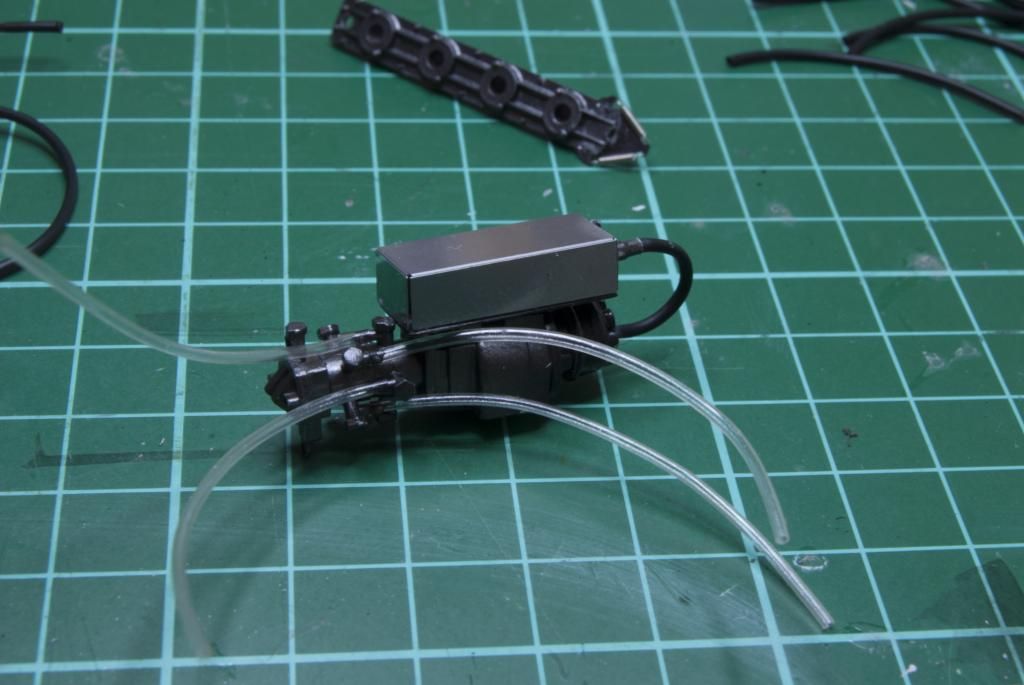
The turned trumpets awaiting to go on also the springs which were too long 
Adam
Finished throttle bodies awaiting the funnels, the springs are a nice addition but the MFH springs are too long so i used some top studio exhaust springs i had laying around.


Started assembling the fuel injection system the MFH kit provides yellow tubing for the fuel pipes but its too large to fit over the ends on the fuel pump section. I'm going to sleeve the yellow piping inside some larger black piping hopefully this will work out. looking at reference pictures this is similar to the real thing anyway.

The turned trumpets awaiting to go on

Adam


Re: M23 1973 Yardley WIP
Looks great matey. No glue bombing here lol. Like what you are doing with this kit . Defo keeping an eye on this
Paul
Paul
Re: M23 1973 Yardley WIP
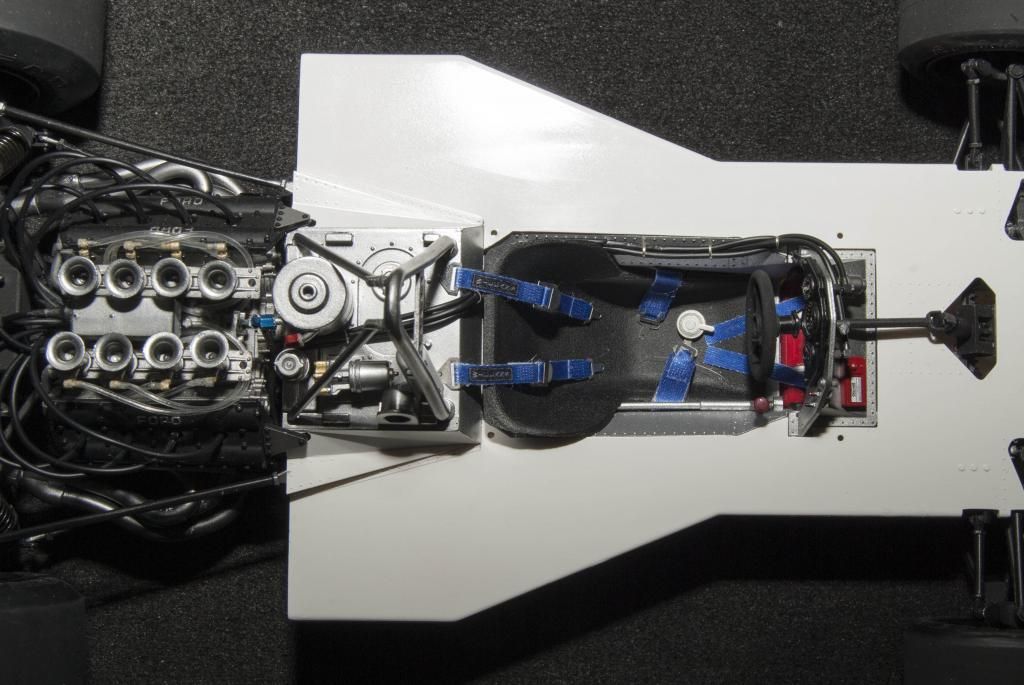
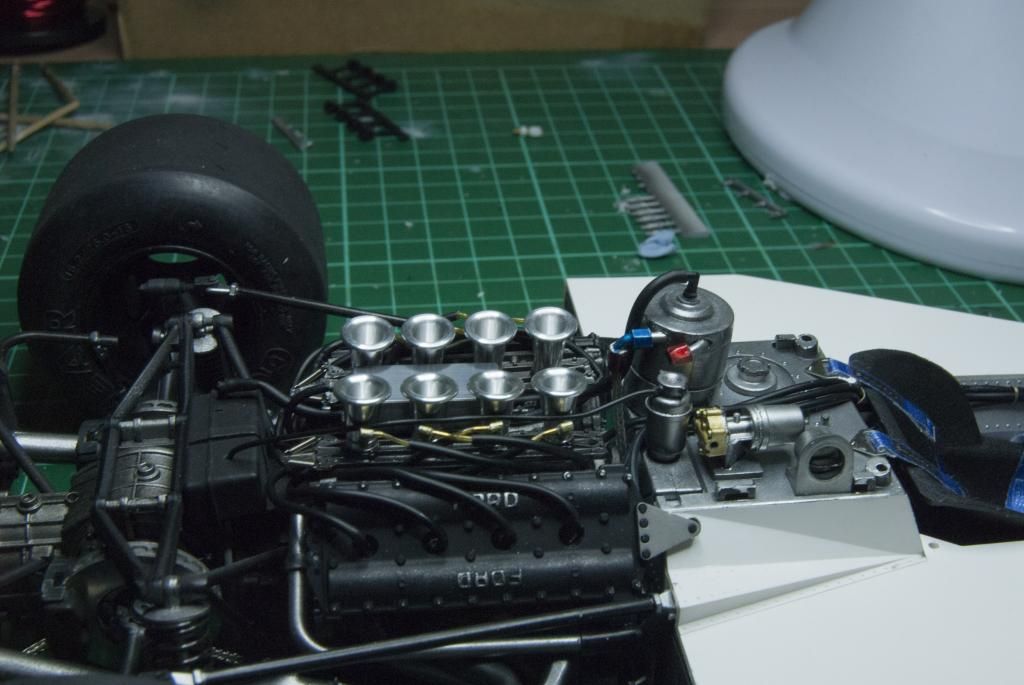
finished the fuel lines and ht leads today and got everything in place not 100% happy with the results the fuel lines were too long so had to trim them in situe! could of been a lot cleaner but overall i think an improvement over the kit parts. also noticed a extra tube from the oil filler cap to the box mounted above the gearbox so added this in whilst it was apart.
before

after
before


after

