Speed Build: Hasegawa 1/20 312T2
-
 Shunter
- FOTA Chairman

- Posts: 2906
- Joined: Sat Sep 20, 2003 12:38 am
- Favorite F1 Team or Driver: Alfa Romeo, McLaren, Williams
- Location: Melbourne, Australia
- Contact:
- Status: Offline

Re: Speed Build: Hasegawa 1/20 312T2
Coming along very nicely, love reading your updates....
-
 alexpayne
- FOTA Chairman
- Posts: 3361
- Joined: Mon Apr 14, 2003 4:17 pm
- Location: Oxford. UK
- Status: Offline
Re: Speed Build: Hasegawa 1/20 312T2
Looking good, the "clear" fibreglass bits help alot.
Atb,Alexp.
Atb,Alexp.
-
hirofkd
Topic author - Backmarker

- Posts: 339
- Joined: Thu Feb 02, 2006 8:50 pm
- Location: Austin, TX
- Contact:
- Status: Offline
Re: Speed Build: Hasegawa 1/20 312T2
<Day63: Apr10>
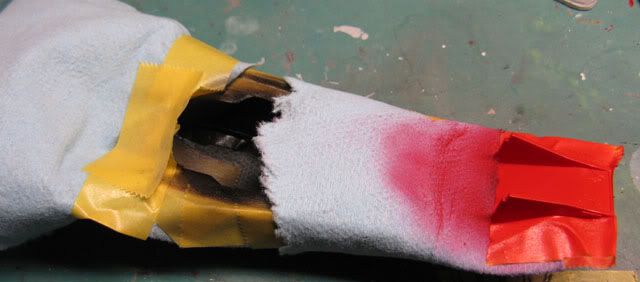
When smoothing a layer of clear, I overdid it, and lost a part of the stripe. I had to touch up the affected areas before applying the next clear coat.
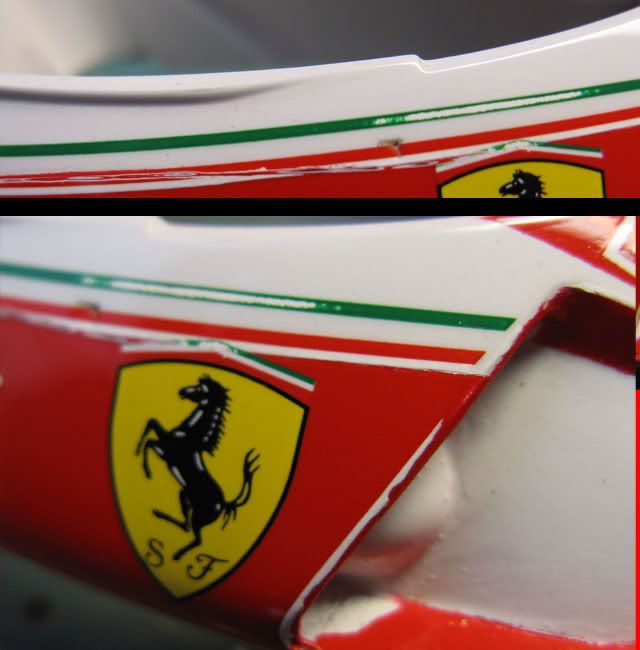
I also noticed that the ridge where the white and red regions meet caused a raised line. Later, an additional clear coat made the line less noticeable, but I really should have masked off the entire white area, including the car number decal.
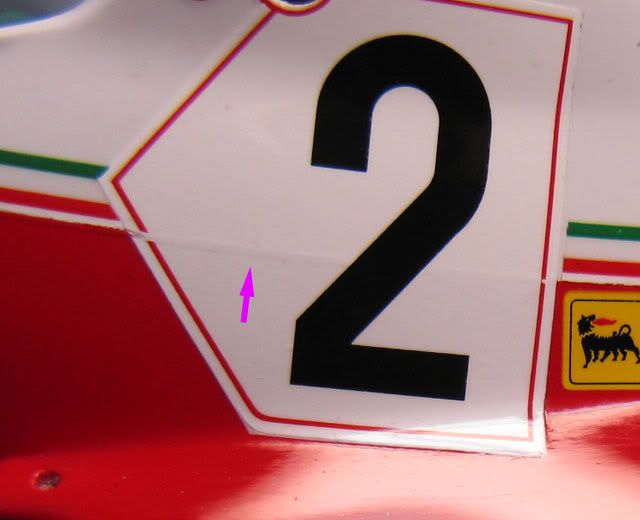
This is just before moving on to the 2nd session of clear-coating. As you can see, the surface looks fairly smooth, but I needed a few more coats in order to completely eliminate the orange peel effect and to cover the touched-up areas.
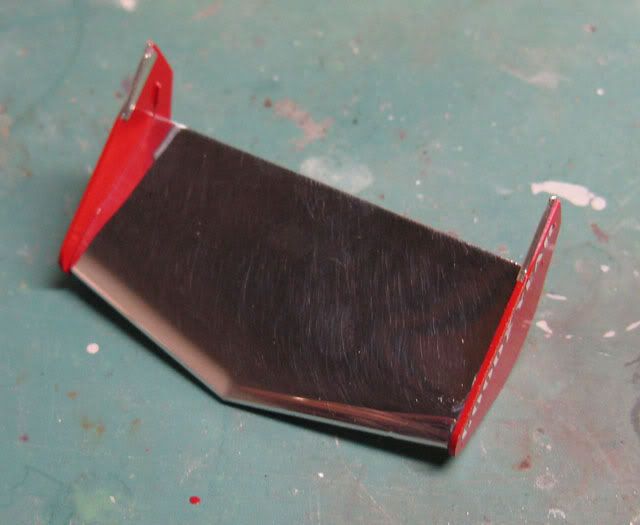
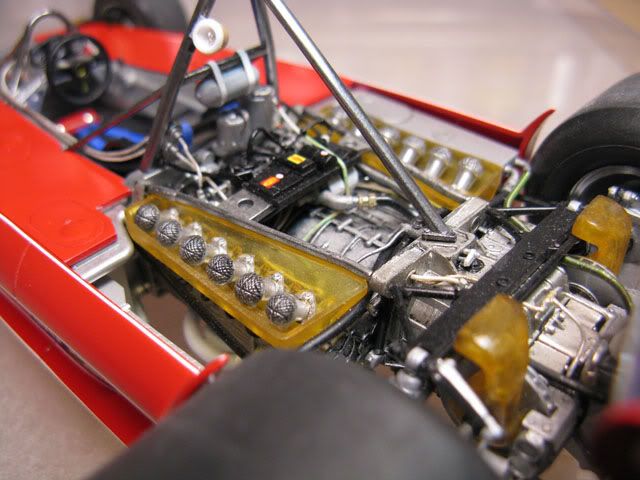
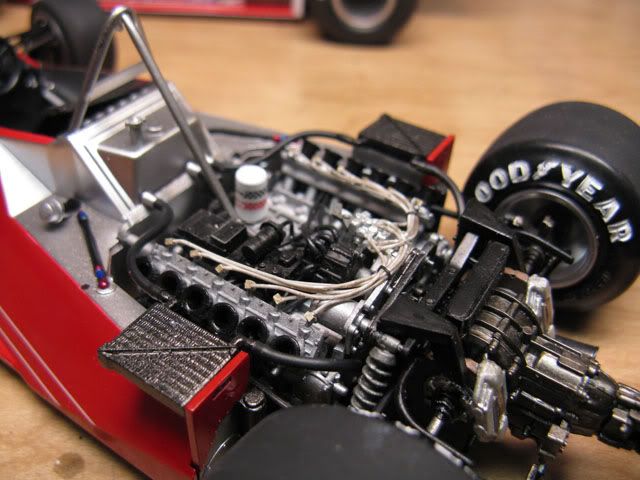
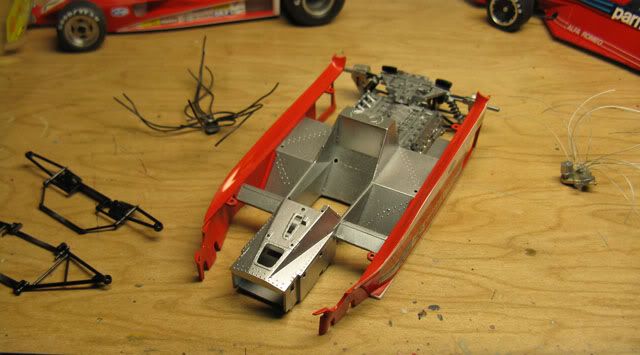
A part of the rear wing was finished and assembled. My finest polishing compound and polishing cloth didn't remove the hairline scratches. I guess I have to try some other microfiber cloths.
<Day64: Apr11>
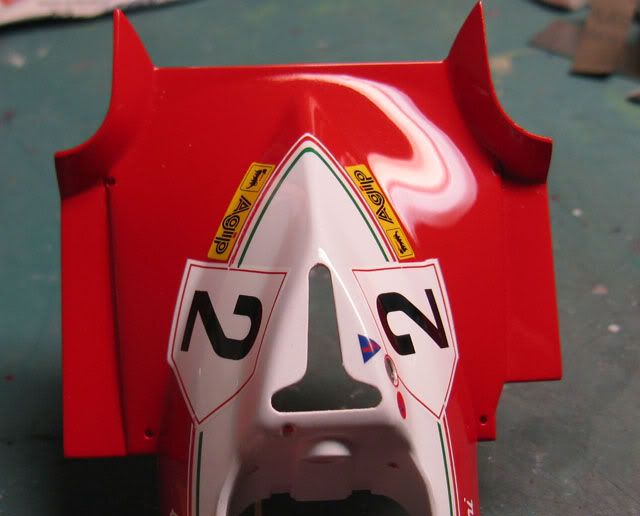
I covered the top surface in order to paint the inside of the cockpit area in black. I also noticed that the red paint on the lower part of the nose section wasn't opaque enough, so I added a few more coats of red while the top part was masked.
<Day70: Apr17>
The kit is almost finished. What's left is to paint the windshield in clear blue.
<Day80: Apr27>
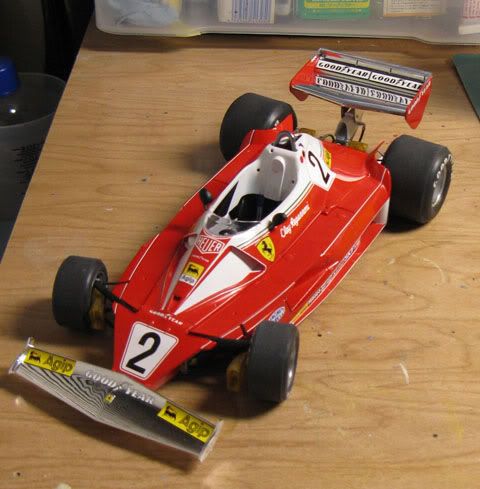
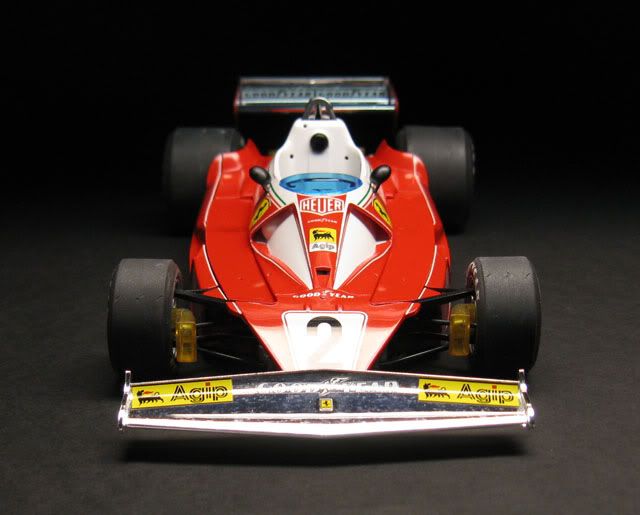
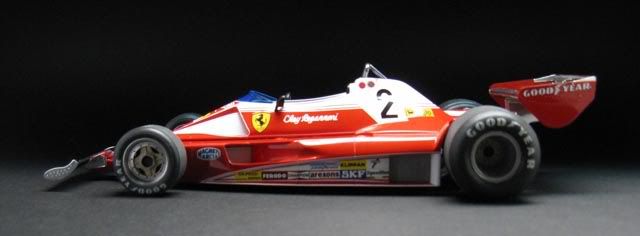
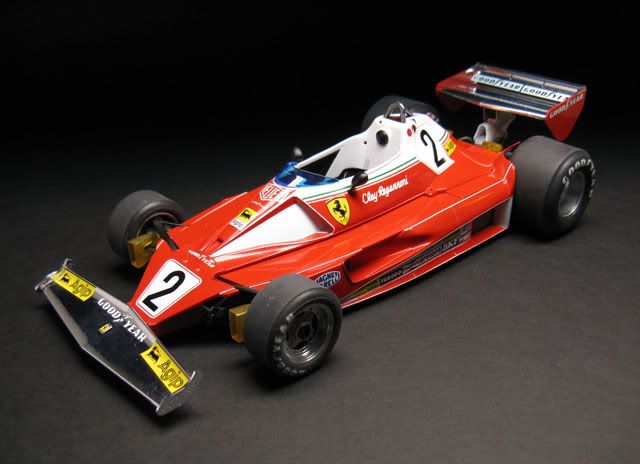
Finally, the model was finished. What started as a speed-build ended up with a moderately detailed model.

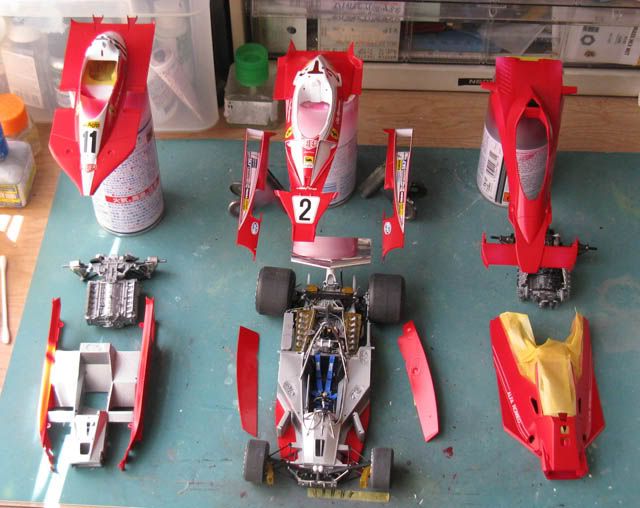
This speed-build took eighty days to finish, but I have a good excuse. The project has been a triple-build all along! Since the 312T2 is a red car, I figured I would be able to work efficiently if I proceeded with three red cars simultaneously.
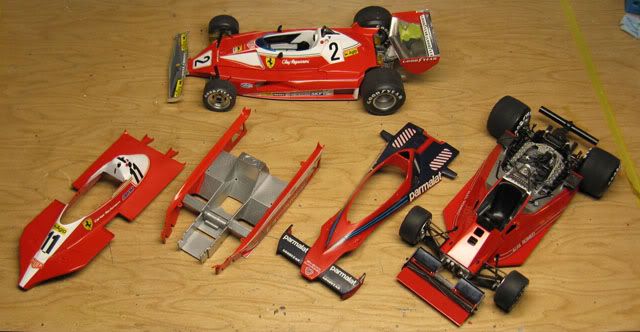
Both T2 and T3 were painted with Gaianotes 70s F1 red, and the Alfa was done with Finisher's Deep Red.
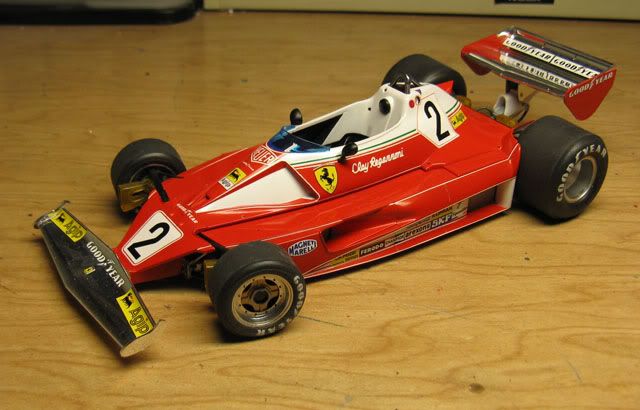
A photo taken on March 29...
...and another on April 27.
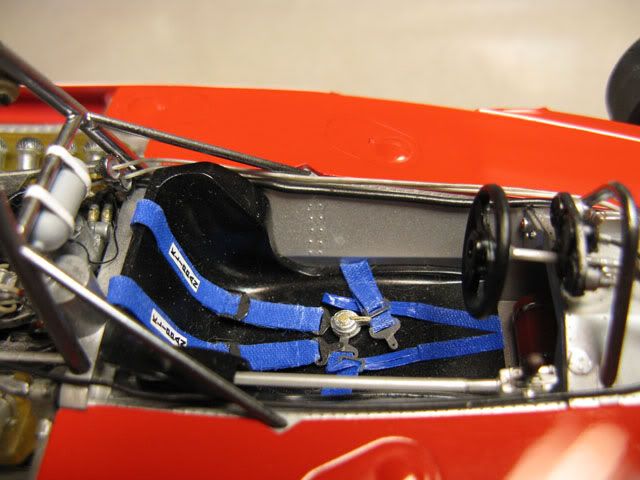
This BT46 model is almost box stock. The only enhancements are fuel lines and seat belts.
This 312T3 model will be another fairly-detailed attempt, but with the focus on finishing within a reasonable time.
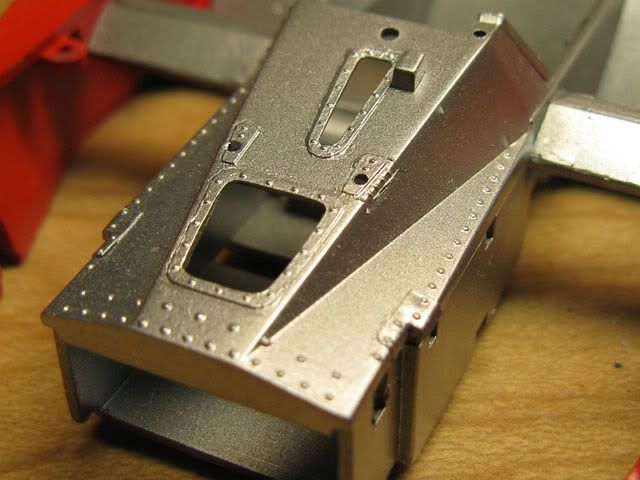
The rivets are done with Archer's surface detail set. It's essentially a decal, so the film becomes a problem.
I have to do some more experiments in order to make the film less noticeable.
And while working on three F1 models, I also began working on Fujimi's Enzo kit (which is excellent BTW), and finished the base coat by the time my 312T2 model was done.

<Day85: May 2>
I took additional photos.
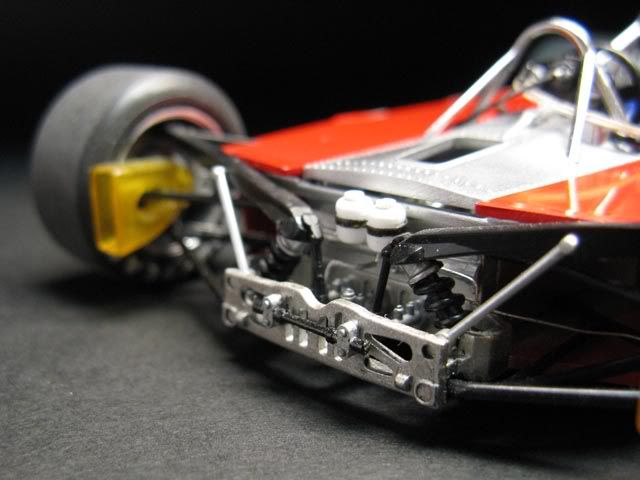
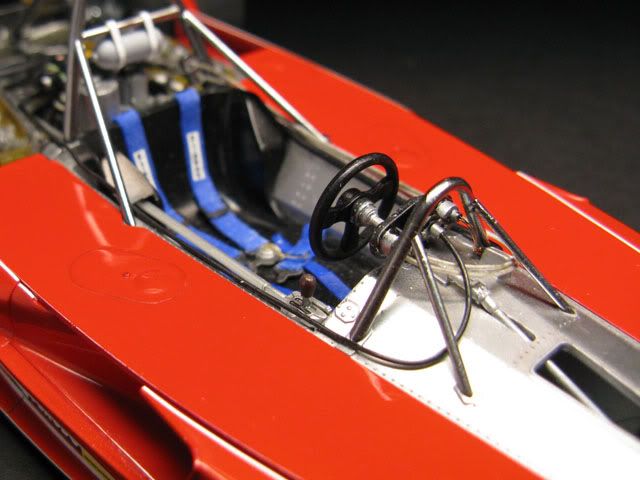
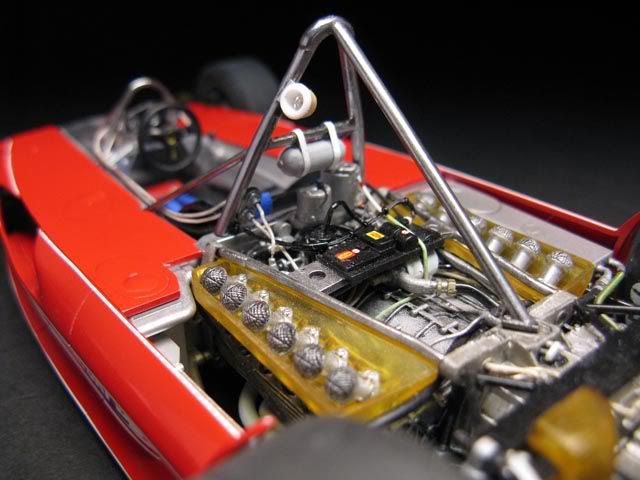
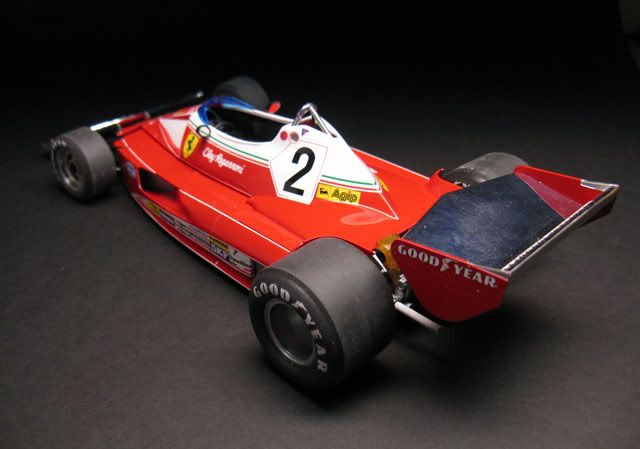
This concludes my Hasegawa 312T2 WIP.
Now I've got to finish the BT46 and 312T3, as well as the Enzo before I receive a pair of Lotus 79 kits this summer.
When smoothing a layer of clear, I overdid it, and lost a part of the stripe. I had to touch up the affected areas before applying the next clear coat.
I also noticed that the ridge where the white and red regions meet caused a raised line. Later, an additional clear coat made the line less noticeable, but I really should have masked off the entire white area, including the car number decal.
This is just before moving on to the 2nd session of clear-coating. As you can see, the surface looks fairly smooth, but I needed a few more coats in order to completely eliminate the orange peel effect and to cover the touched-up areas.
A part of the rear wing was finished and assembled. My finest polishing compound and polishing cloth didn't remove the hairline scratches. I guess I have to try some other microfiber cloths.
<Day64: Apr11>
I covered the top surface in order to paint the inside of the cockpit area in black. I also noticed that the red paint on the lower part of the nose section wasn't opaque enough, so I added a few more coats of red while the top part was masked.
<Day70: Apr17>
The kit is almost finished. What's left is to paint the windshield in clear blue.
<Day80: Apr27>
Finally, the model was finished. What started as a speed-build ended up with a moderately detailed model.
This speed-build took eighty days to finish, but I have a good excuse.
Both T2 and T3 were painted with Gaianotes 70s F1 red, and the Alfa was done with Finisher's Deep Red.
A photo taken on March 29...
...and another on April 27.
This BT46 model is almost box stock. The only enhancements are fuel lines and seat belts.
This 312T3 model will be another fairly-detailed attempt, but with the focus on finishing within a reasonable time.
The rivets are done with Archer's surface detail set. It's essentially a decal, so the film becomes a problem.
I have to do some more experiments in order to make the film less noticeable.
And while working on three F1 models, I also began working on Fujimi's Enzo kit (which is excellent BTW), and finished the base coat by the time my 312T2 model was done.
<Day85: May 2>
I took additional photos.
This concludes my Hasegawa 312T2 WIP.
Now I've got to finish the BT46 and 312T3, as well as the Enzo before I receive a pair of Lotus 79 kits this summer.
-
 Flemming
- Major Constructor

- Posts: 1197
- Joined: Tue Jul 26, 2005 3:17 am
- Your Name: Flemming
- Favorite F1 Team or Driver: Jackie Stewart - Tyrrell
- Location: Danmark
- Contact:
- Status: Offline

Re: Speed Build: Hasegawa 1/20 312T2
Hi
All I can say is: Exxxxxxellent!
Flemming
All I can say is: Exxxxxxellent!
Flemming
Re: Speed Build: Hasegawa 1/20 312T2
..well done..looks very cool..! 
Alex Nahooy.
Alex Nahooy.