


THomas, great!
But IMHO, the add-on on the windshield, the joint with the plastic should be smooth, unlike for instance a JS11 and an FW08...
WILLIAMS FW09 Dallas winner KAWAI+some more...
-
 steinietrabi
- Constructors Champion

- Posts: 1377
- Joined: Mon Mar 30, 2020 1:56 pm
- Your Name: Thomas
- Favorite F1 Team or Driver: Williams, Ferrari, McLaren... Michael Schumacher
- Location: Crottendorf / Germany
- Status: Offline

Re: WILLIAMS FW09 Dallas winner KAWAI+some more...
James could you please check my comments above?!  Thanks a lot.
Greetings Thomas
-
 GF-F1
GF-F1
- Team Owner

- Posts: 840
- Joined: Mon Feb 22, 2010 3:17 pm
- Favorite F1 Team or Driver: Ligier
- Location: Thessaloniki
- Contact:
- Status: Offline

Re: WILLIAMS FW09 Dallas winner KAWAI+some more...
Hello ,
Both WIP are very impressive, and to share ideas looks to give you more motivation, BRAVO!!!!
Cheers.
Franck
www.gf-models.eu
Both WIP are very impressive, and to share ideas looks to give you more motivation, BRAVO!!!!
Cheers.
Franck
www.gf-models.eu
Re: WILLIAMS FW09 Dallas winner KAWAI+some more...
Sorry, I did not see them, just had time for a fast check!steinietrabi wrote:James could you please check my comments above?!
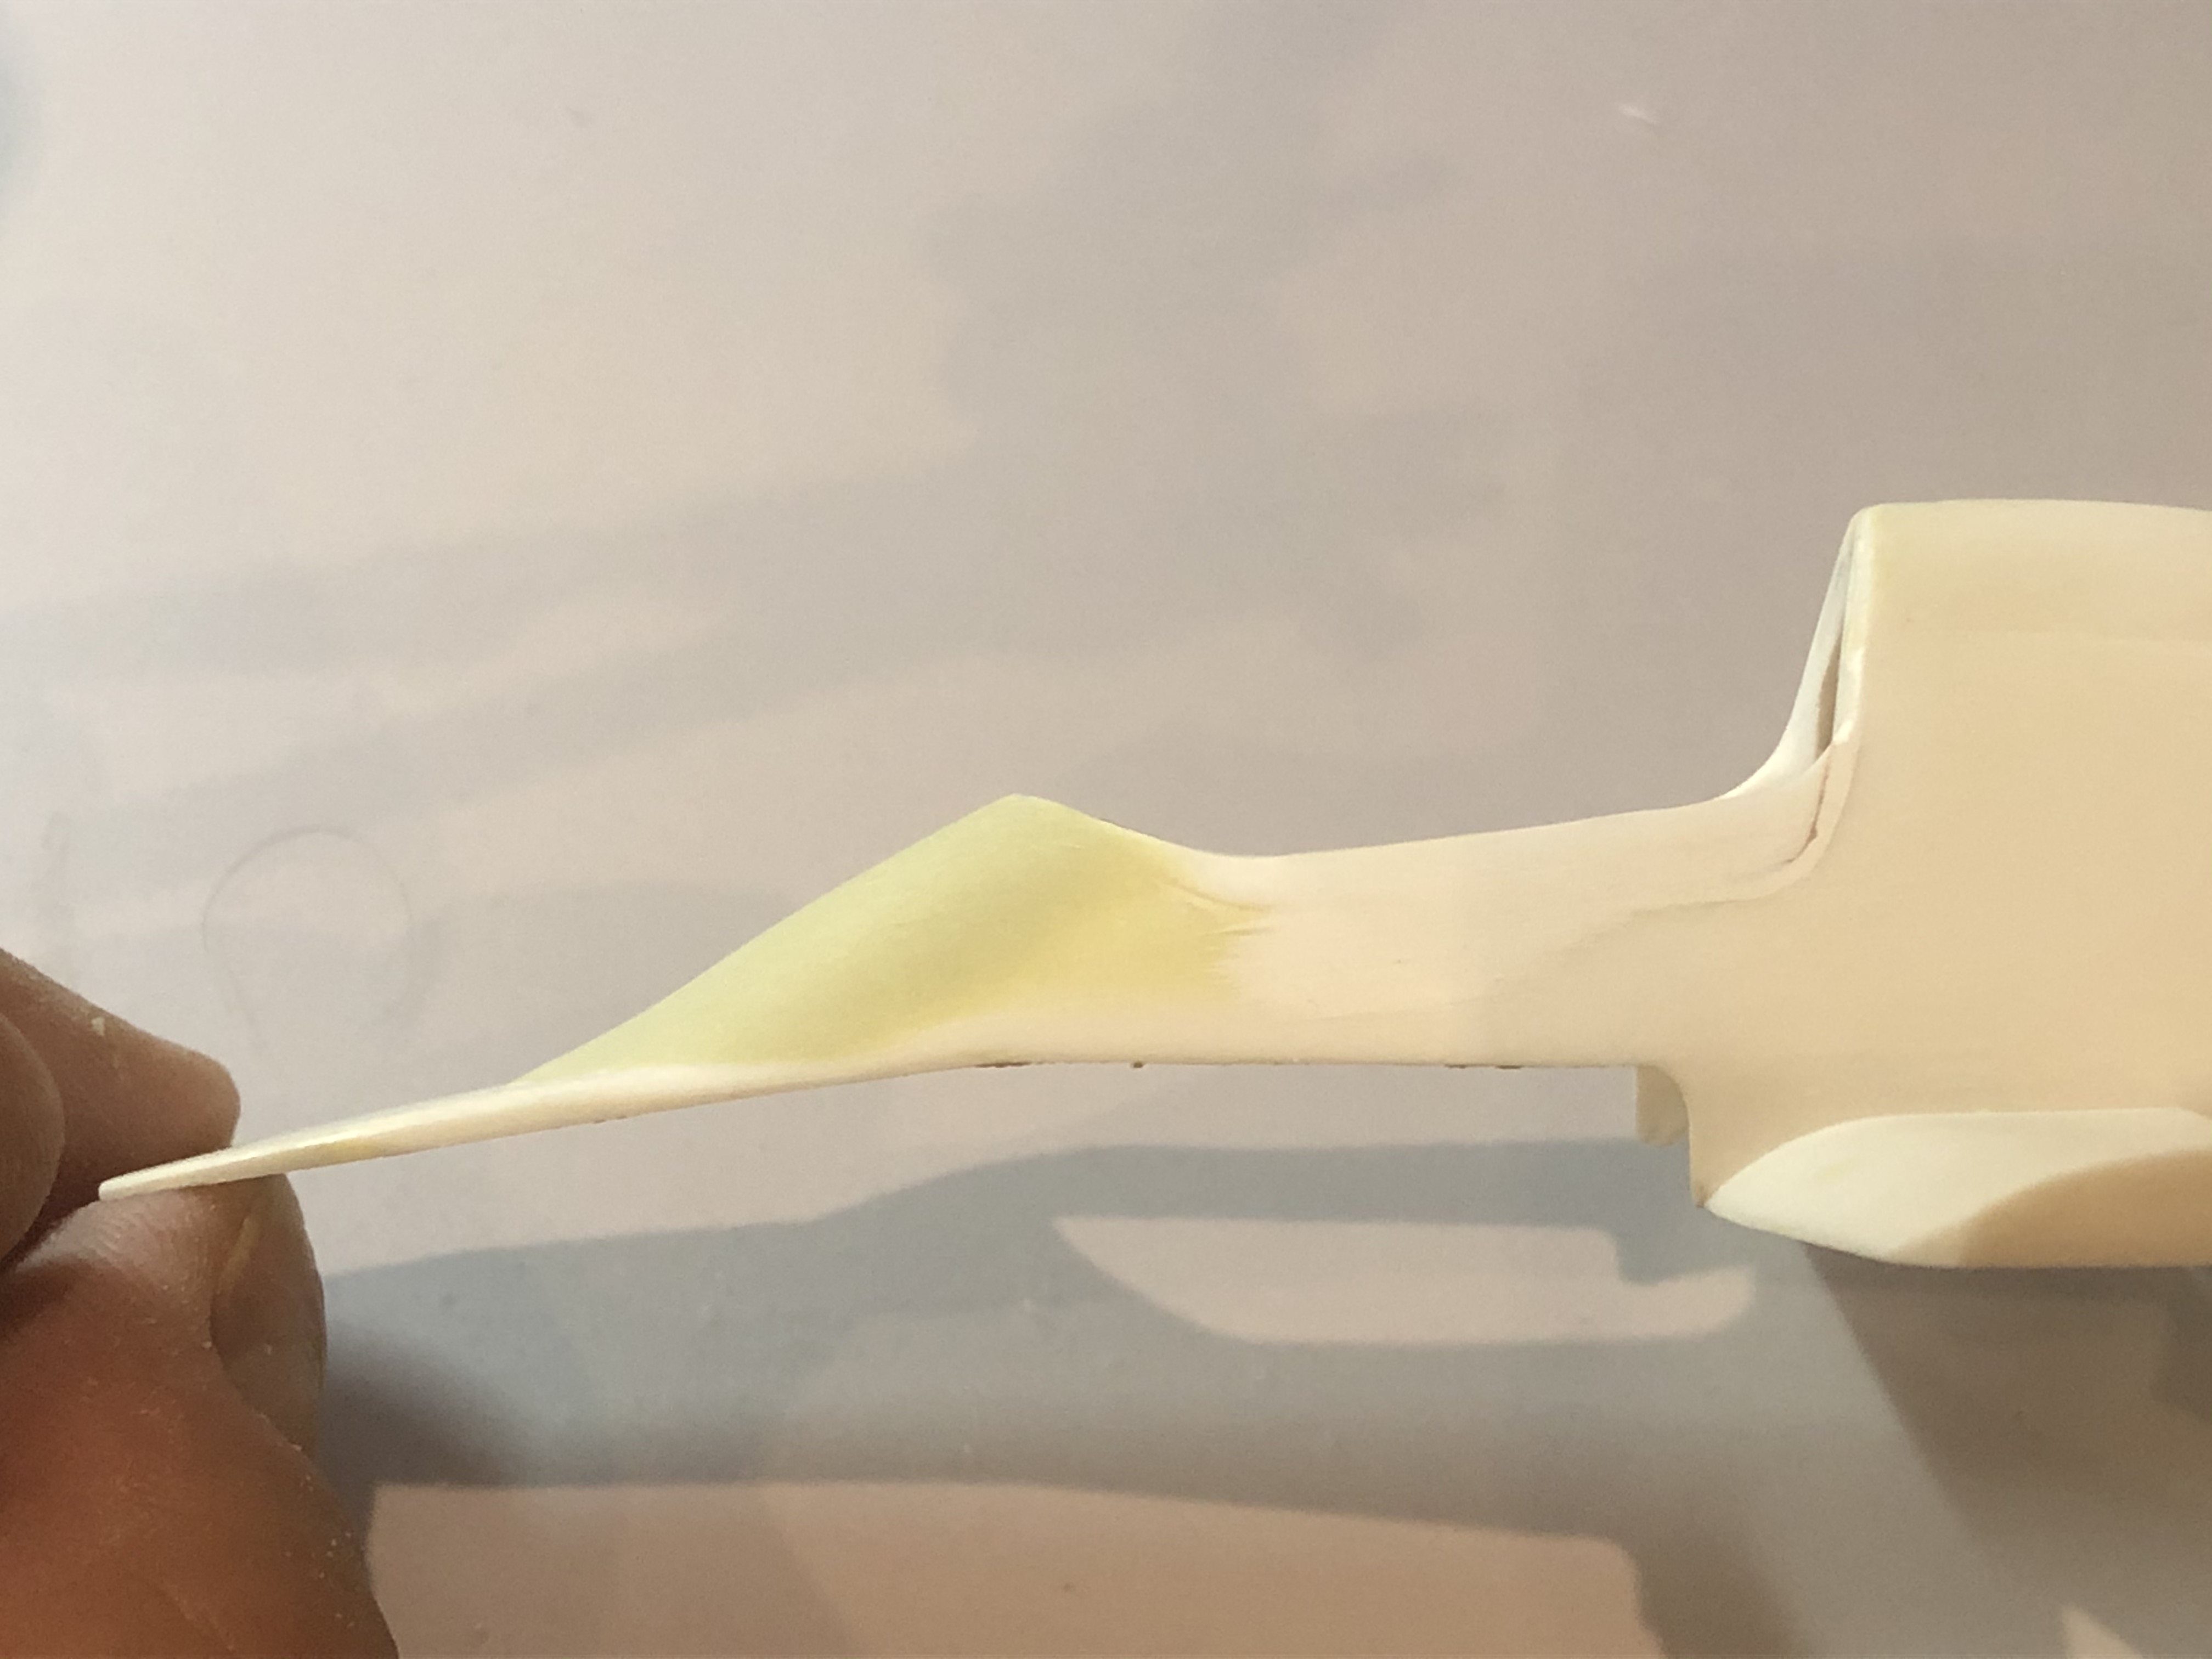
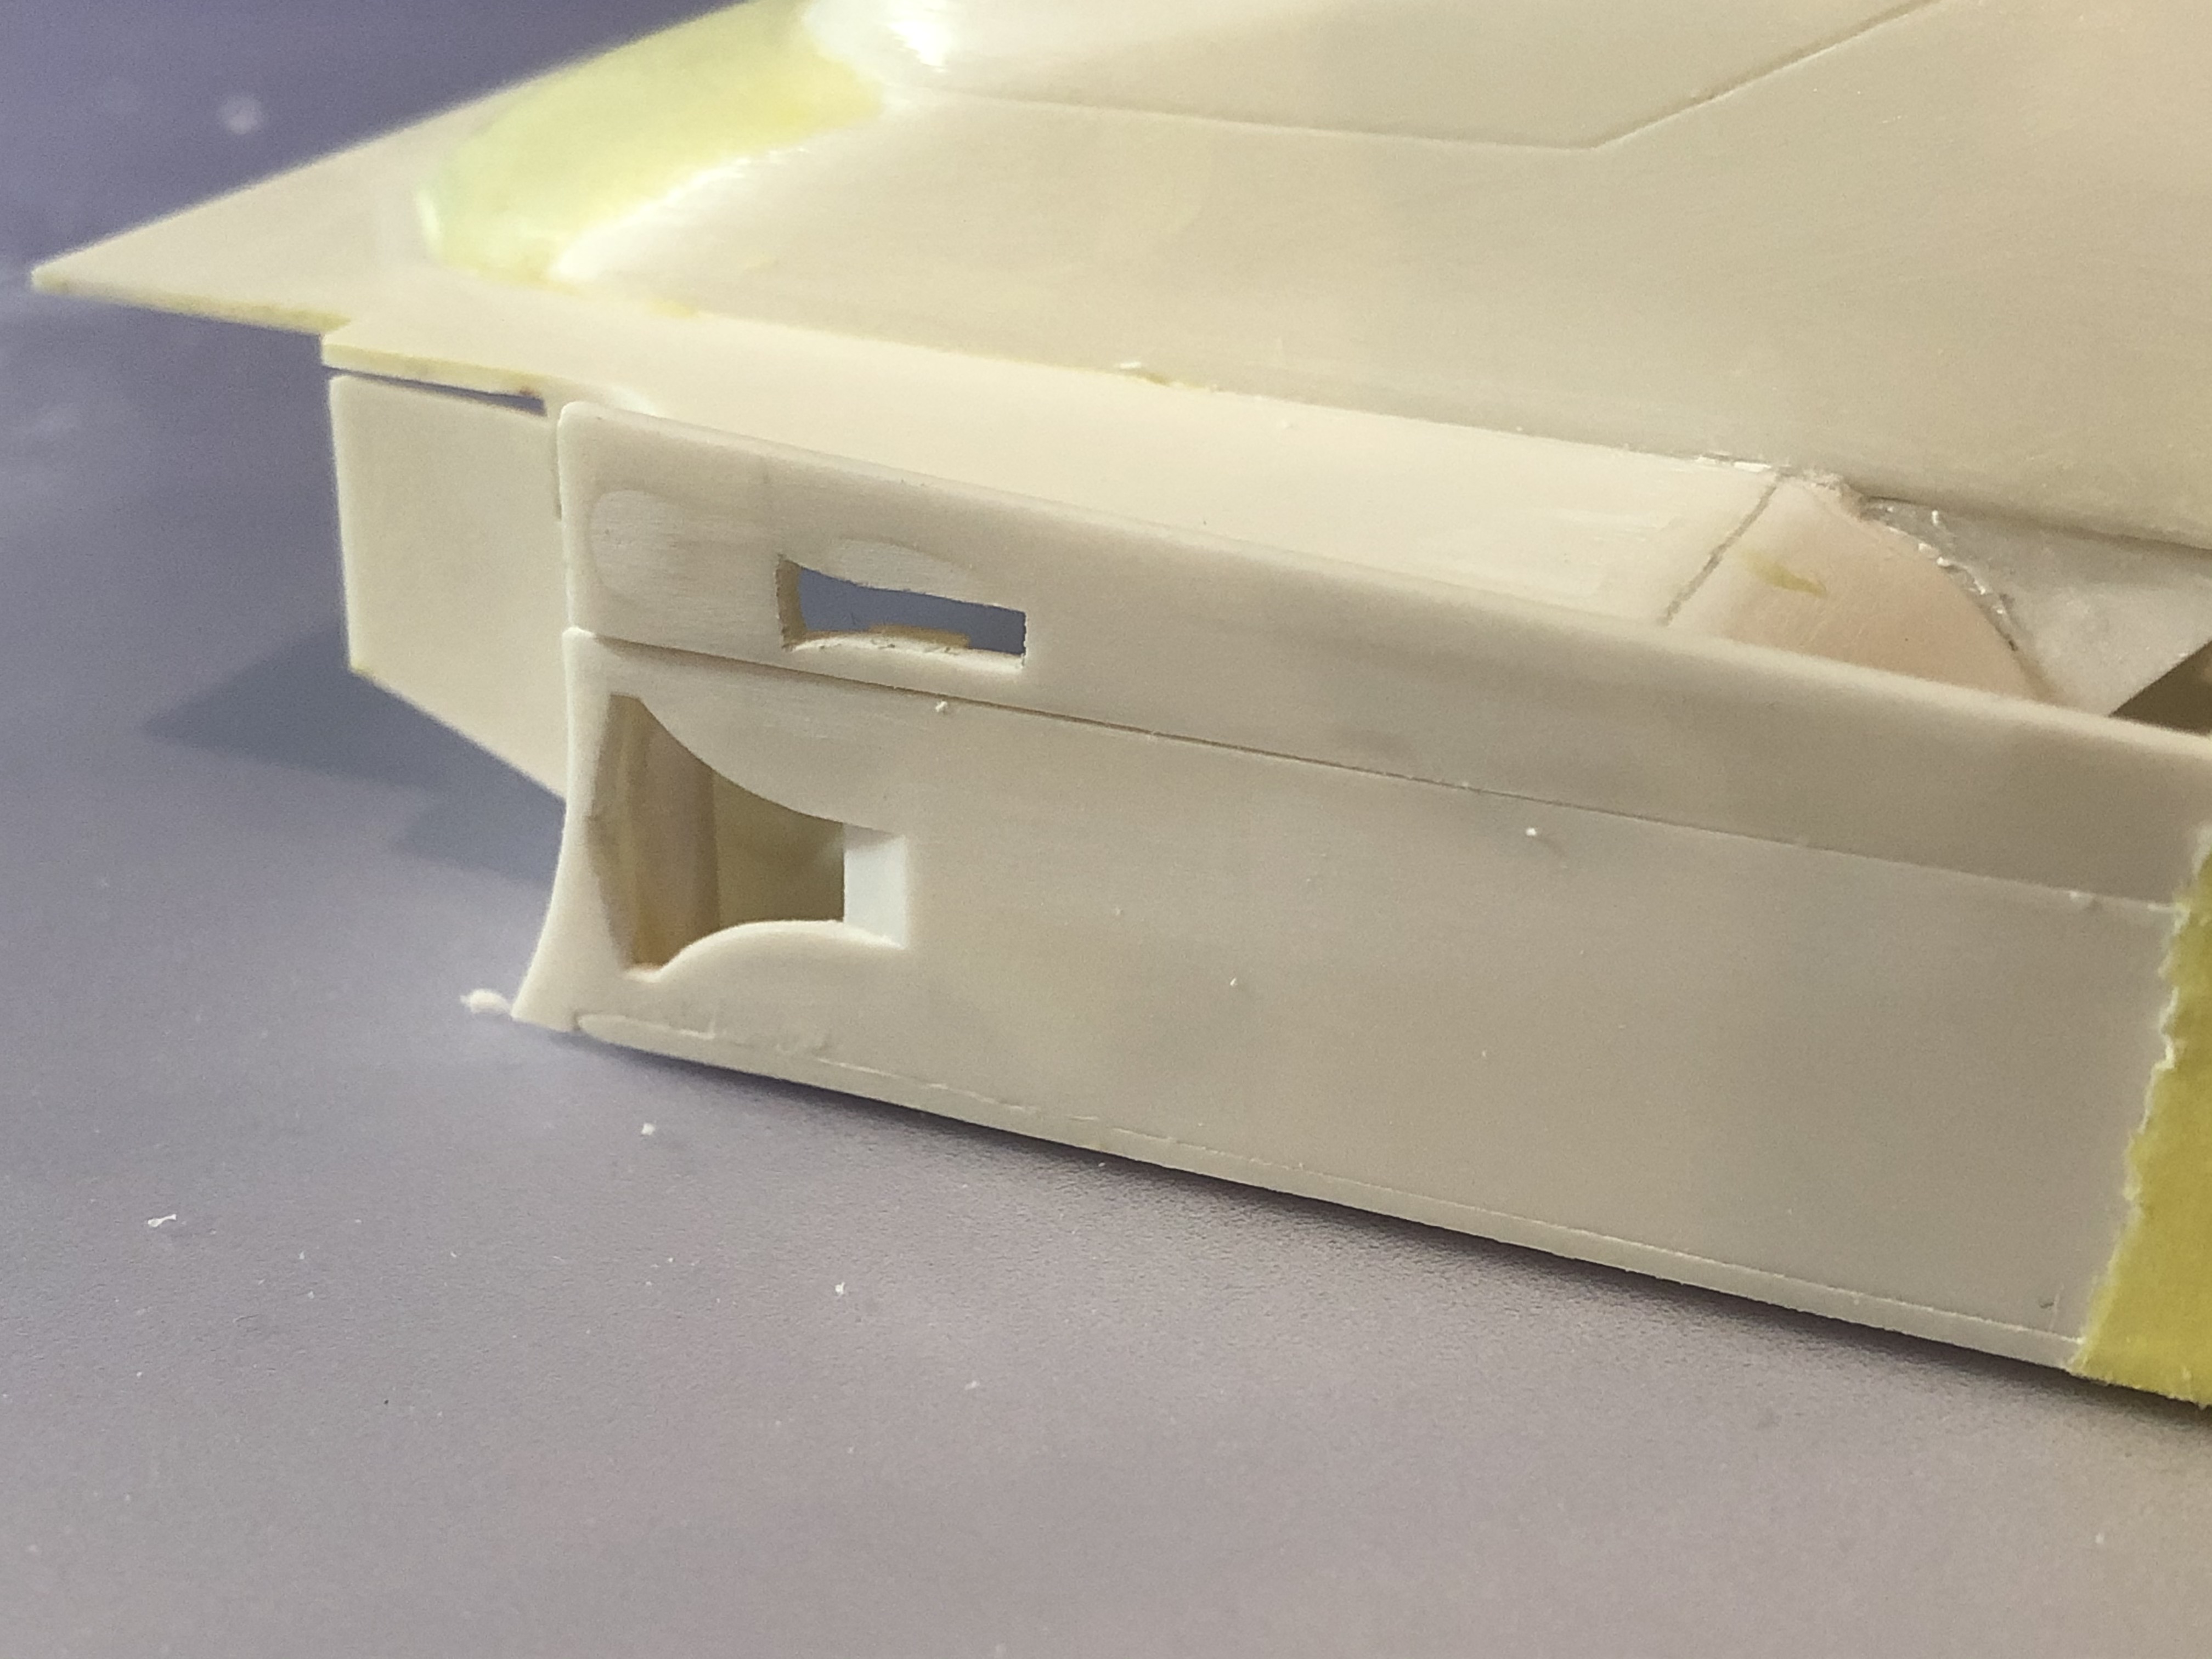
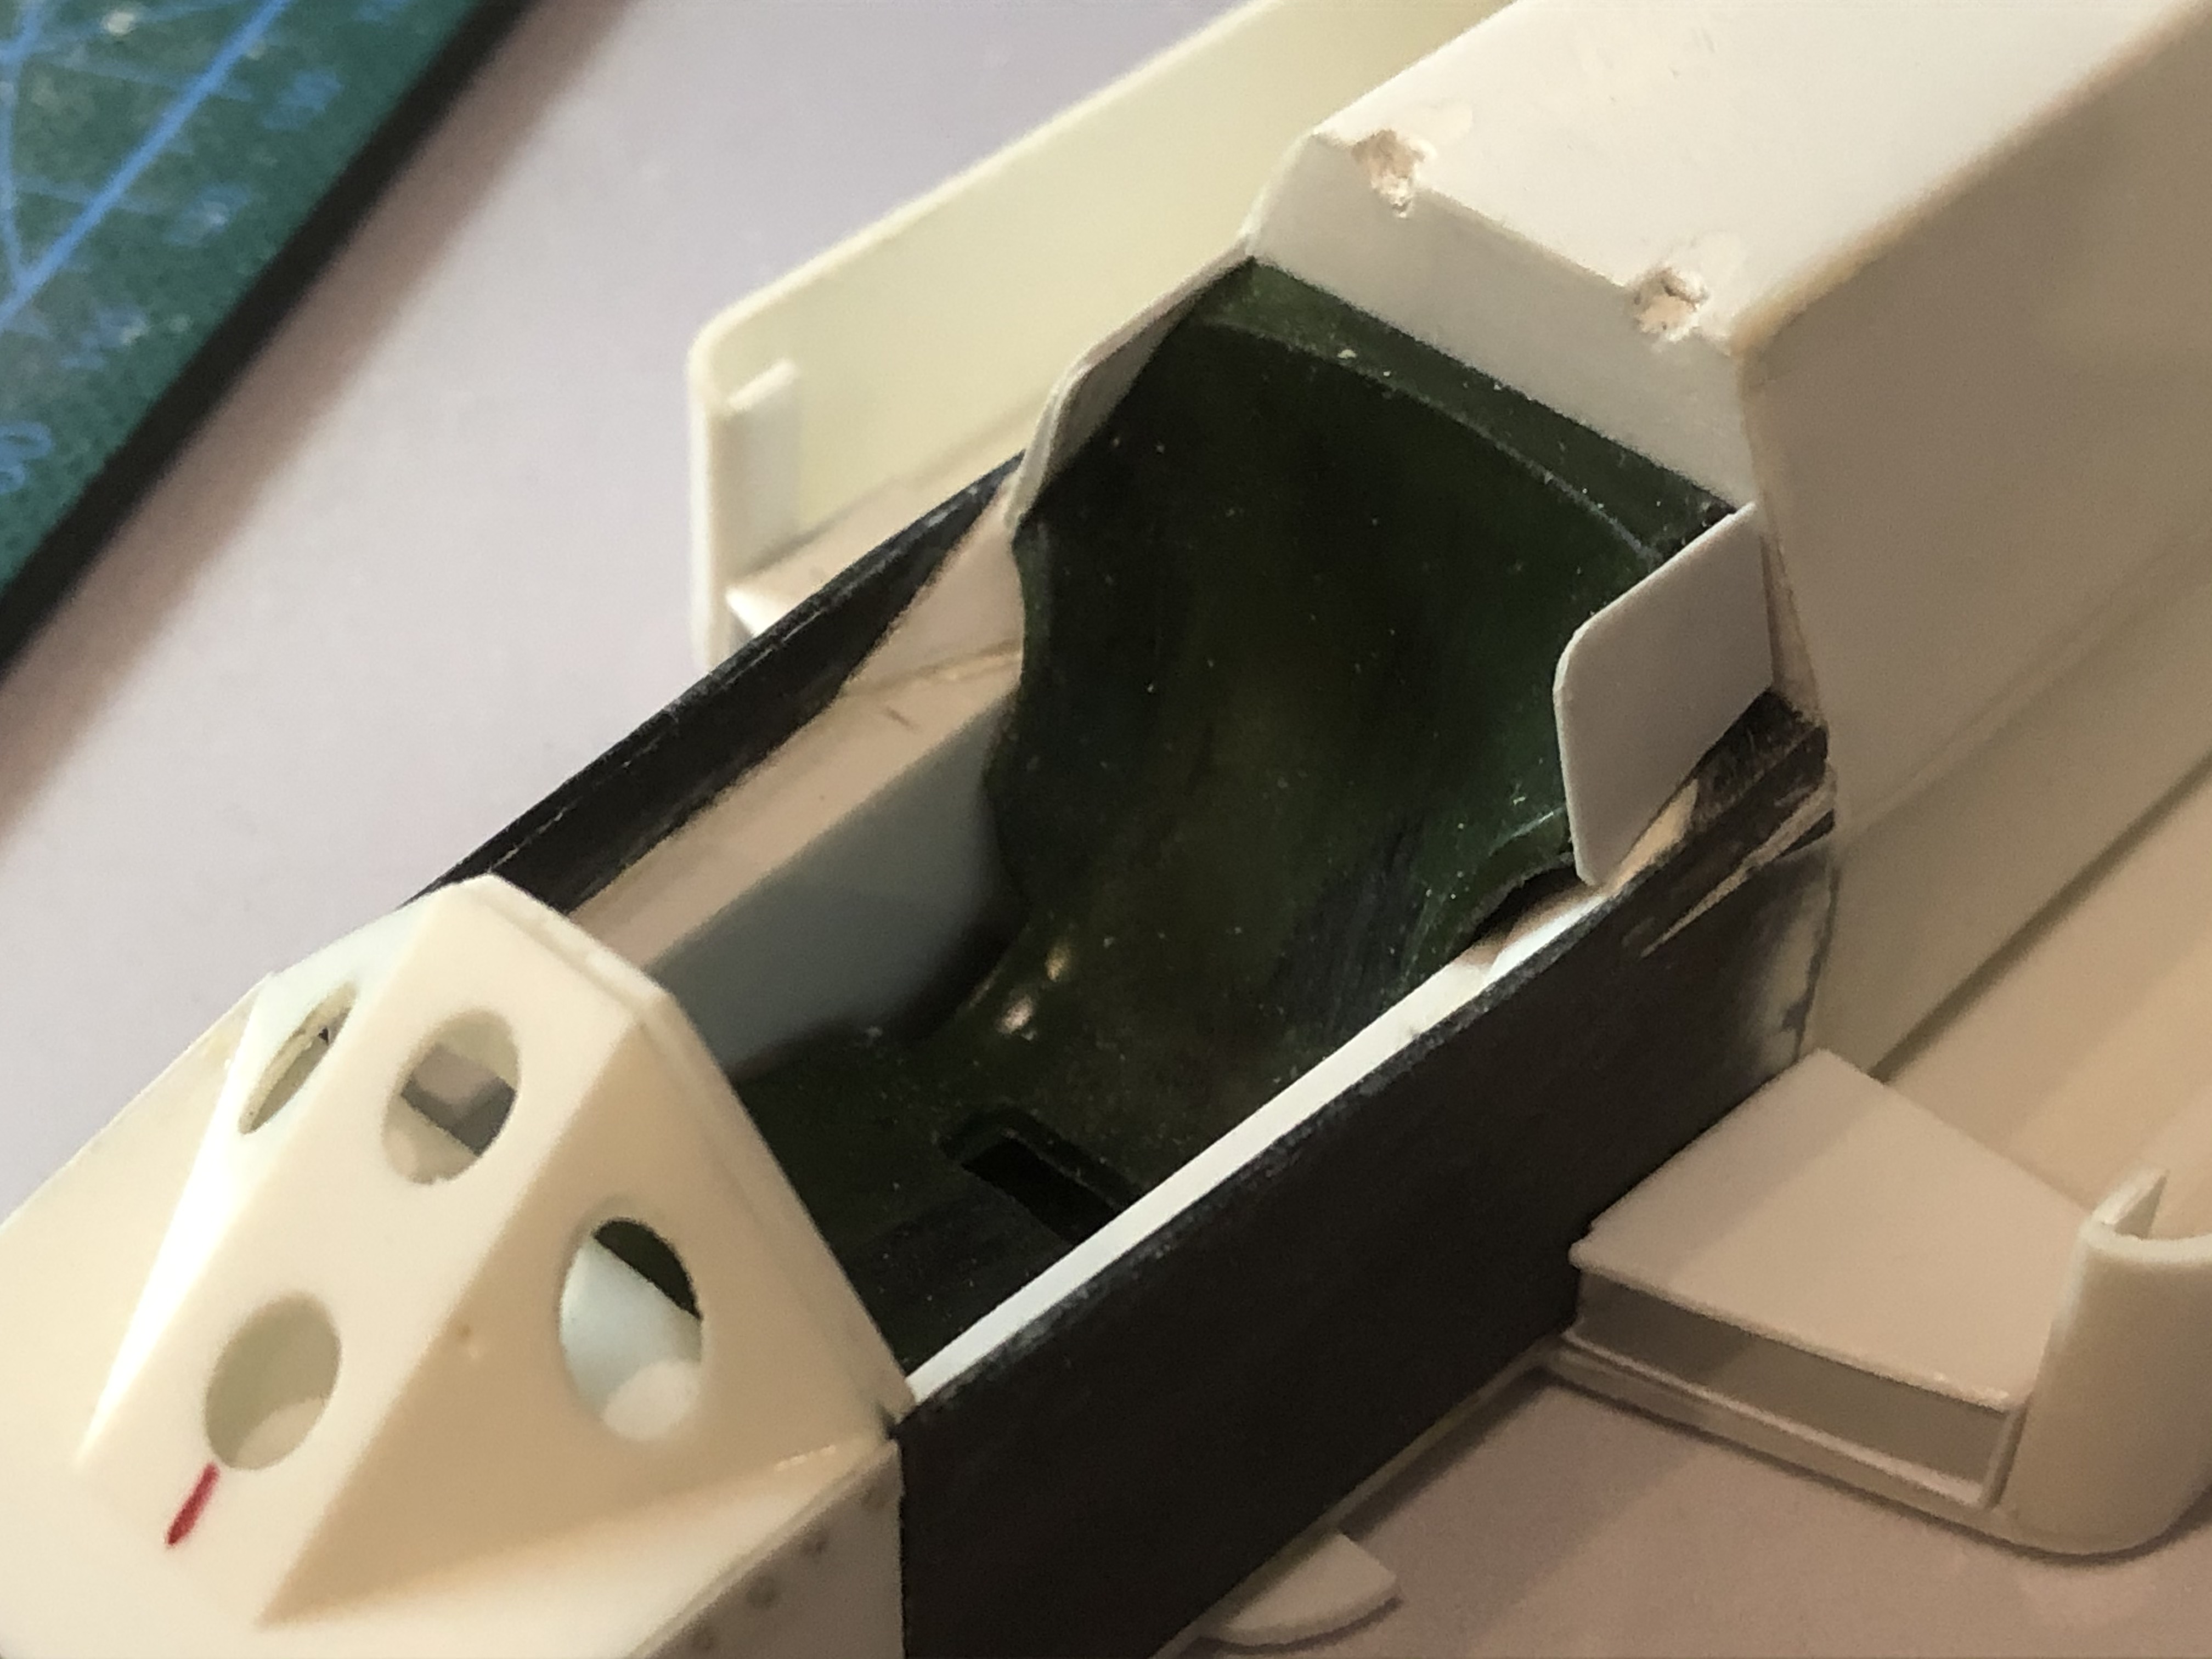
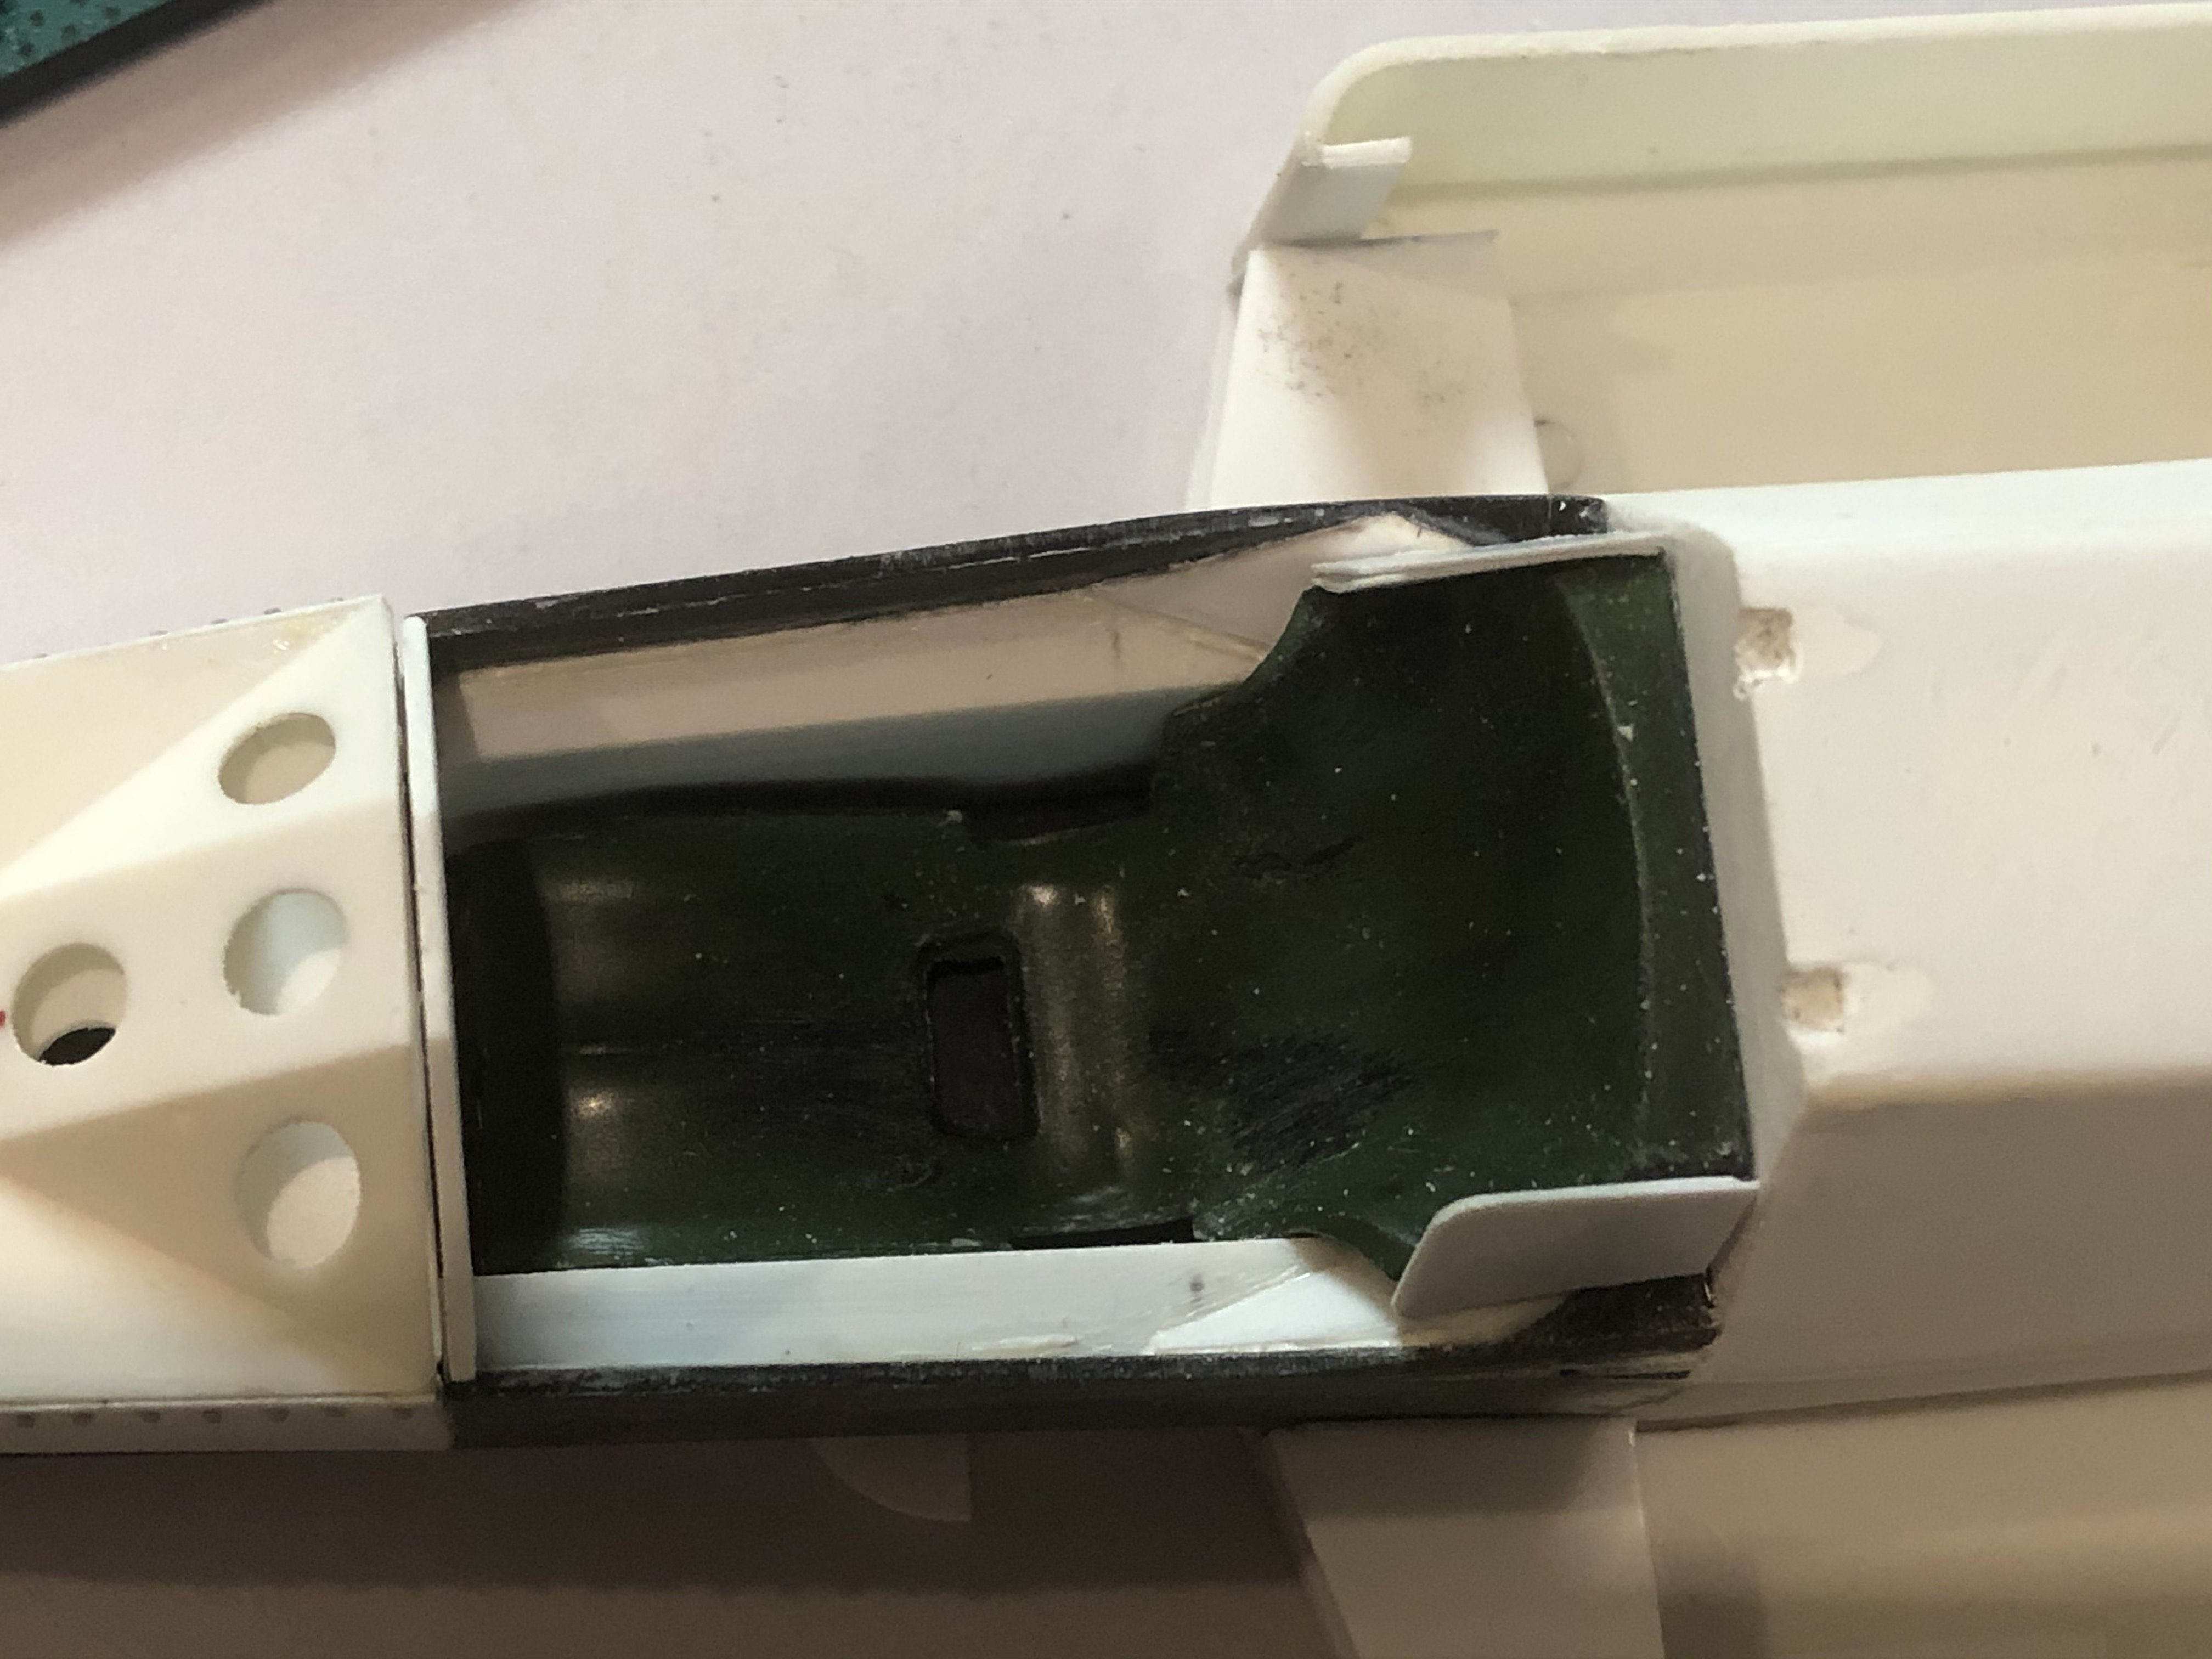
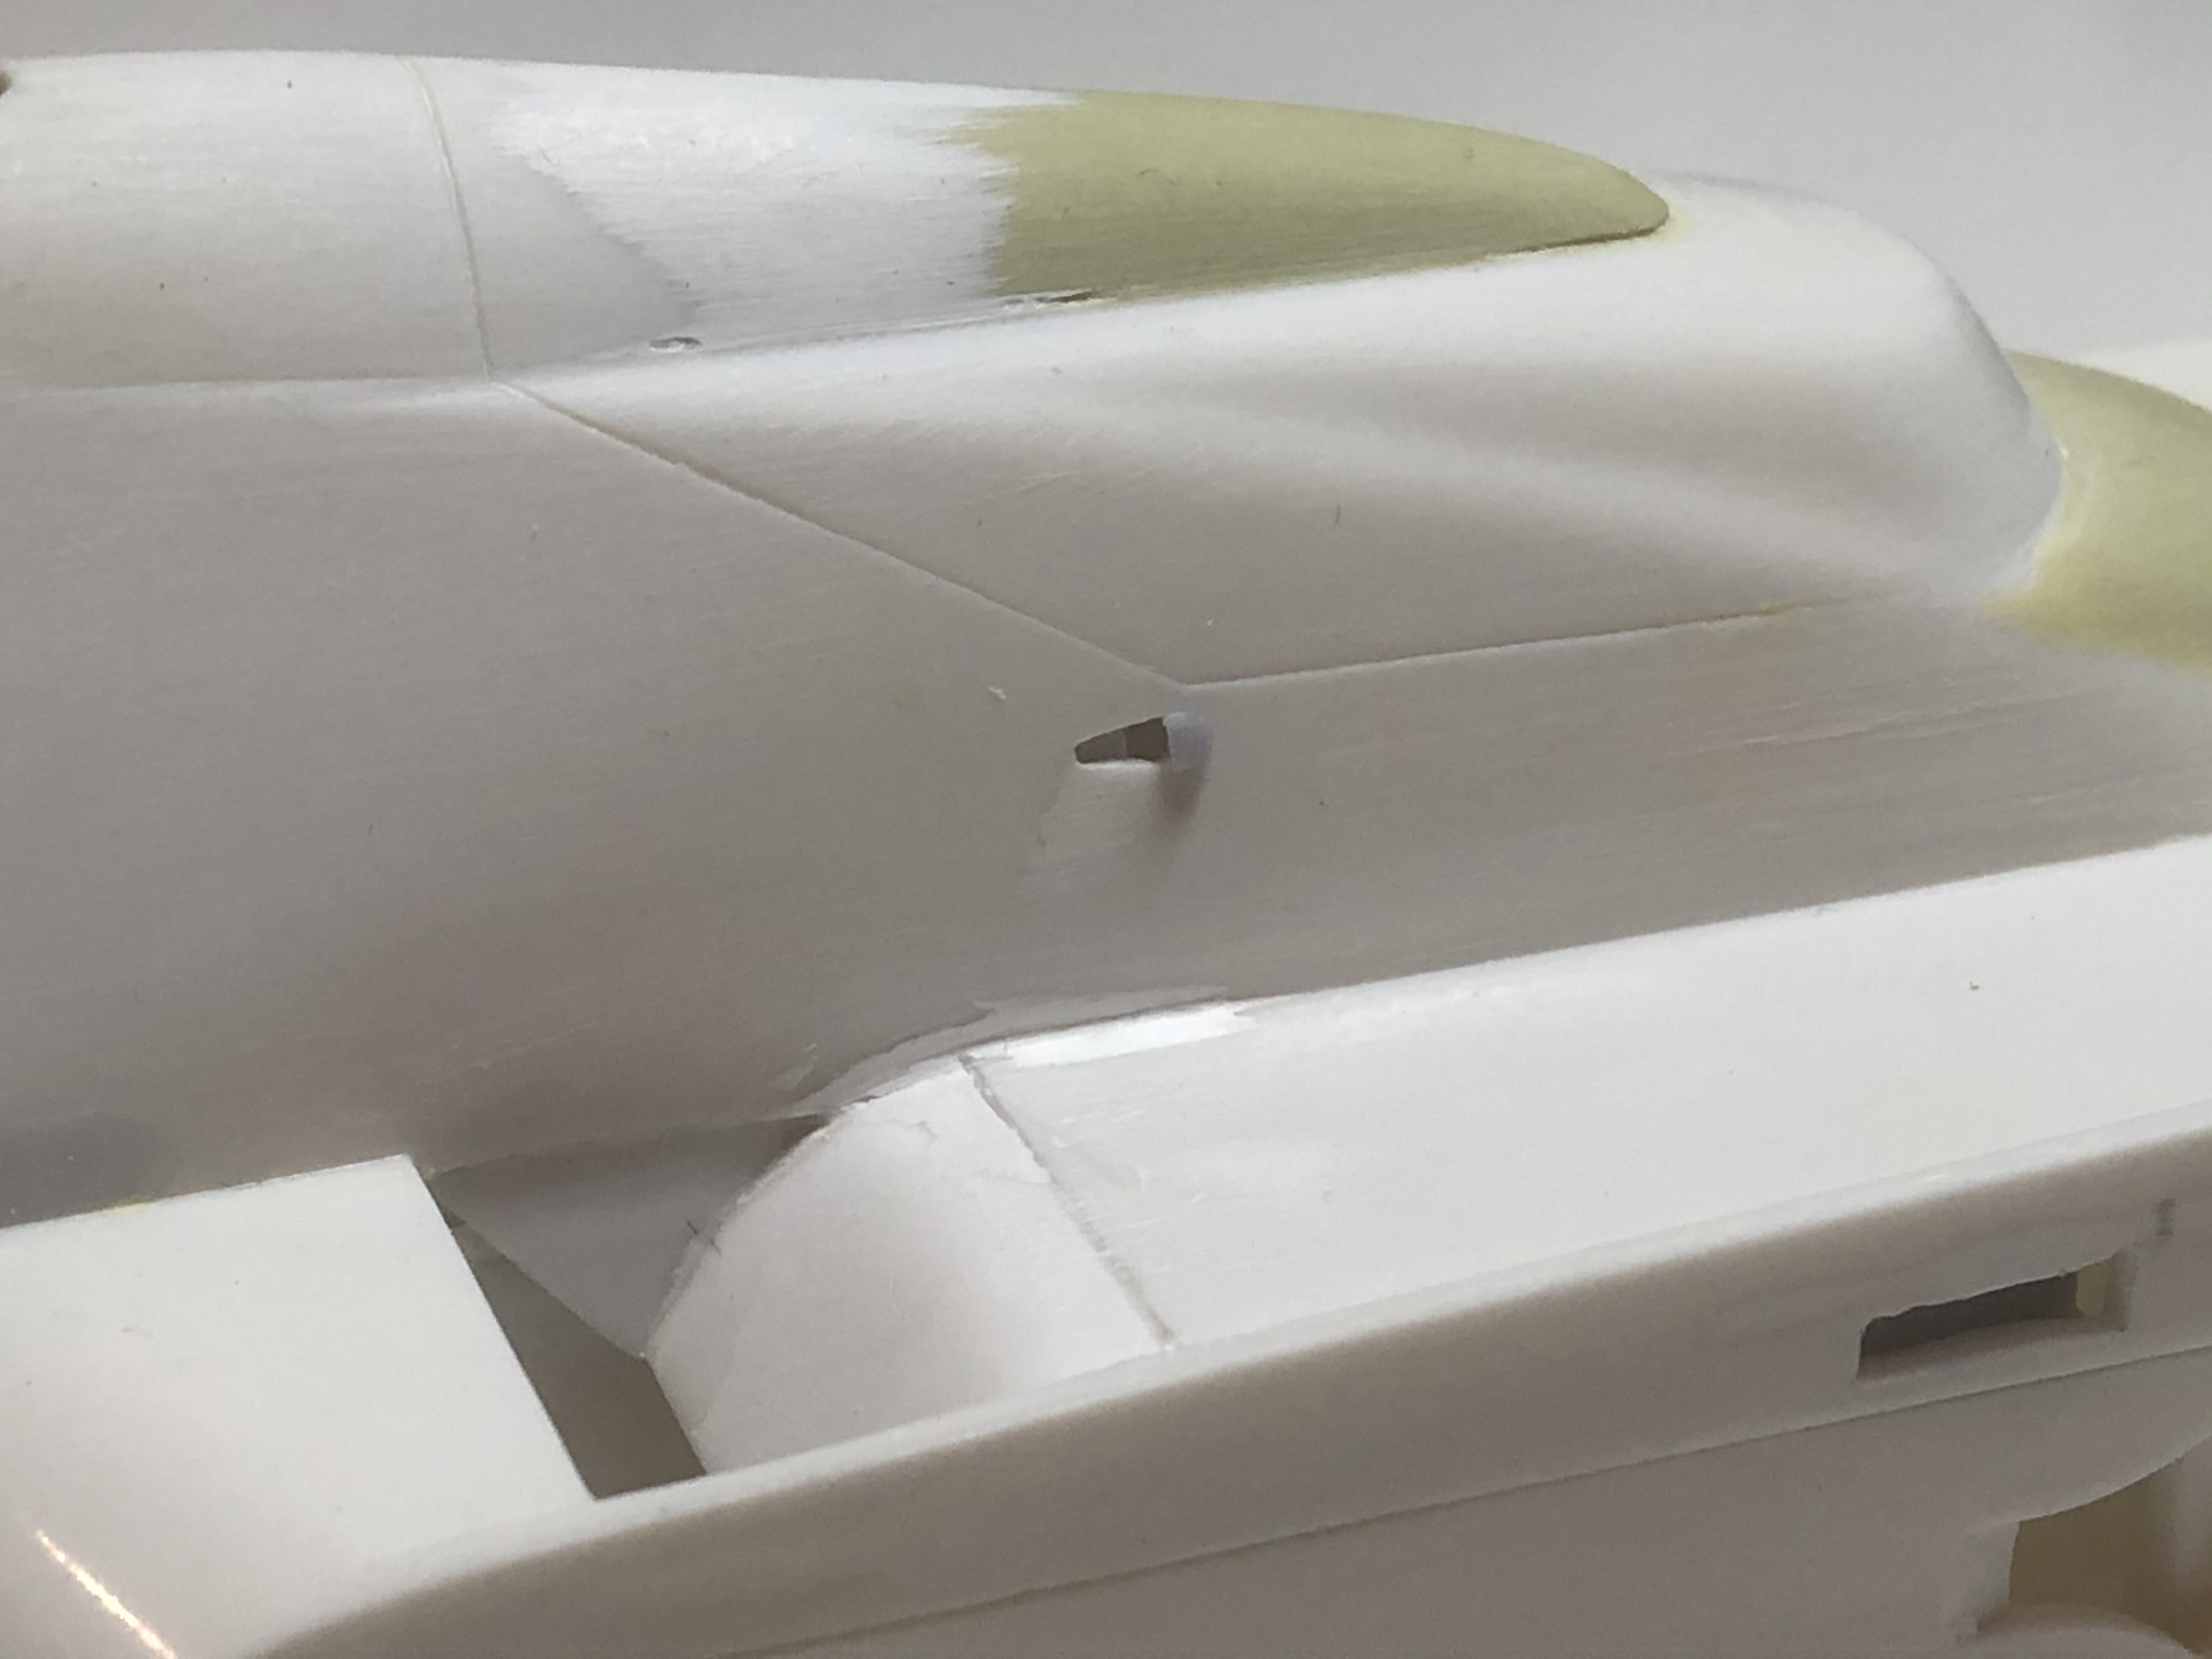
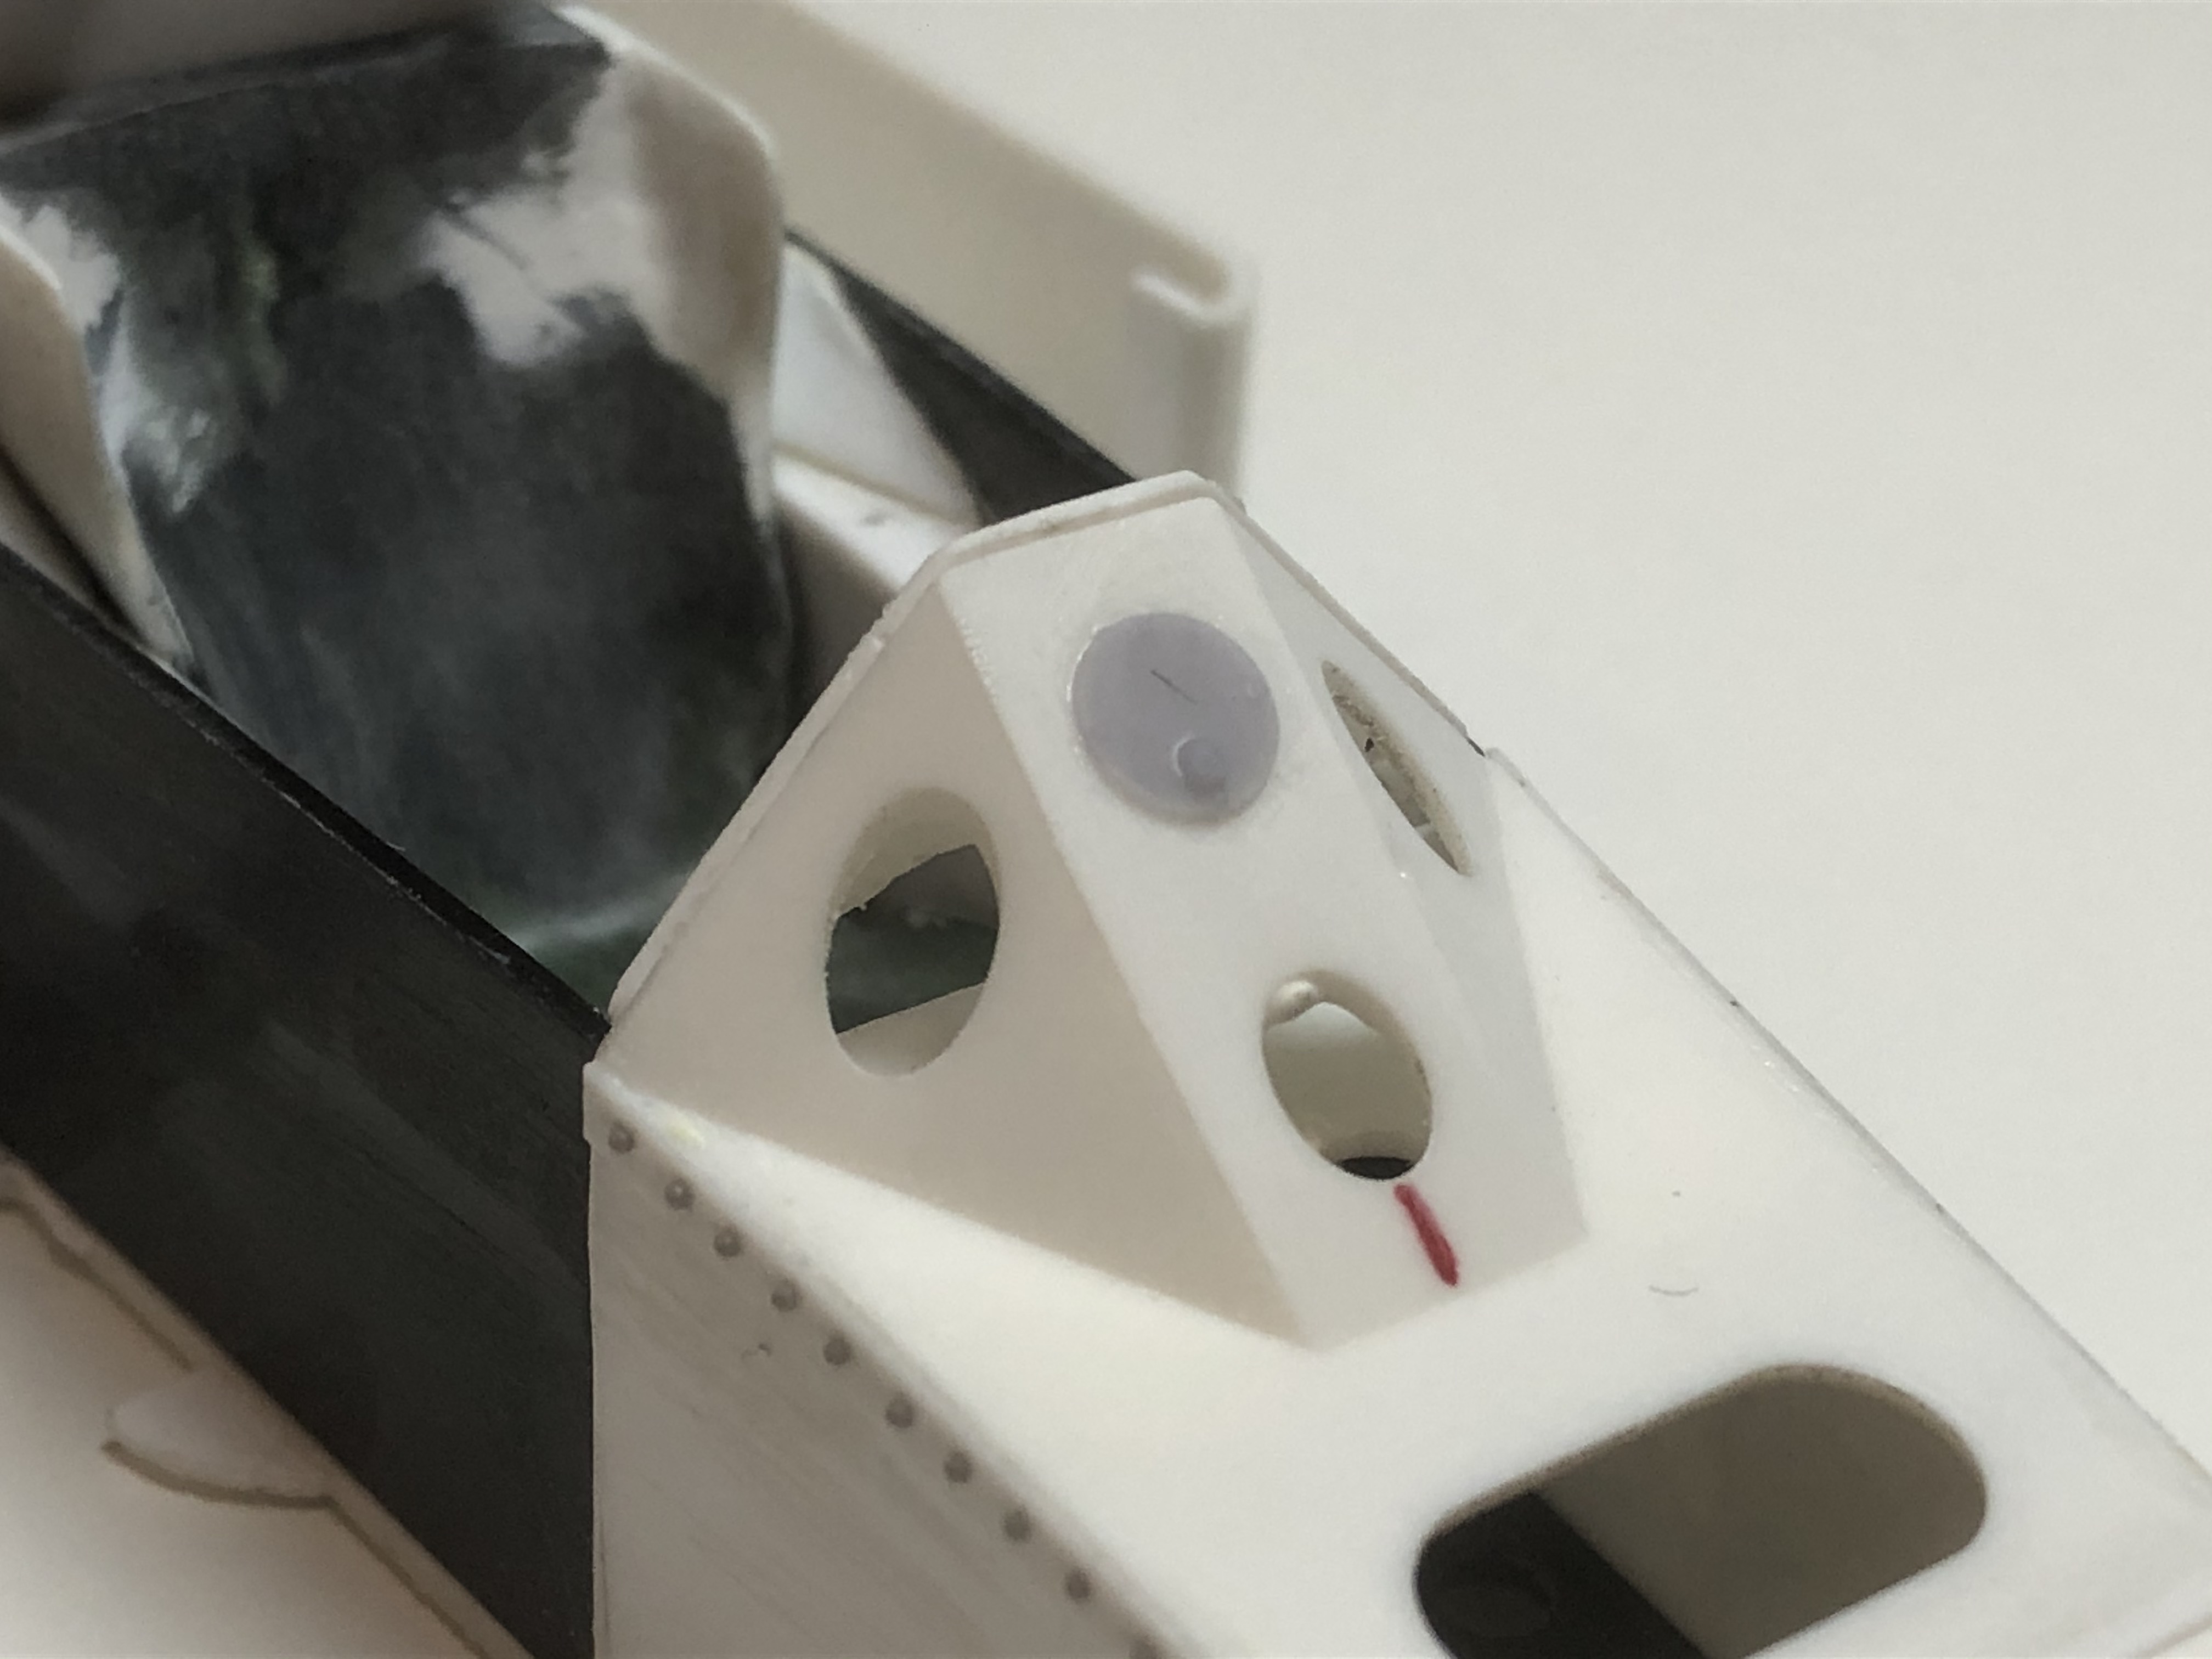
@James: How does the left side look on your cockpit? I have a huge hole here which is not fully injected.
Ah! You probably mean this.
Note: my pic should be here, but could not load it!!
It’s curious how they managed to “serialize” an injection default. I had not seen it. Well, some putty and that’s it!
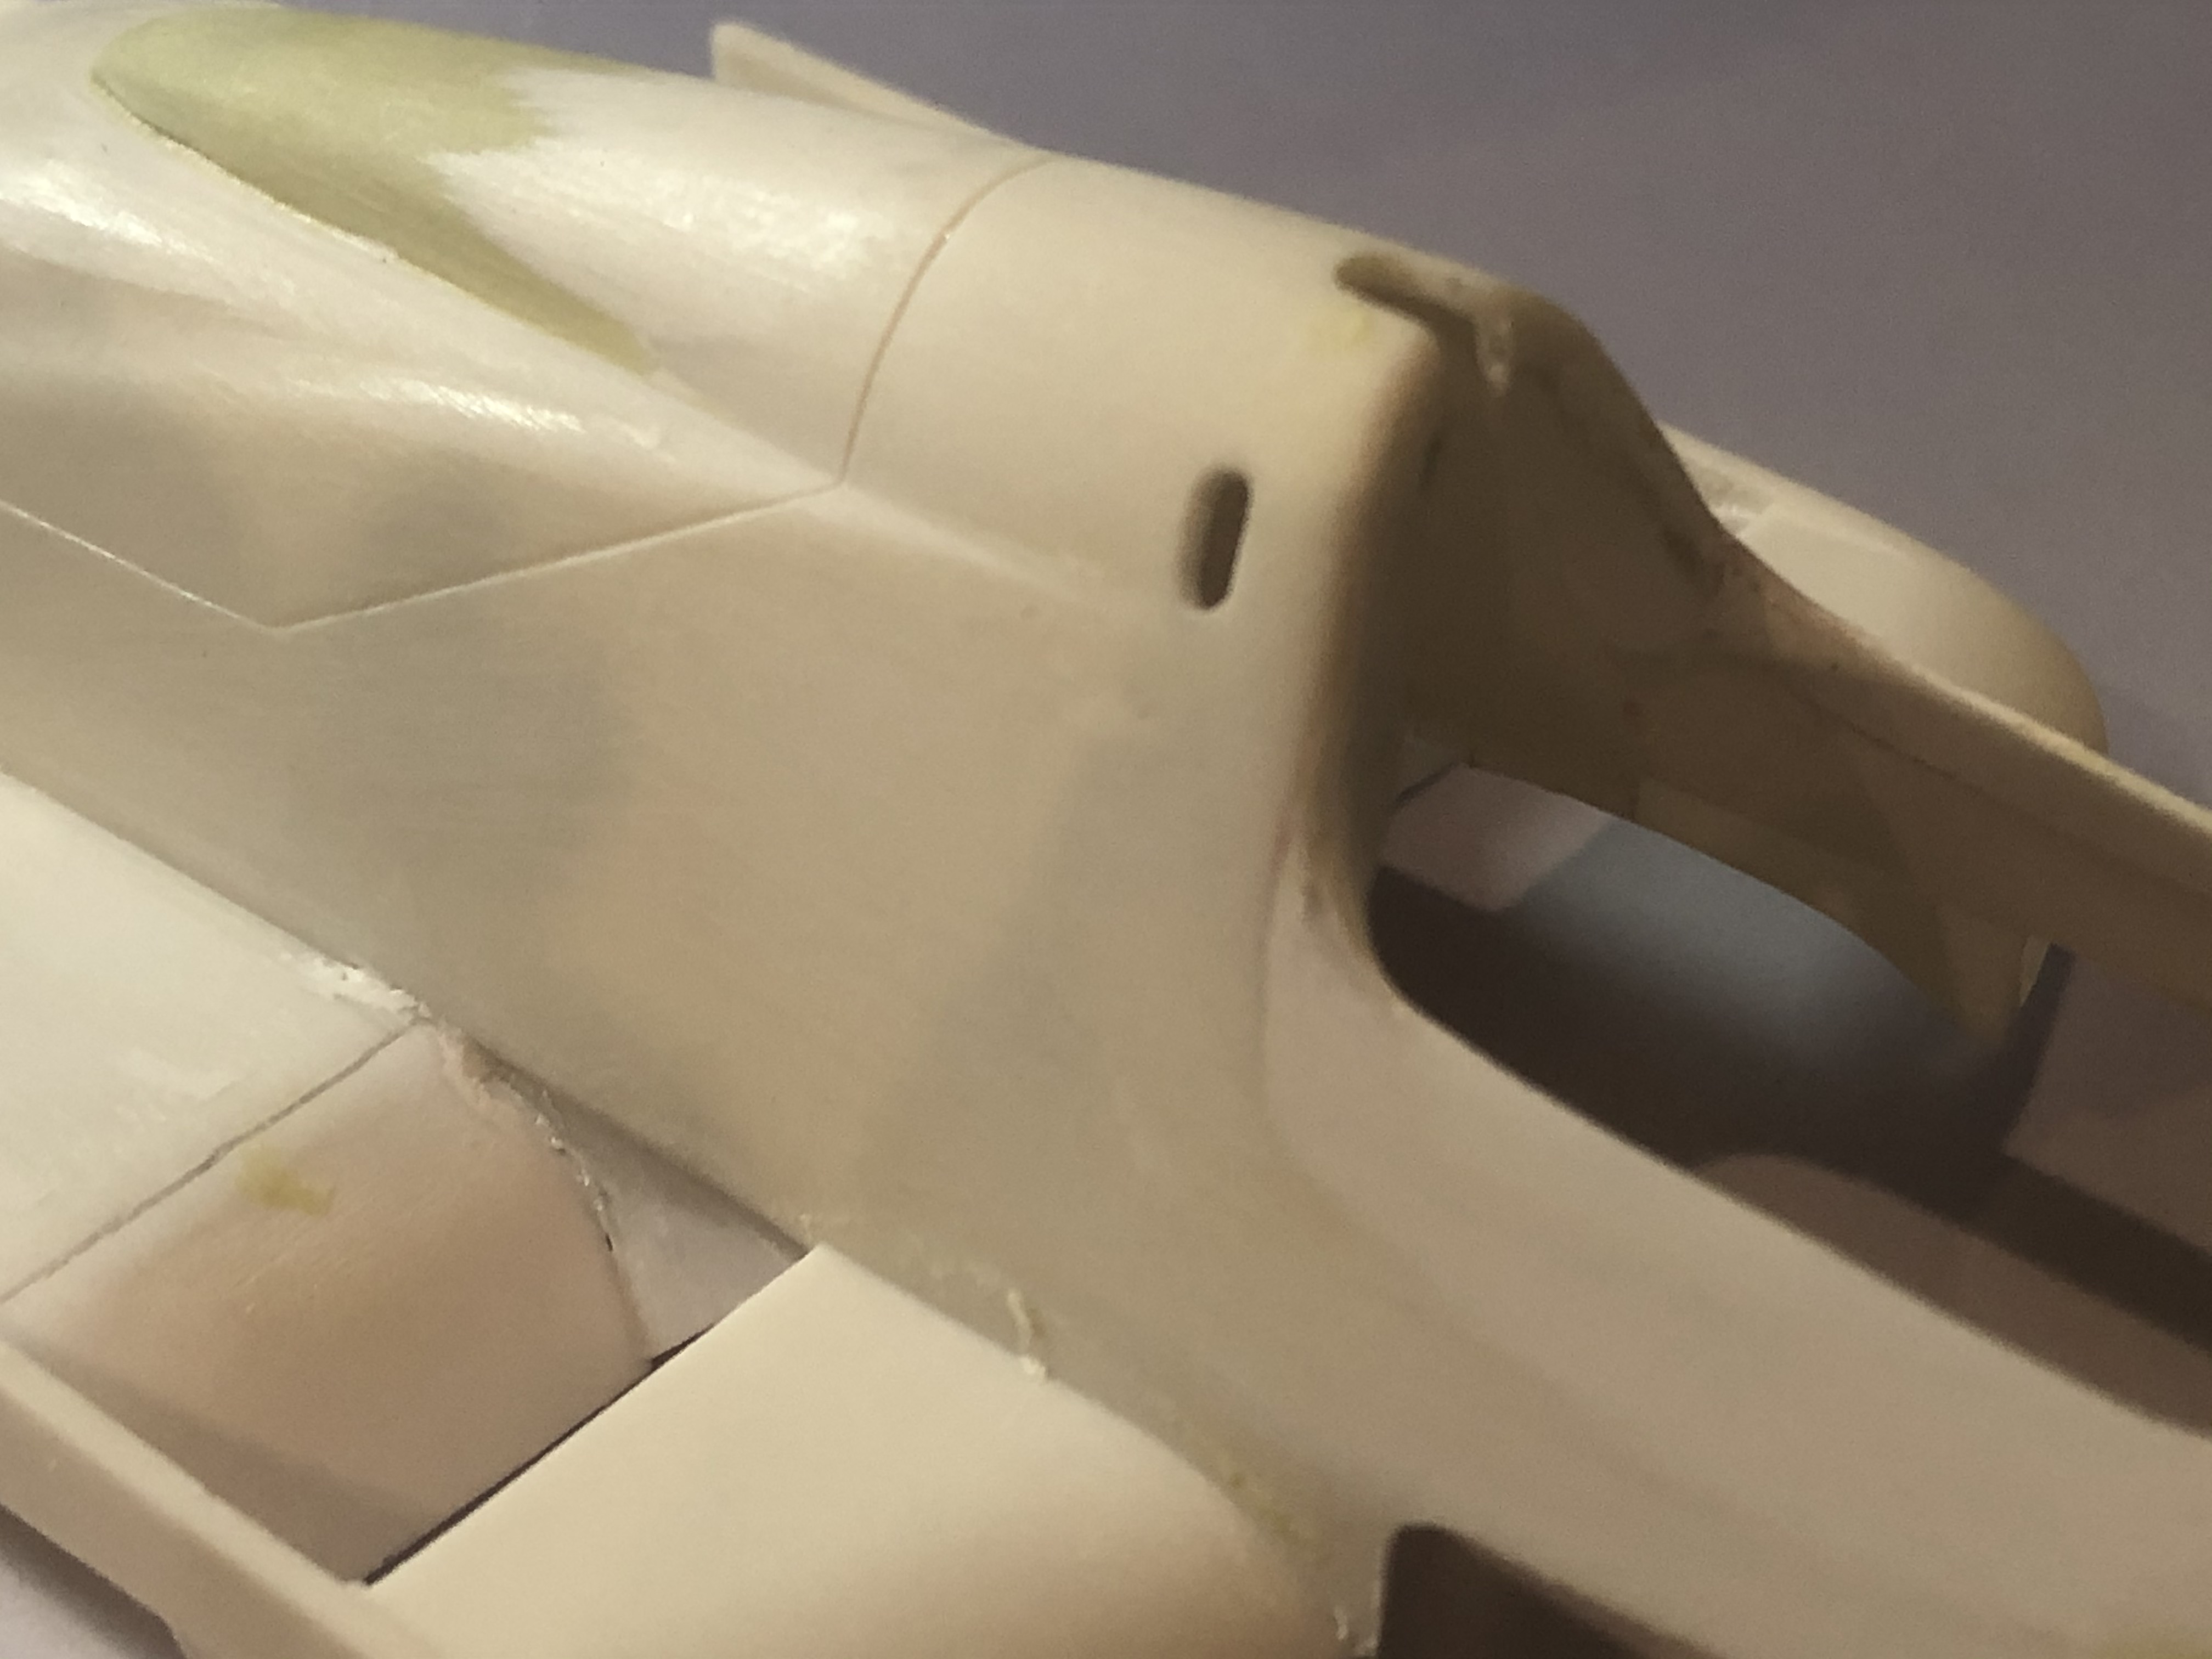
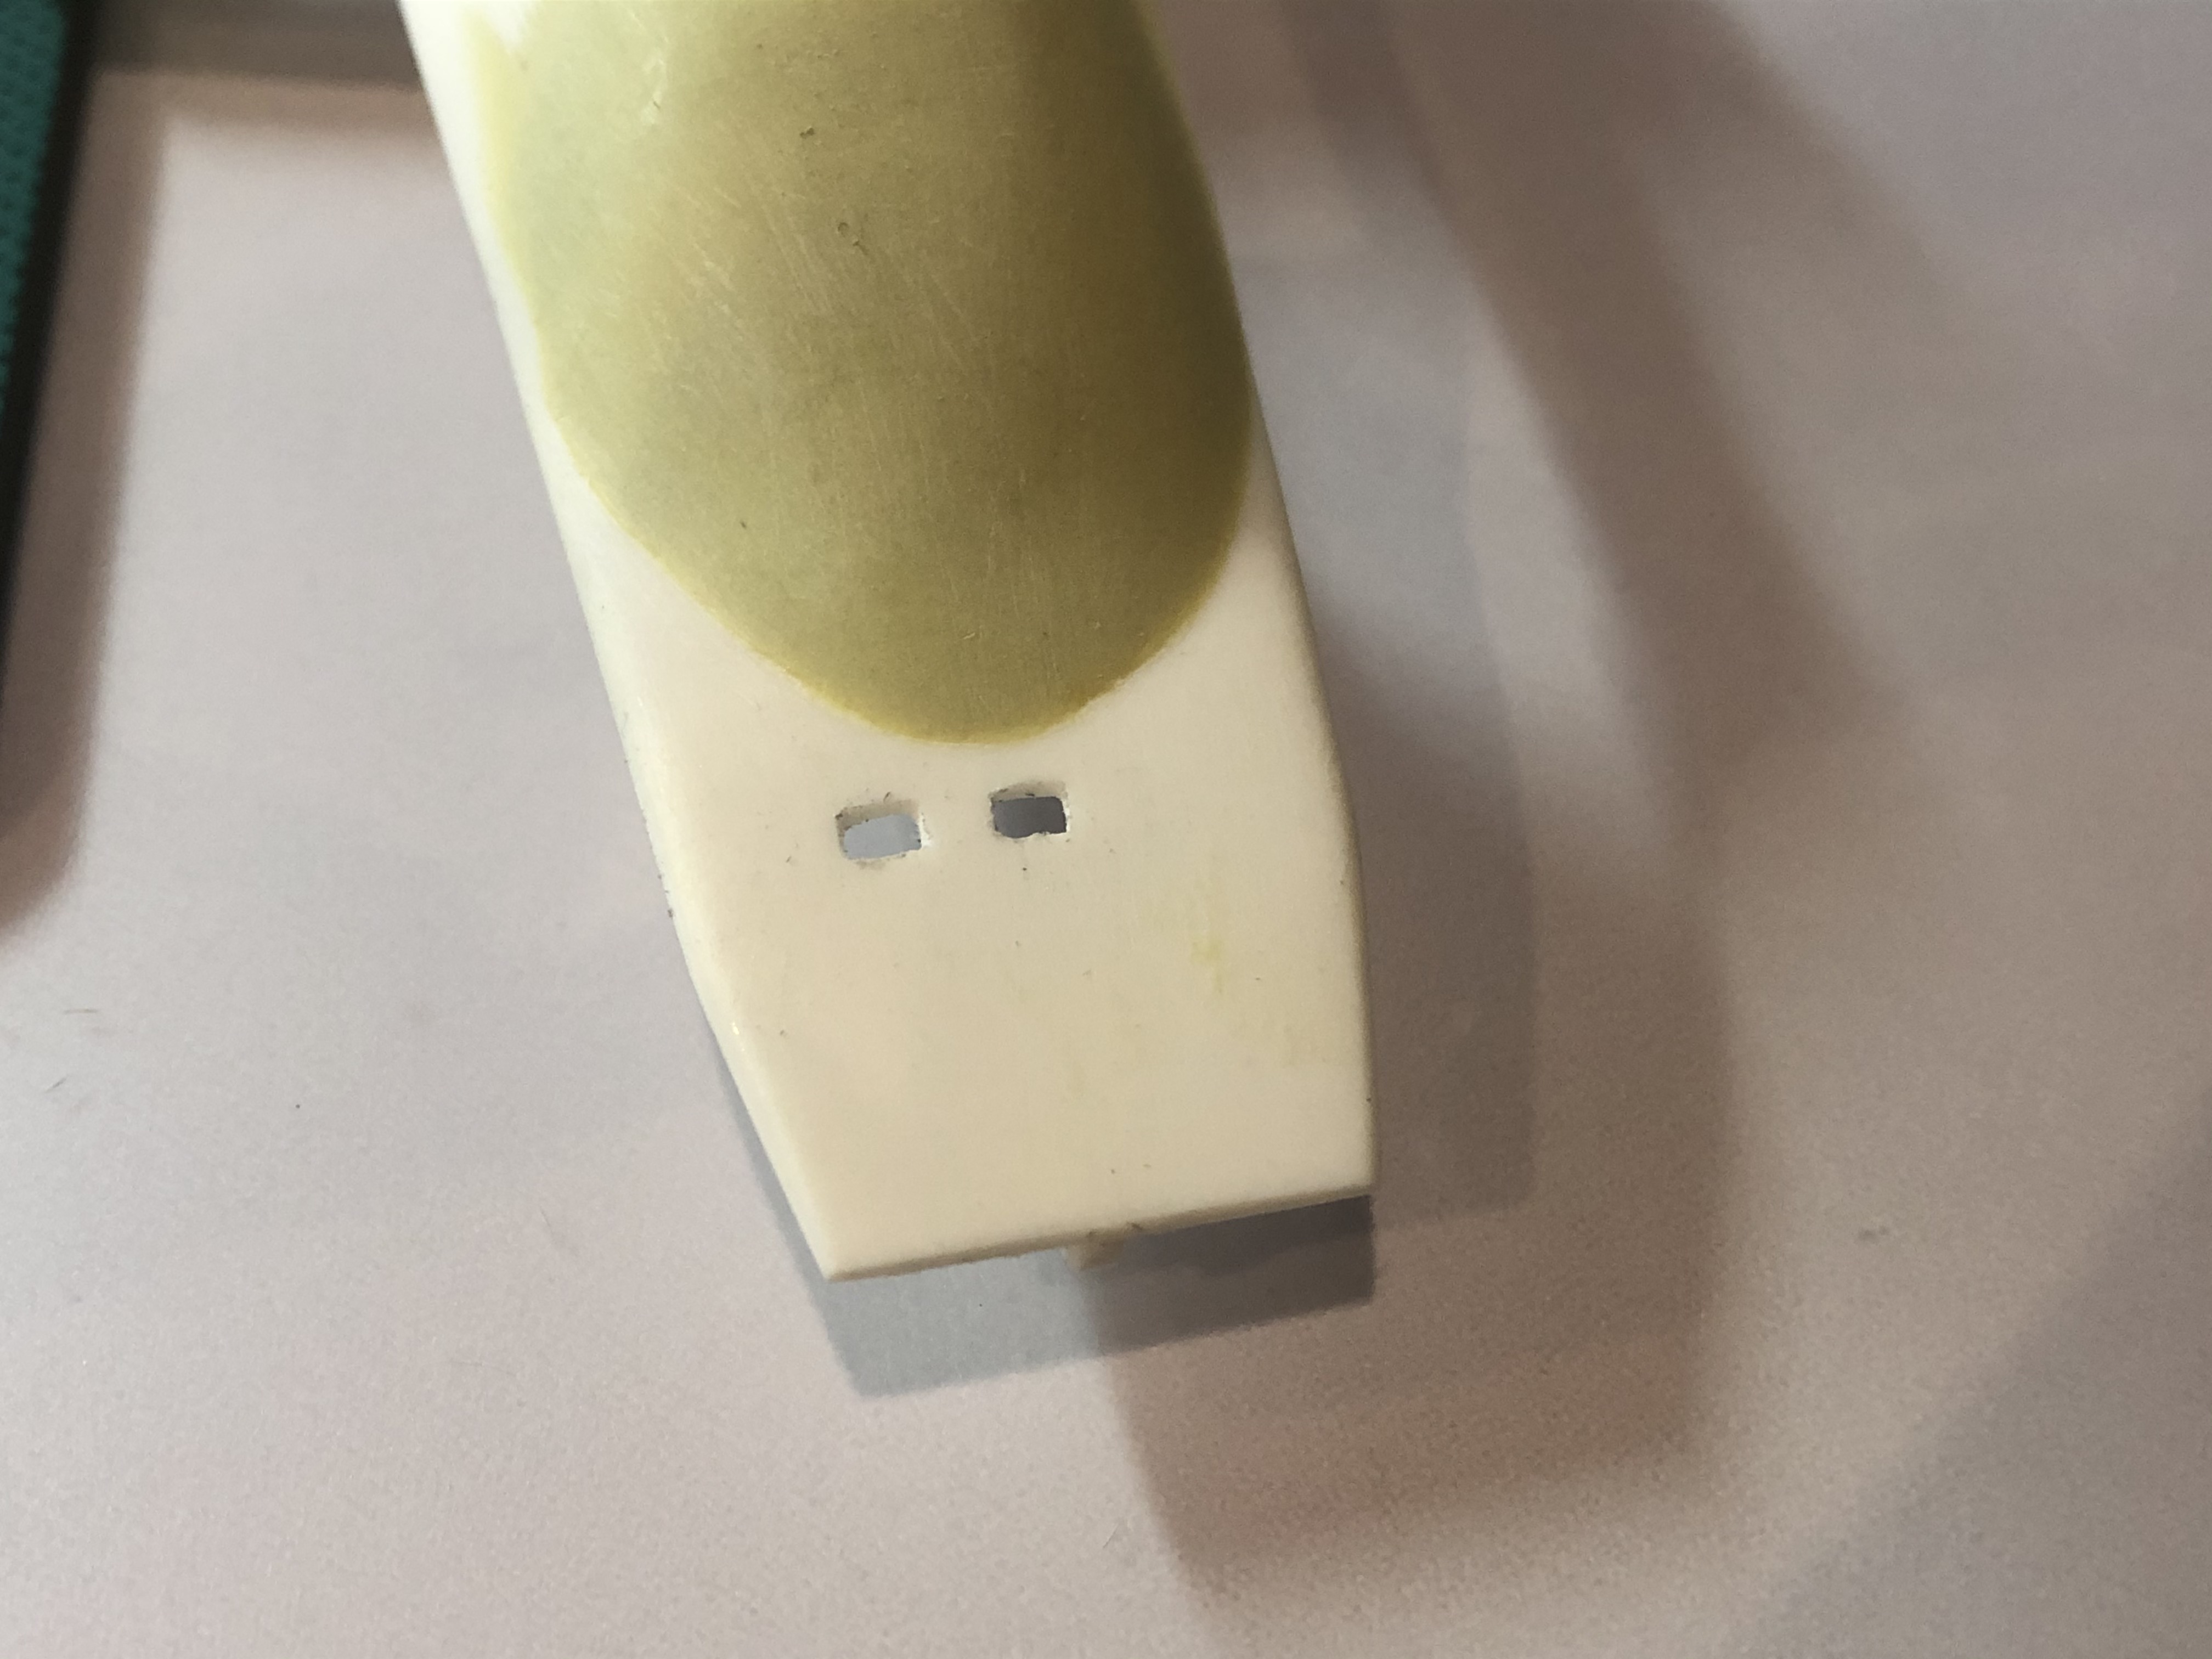
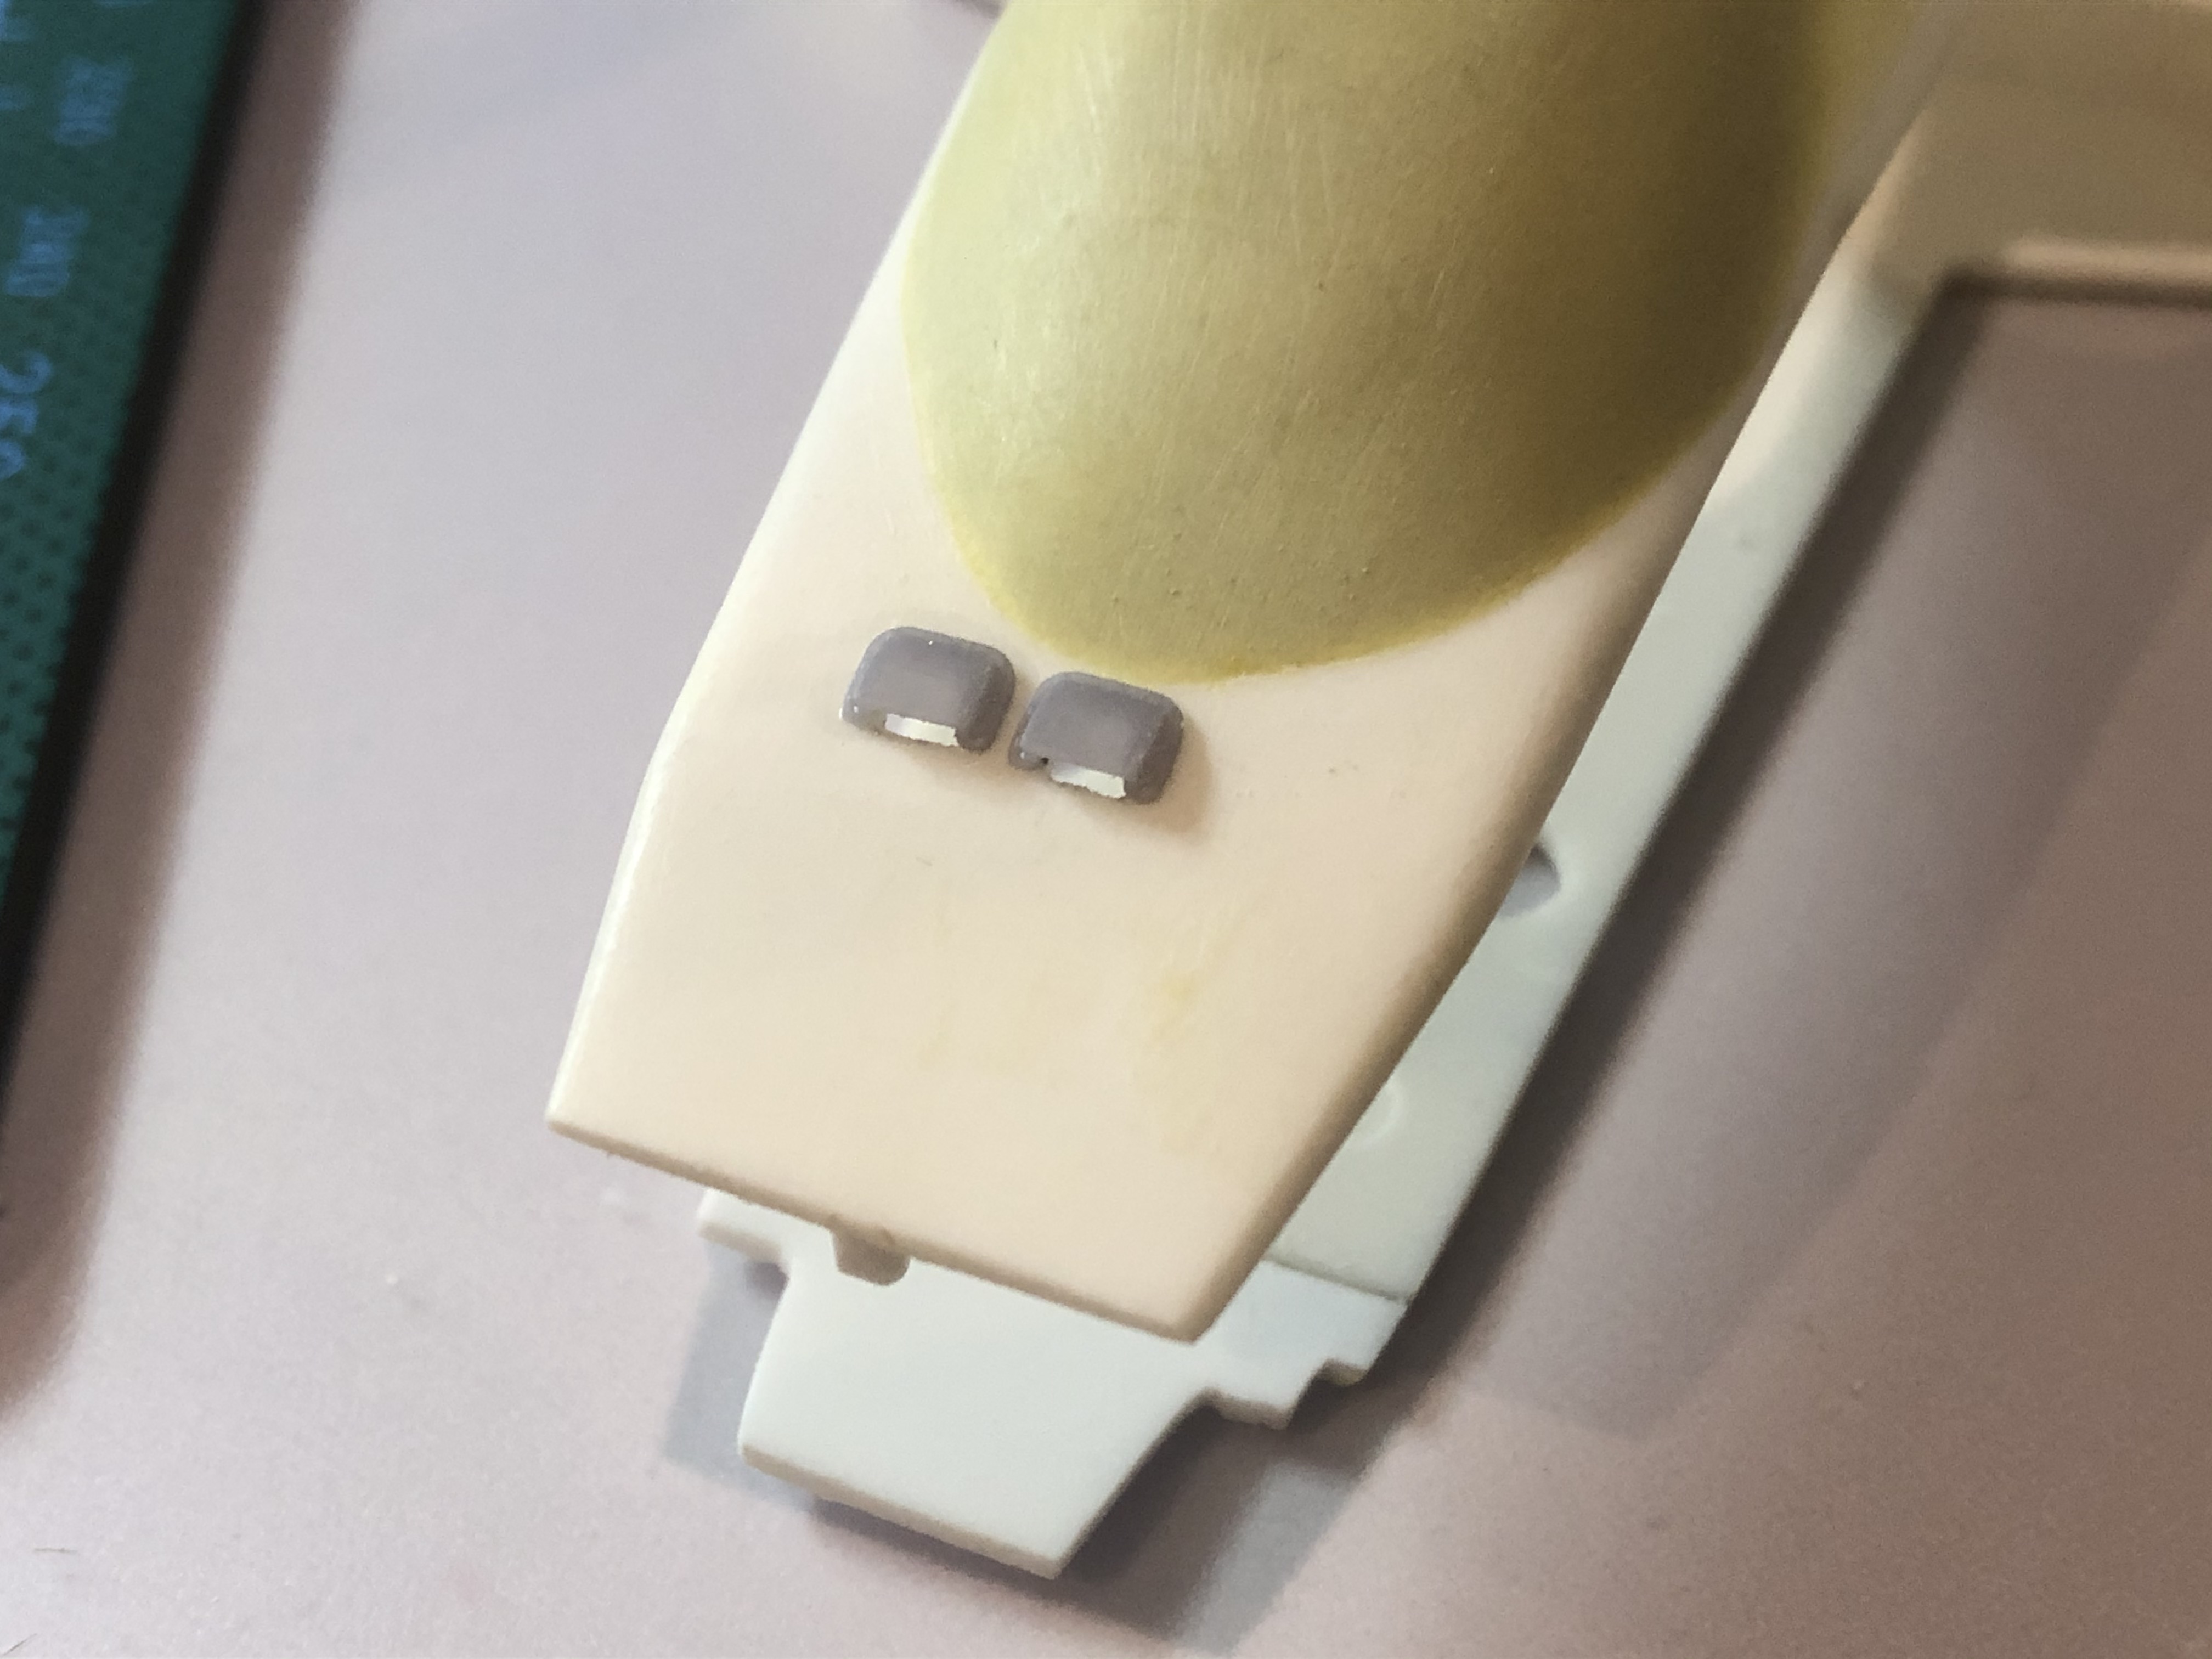
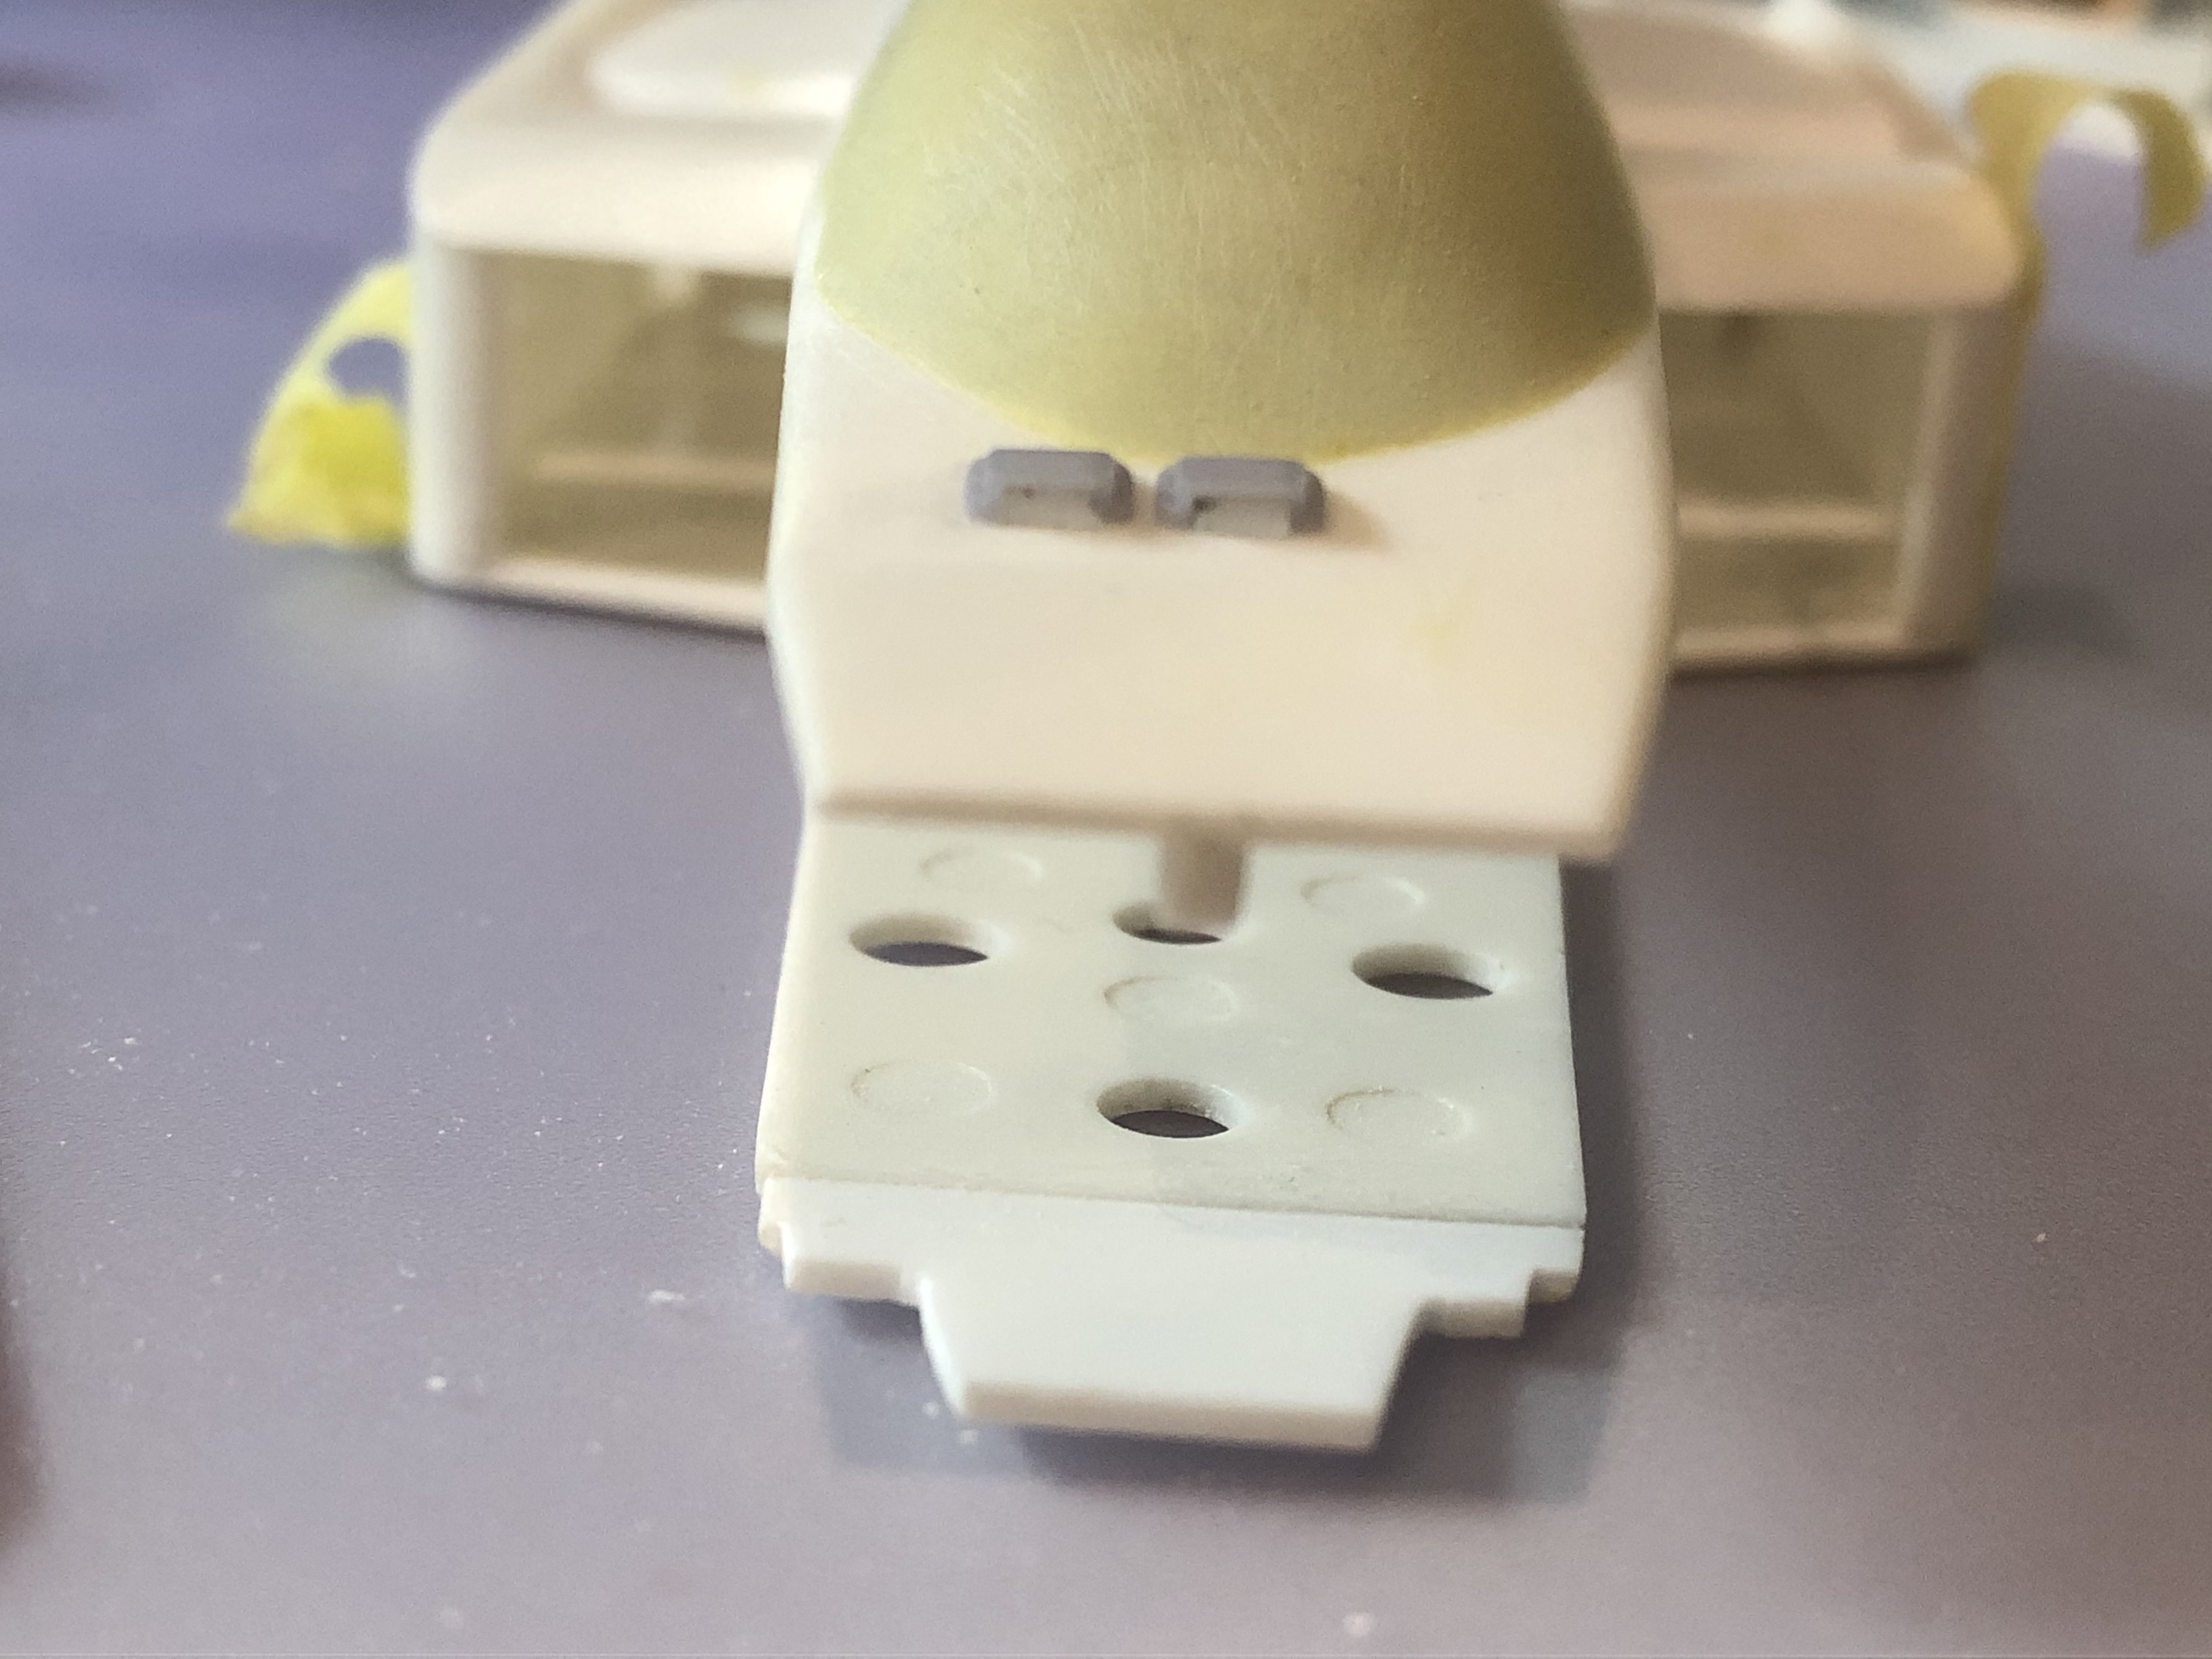
@ James: Can you look at the air inlets over the Naca ducts in the side pods, maybe you can provide the dimensions...
I thought you meant the cockpit ones. These, I’d say 2.7mm the taller side, and kinda 1mm the small one. 90deg angle, top rear. Length, some 5 or 6mm.
Ah, the ones you meant are those in front of the “saved” red child. 3.5mm rear, 2.5 front, and a length of 8.5mm. Can you believe I had not even noticed them?
For the engine one, 1.5mm rear, 0.6mm front, 3mm long.
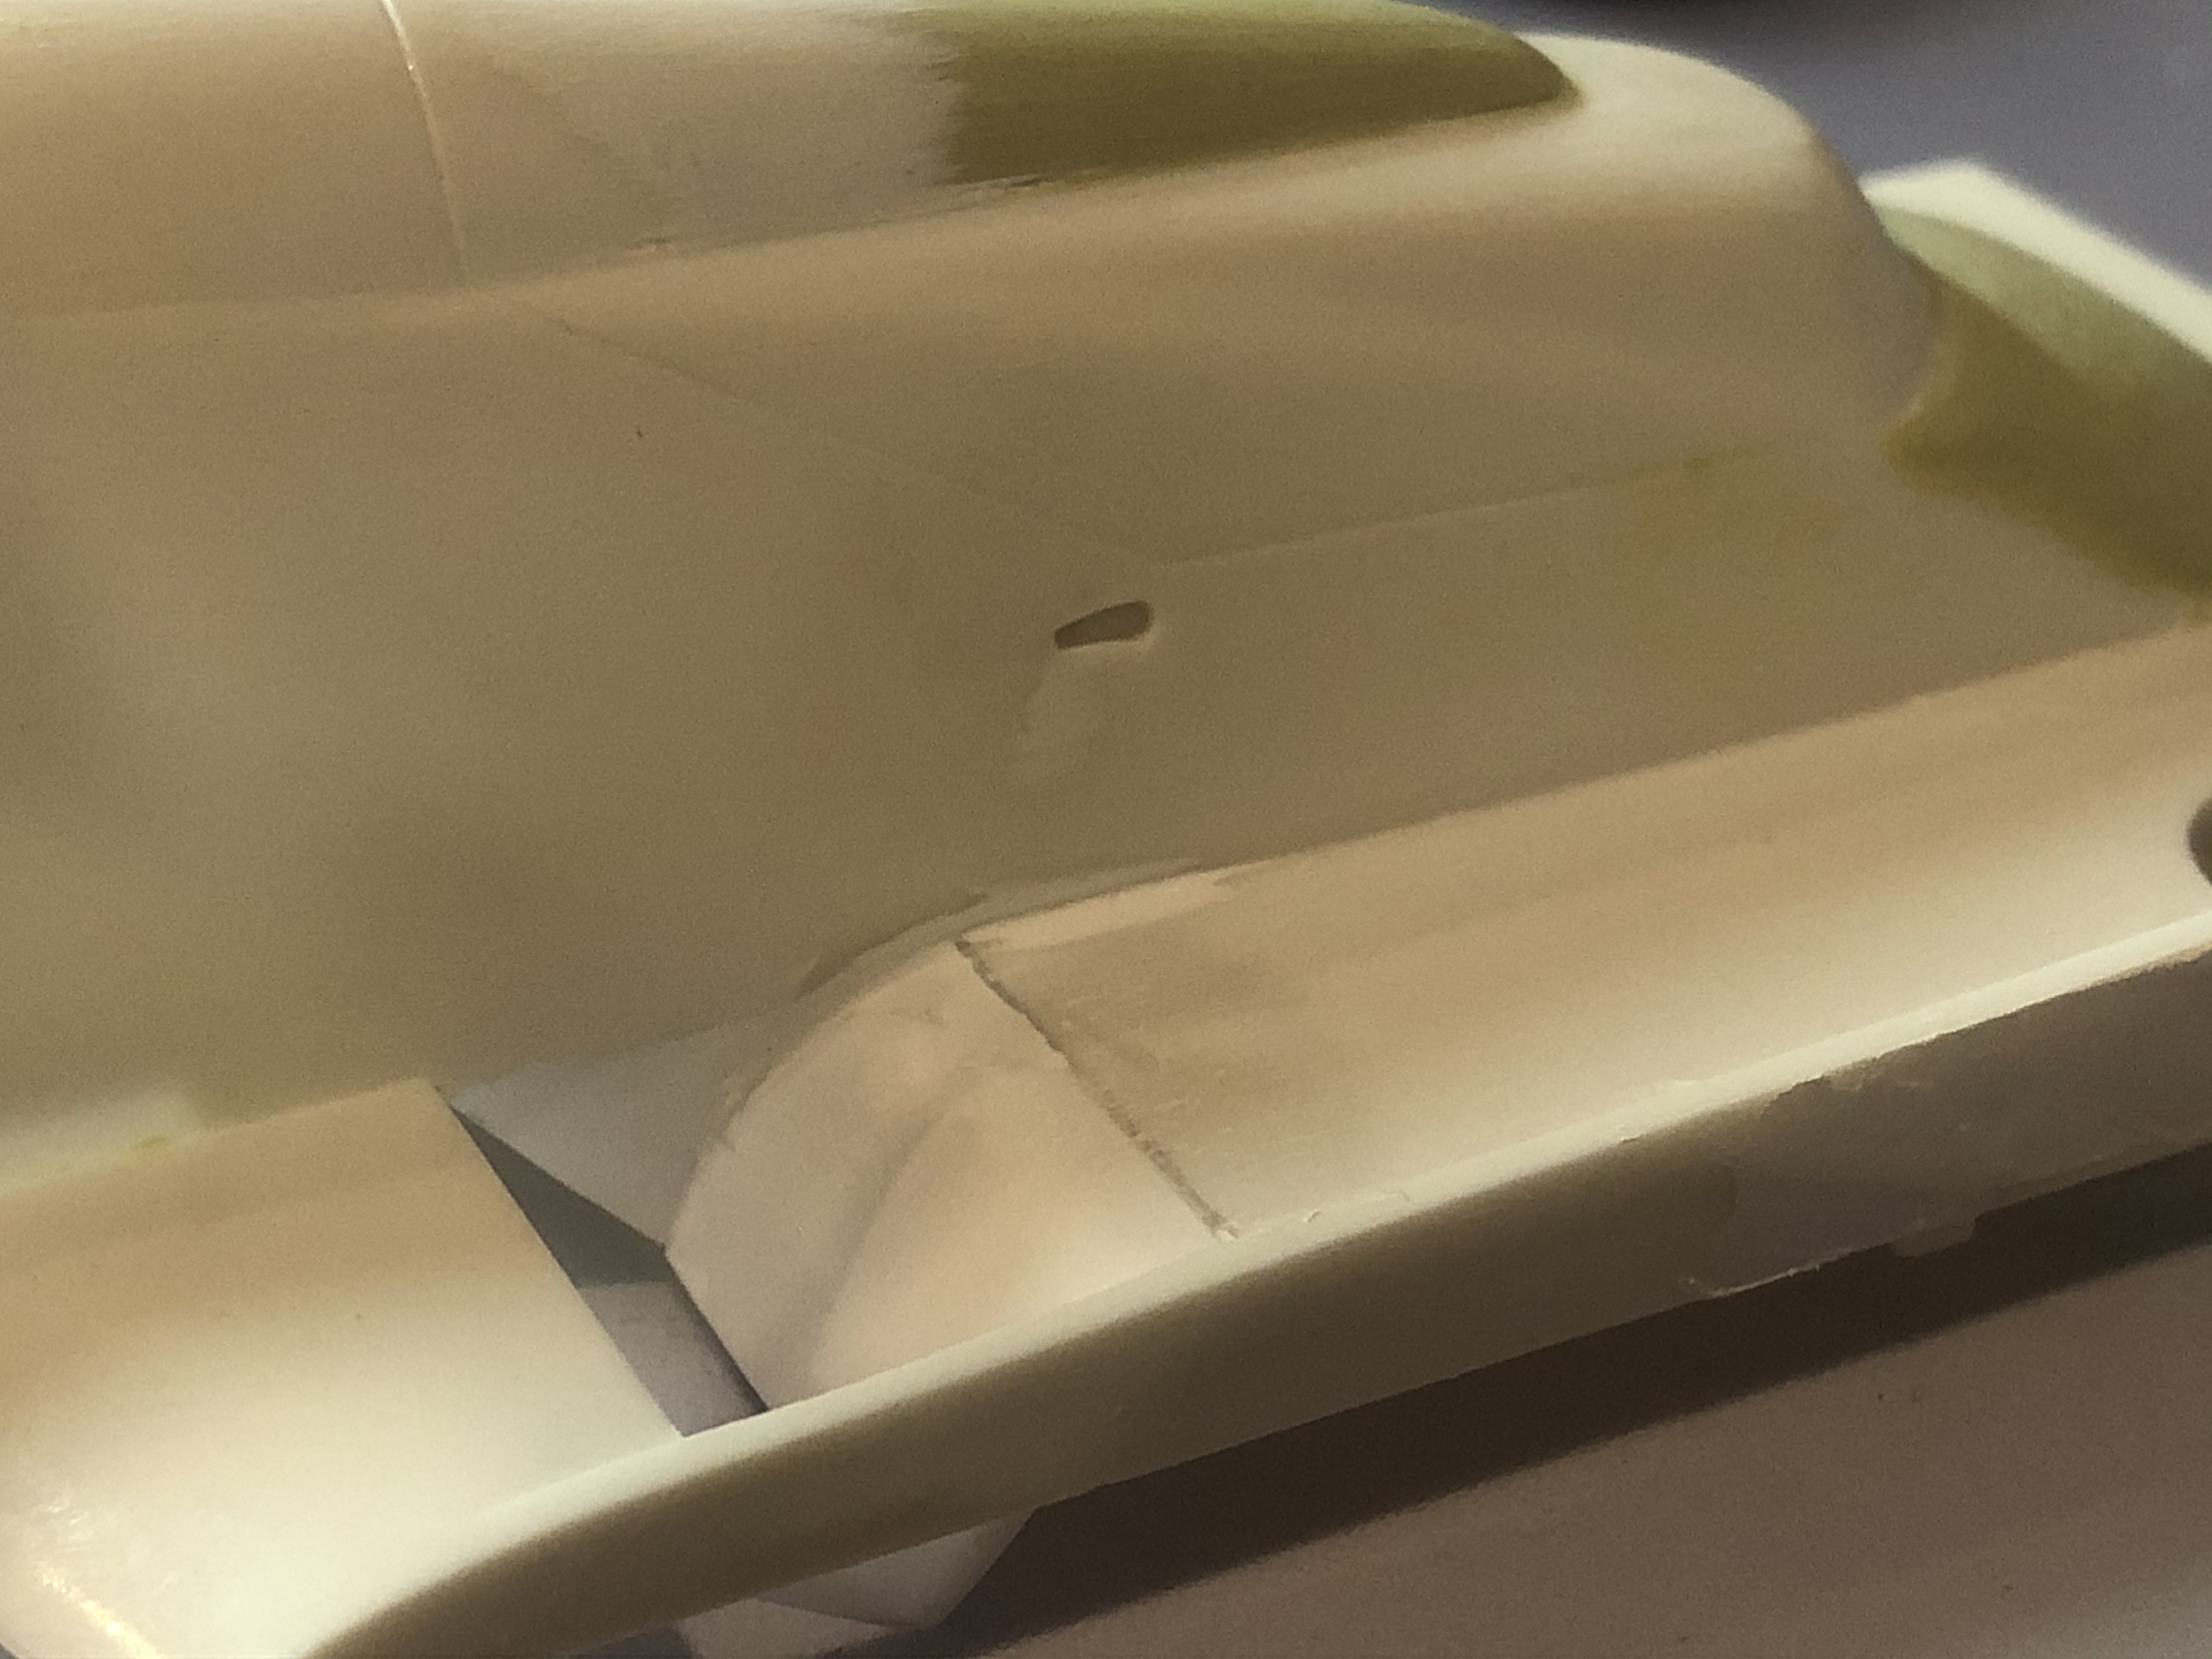
I am not sure what to do with engine cover: it's one of those "trying to make a silk purse" cases. It should start getting narrower when the sidpods have the undercut for wheels, but it keeps going straight. Layout should be similar to fw07.
I should "go to war", but I wanted to keep this simple!!
the idea was showing those wanting to build this kit that it was not that complicated!
I have a few more pics, sorry I can't upload right now...
Ed: BTW before i FORGET!!
there's tons of amazing pics here
https://marshallpruett.com/gallery-form ... llas-1984/
http://www.arcforums.com/forums/air/ind ... prix-1984/
-
steinietrabi
- Constructors Champion
- Posts: 1377
- Joined: Mon Mar 30, 2020 1:56 pm
- Your Name: Thomas
- Favorite F1 Team or Driver: Williams, Ferrari, McLaren... Michael Schumacher
- Location: Crottendorf / Germany
- Status: Offline
Re: WILLIAMS FW09 Dallas winner KAWAI+some more...
Not that much happened, but I still want to show you guys.
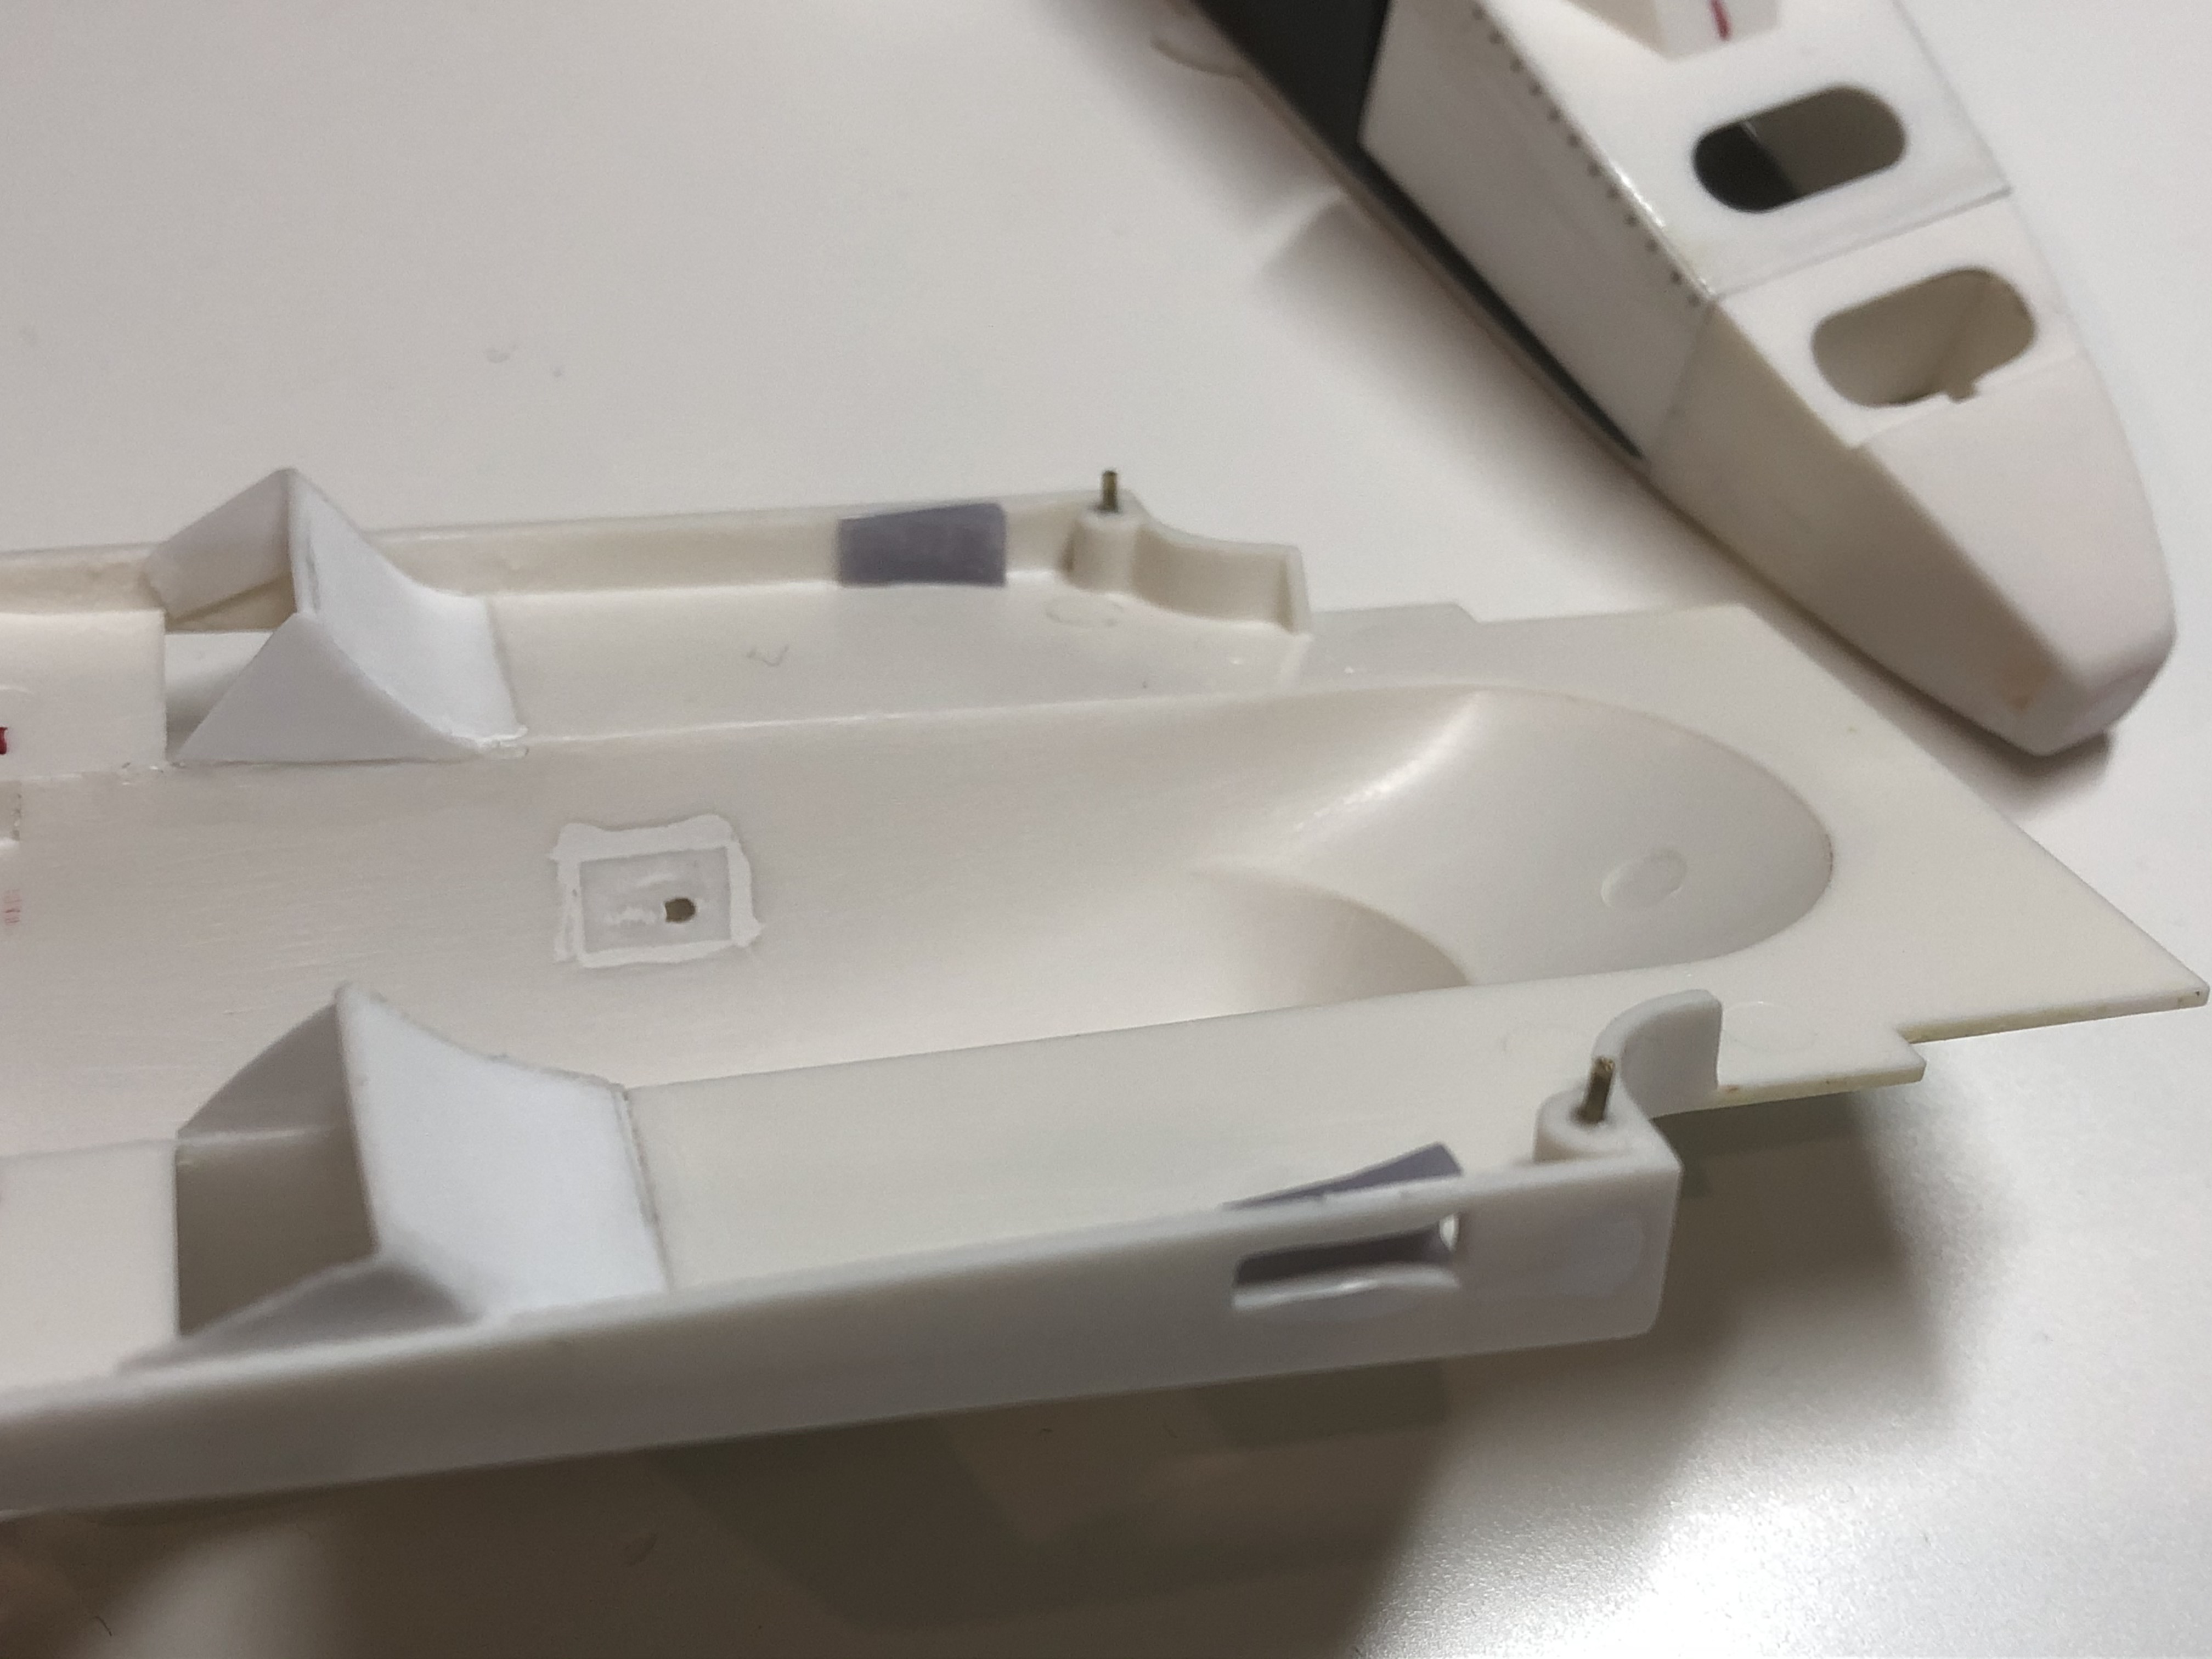
I've now finished the areas with the modeling clay with Milliput.
Then I filled and sanded almost everything again.
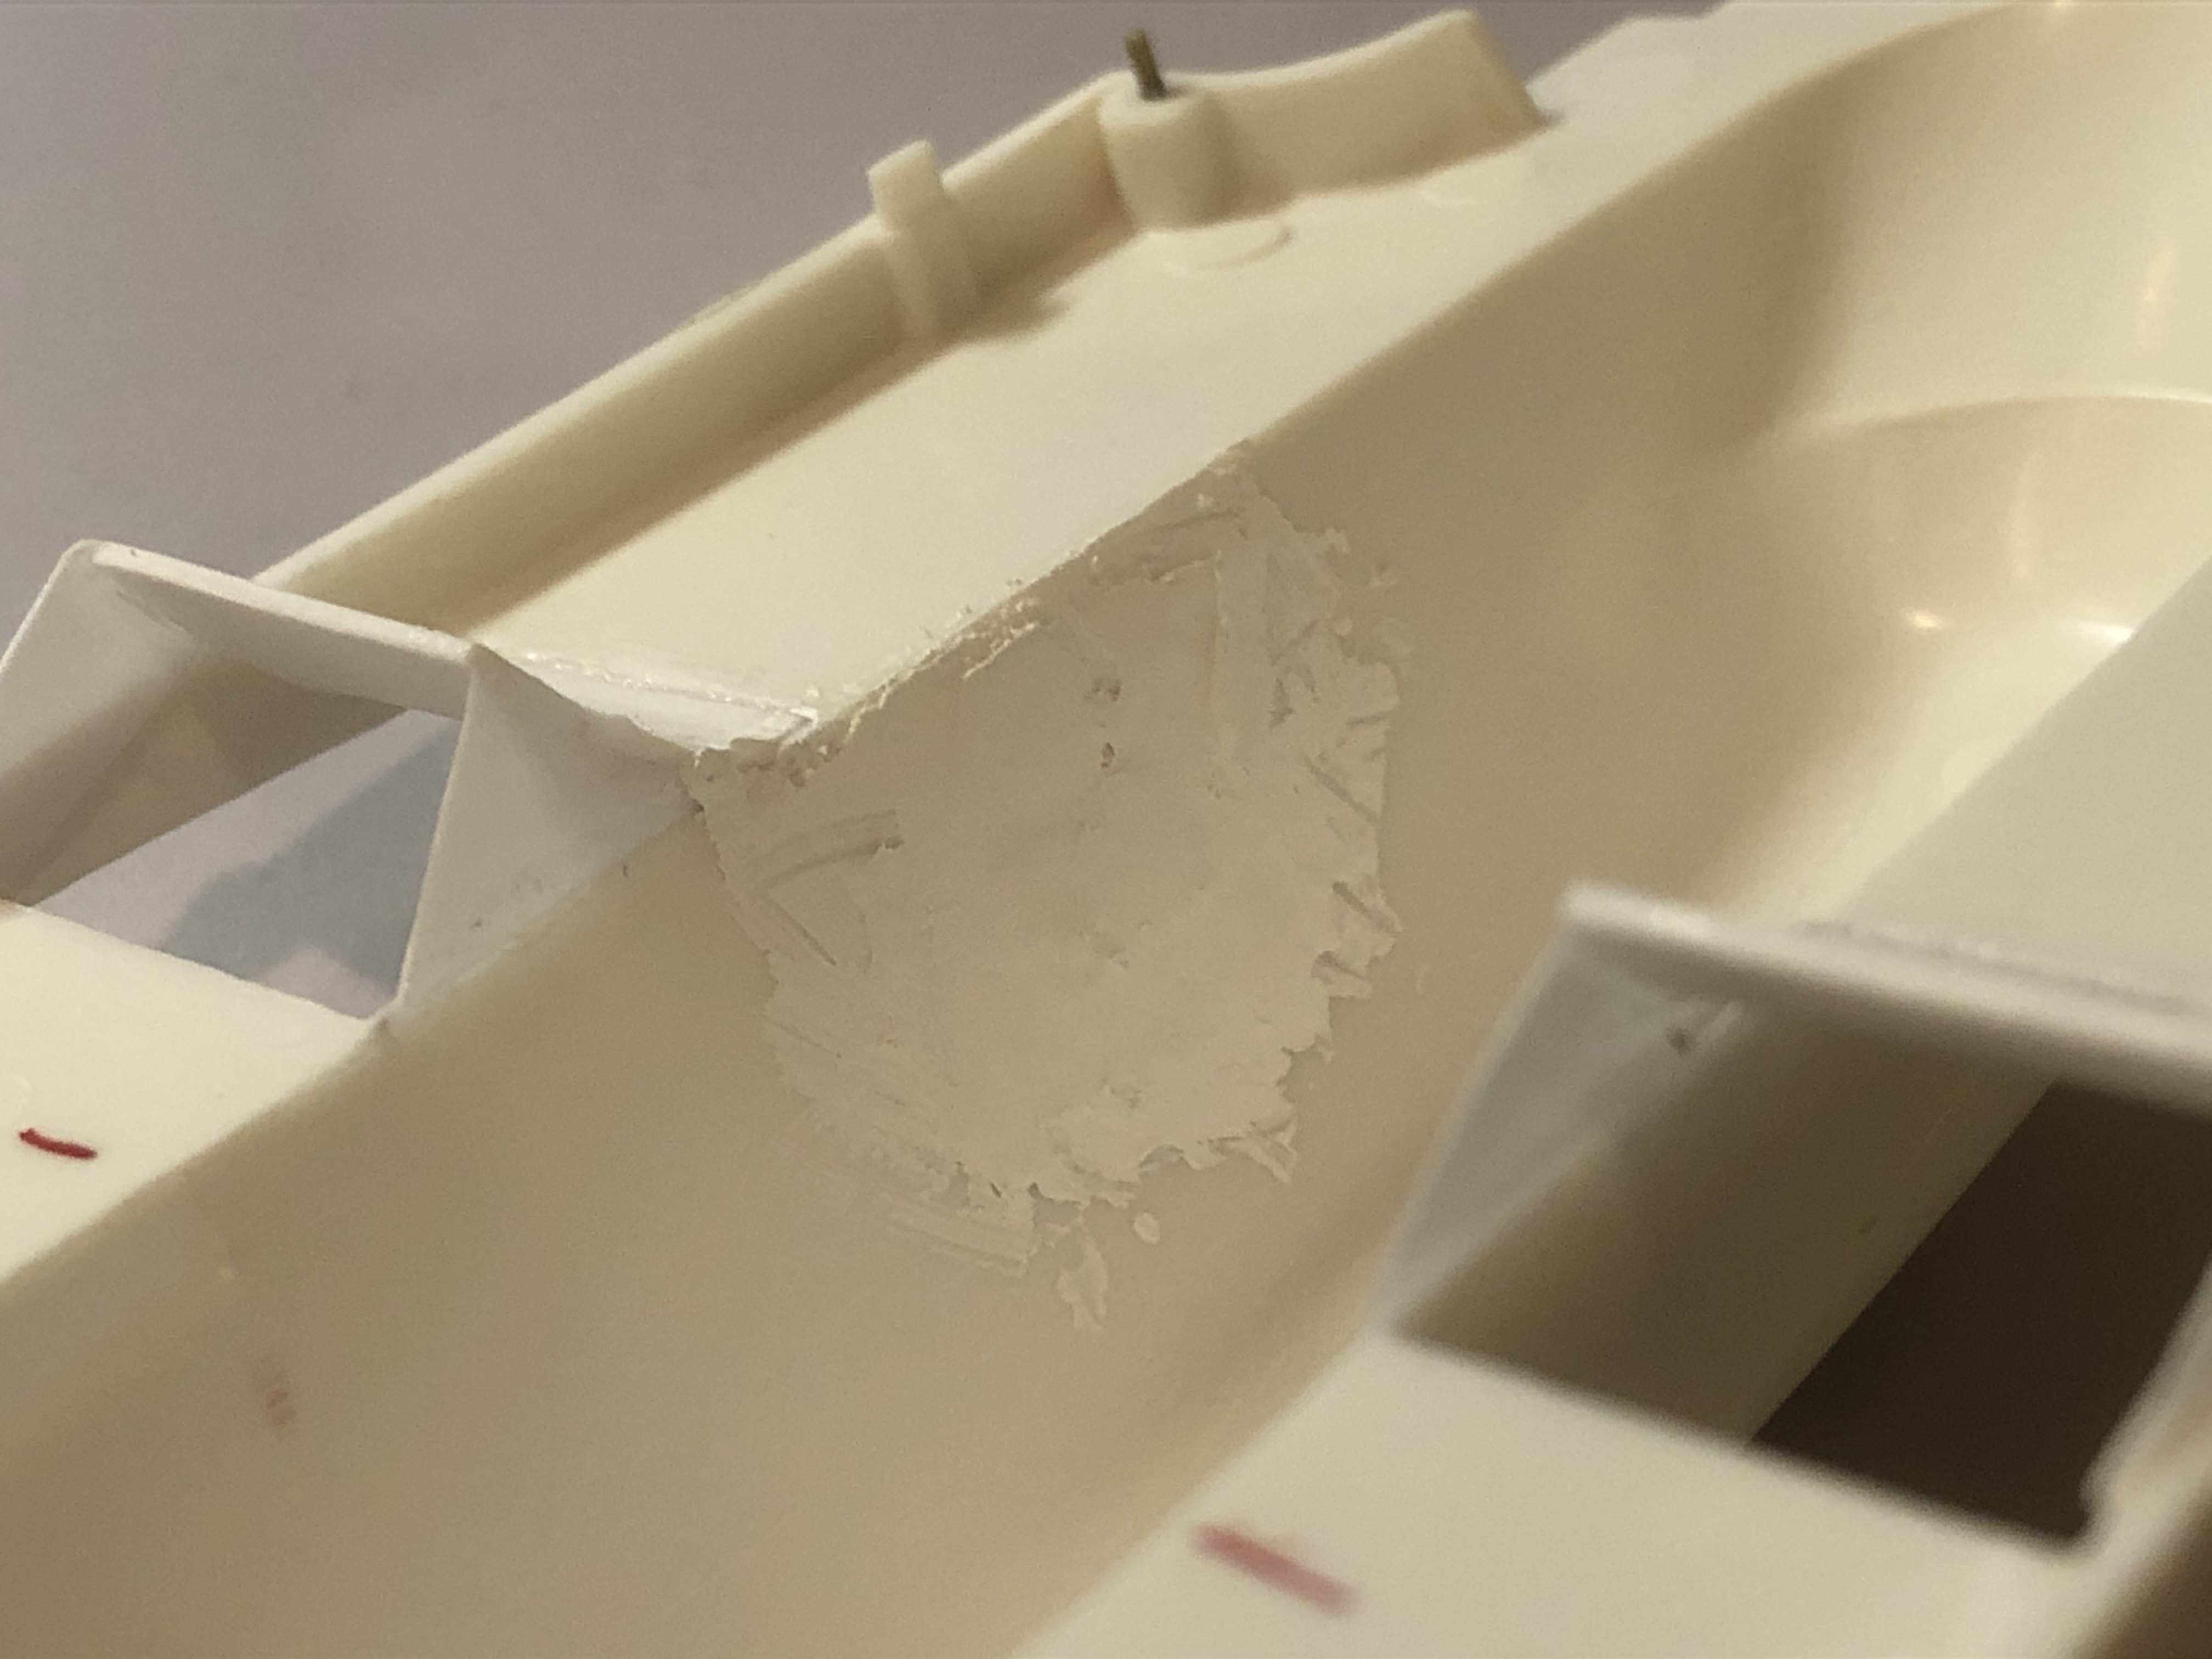
The opening on the right-hand side and the Naca-Duct opening on the left-hand side are new.
From the inside I closed the opening again with 0.1mm plate and filled it with a putty. When it is dry and sanded, I will drill out the back area again.
I prepared the ventilation slots on the side boxes, but first of all I filled the sink marks and sanded them once. The 2nd layer of putty has just been applied. I think when I have sanded these I will draw the openings in the correct dimension so that I can cut them out.
I've now finished the areas with the modeling clay with Milliput.
Then I filled and sanded almost everything again.
The opening on the right-hand side and the Naca-Duct opening on the left-hand side are new.
From the inside I closed the opening again with 0.1mm plate and filled it with a putty. When it is dry and sanded, I will drill out the back area again.
I prepared the ventilation slots on the side boxes, but first of all I filled the sink marks and sanded them once. The 2nd layer of putty has just been applied. I think when I have sanded these I will draw the openings in the correct dimension so that I can cut them out.
Last edited by steinietrabi on Wed Jan 06, 2021 6:04 am, edited 1 time in total.
Greetings Thomas
-
 RE60B
RE60B
- FOTA Vice Chairman

- Posts: 1801
- Joined: Thu Jan 24, 2013 1:35 pm
- Your Name: Cédric
- Favorite F1 Team or Driver: RENAULT
- Location: ANTIBES
- Status: Offline
Re: WILLIAMS FW09 Dallas winner KAWAI+some more...
I remember when i work with my friend Gilles when we construct the 2 JS29 A lfa 1/12
Come on guy's!
Come on guy's!
-
steinietrabi
- Constructors Champion
- Posts: 1377
- Joined: Mon Mar 30, 2020 1:56 pm
- Your Name: Thomas
- Favorite F1 Team or Driver: Williams, Ferrari, McLaren... Michael Schumacher
- Location: Crottendorf / Germany
- Status: Offline
Re: WILLIAMS FW09 Dallas winner KAWAI+some more...
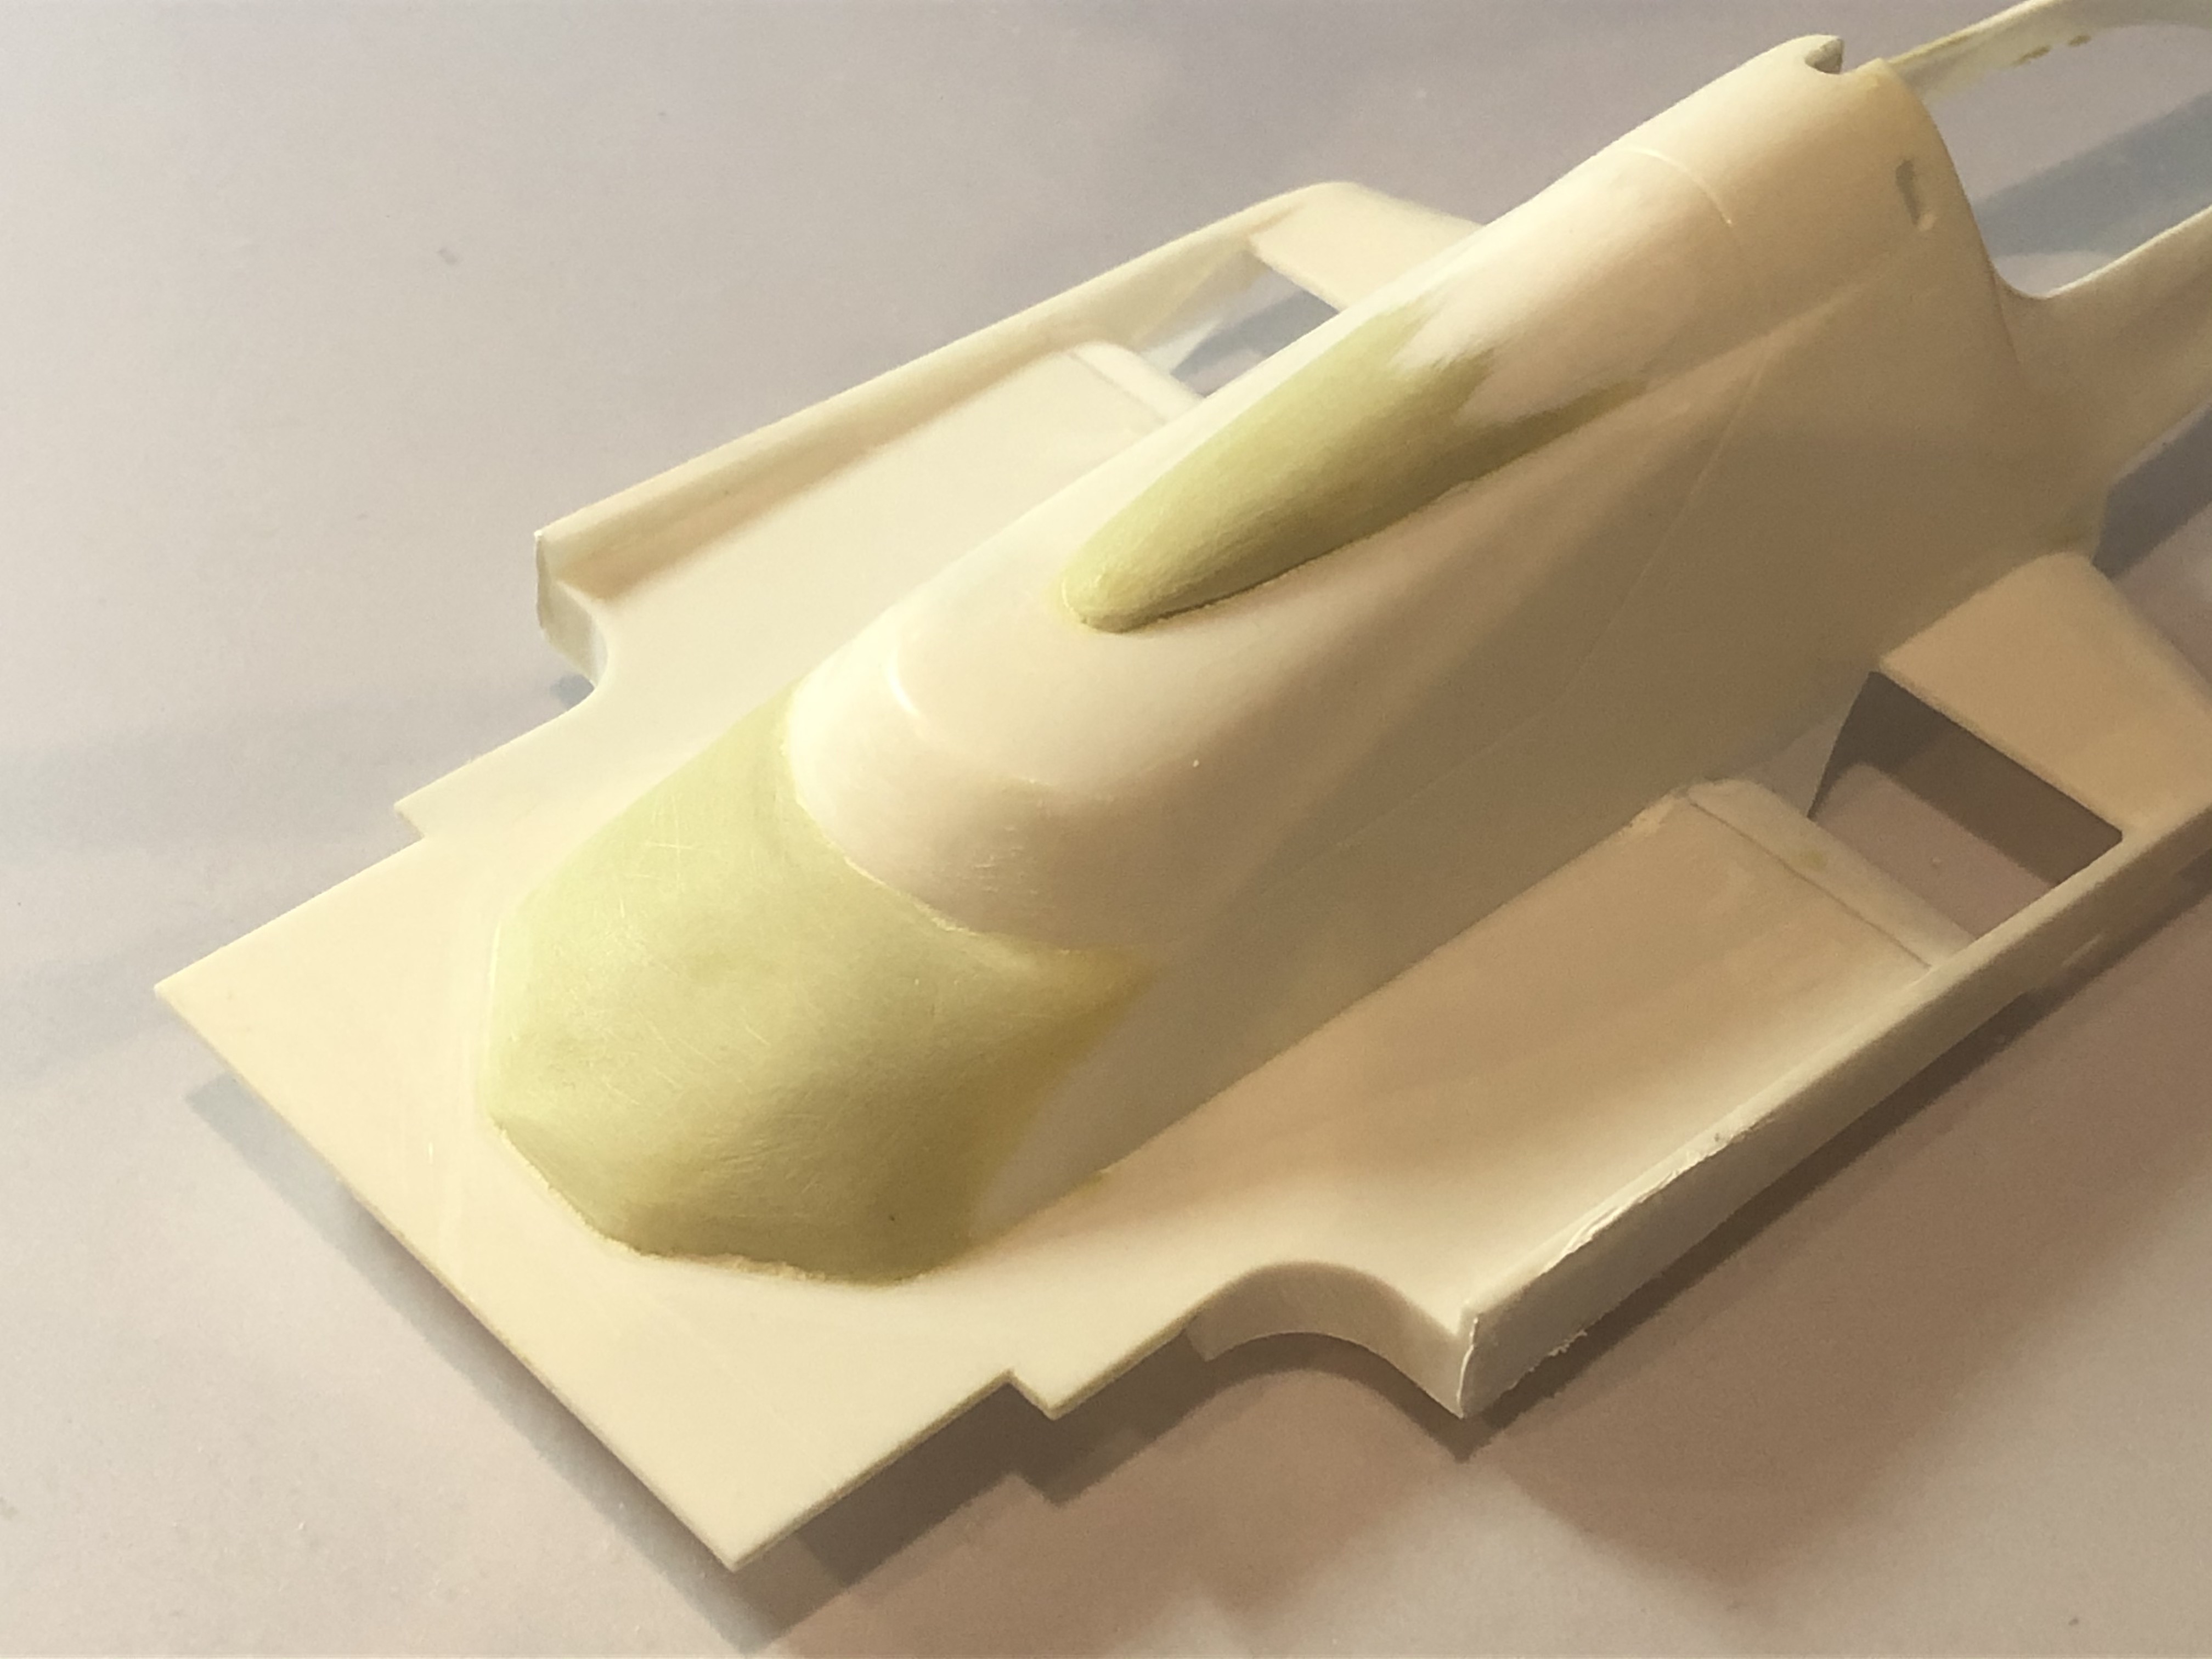
I decided to do a few more things yesterday ... 
The upper air inlets in the side pods, the air inlets on the nose and I started to set the rivets in the nose area.
The upper air inlets in the side pods, the air inlets on the nose and I started to set the rivets in the nose area.
Last edited by steinietrabi on Wed Jan 06, 2021 6:04 am, edited 1 time in total.
Greetings Thomas
Re: WILLIAMS FW09 Dallas winner KAWAI+some more...
Top notch work!!
-
steinietrabi
- Constructors Champion
- Posts: 1377
- Joined: Mon Mar 30, 2020 1:56 pm
- Your Name: Thomas
- Favorite F1 Team or Driver: Williams, Ferrari, McLaren... Michael Schumacher
- Location: Crottendorf / Germany
- Status: Offline
Re: WILLIAMS FW09 Dallas winner KAWAI+some more...
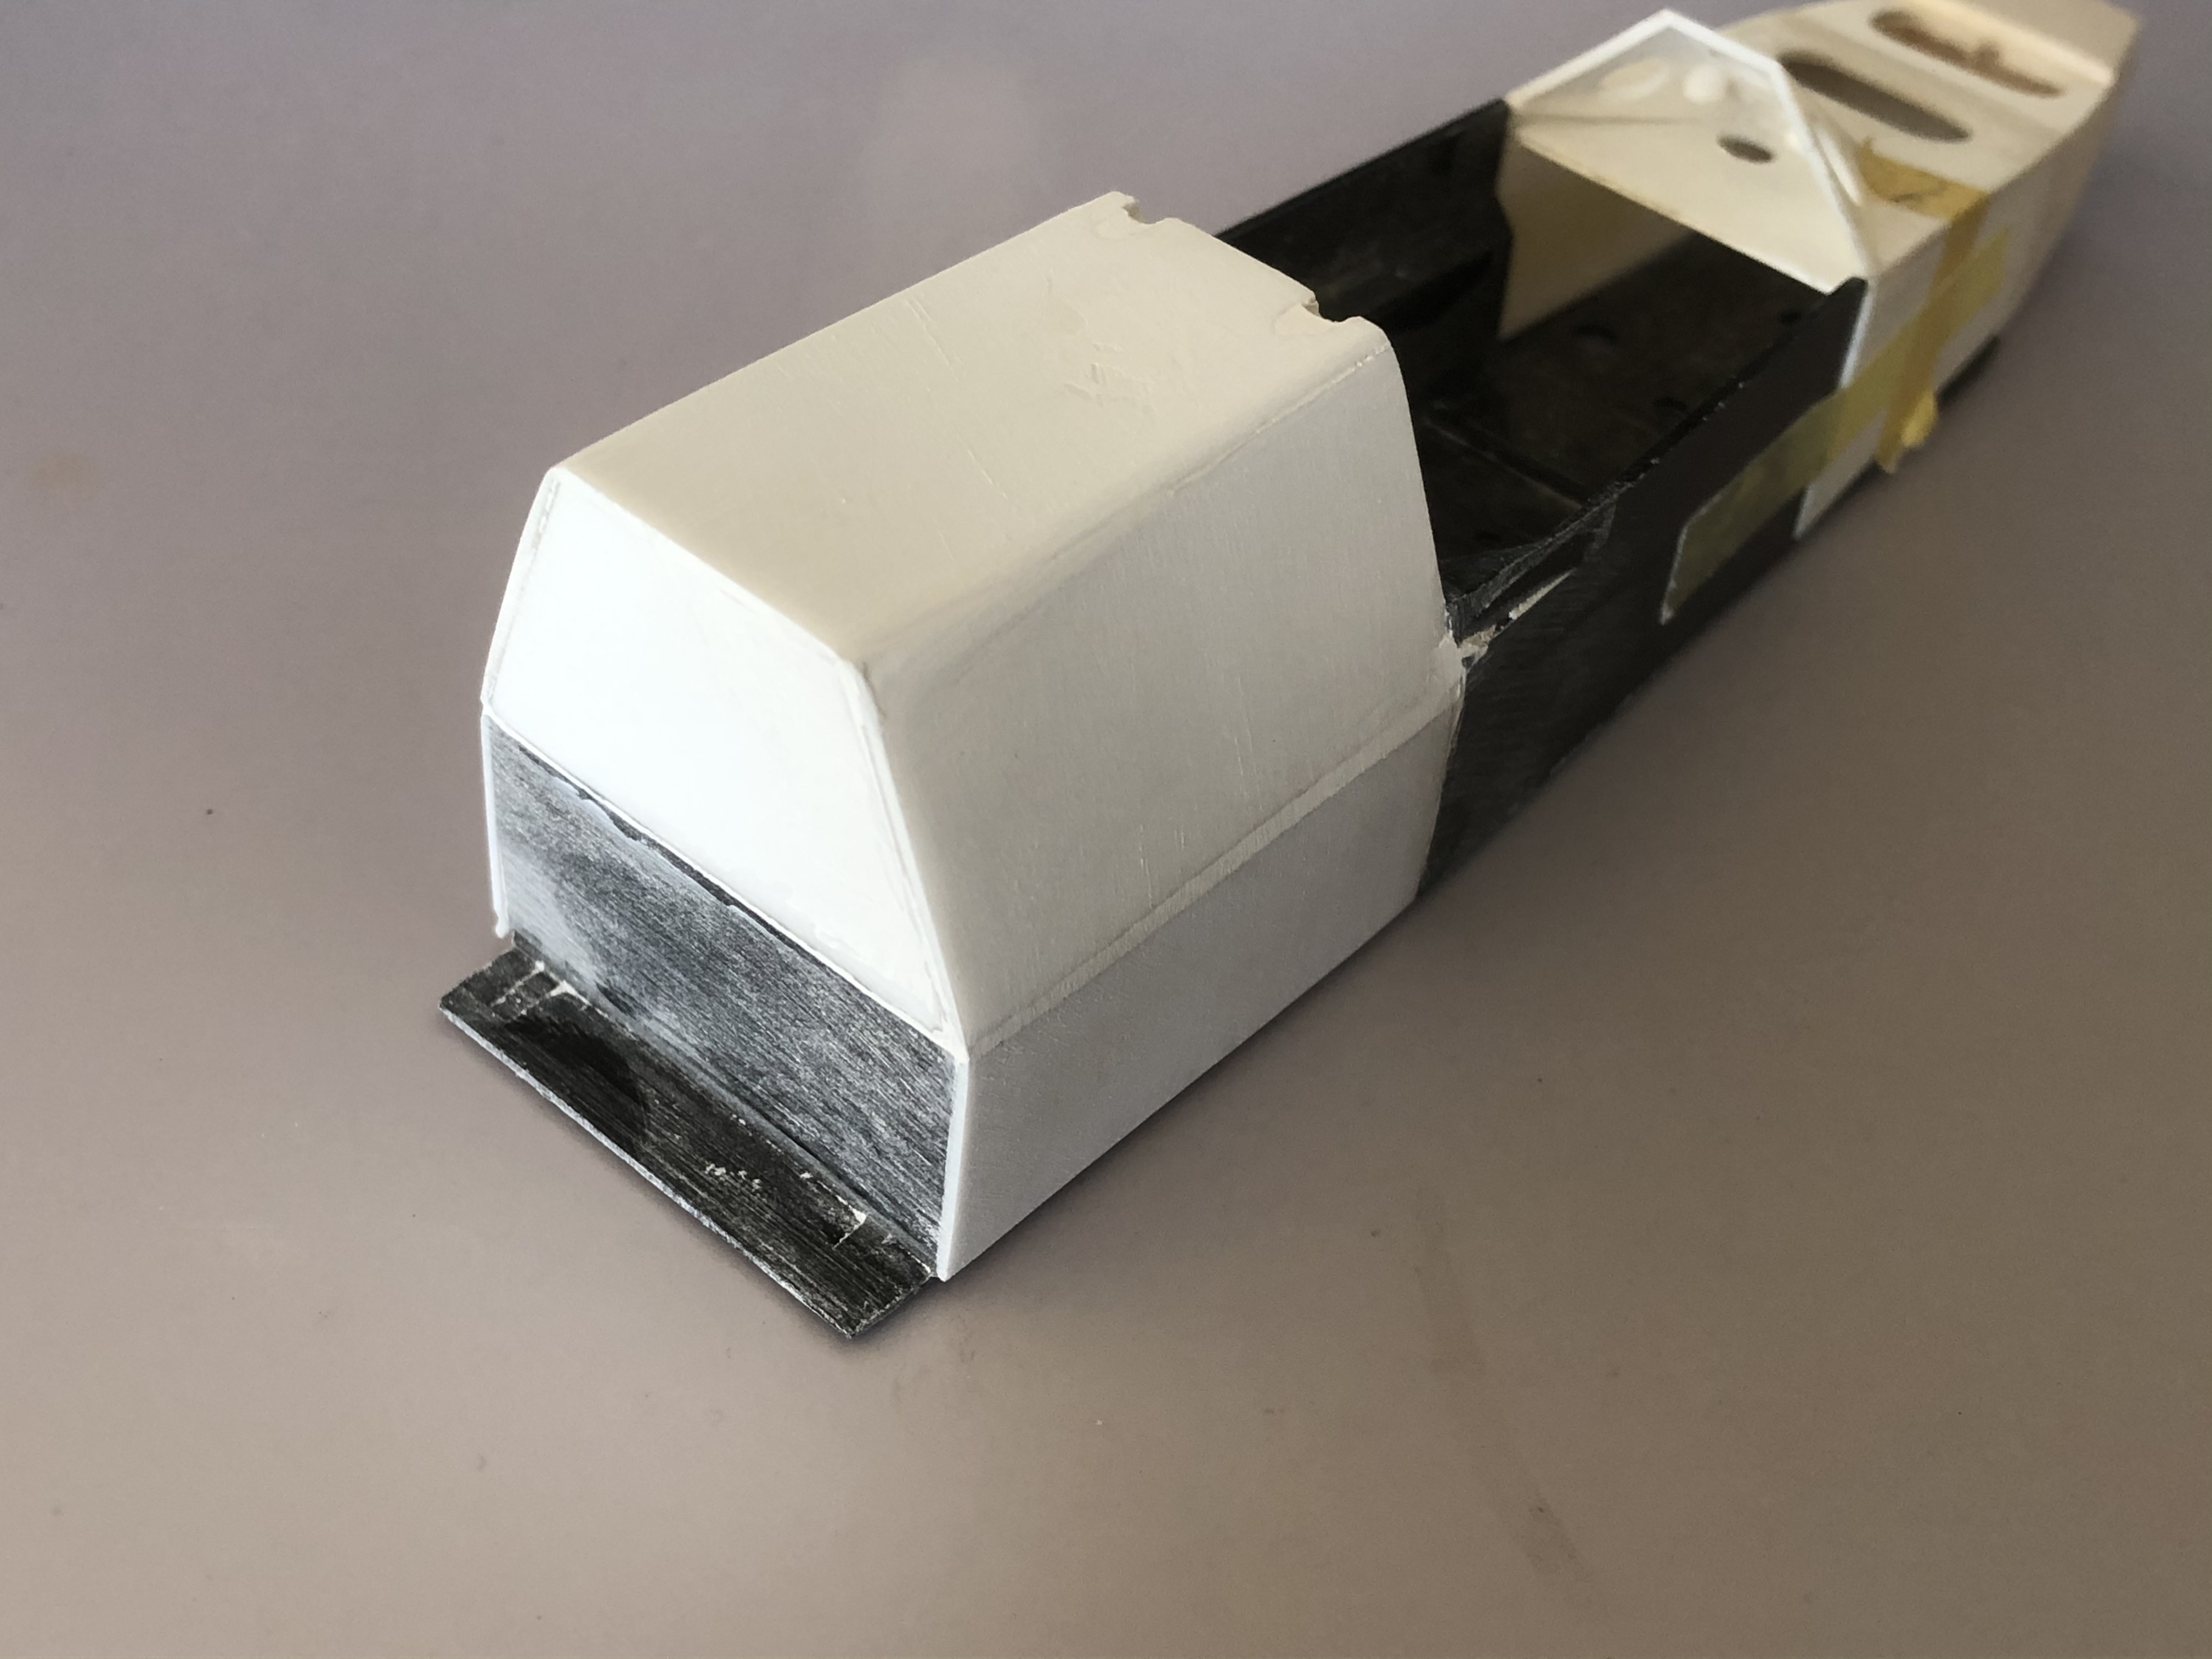
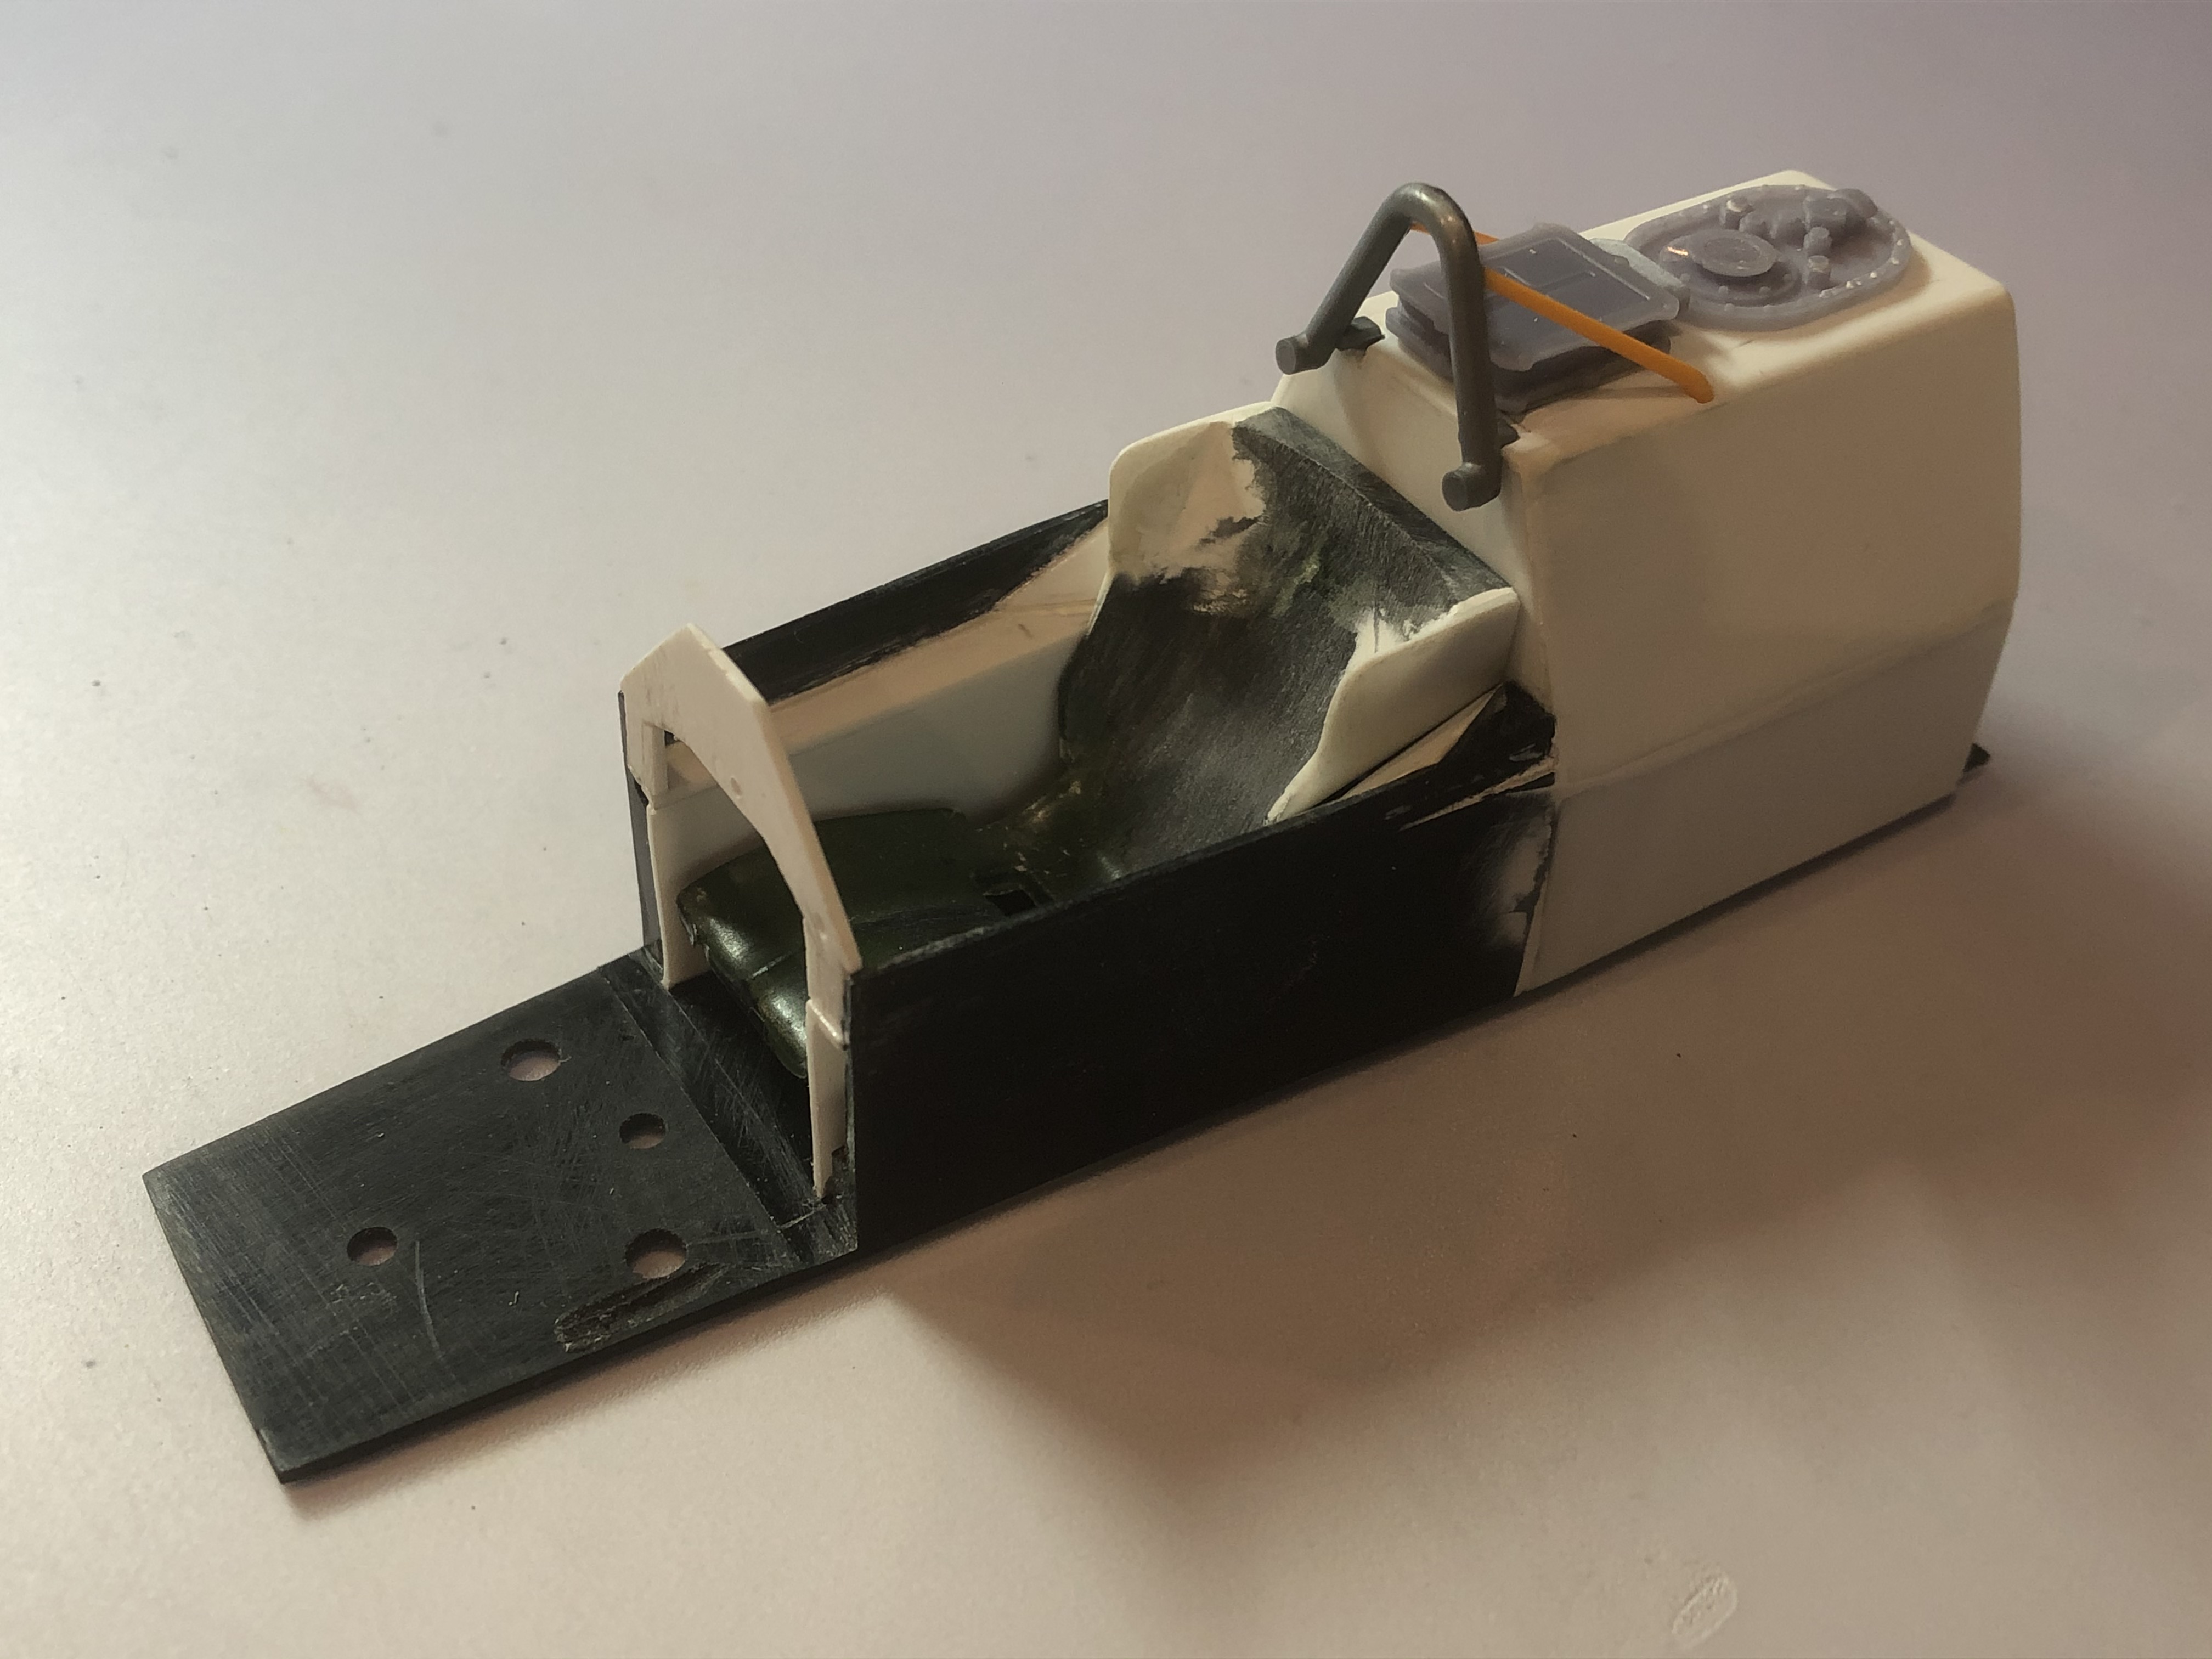
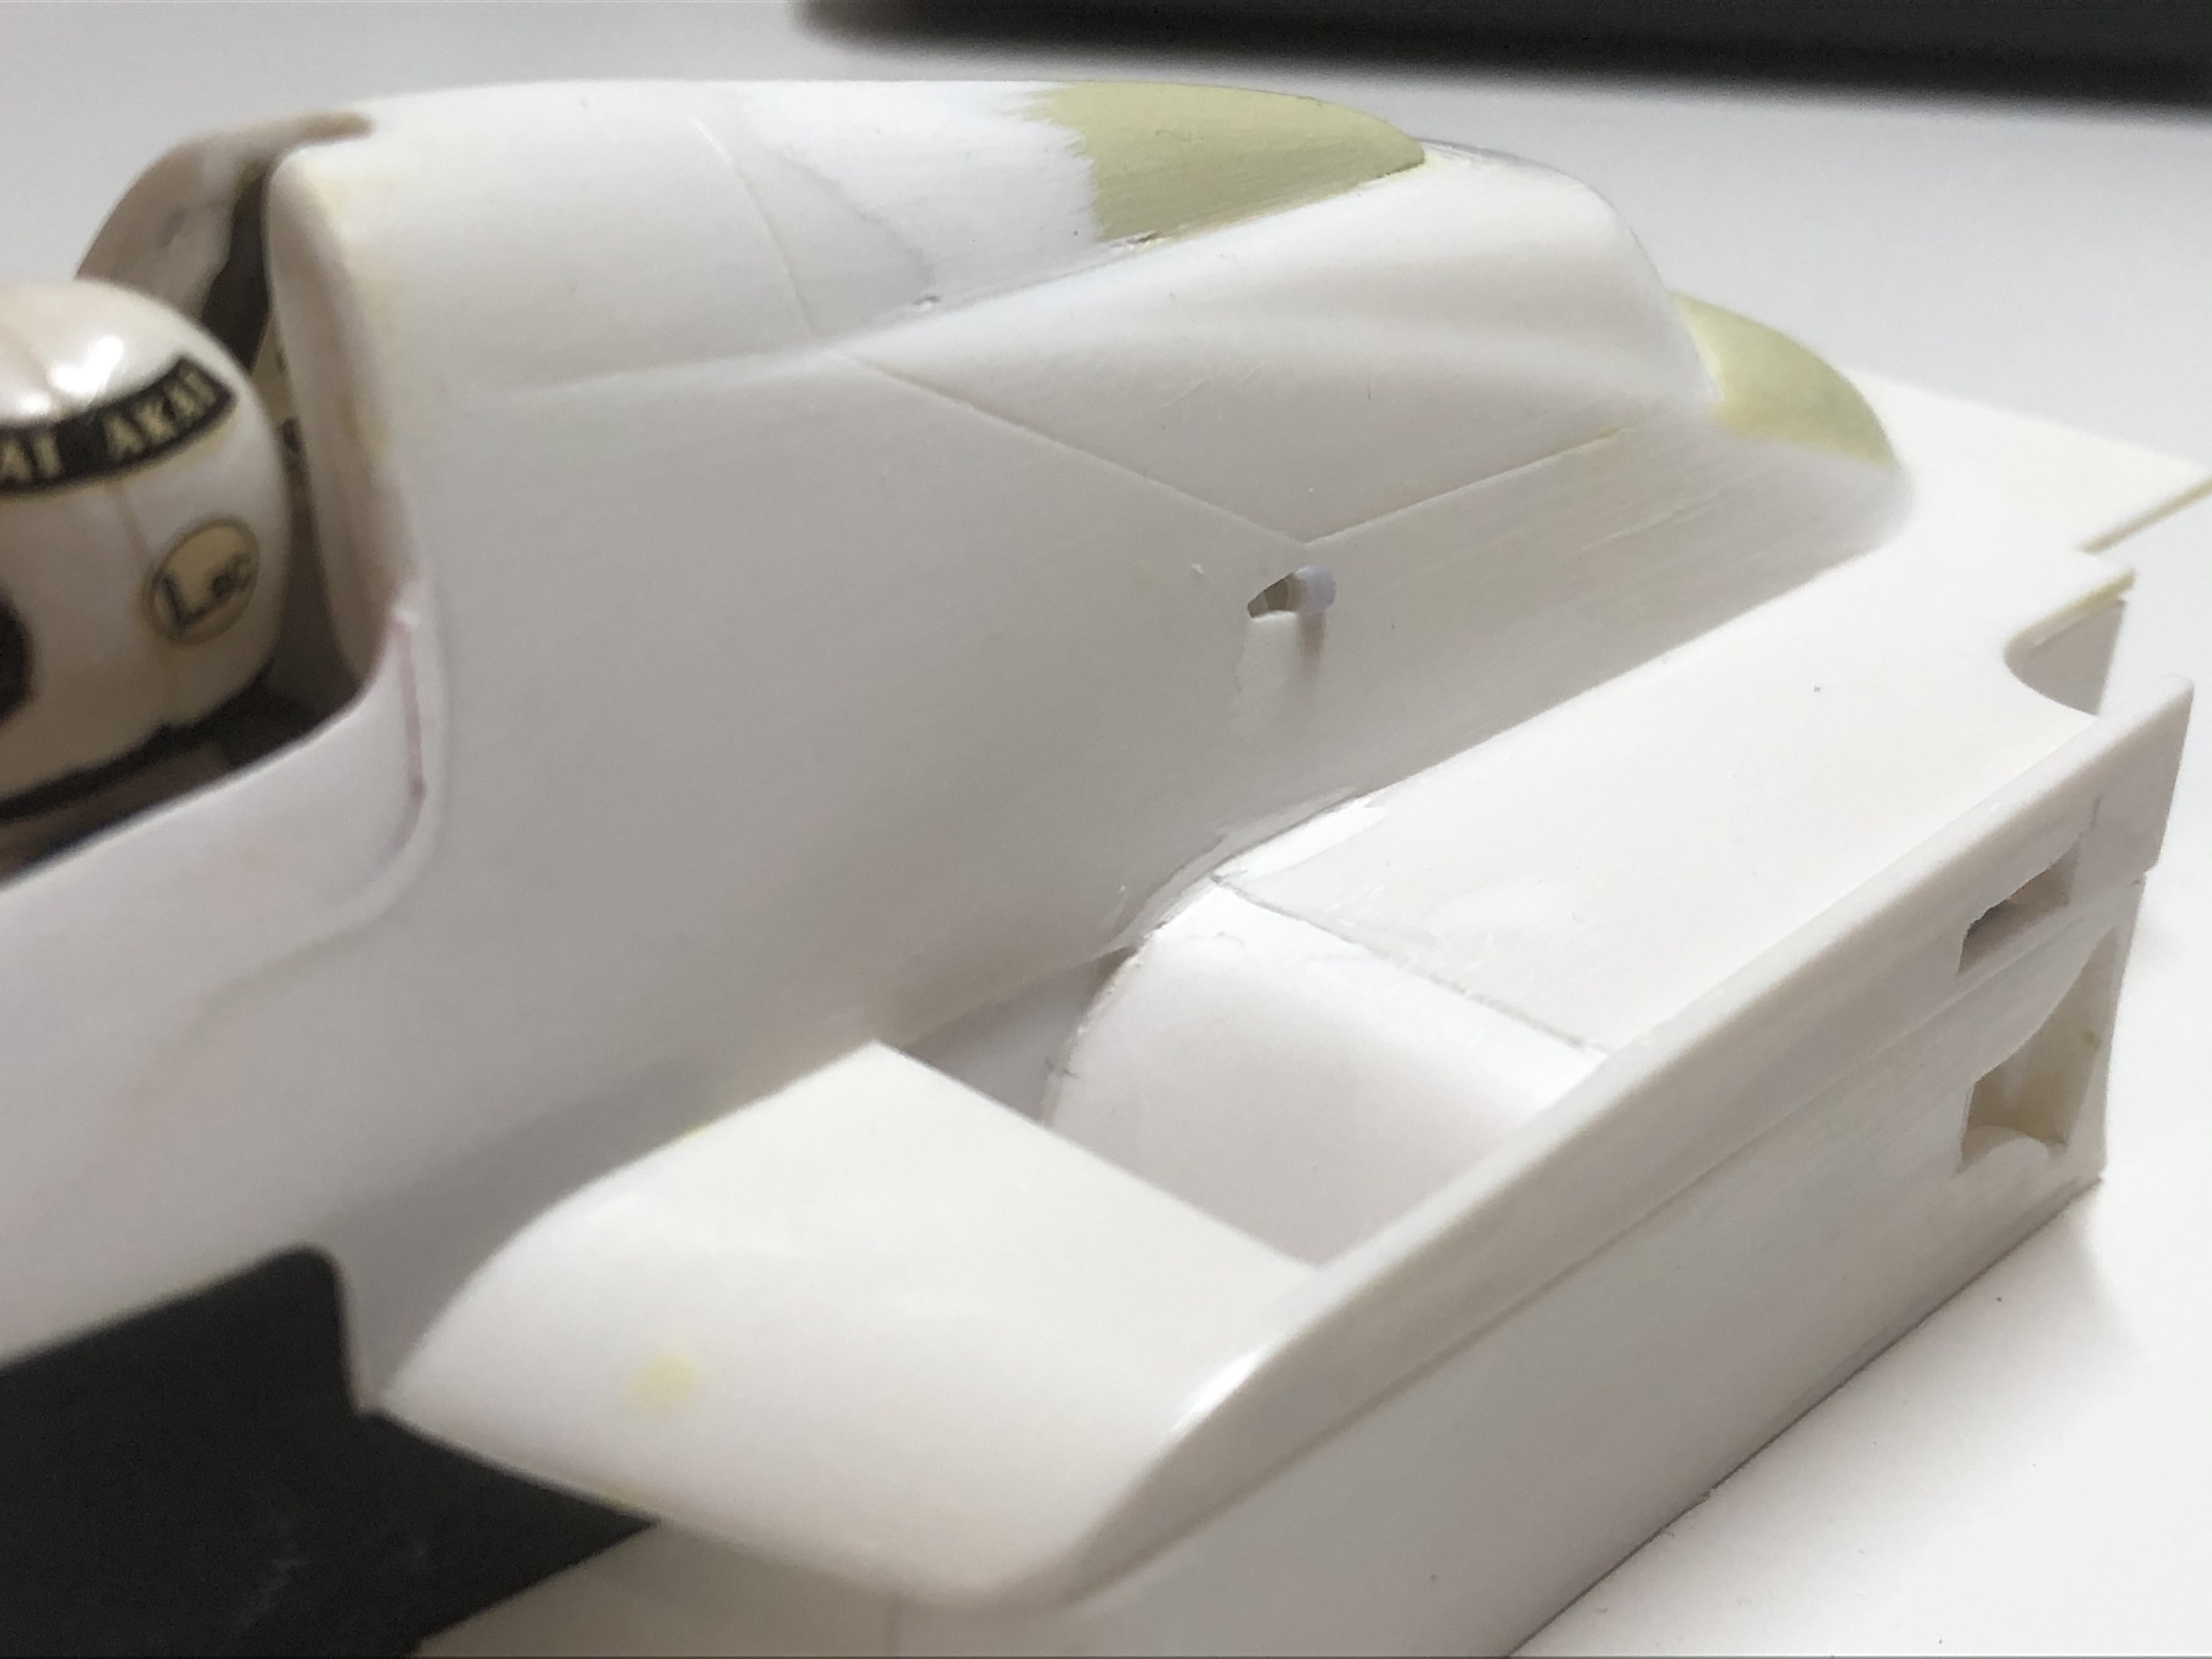
So in the area of the front opening of the side pods I glued a little sheet in place.
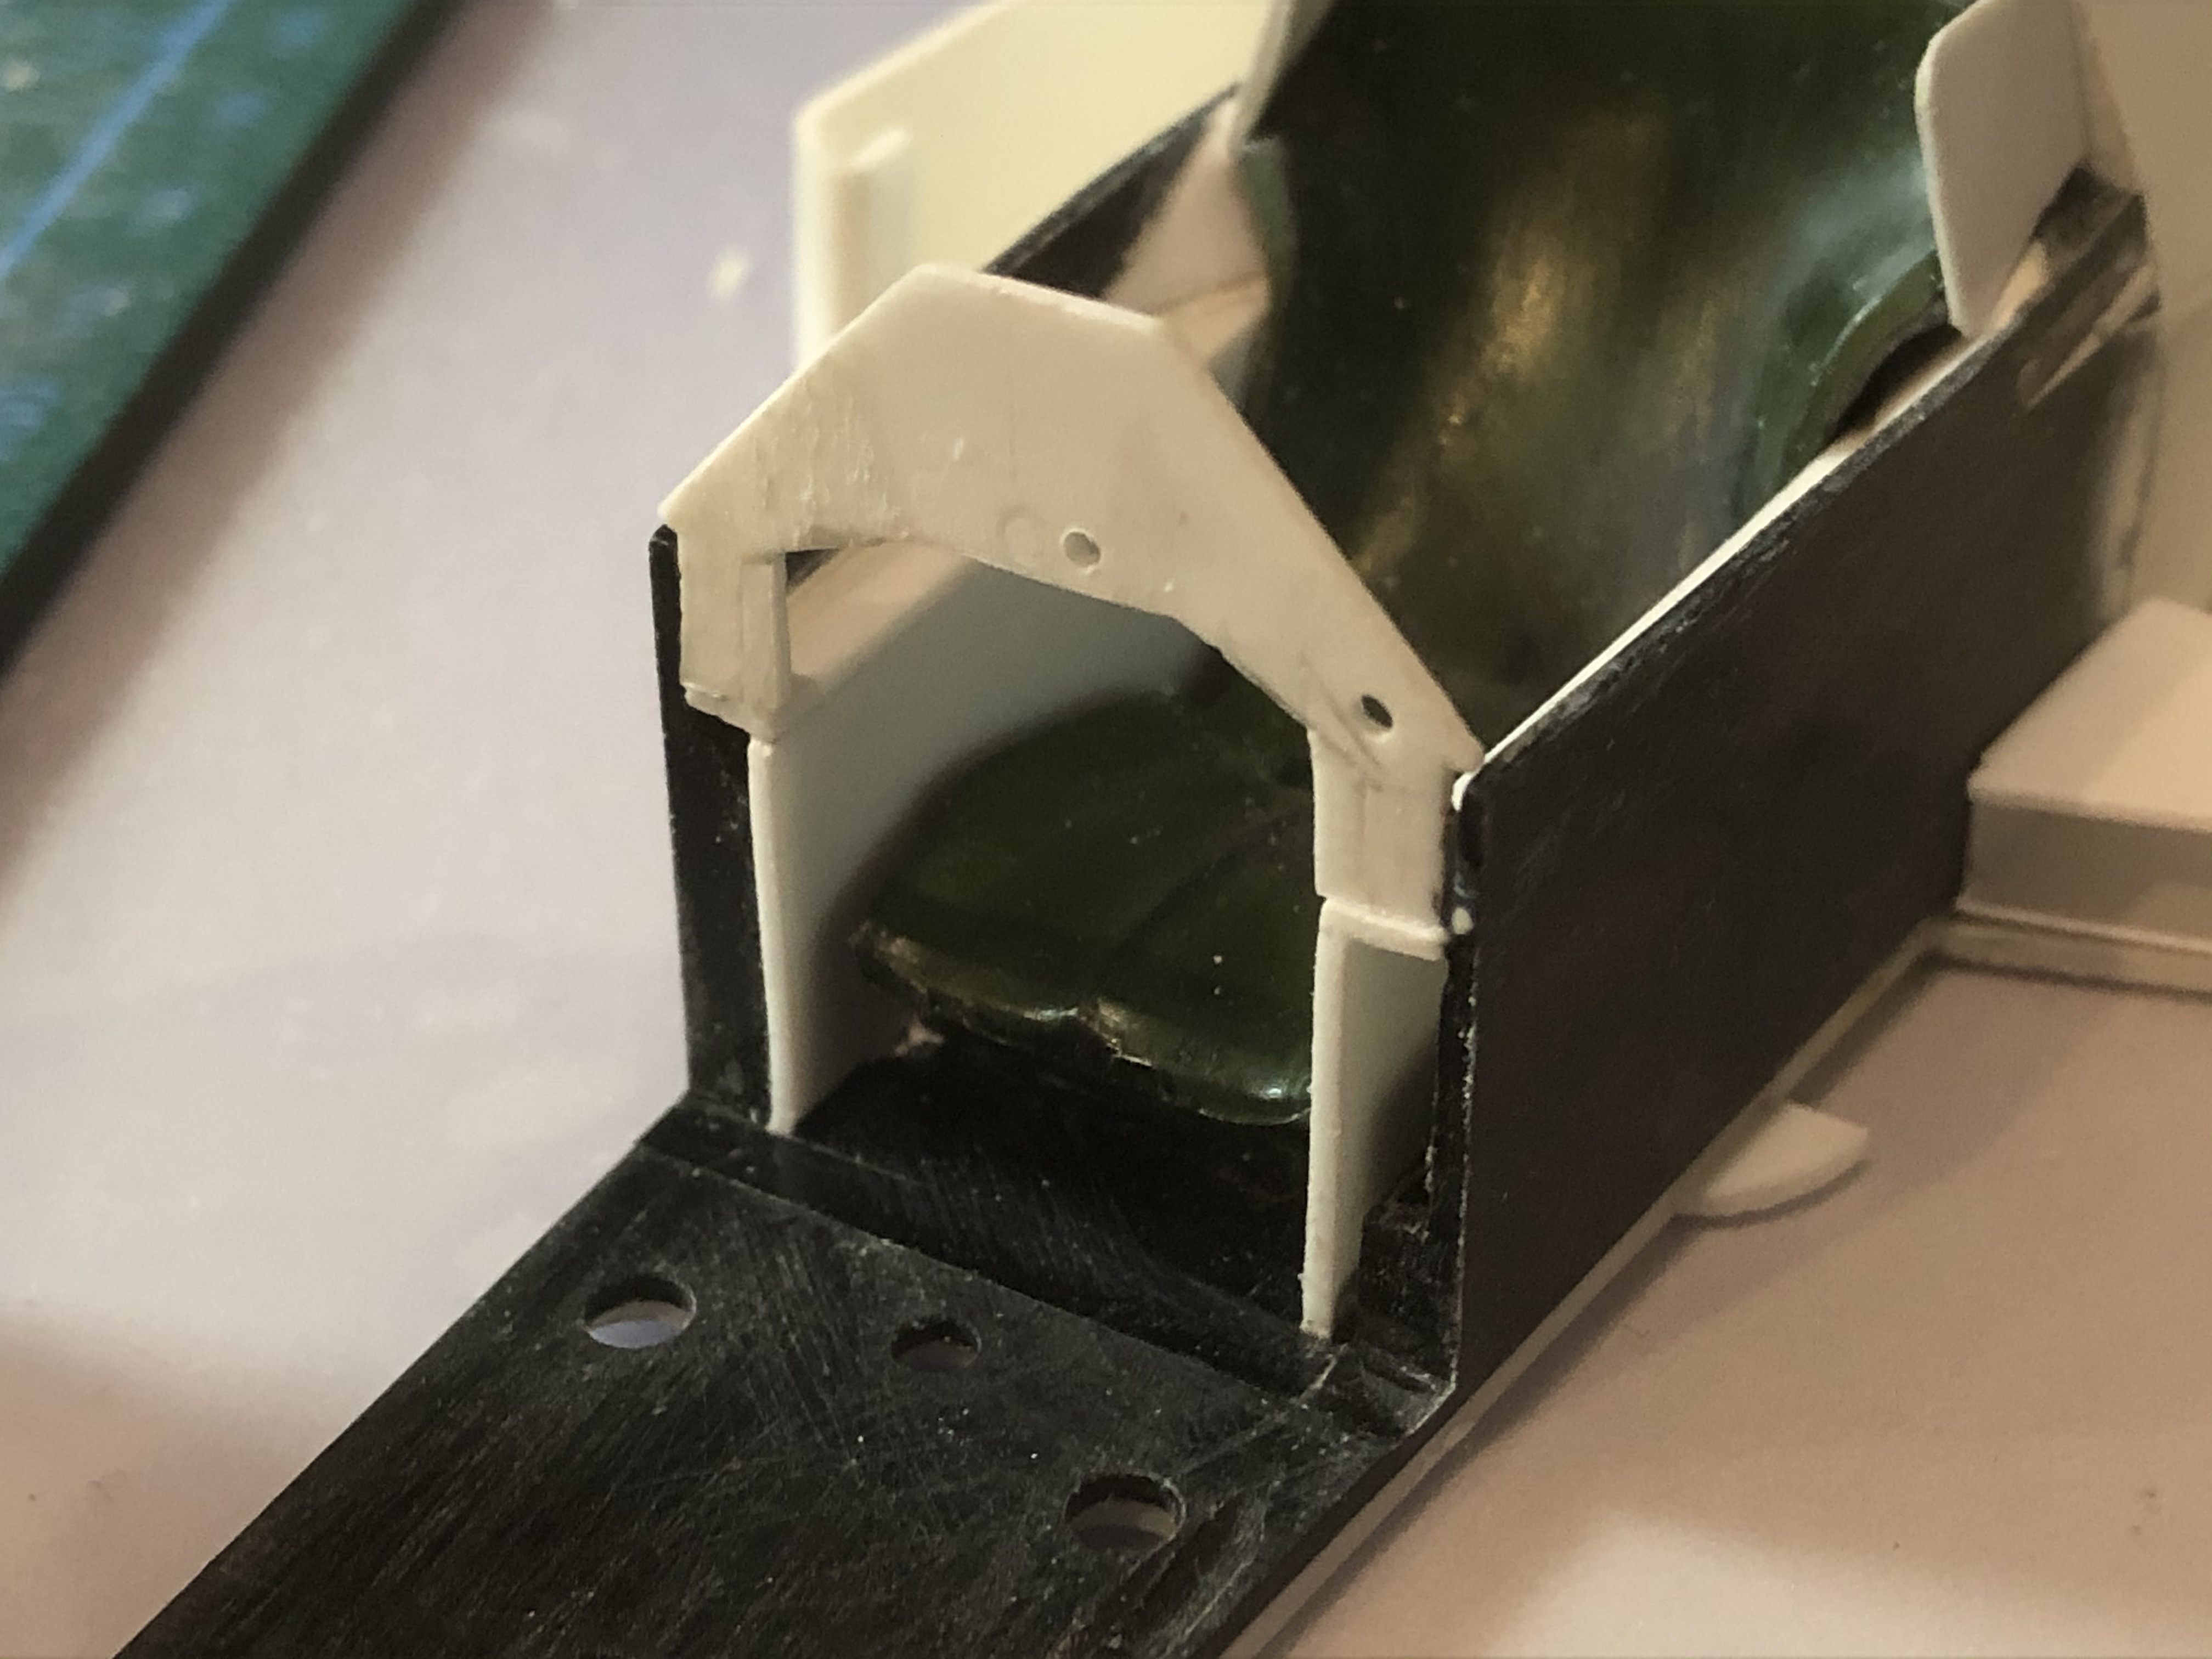
I have attached the small diffusers at the height of the cockpit.
Then I looked at the lower area of the side box openings.
I built this partly from 0.25mm sheet. They are very fragile, maybe I'll have to build them again from aluminum or brass sheet.
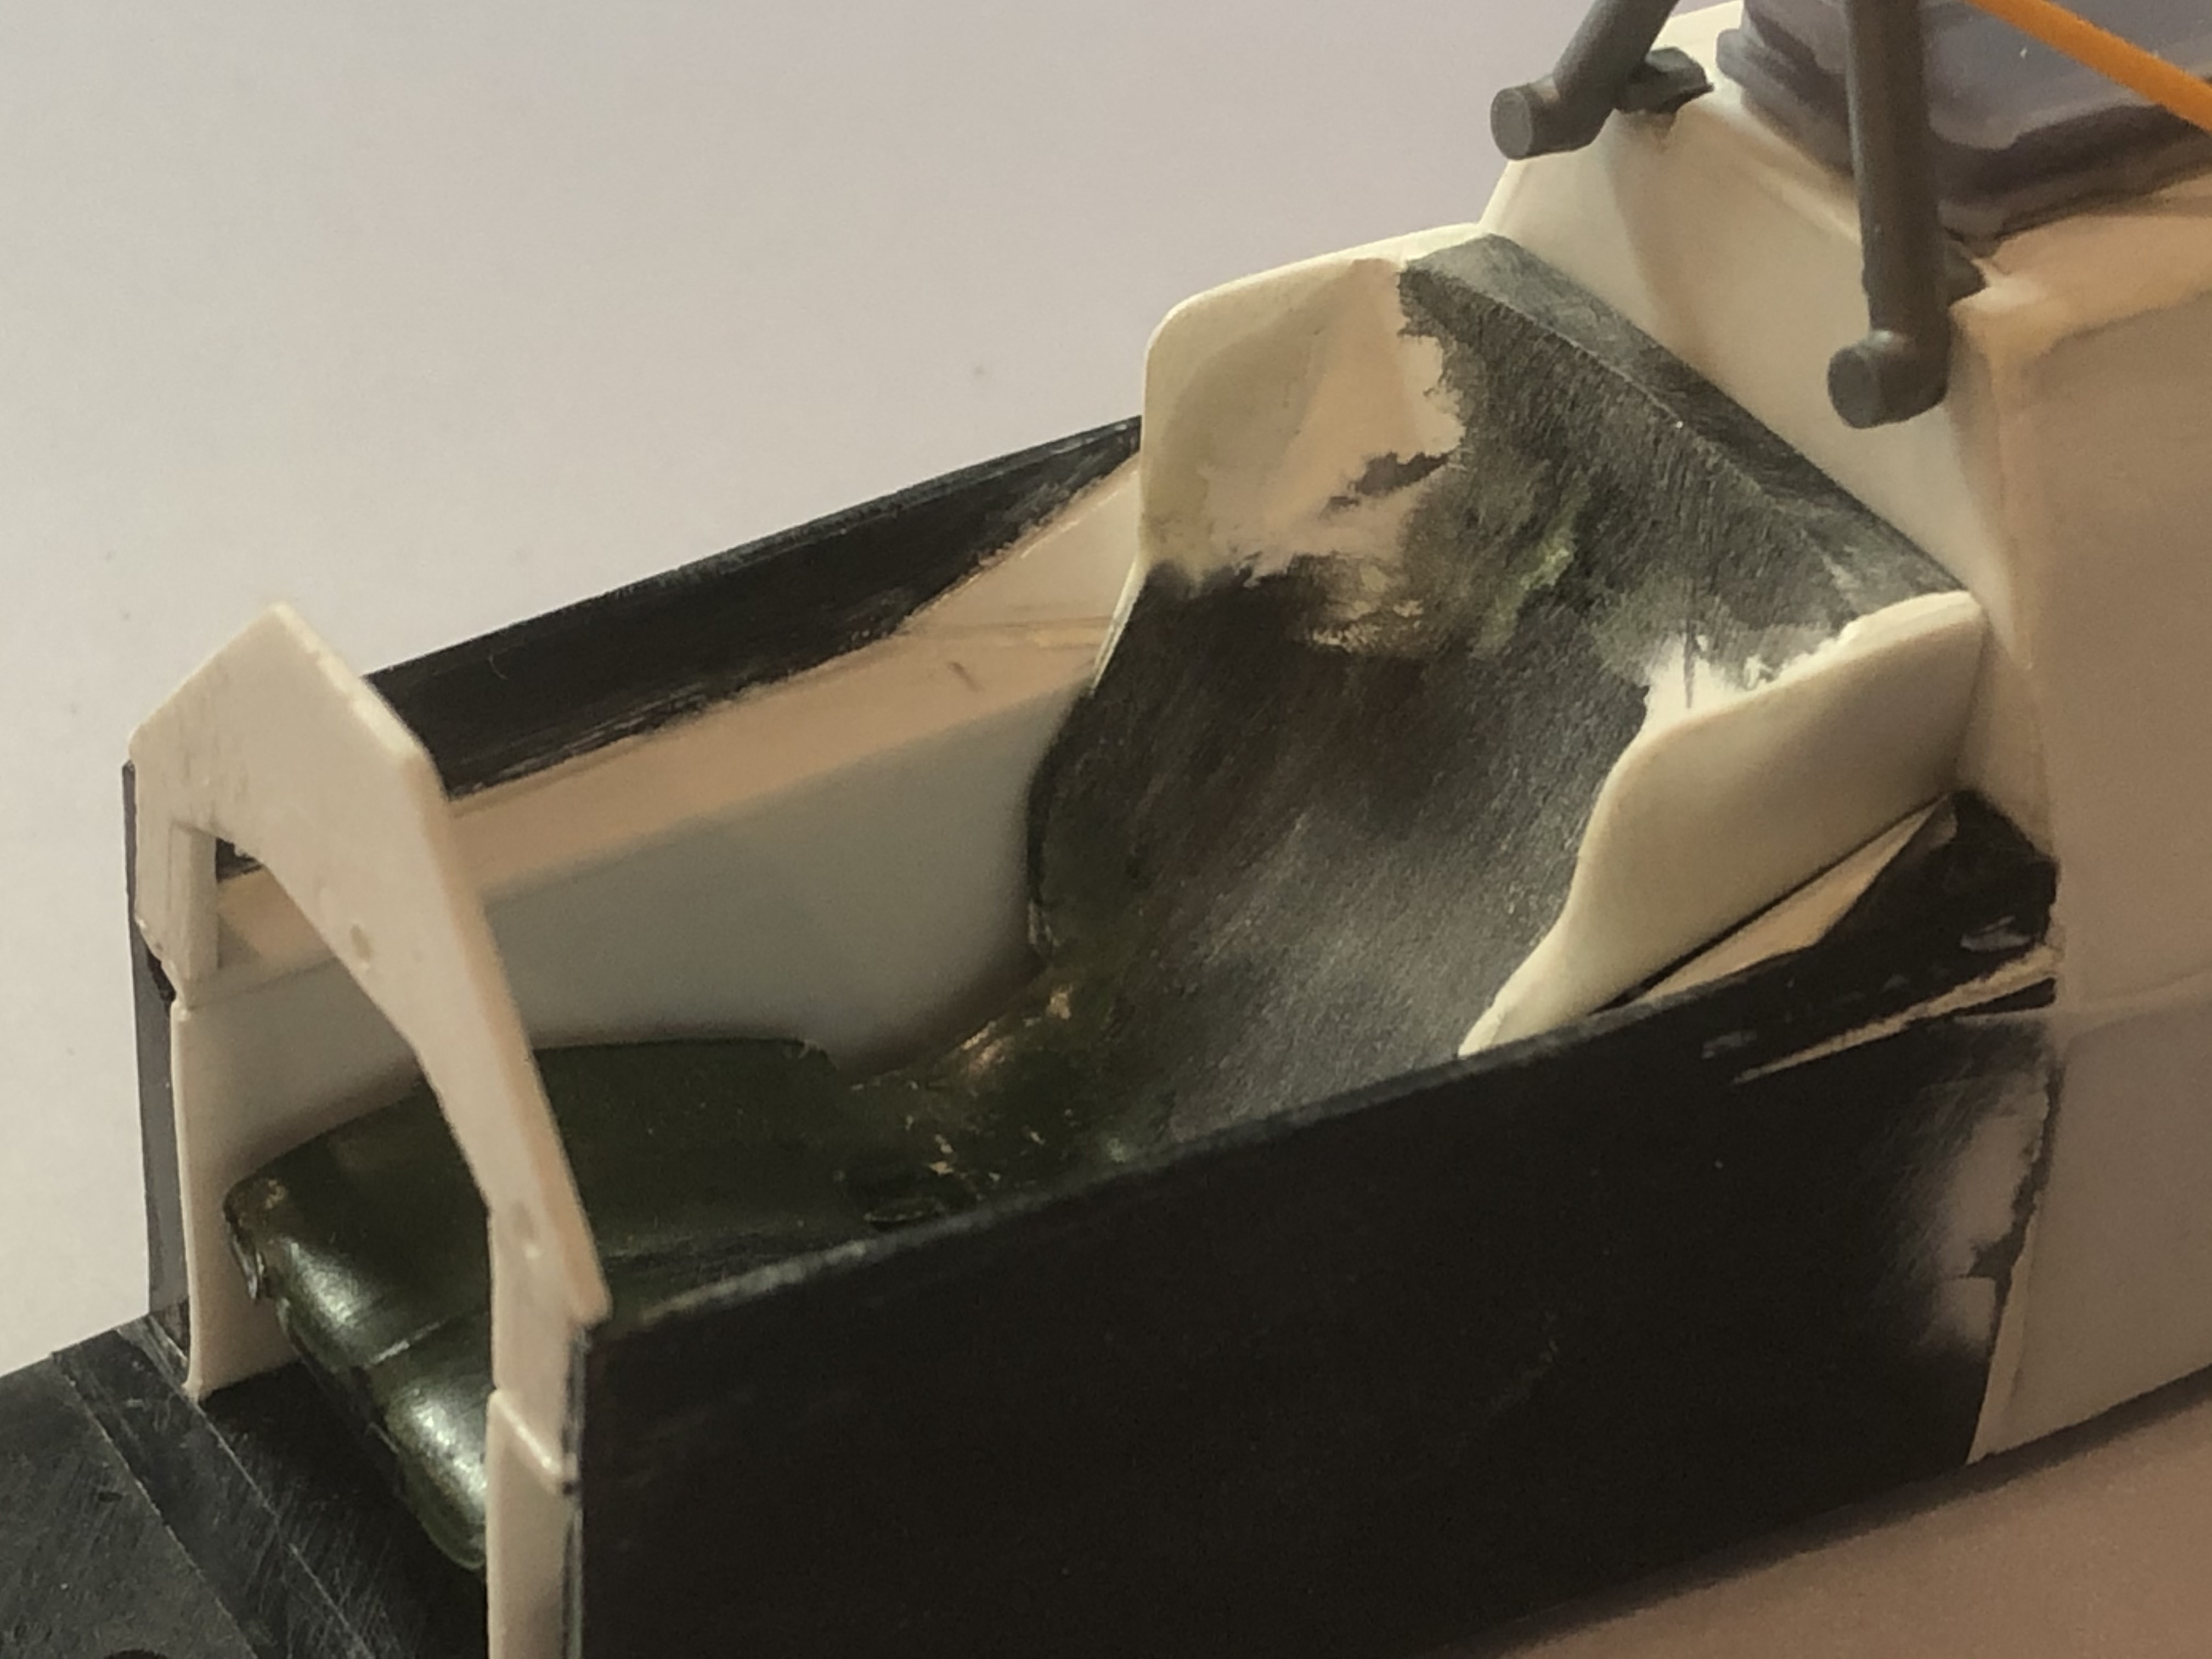
I also redesigned the interior of the cockpit. There was also a huge hole on the left side inside where the mold wasn't filled properly during injection molding due to the thin wall thickness! But now the side surfaces are just like us in the real cockpit and the switches and the shift linkage can be attached properly.
I used the seat from the FW07, 90% of which is the same as that of the FW09.
It can be used with a few adjustments on the underside and in the area of the cockpit sides at the upper rear end.
Only the upper area of the headrests still needs to be adjusted, I tried to make a template with very thin sheet.
When I work with Milliput again, I will remodel the corners.
And I've educated myself a little.
https://dai.ly/x7825xo
I have attached the small diffusers at the height of the cockpit.
Then I looked at the lower area of the side box openings.
I built this partly from 0.25mm sheet. They are very fragile, maybe I'll have to build them again from aluminum or brass sheet.
I also redesigned the interior of the cockpit. There was also a huge hole on the left side inside where the mold wasn't filled properly during injection molding due to the thin wall thickness! But now the side surfaces are just like us in the real cockpit and the switches and the shift linkage can be attached properly.
I used the seat from the FW07, 90% of which is the same as that of the FW09.
It can be used with a few adjustments on the underside and in the area of the cockpit sides at the upper rear end.
Only the upper area of the headrests still needs to be adjusted, I tried to make a template with very thin sheet.
When I work with Milliput again, I will remodel the corners.
And I've educated myself a little.
https://dai.ly/x7825xo
Last edited by steinietrabi on Wed Jan 06, 2021 6:04 am, edited 1 time in total.
Greetings Thomas
-
steinietrabi
- Constructors Champion
- Posts: 1377
- Joined: Mon Mar 30, 2020 1:56 pm
- Your Name: Thomas
- Favorite F1 Team or Driver: Williams, Ferrari, McLaren... Michael Schumacher
- Location: Crottendorf / Germany
- Status: Offline
Re: WILLIAMS FW09 Dallas winner KAWAI+some more...
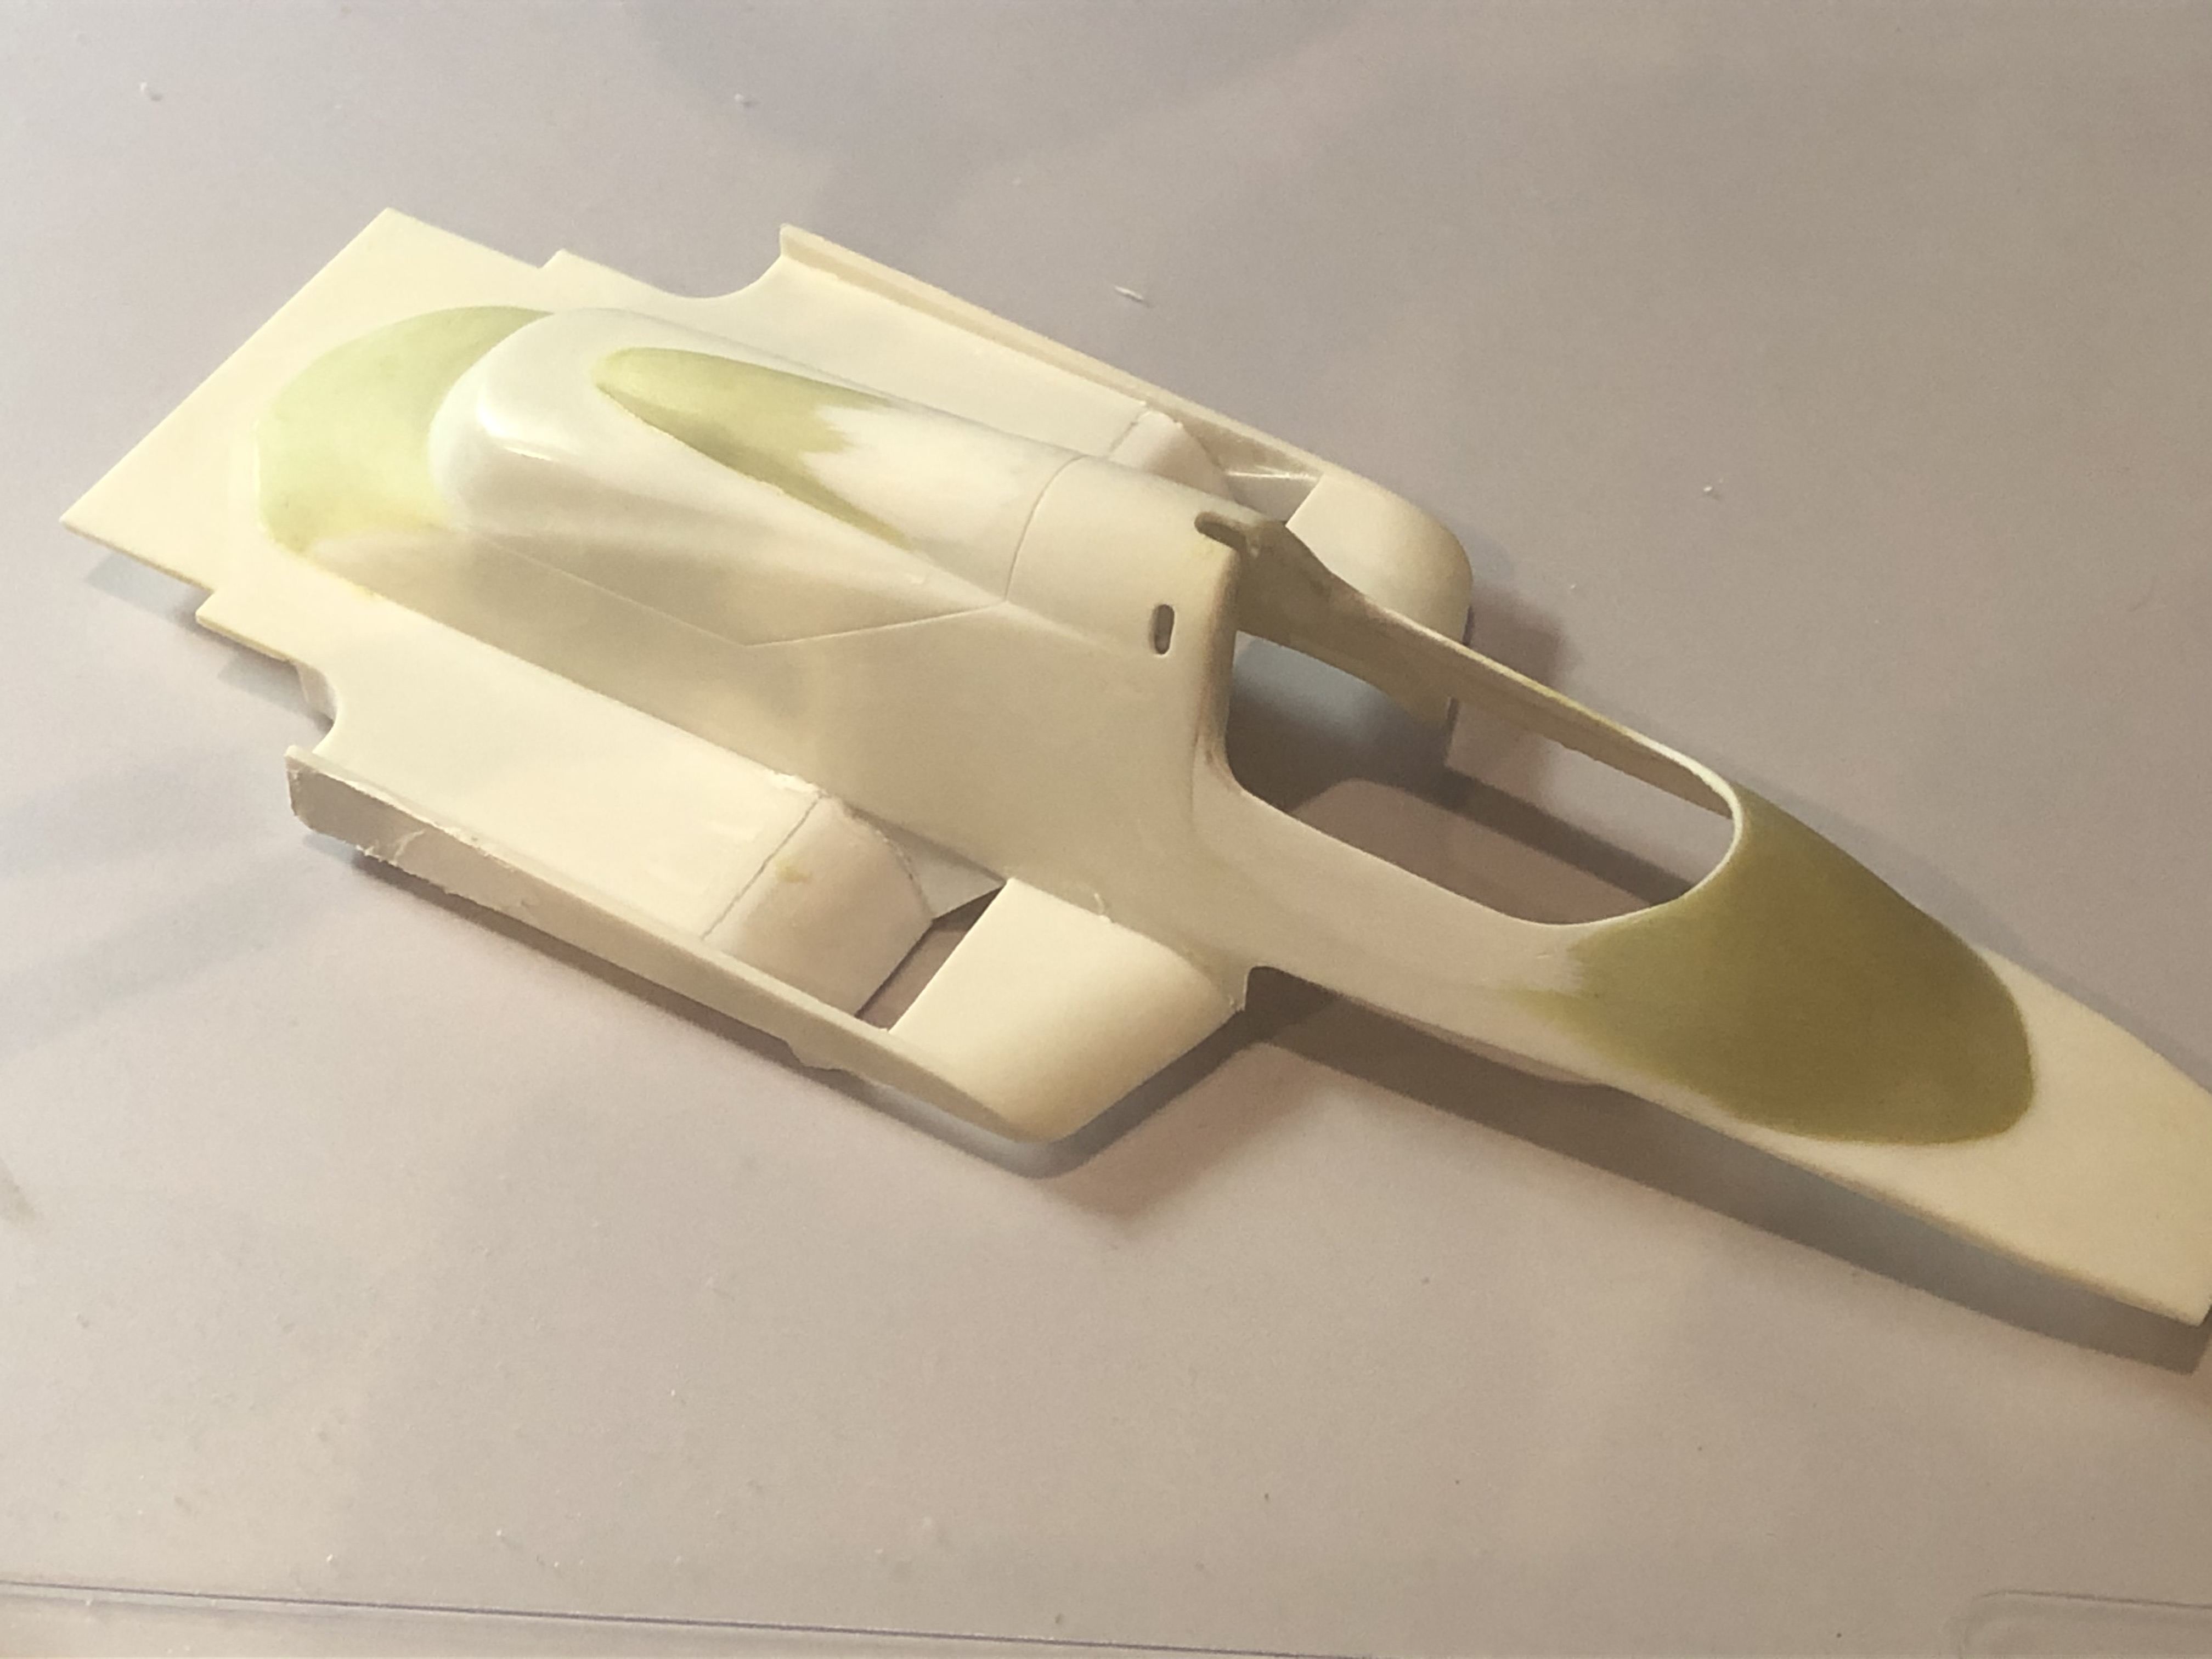
Such a little update from the last two days! 
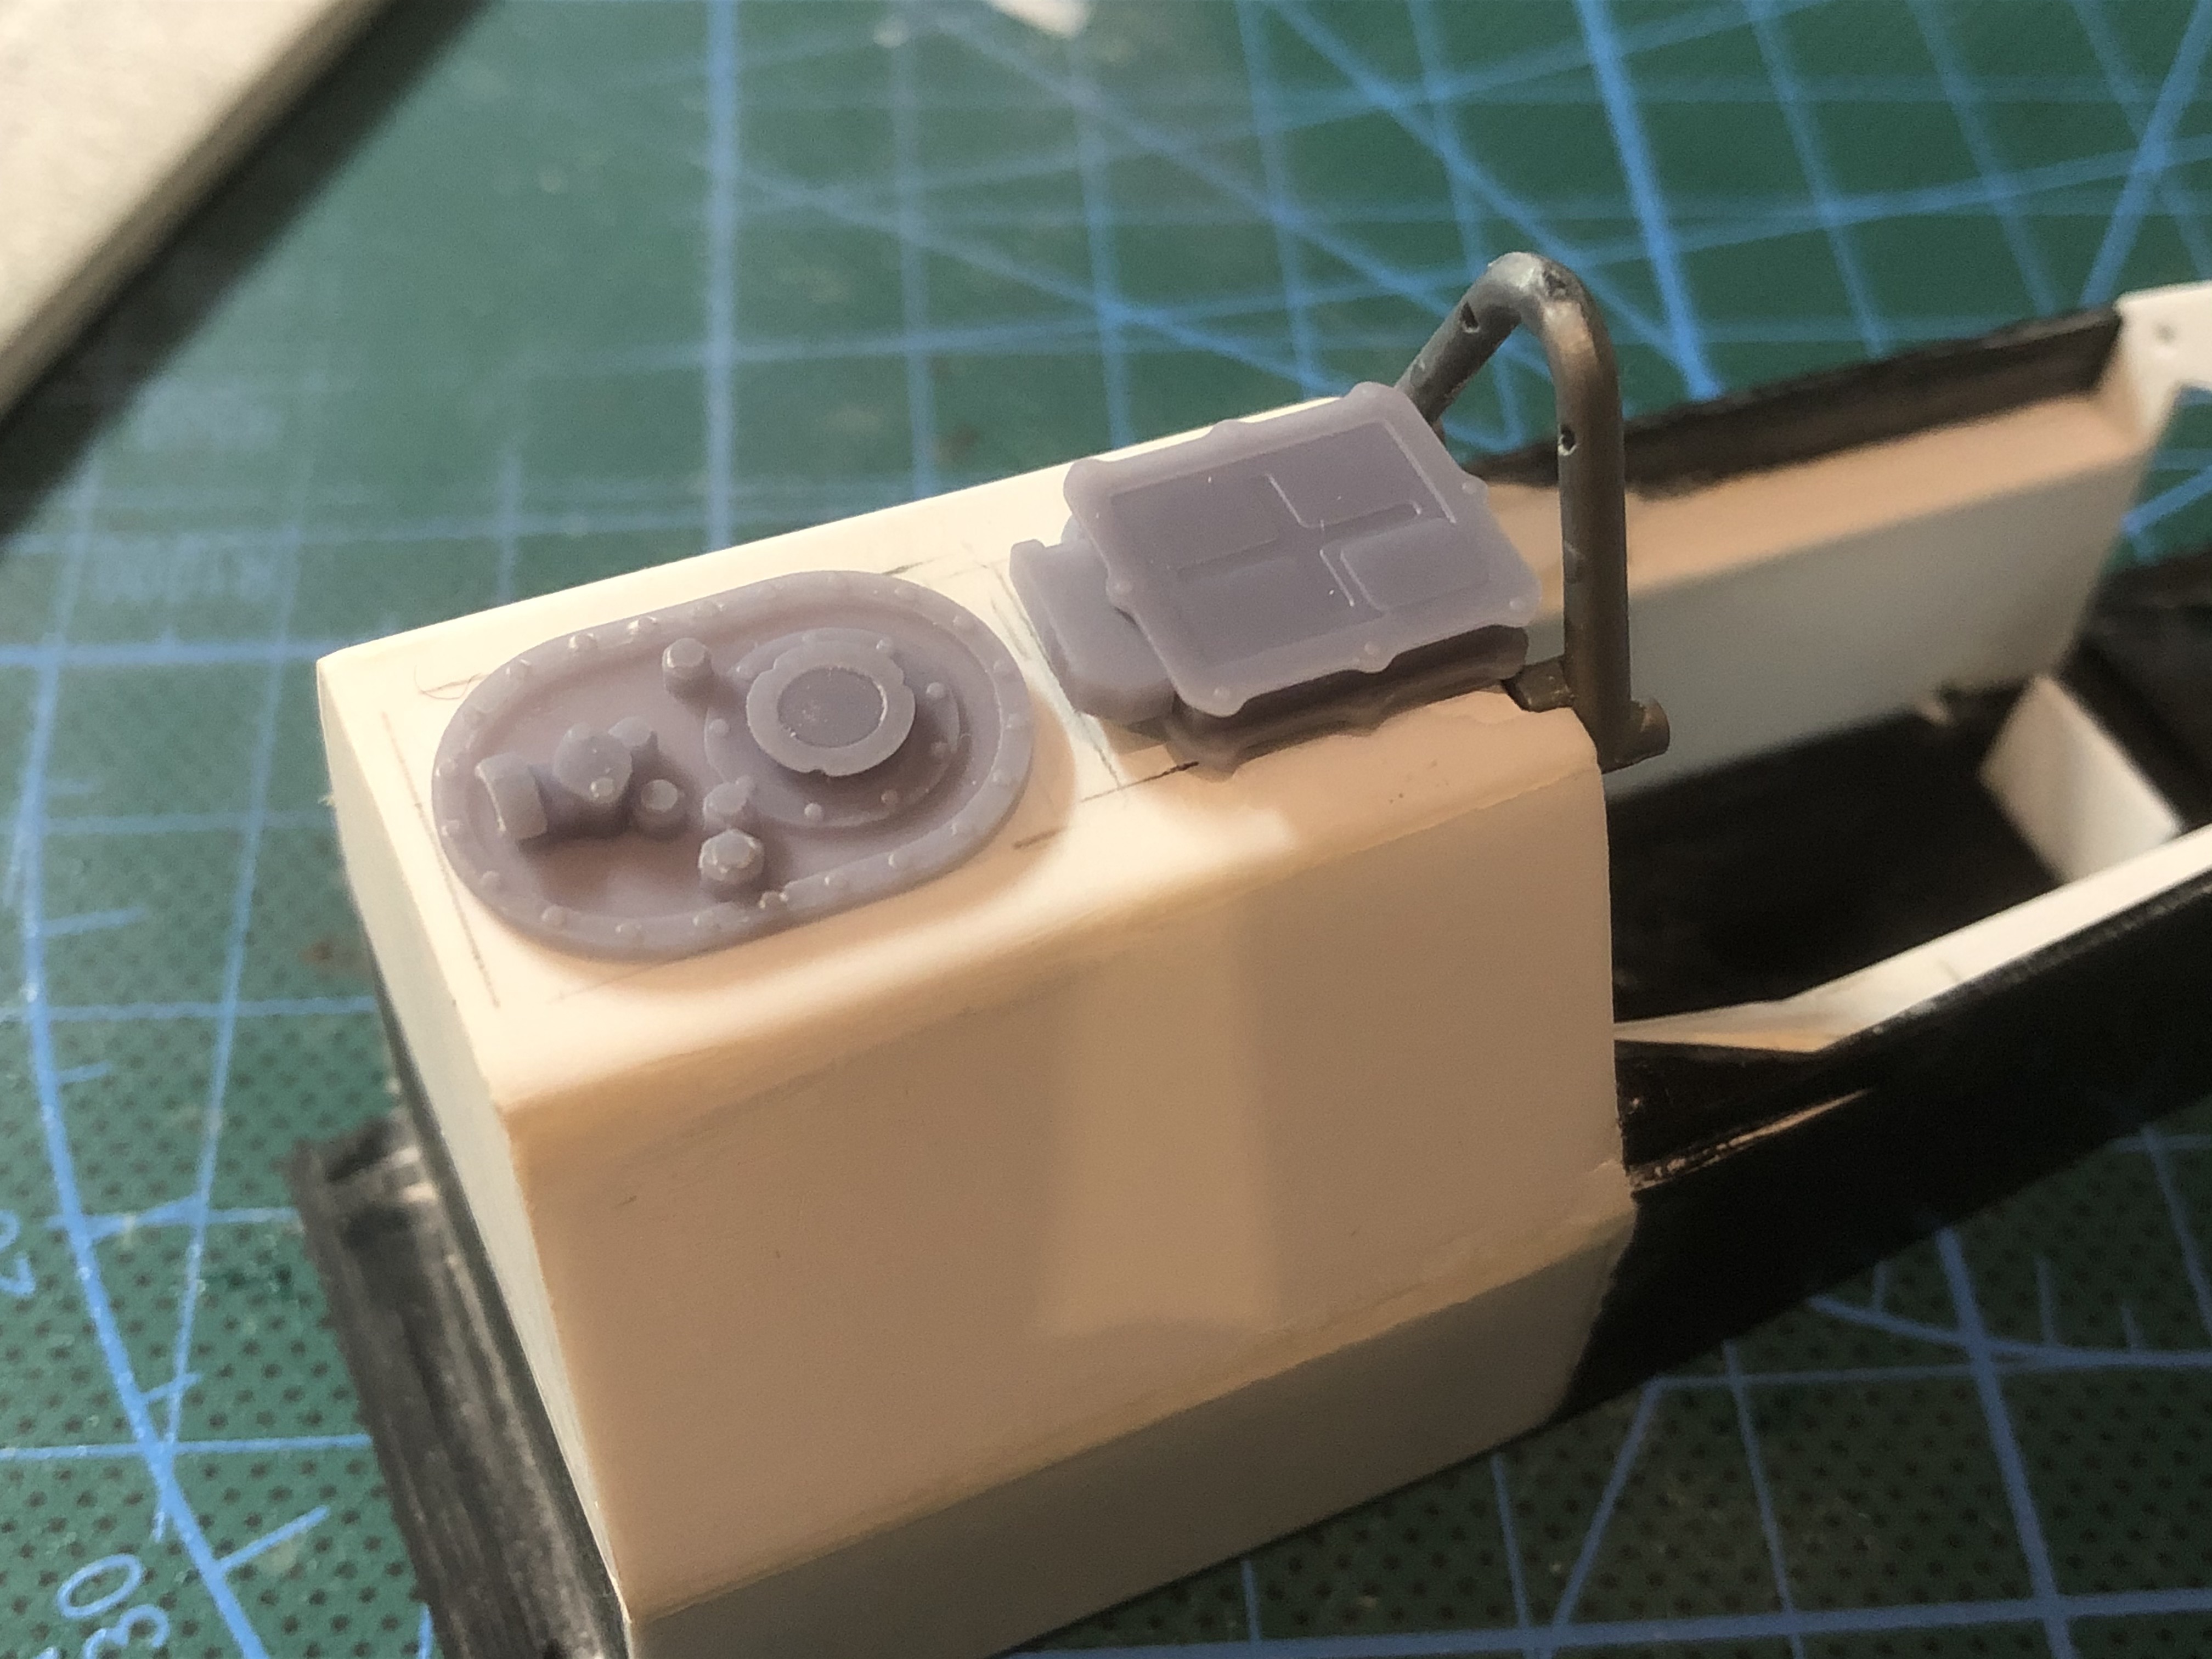
The 3D printed parts are ready.
Control unit, connection area on the fuel tank, NACA ducts on side pods, air opening on the chassis and cover in front of the cockpit.
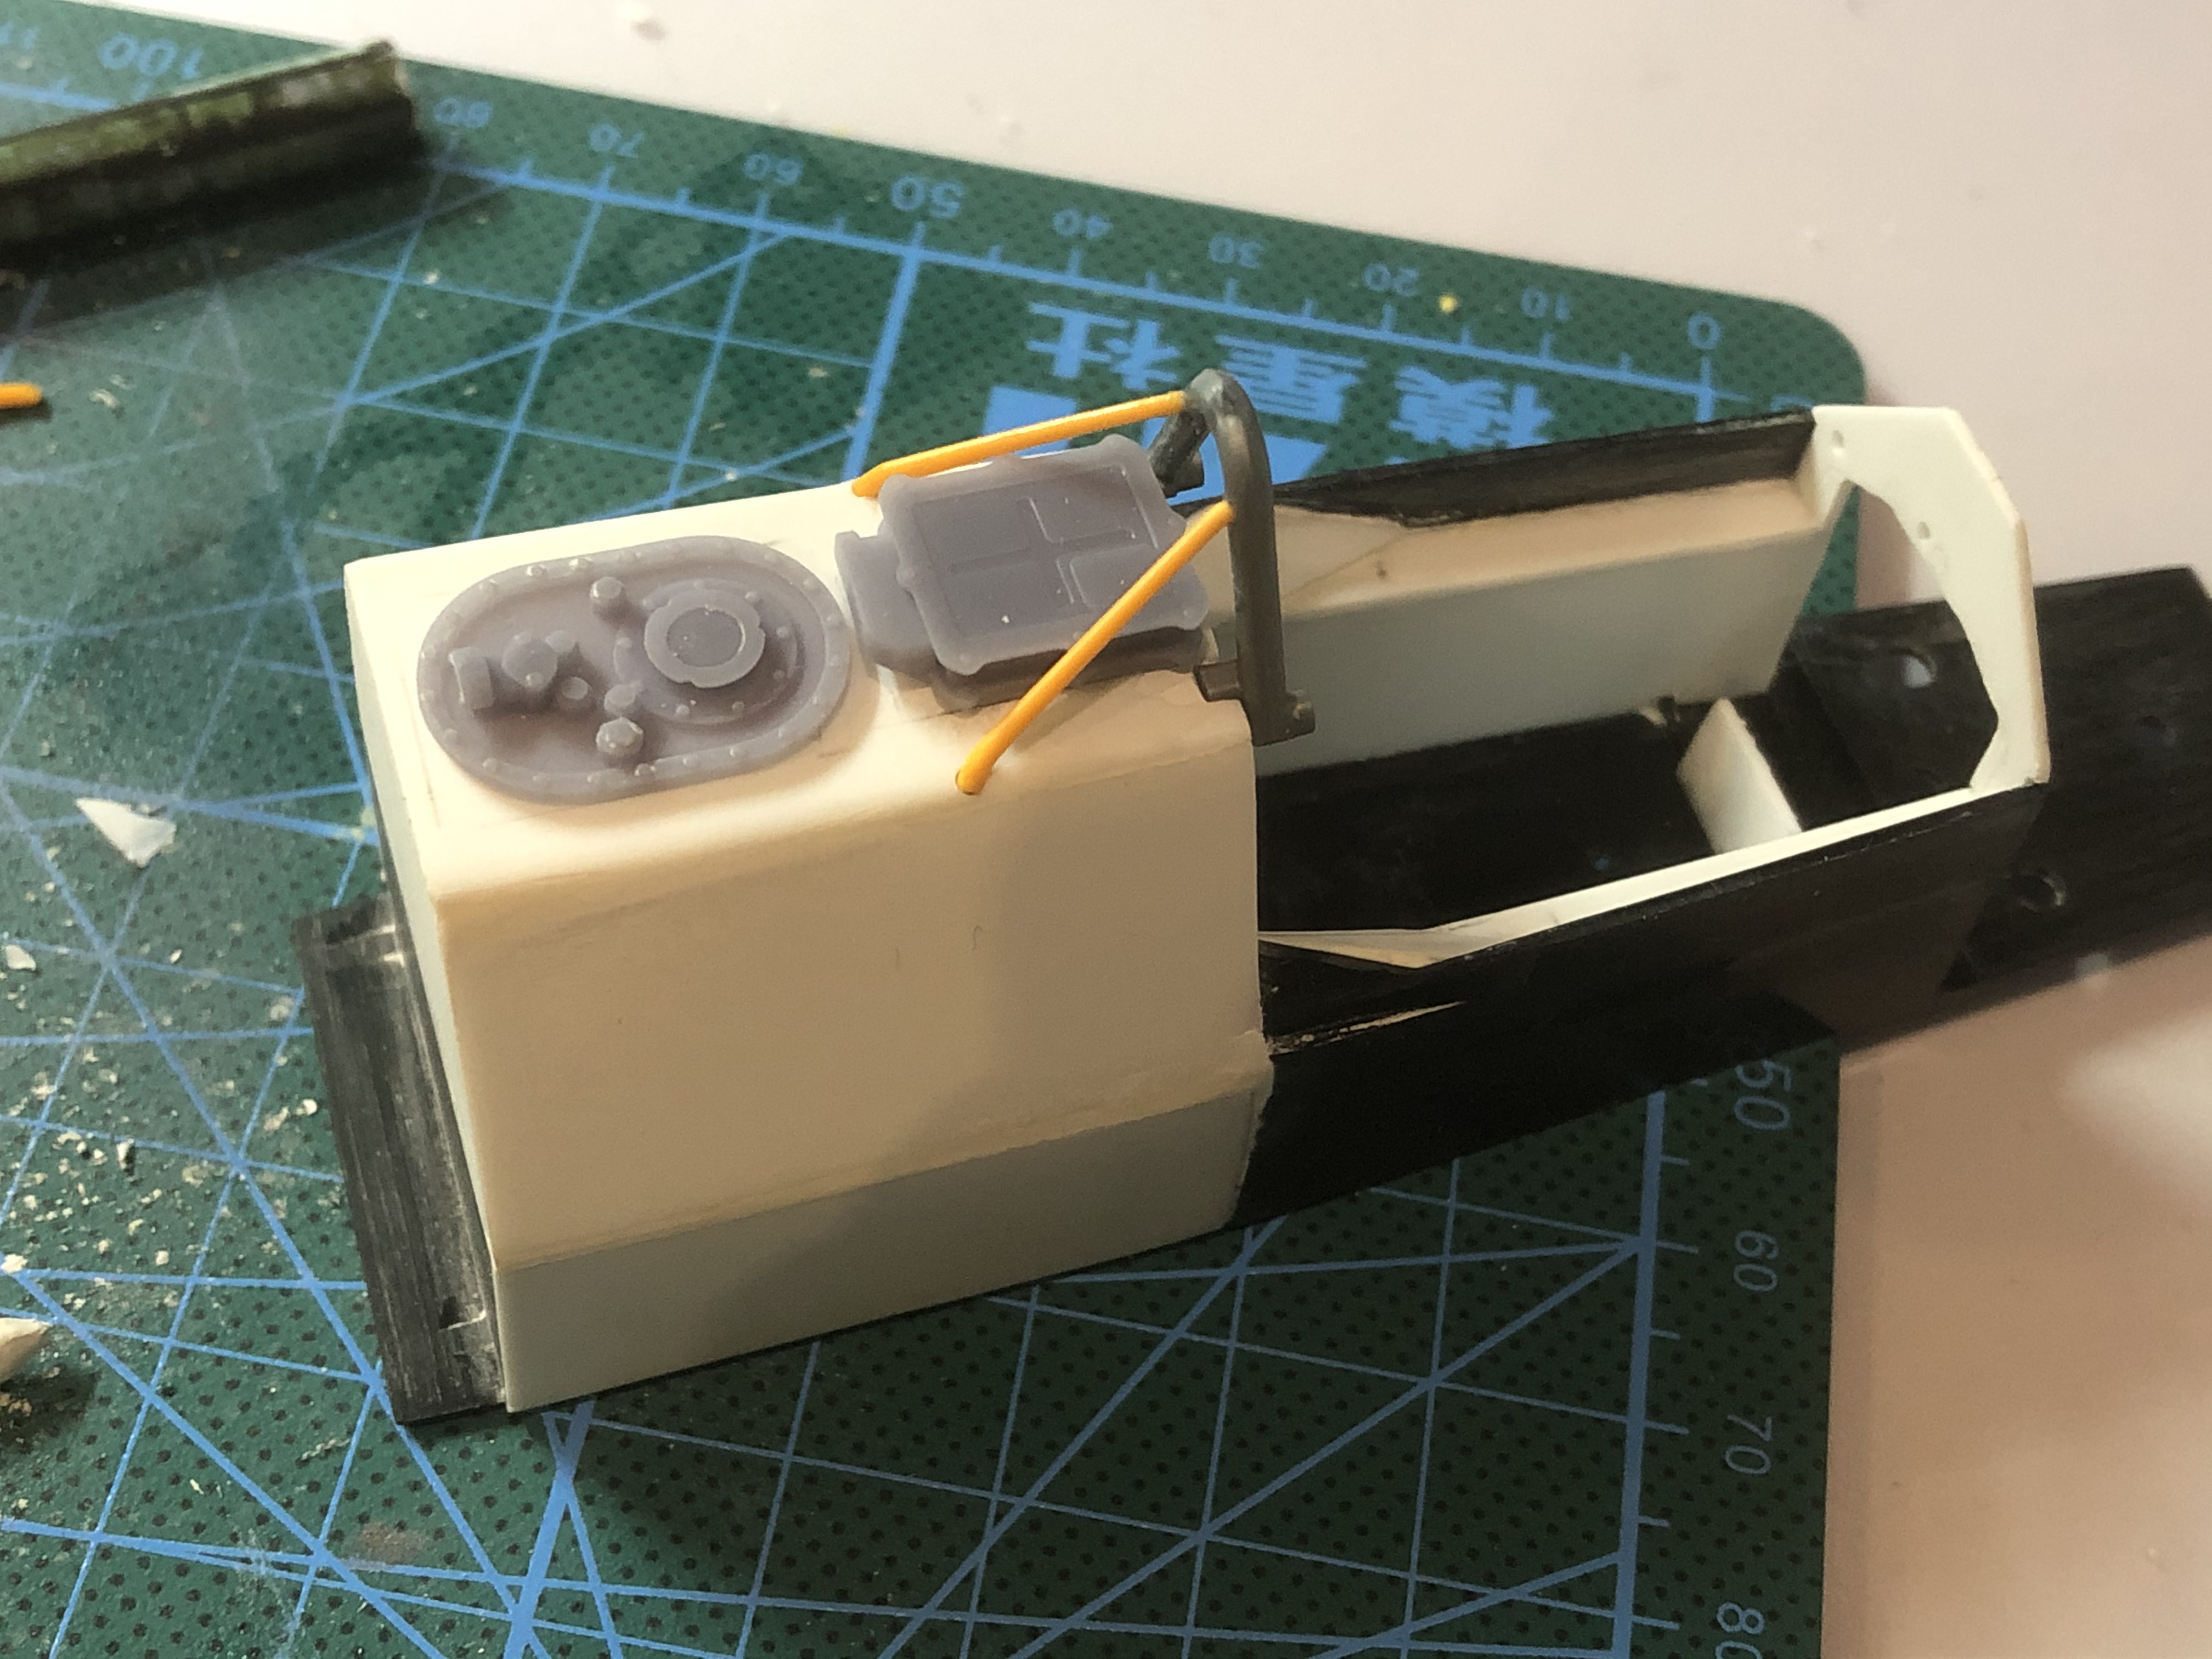
I also adjusted the seat and added the side elevations to the head area.
I put the roll bar on trial - I had to remake the rear support.
And again I fill in and sanded a few areas ... it just doesn't get any less with so many adapted areas!
The 3D printed parts are ready.
Control unit, connection area on the fuel tank, NACA ducts on side pods, air opening on the chassis and cover in front of the cockpit.
I also adjusted the seat and added the side elevations to the head area.
I put the roll bar on trial - I had to remake the rear support.
And again I fill in and sanded a few areas ... it just doesn't get any less with so many adapted areas!
Last edited by steinietrabi on Wed Jan 06, 2021 6:04 am, edited 1 time in total.
Greetings Thomas
-
- Similar Topics
- Replies
- Views
- Last post
-
- 6 Replies
- 311 Views
-
Last post by Seema