WILLIAMS FW09 Dallas winner KAWAI+some more...

Re: WILLIAMS FW09 Dallas winner KAWAI+some more...
Wow I like the "detachability" system. Clever!!!! 
-
 Shunter
- FOTA Chairman

- Posts: 2887
- Joined: Sat Sep 20, 2003 12:38 am
- Favorite F1 Team or Driver: Alfa Romeo, McLaren, Williams
- Location: Melbourne, Australia
- Contact:
- Status: Offline

Re: WILLIAMS FW09 Dallas winner KAWAI+some more...
Beautiful work...
-
 steinietrabi
- Constructors Champion

- Posts: 1376
- Joined: Mon Mar 30, 2020 1:56 pm
- Your Name: Thomas
- Favorite F1 Team or Driver: Williams, Ferrari, McLaren... Michael Schumacher
- Location: Crottendorf / Germany
- Status: Offline

Re: WILLIAMS FW09 Dallas winner KAWAI+some more...
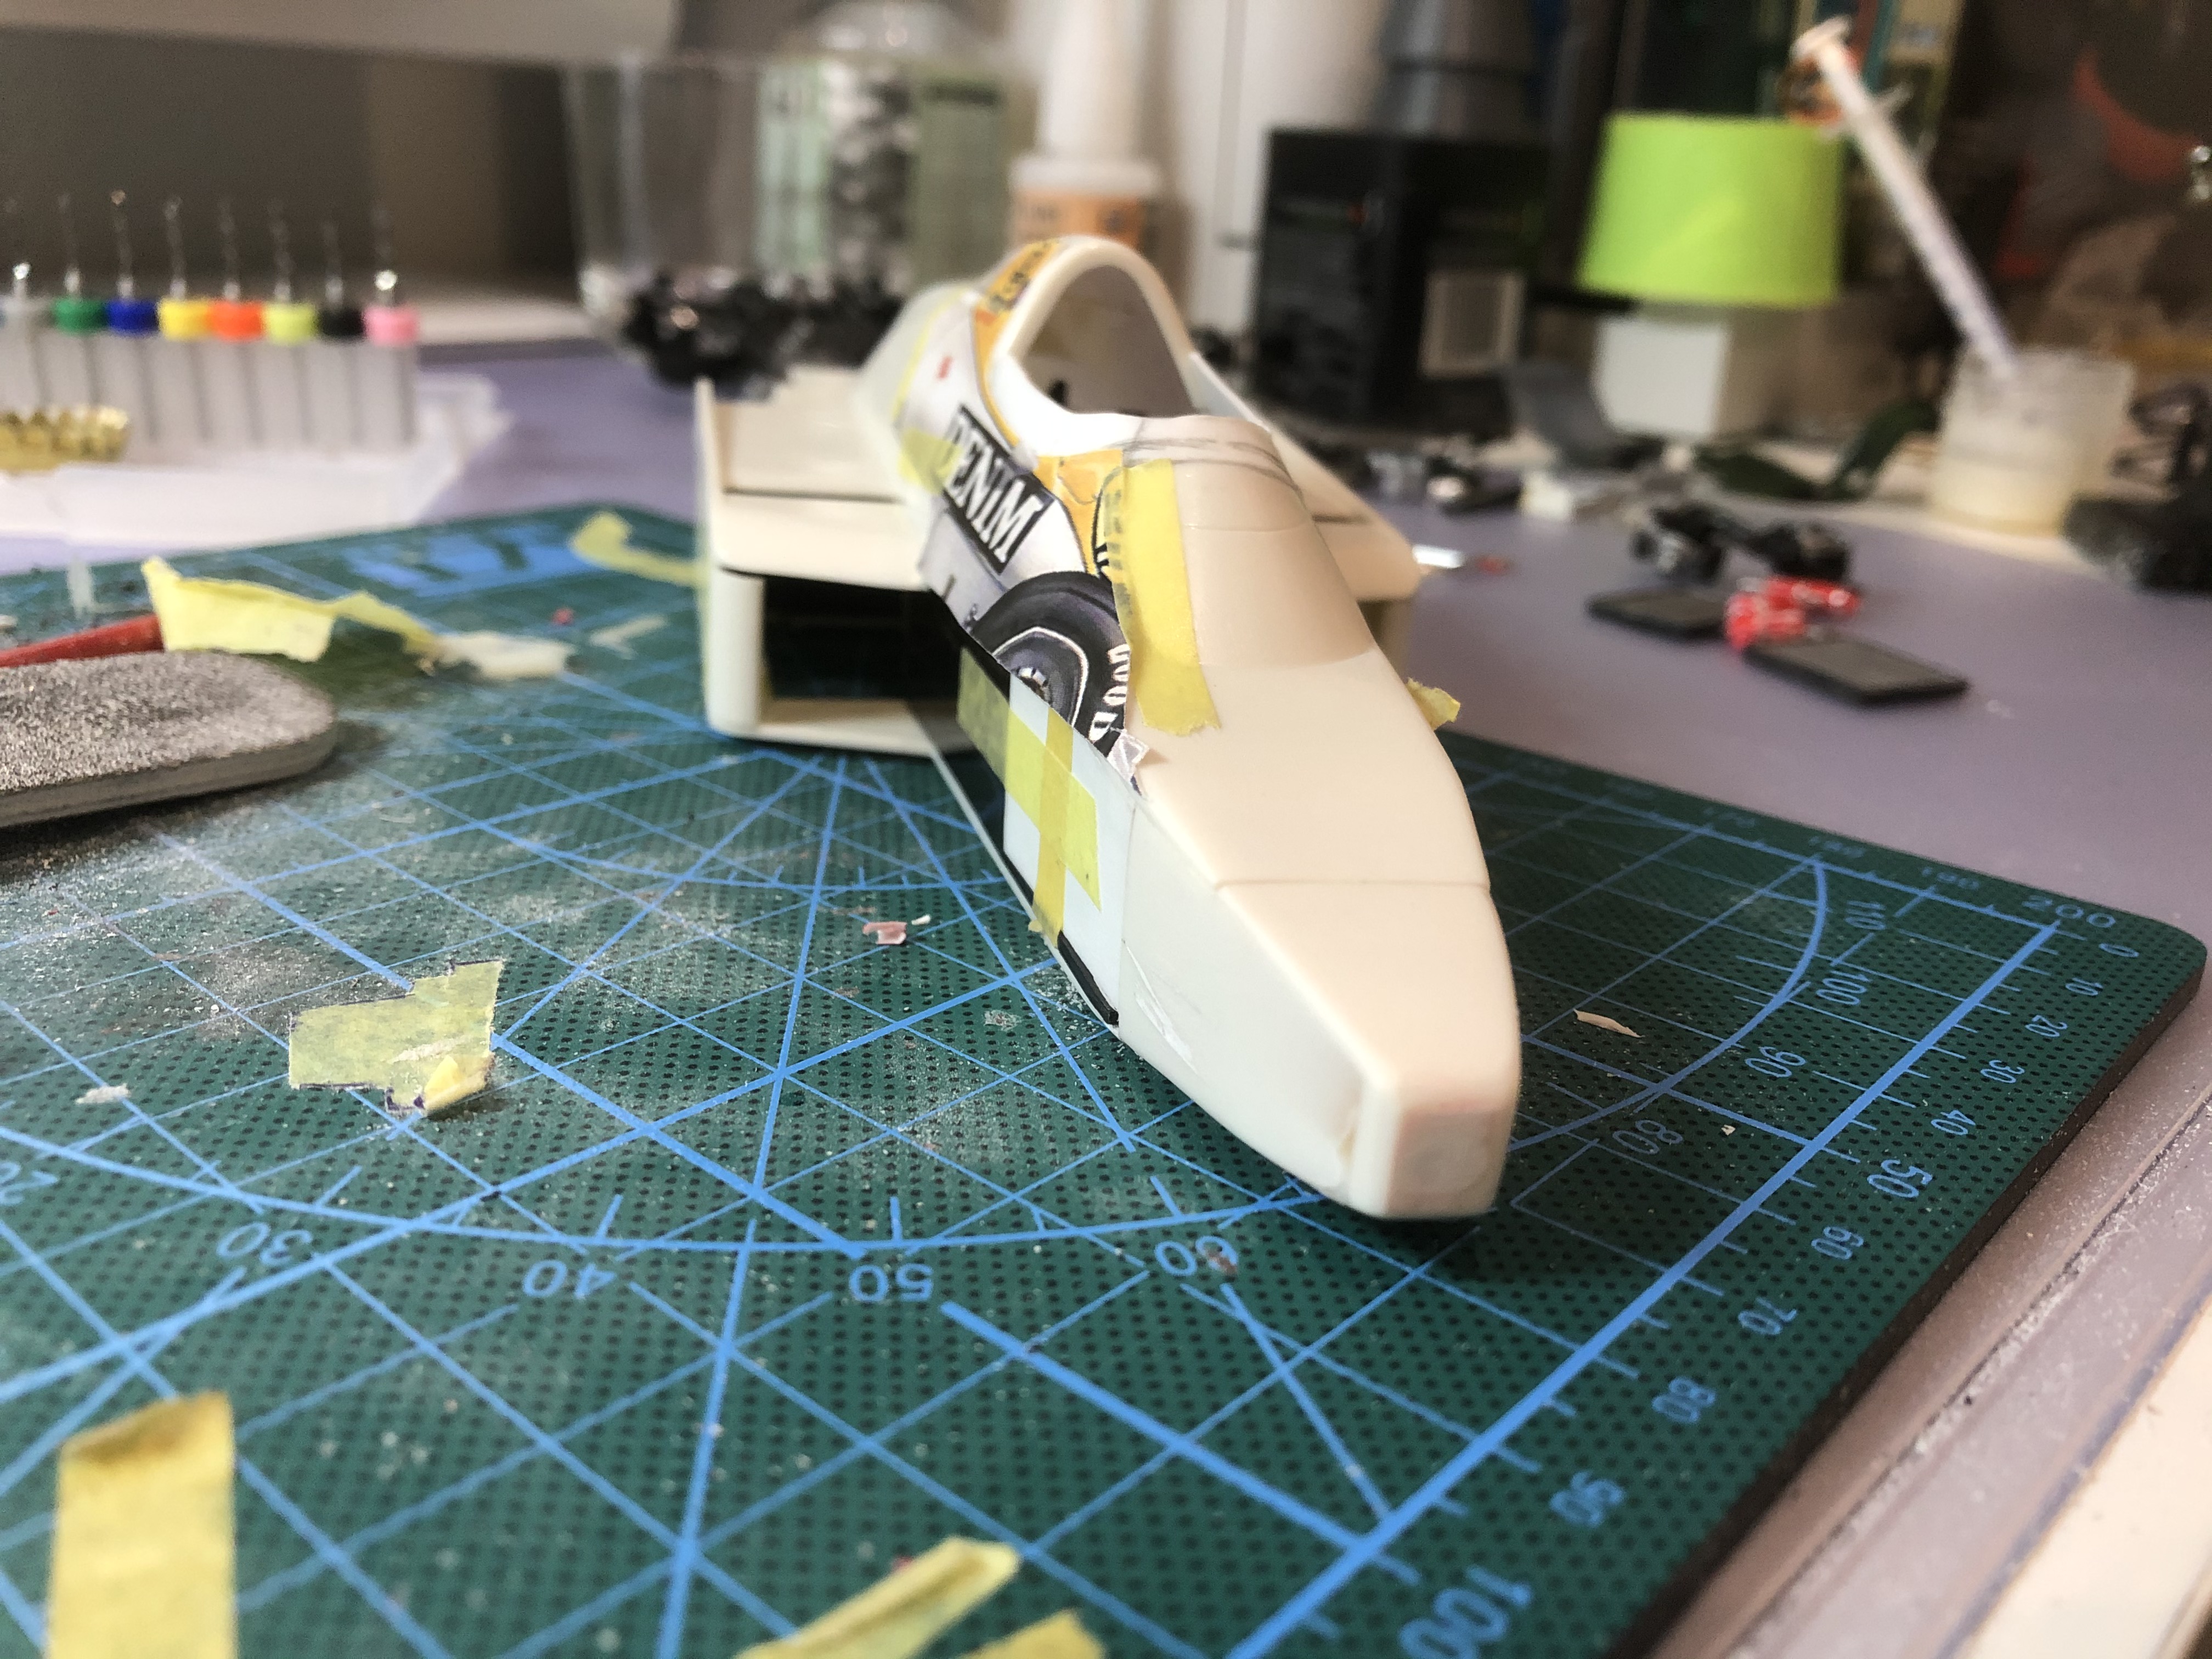
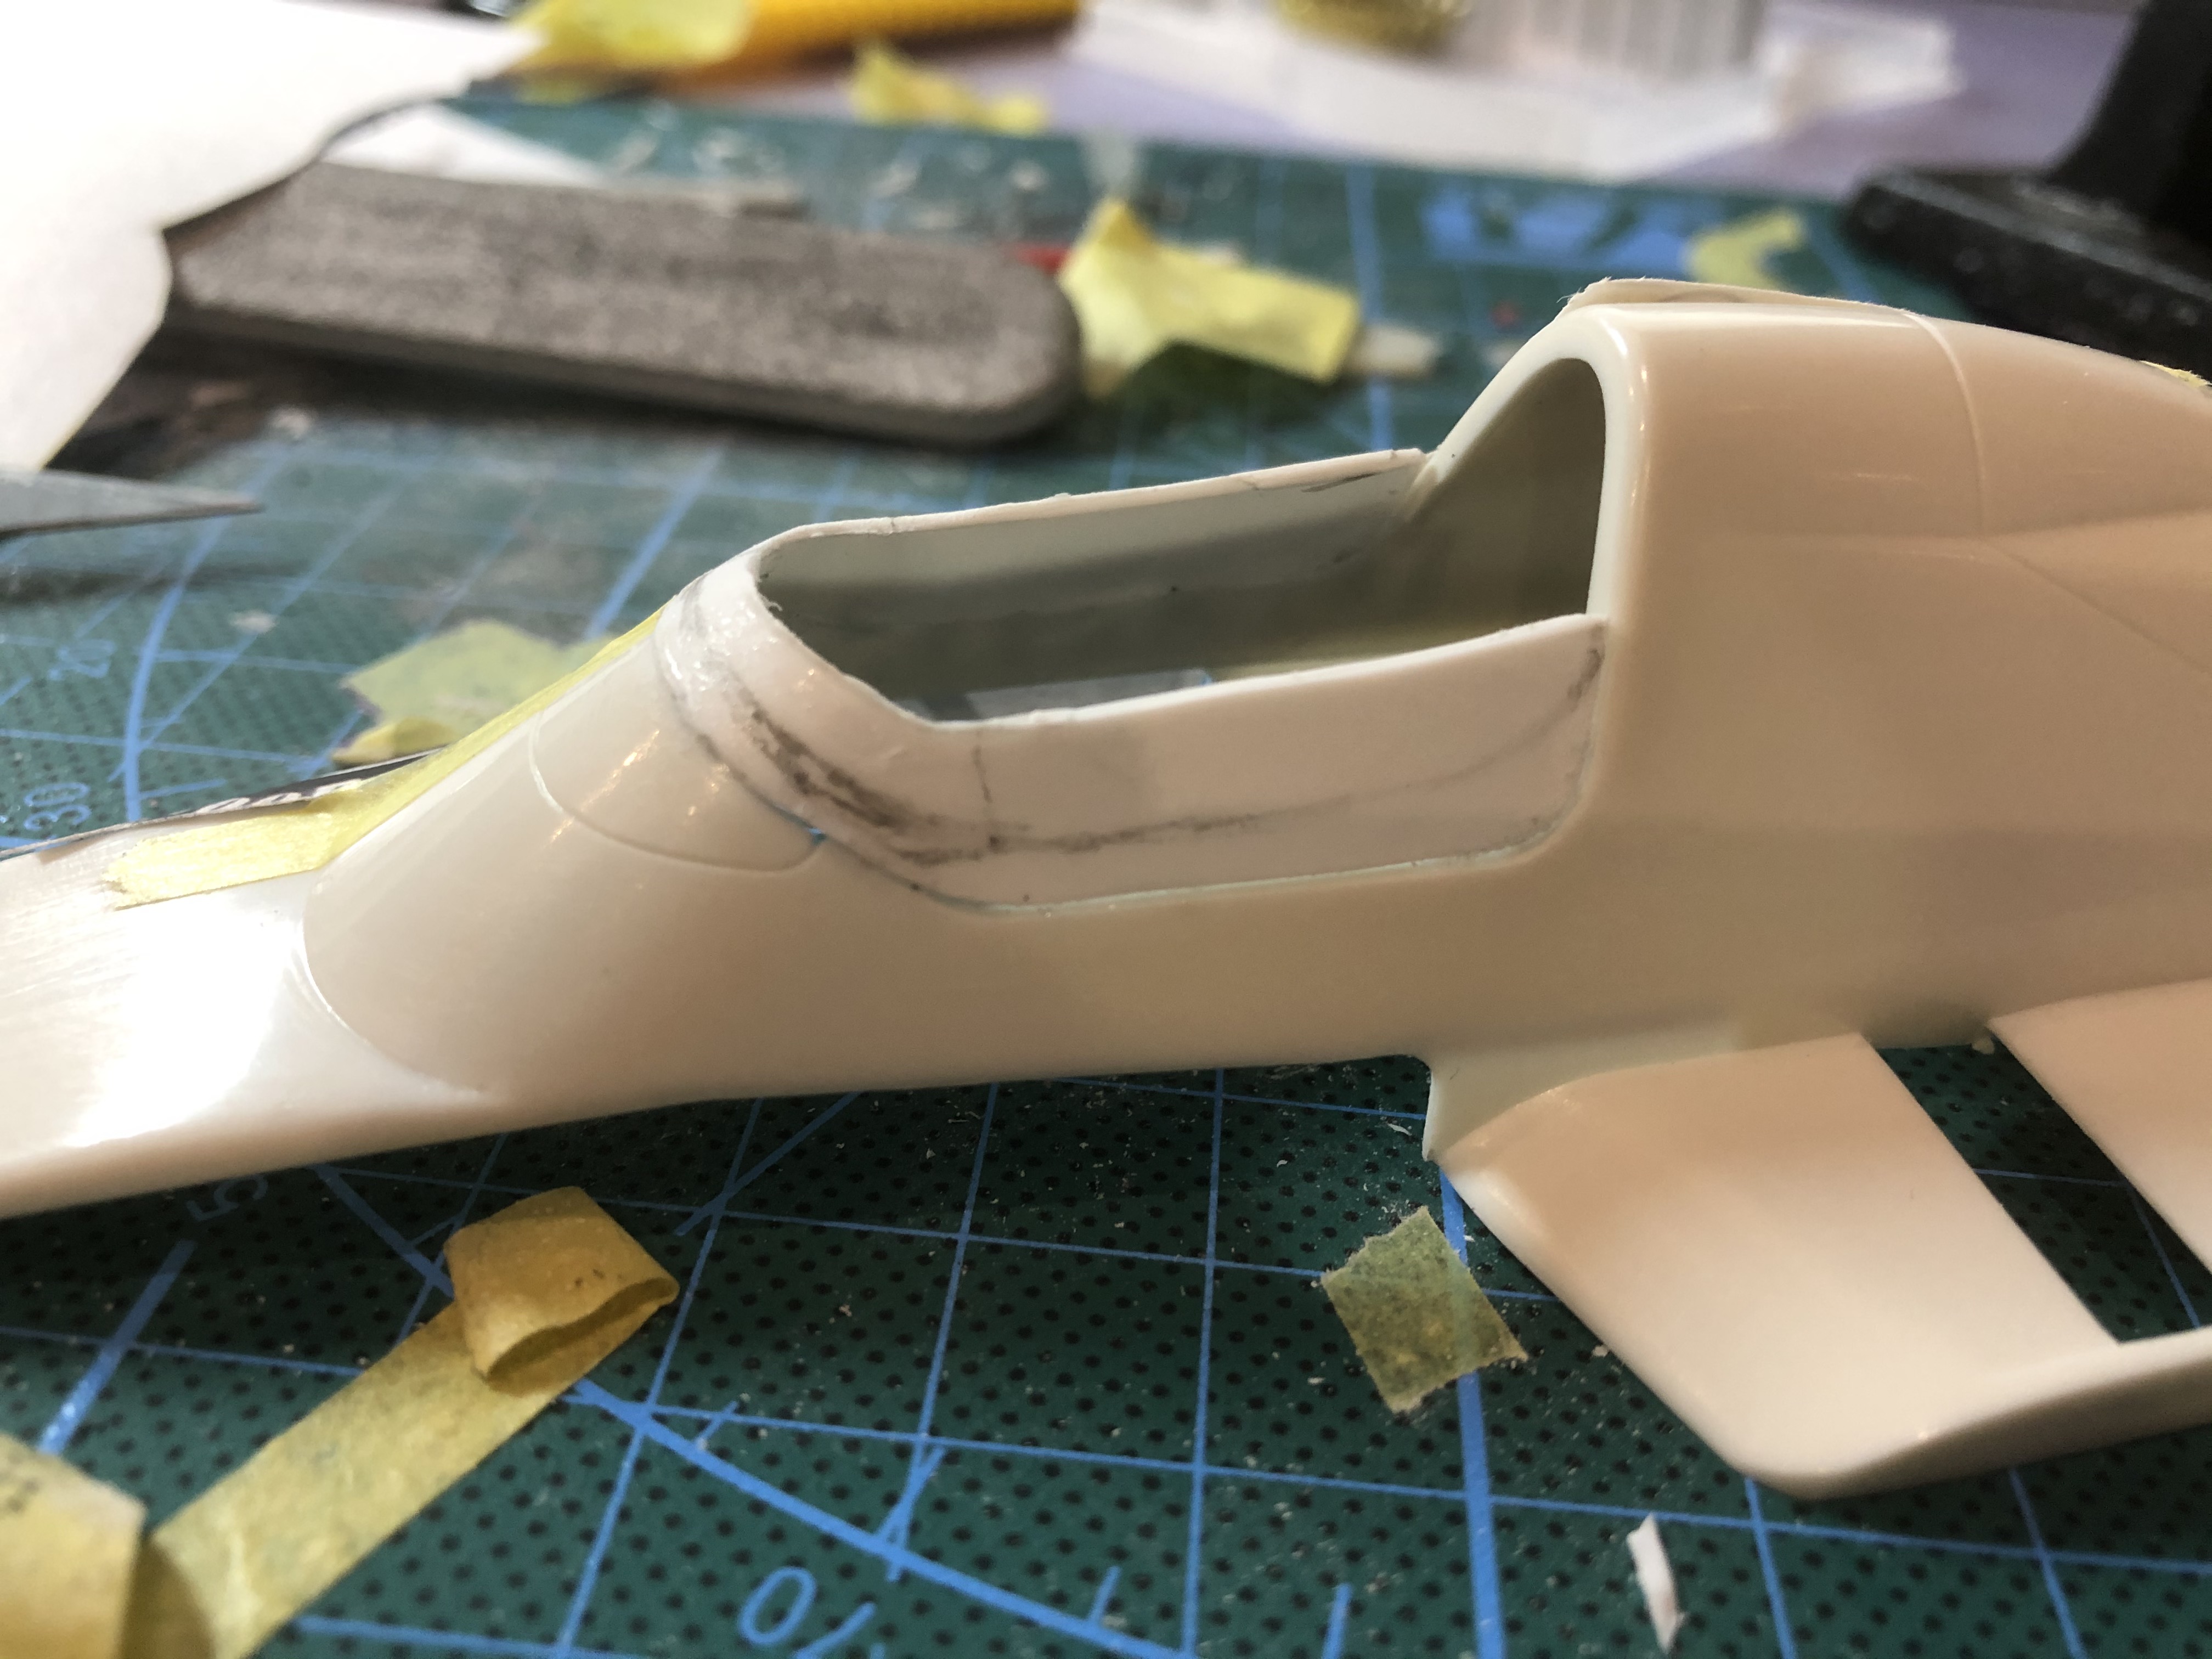
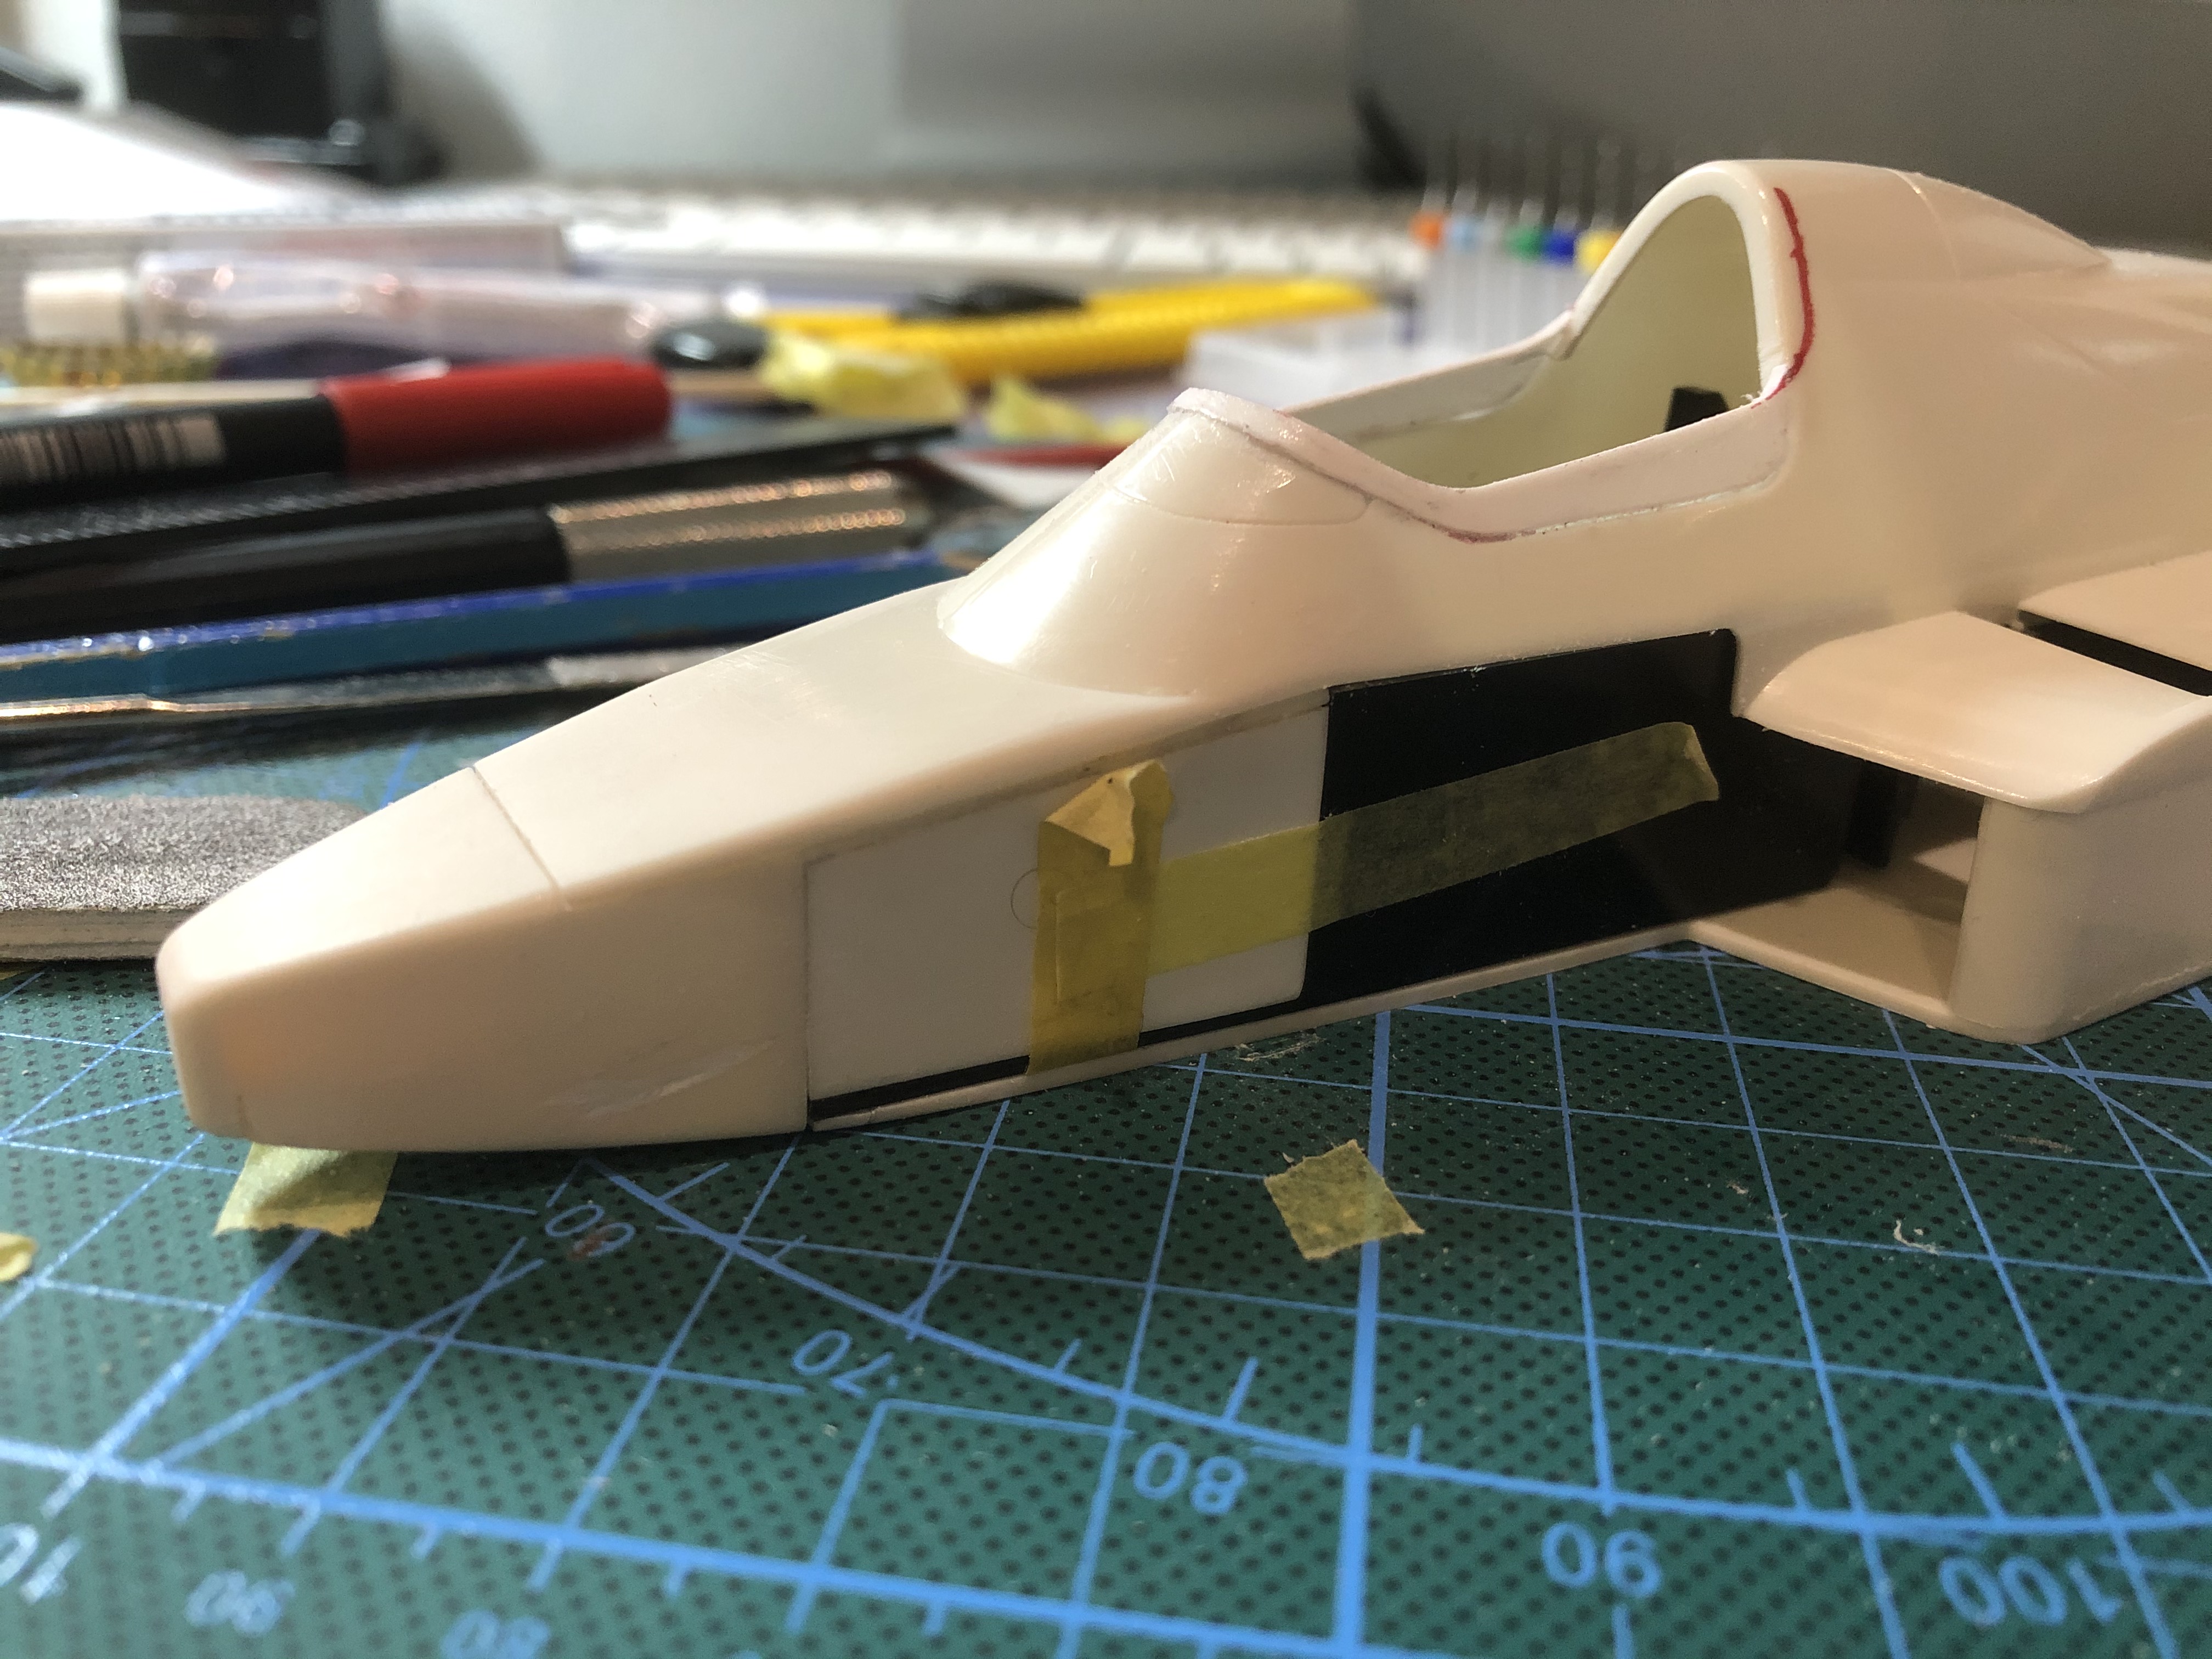
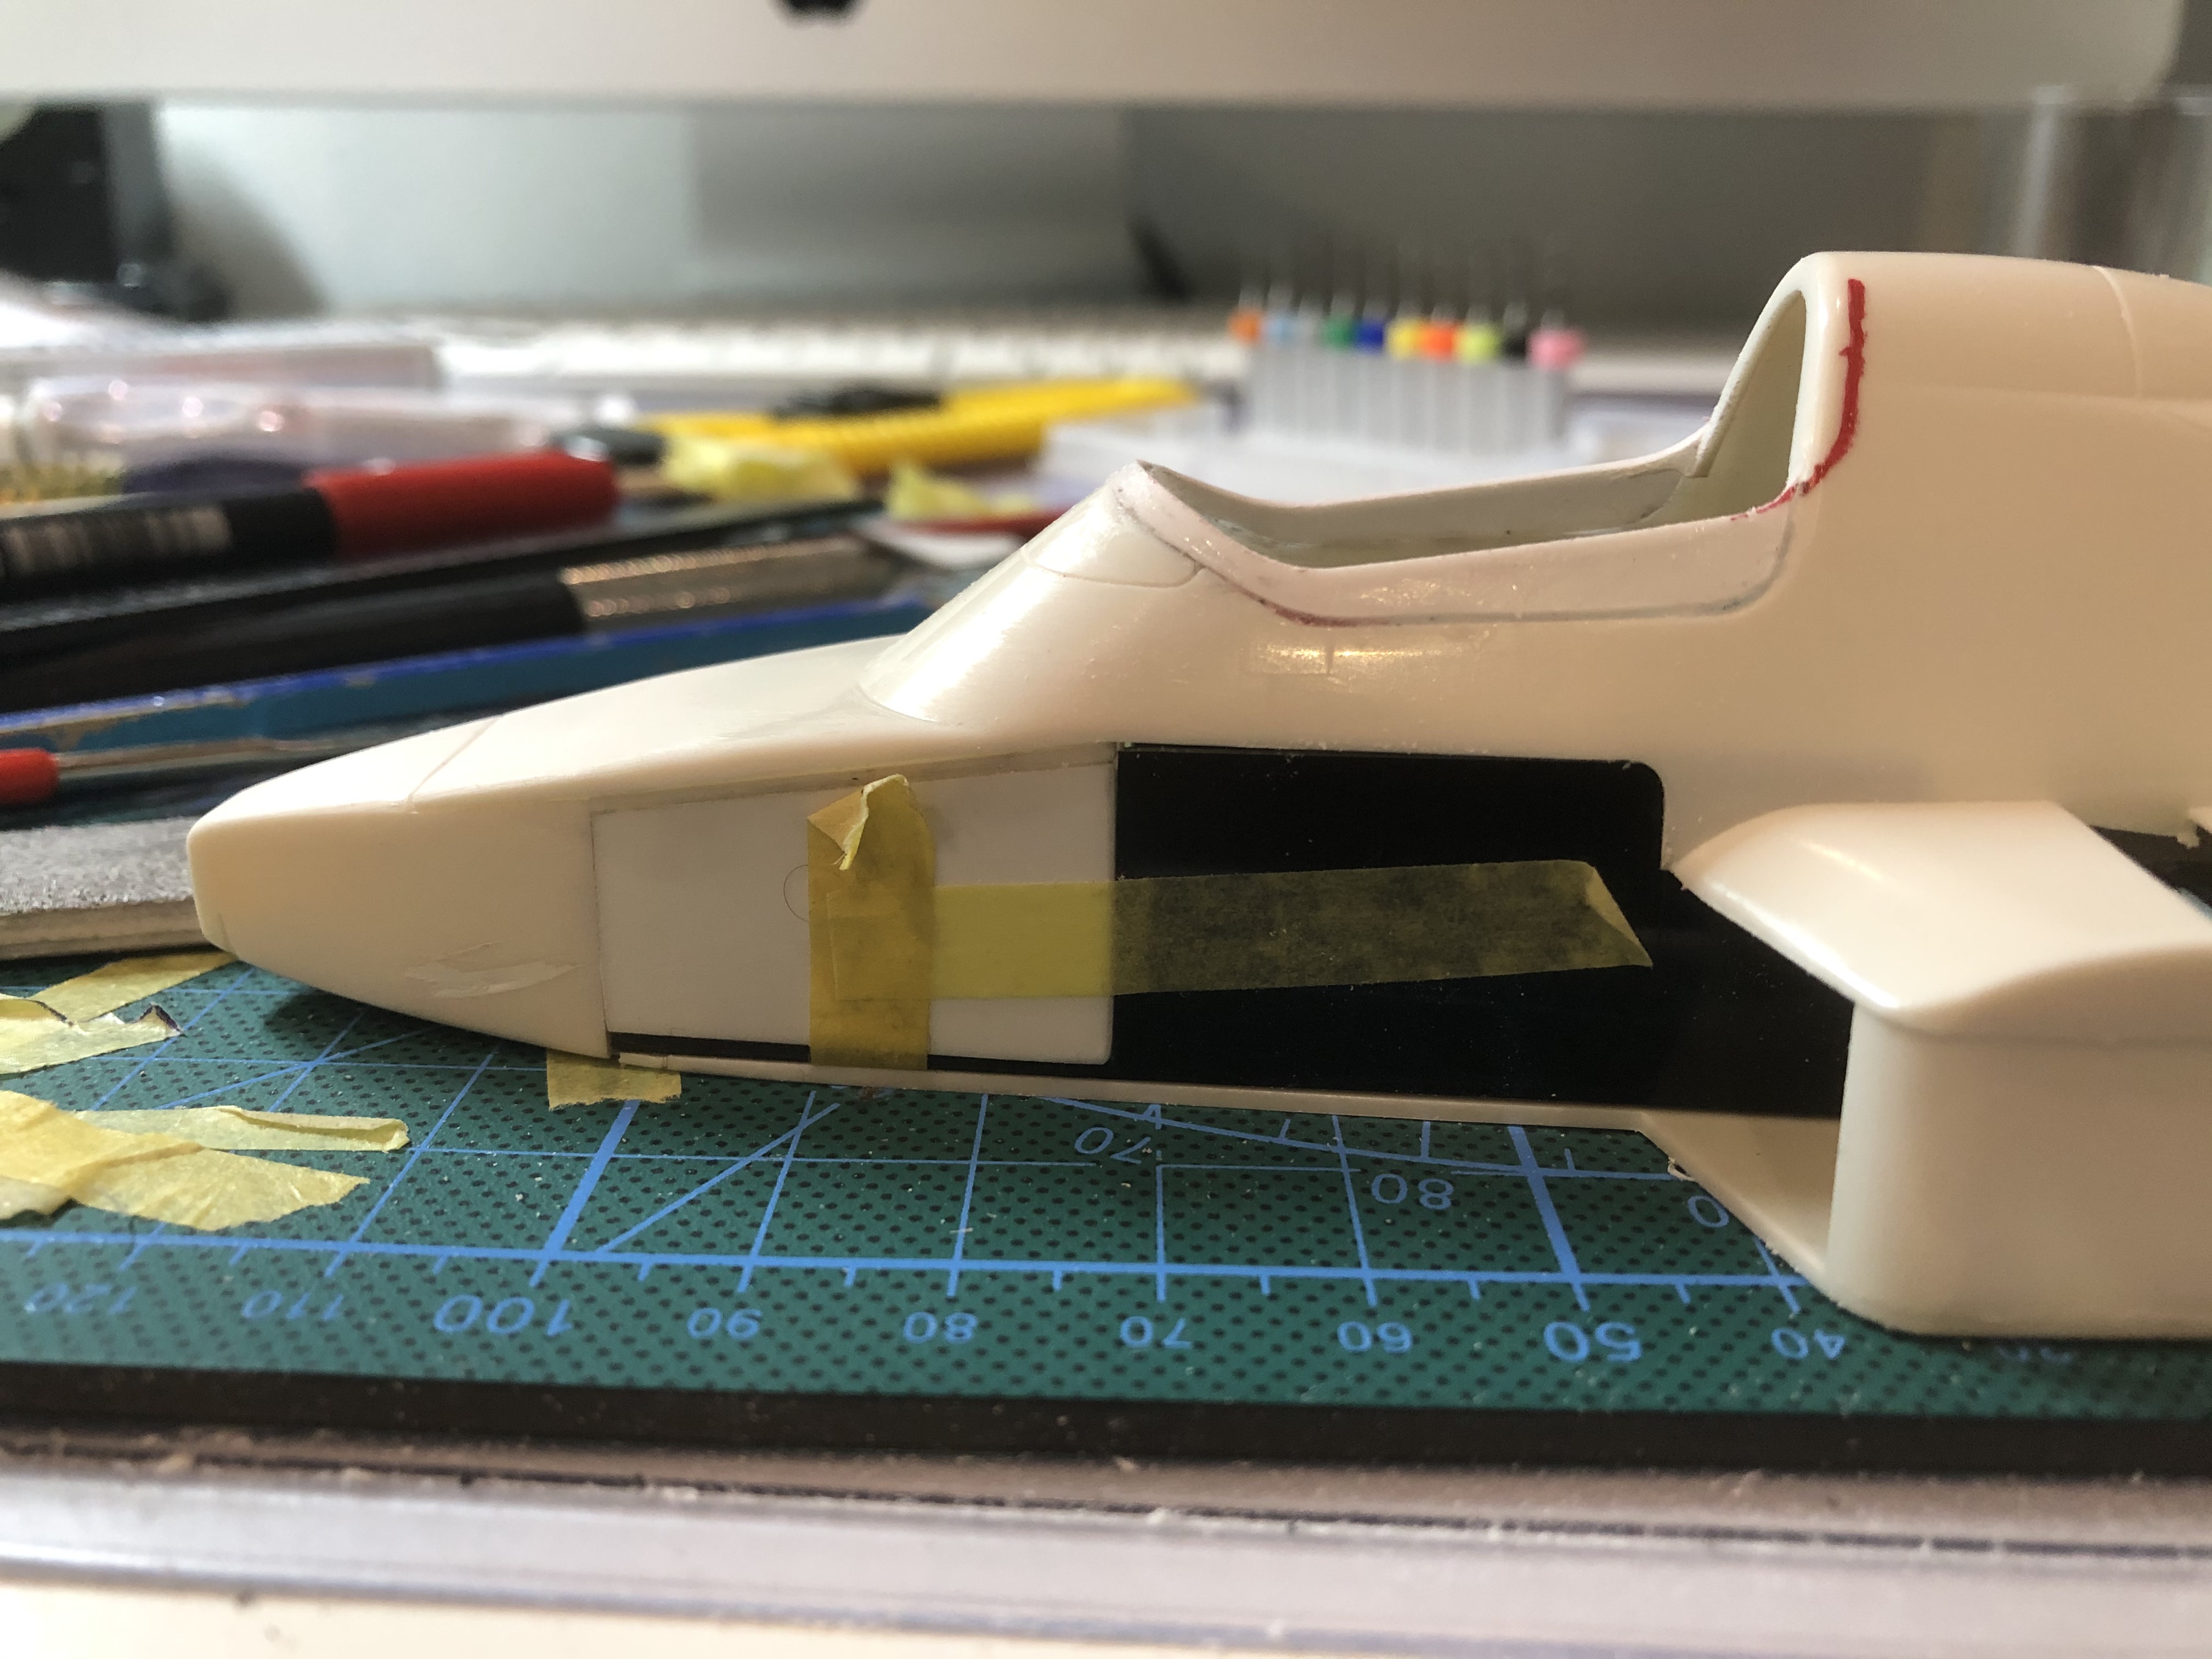
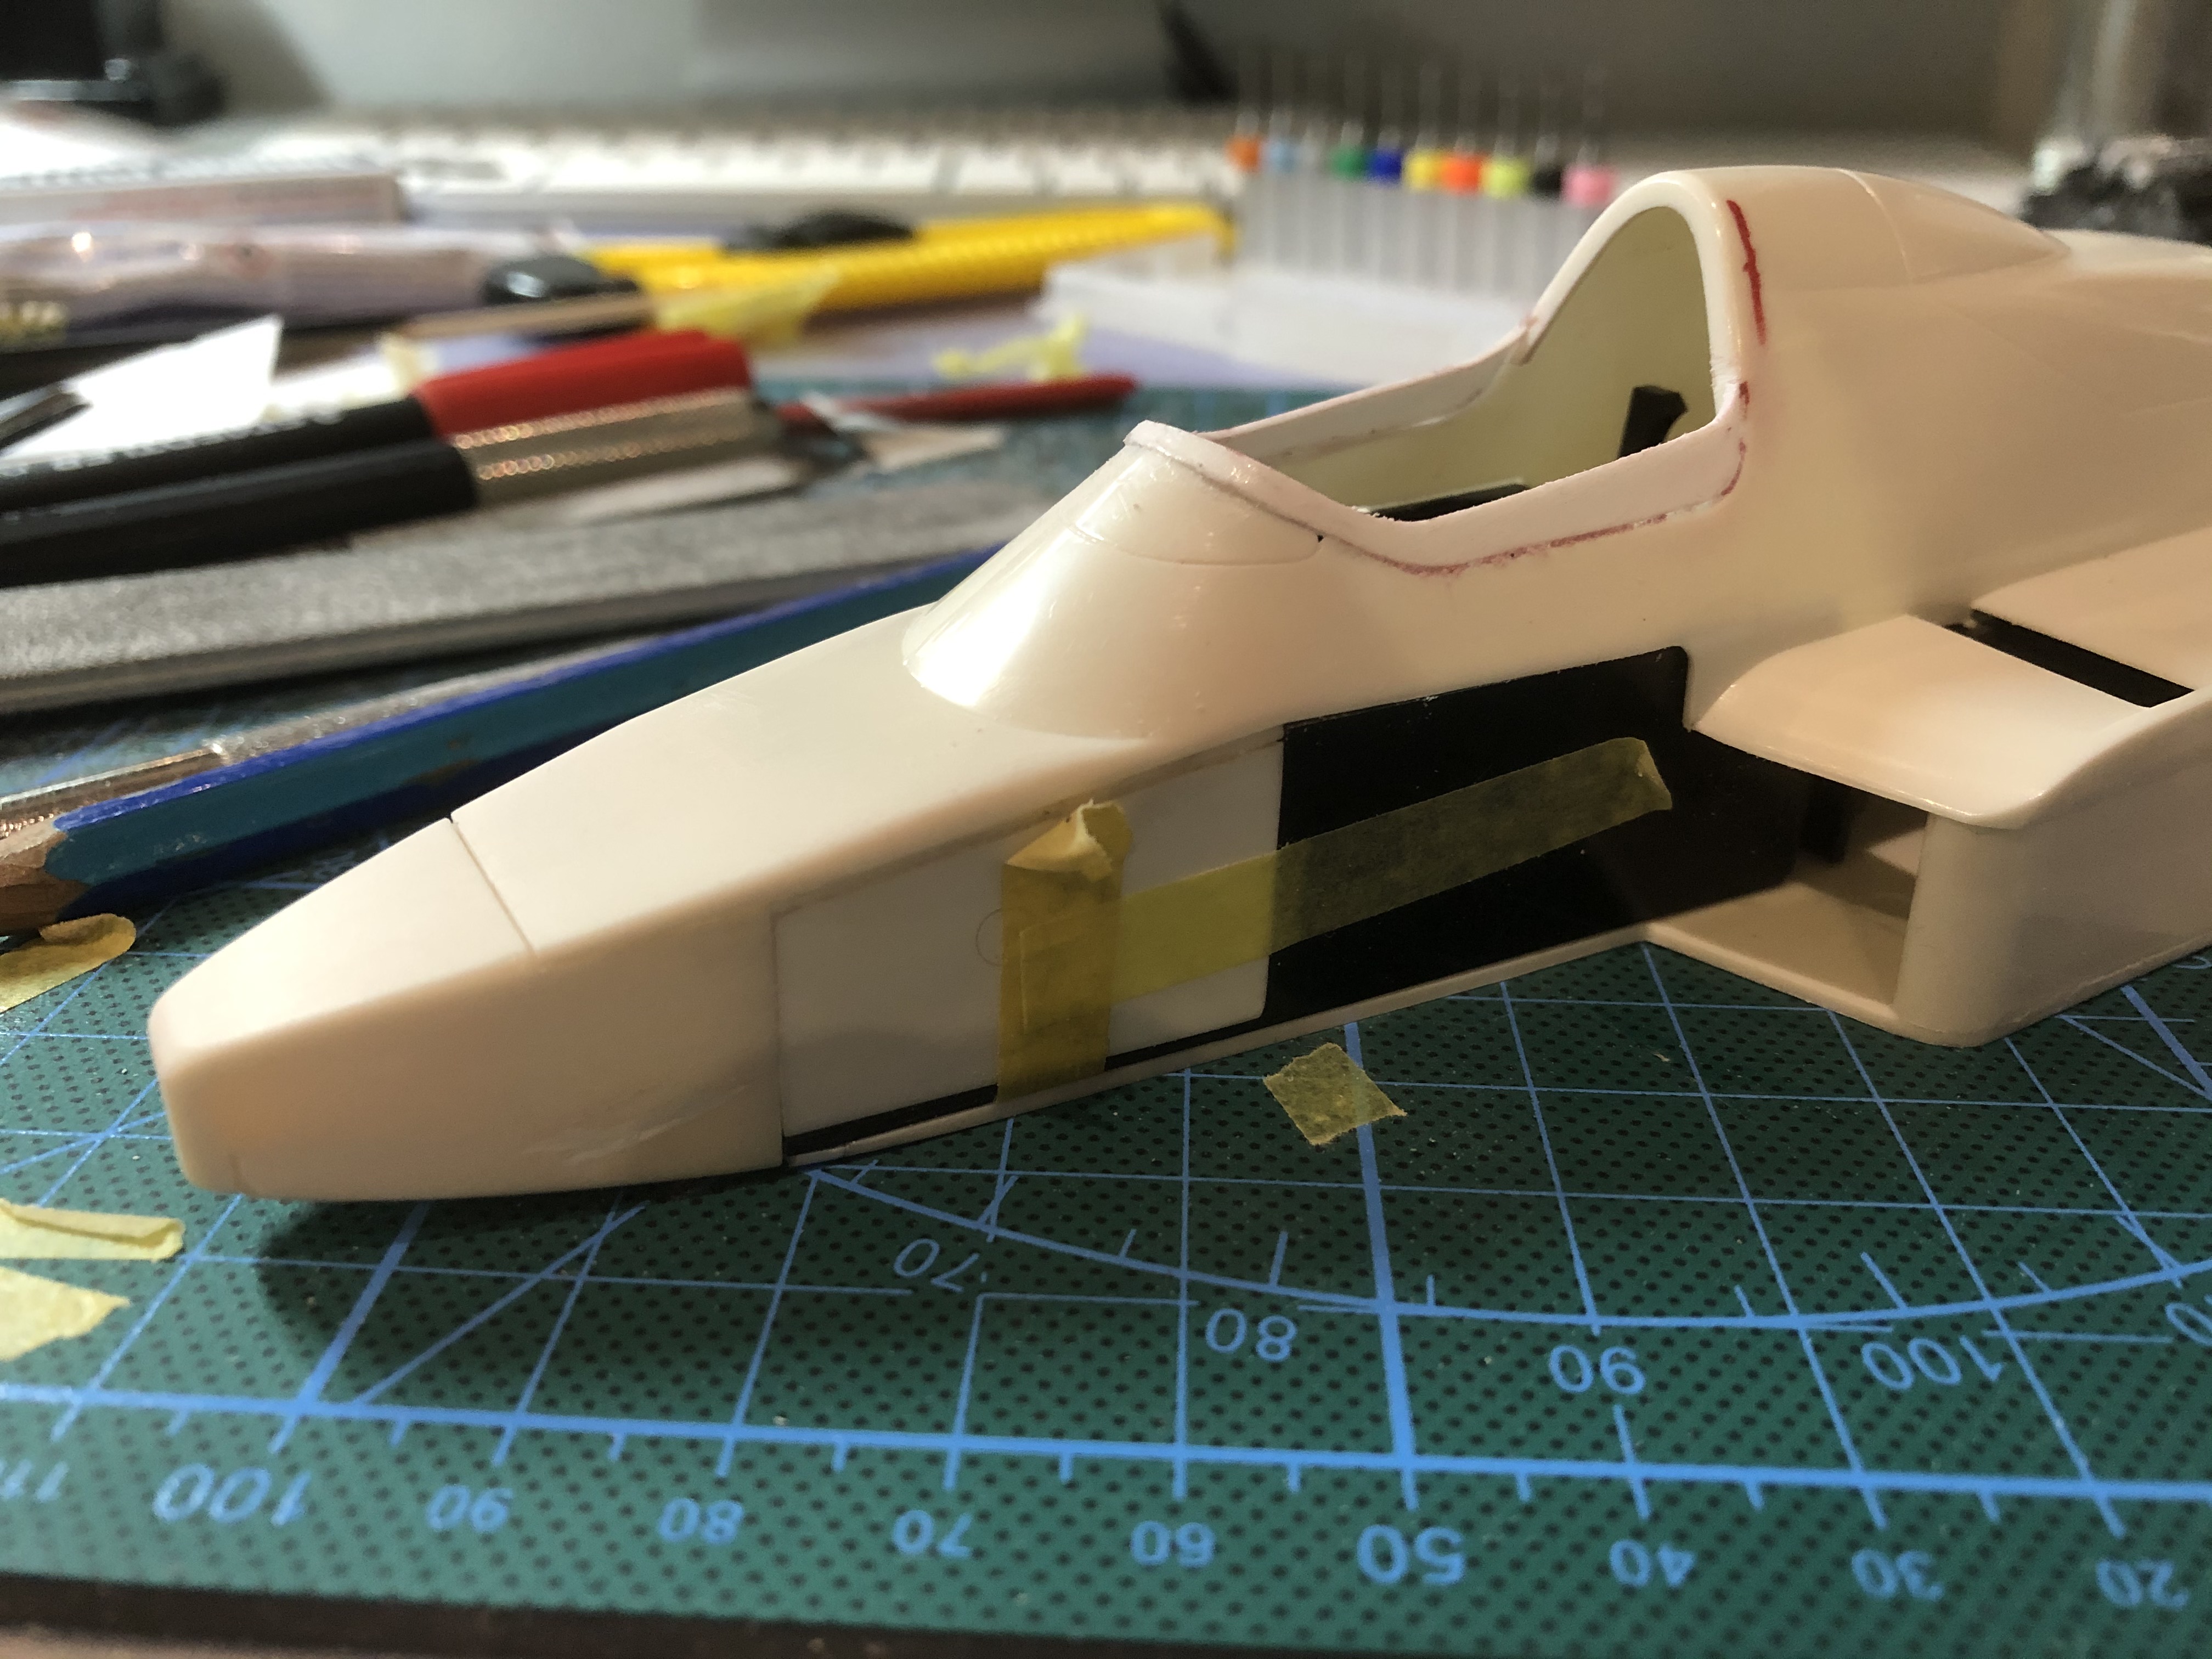
So today the pictures come from the nose. It's been an eternal grinding and comparing
Then I compared the two engines and rear suspension. It won't be that easy to relocate these properly. With the FW11, the motor and gearbox can actually be separated easily - the only problem I have here is that this is also an old one and has already been glued and not with only a little bit of glue
The motor of the FW07 is directly connected to the gearbox, here I have to think about where and how I separate if I want to get both sensibly.
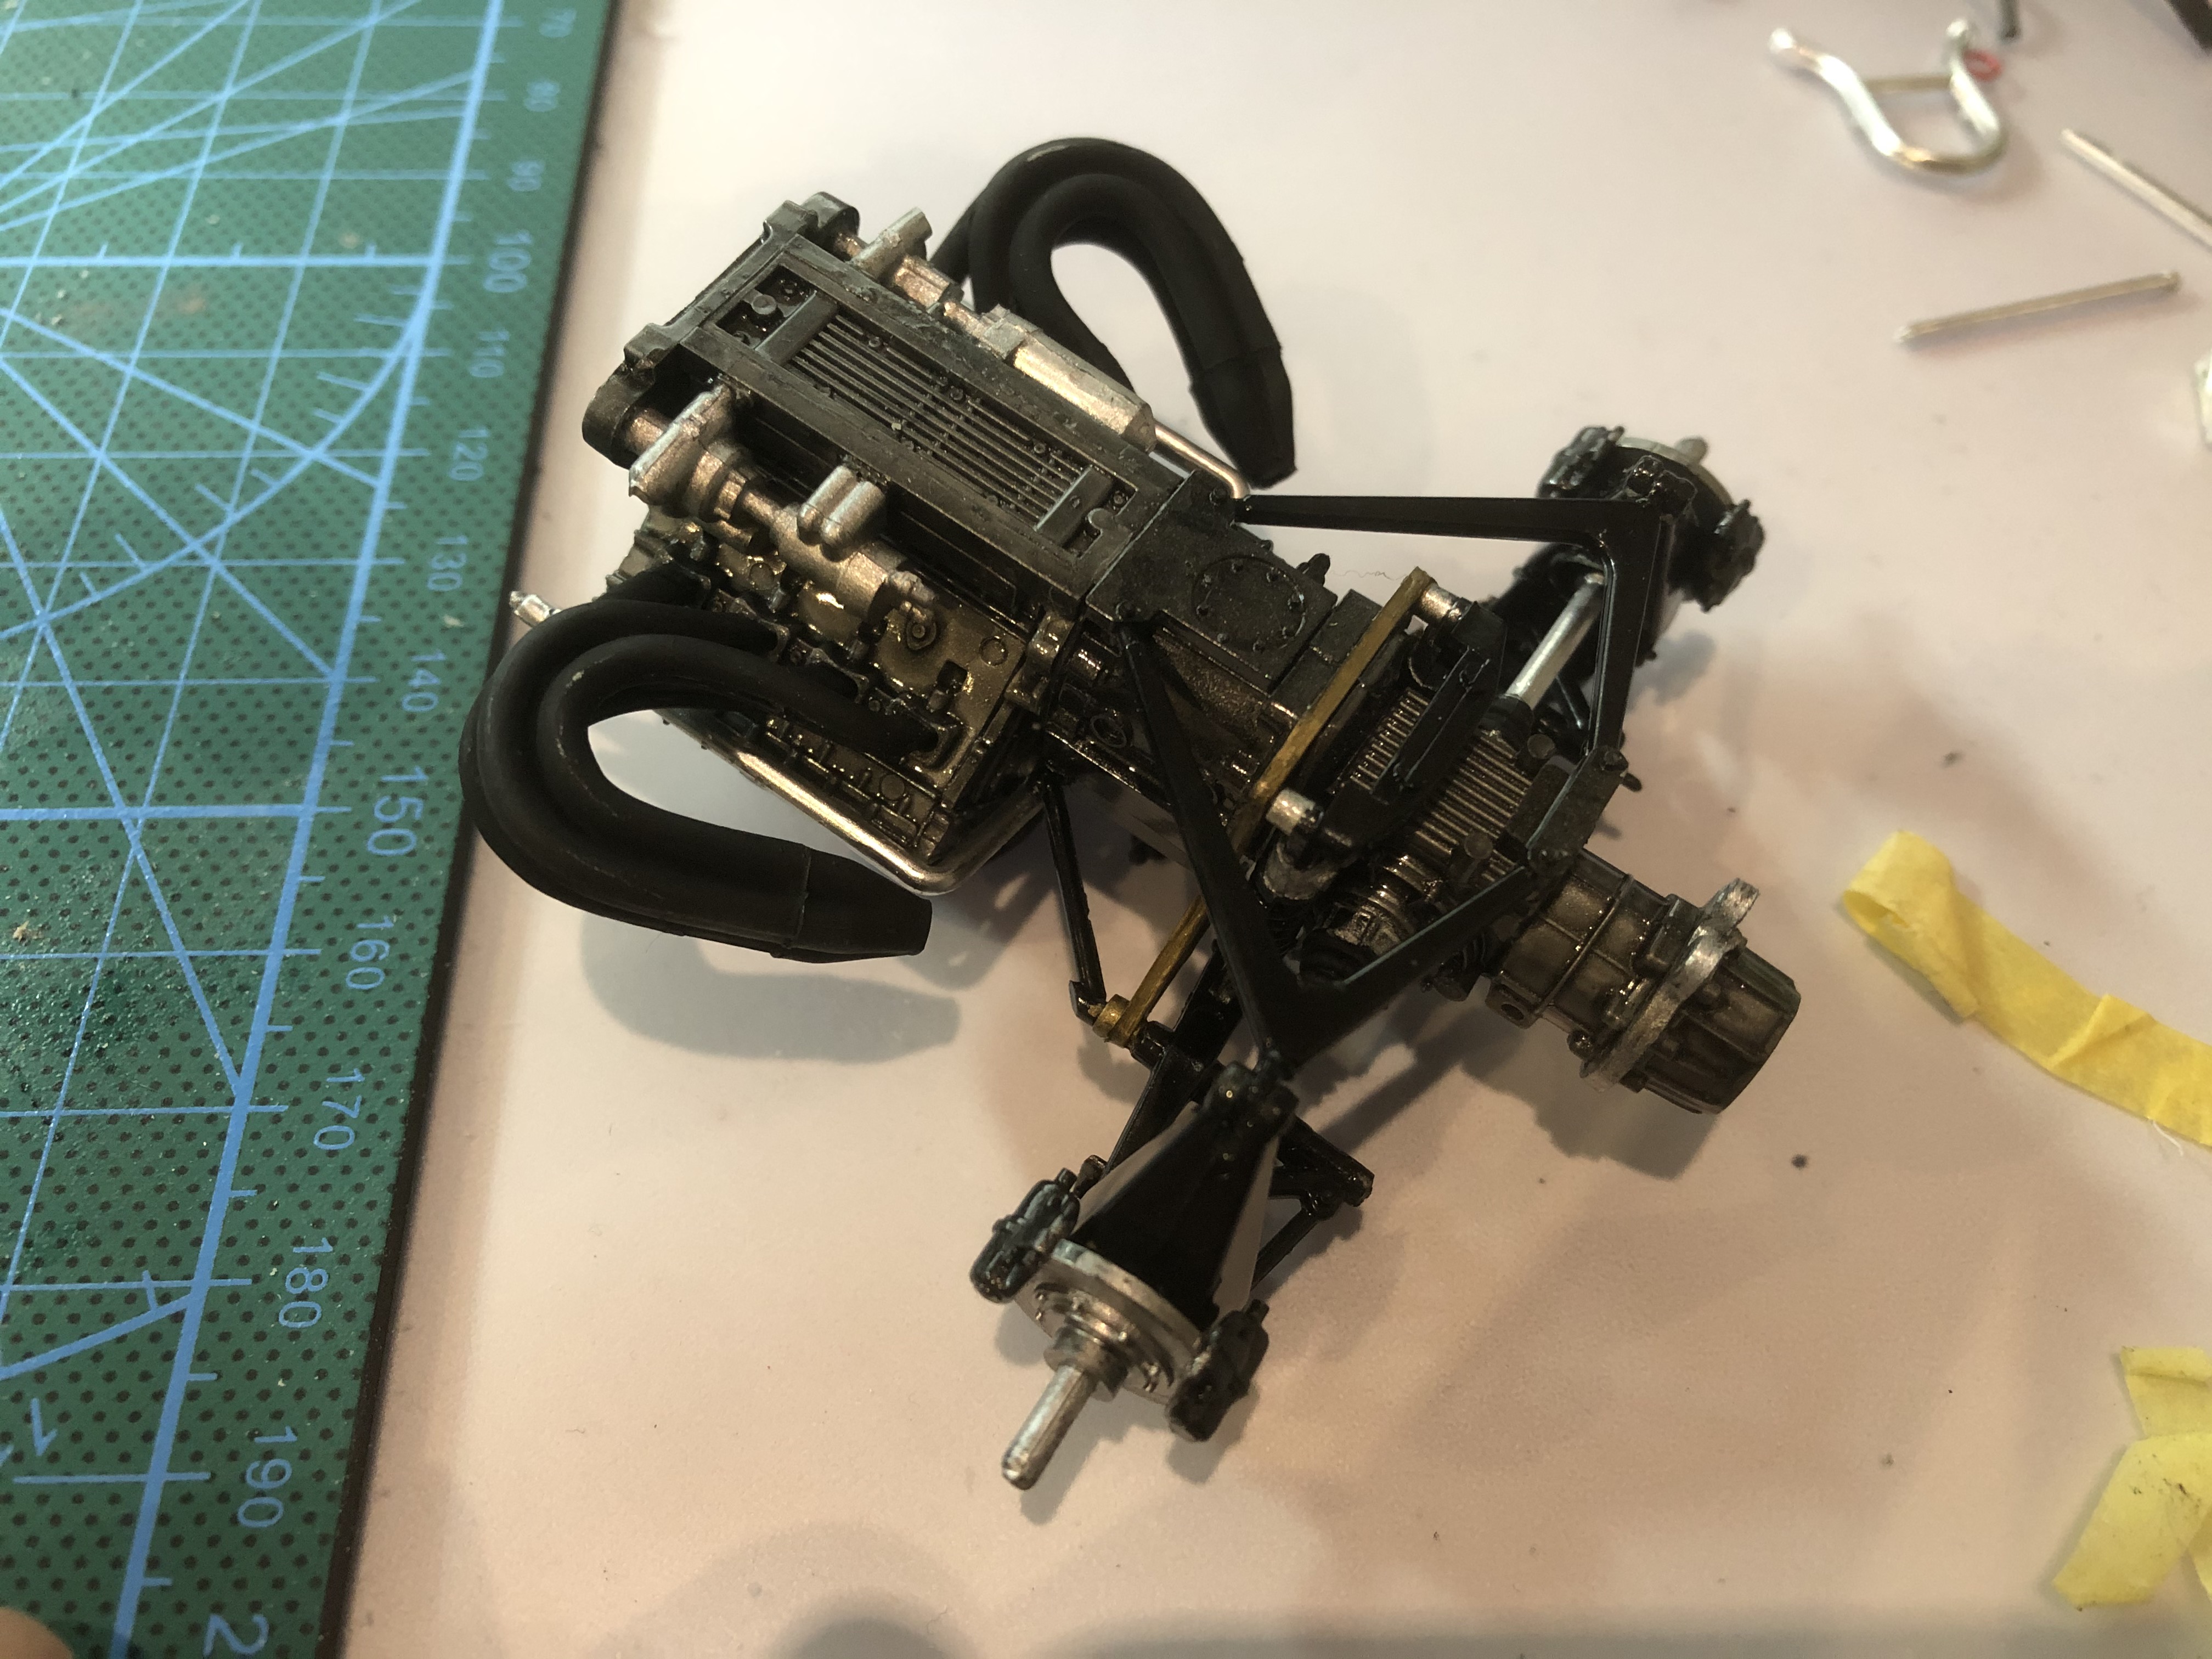
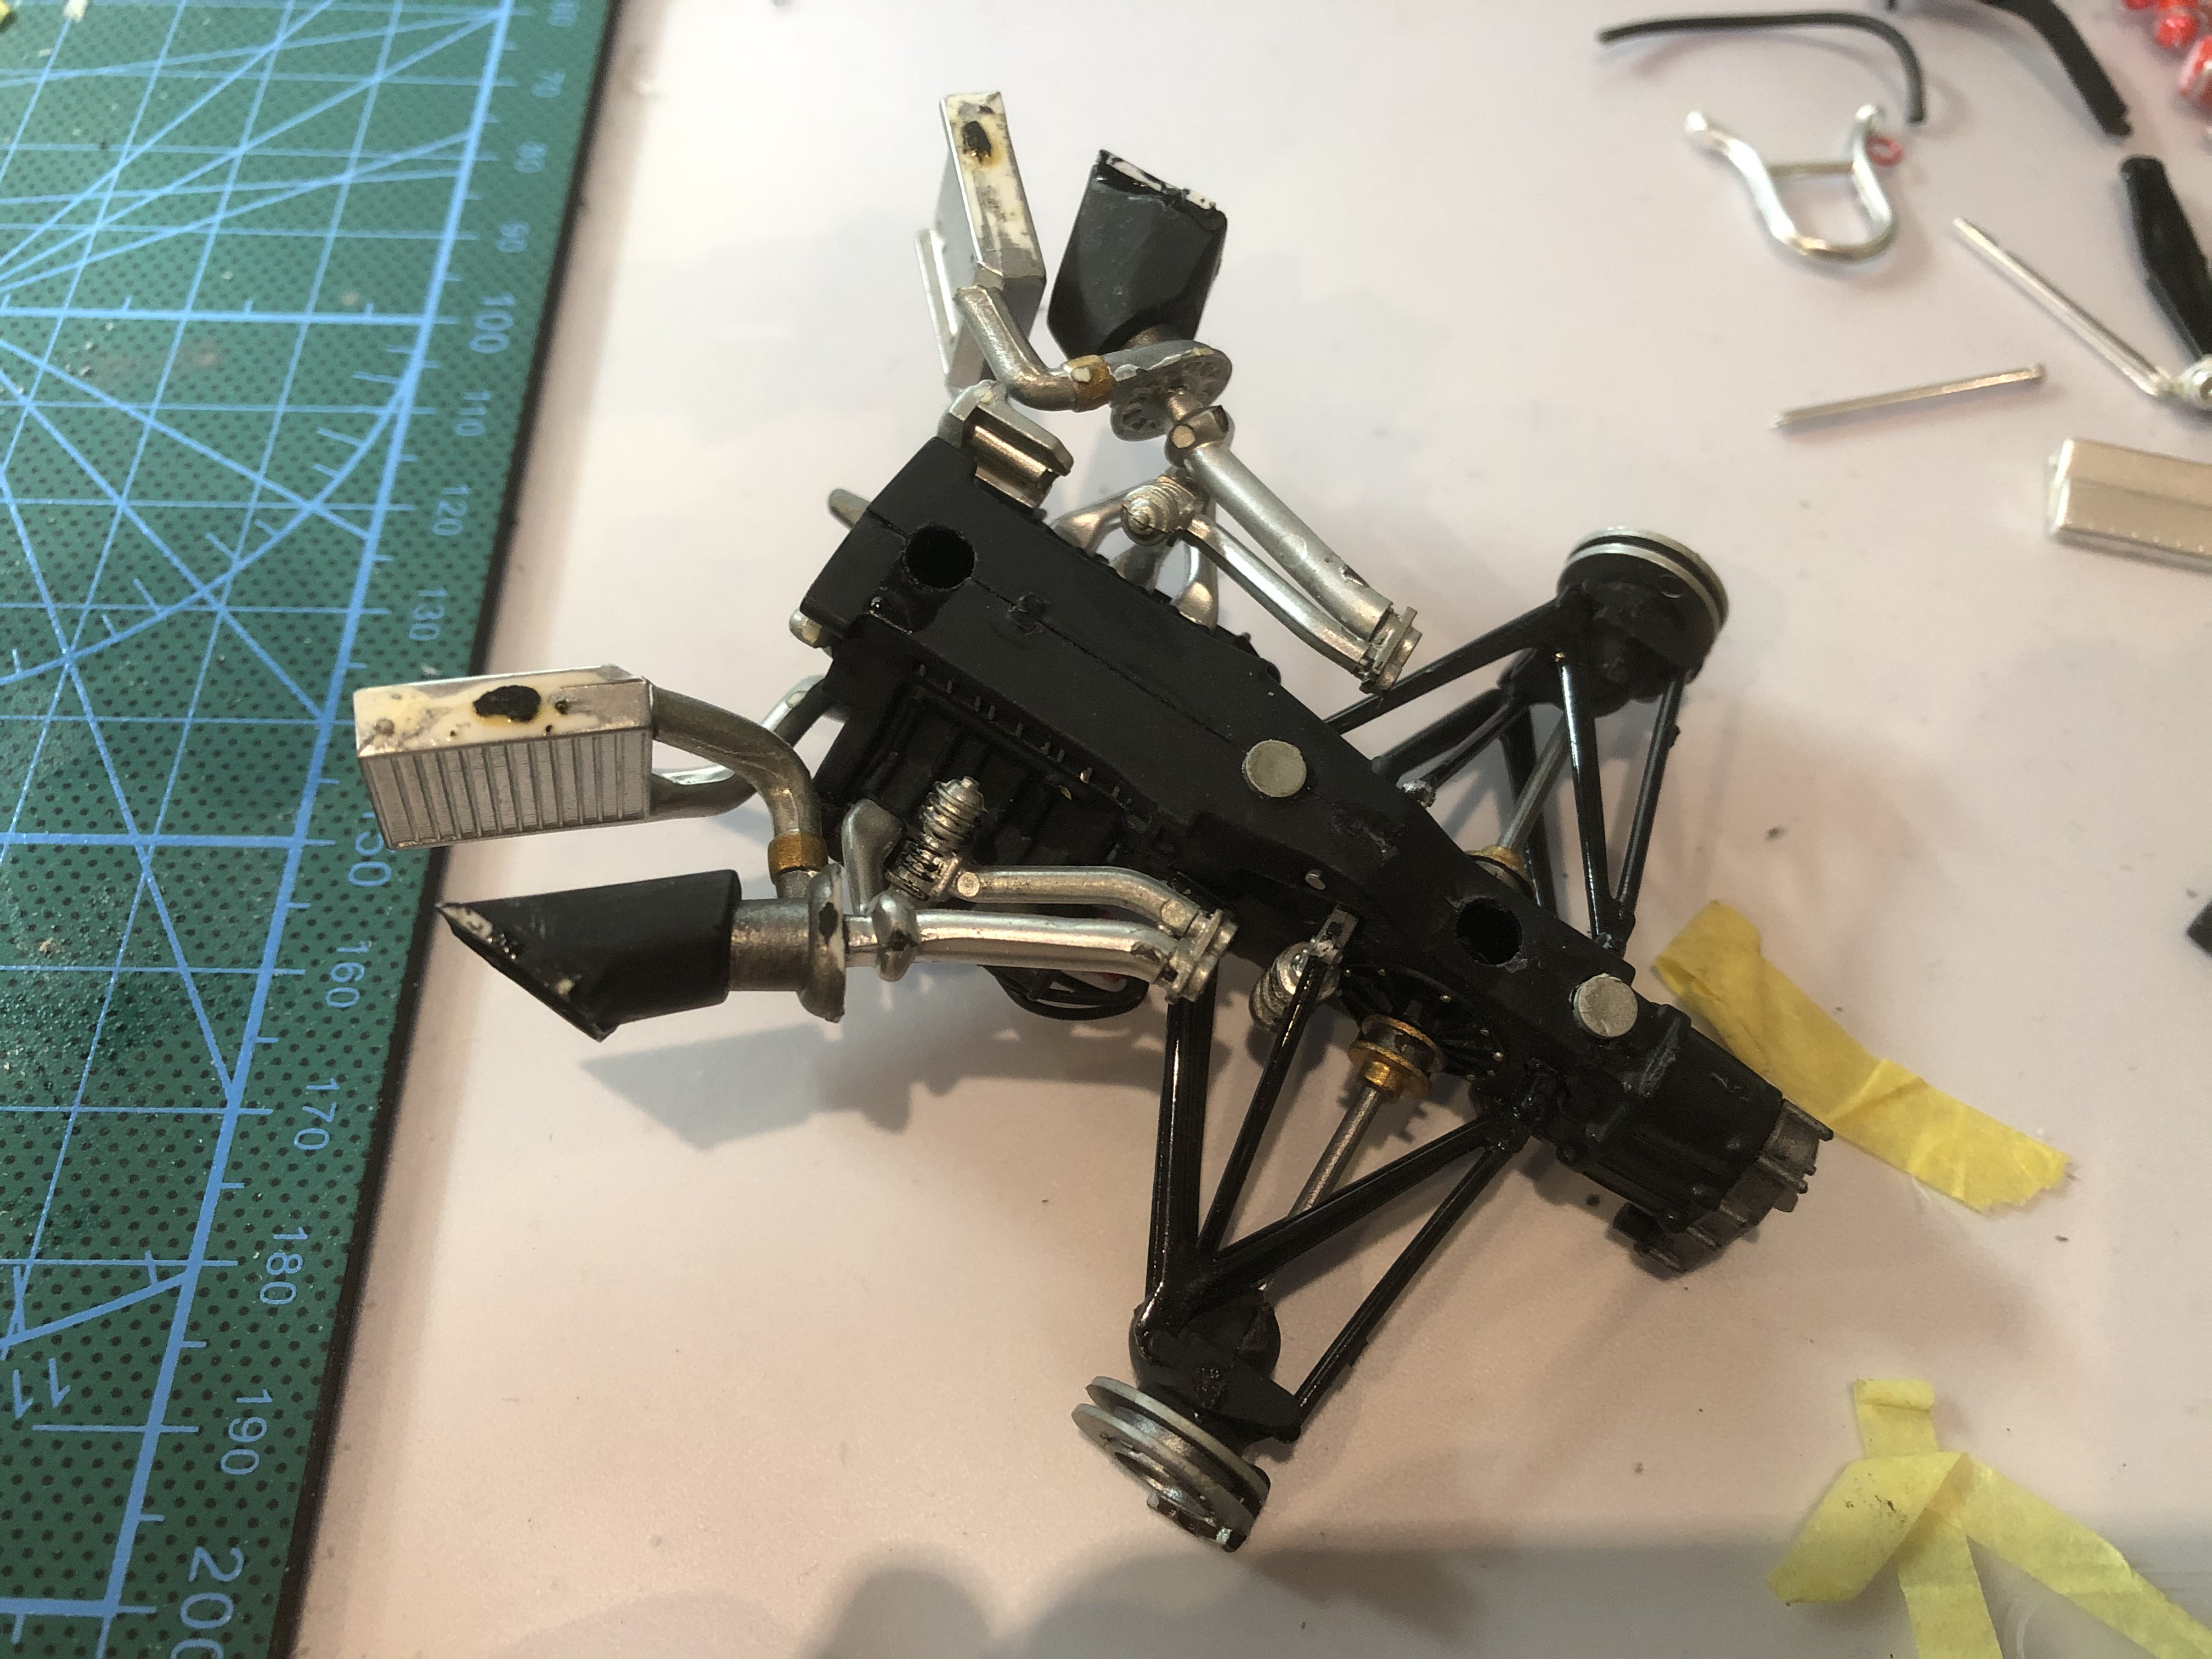
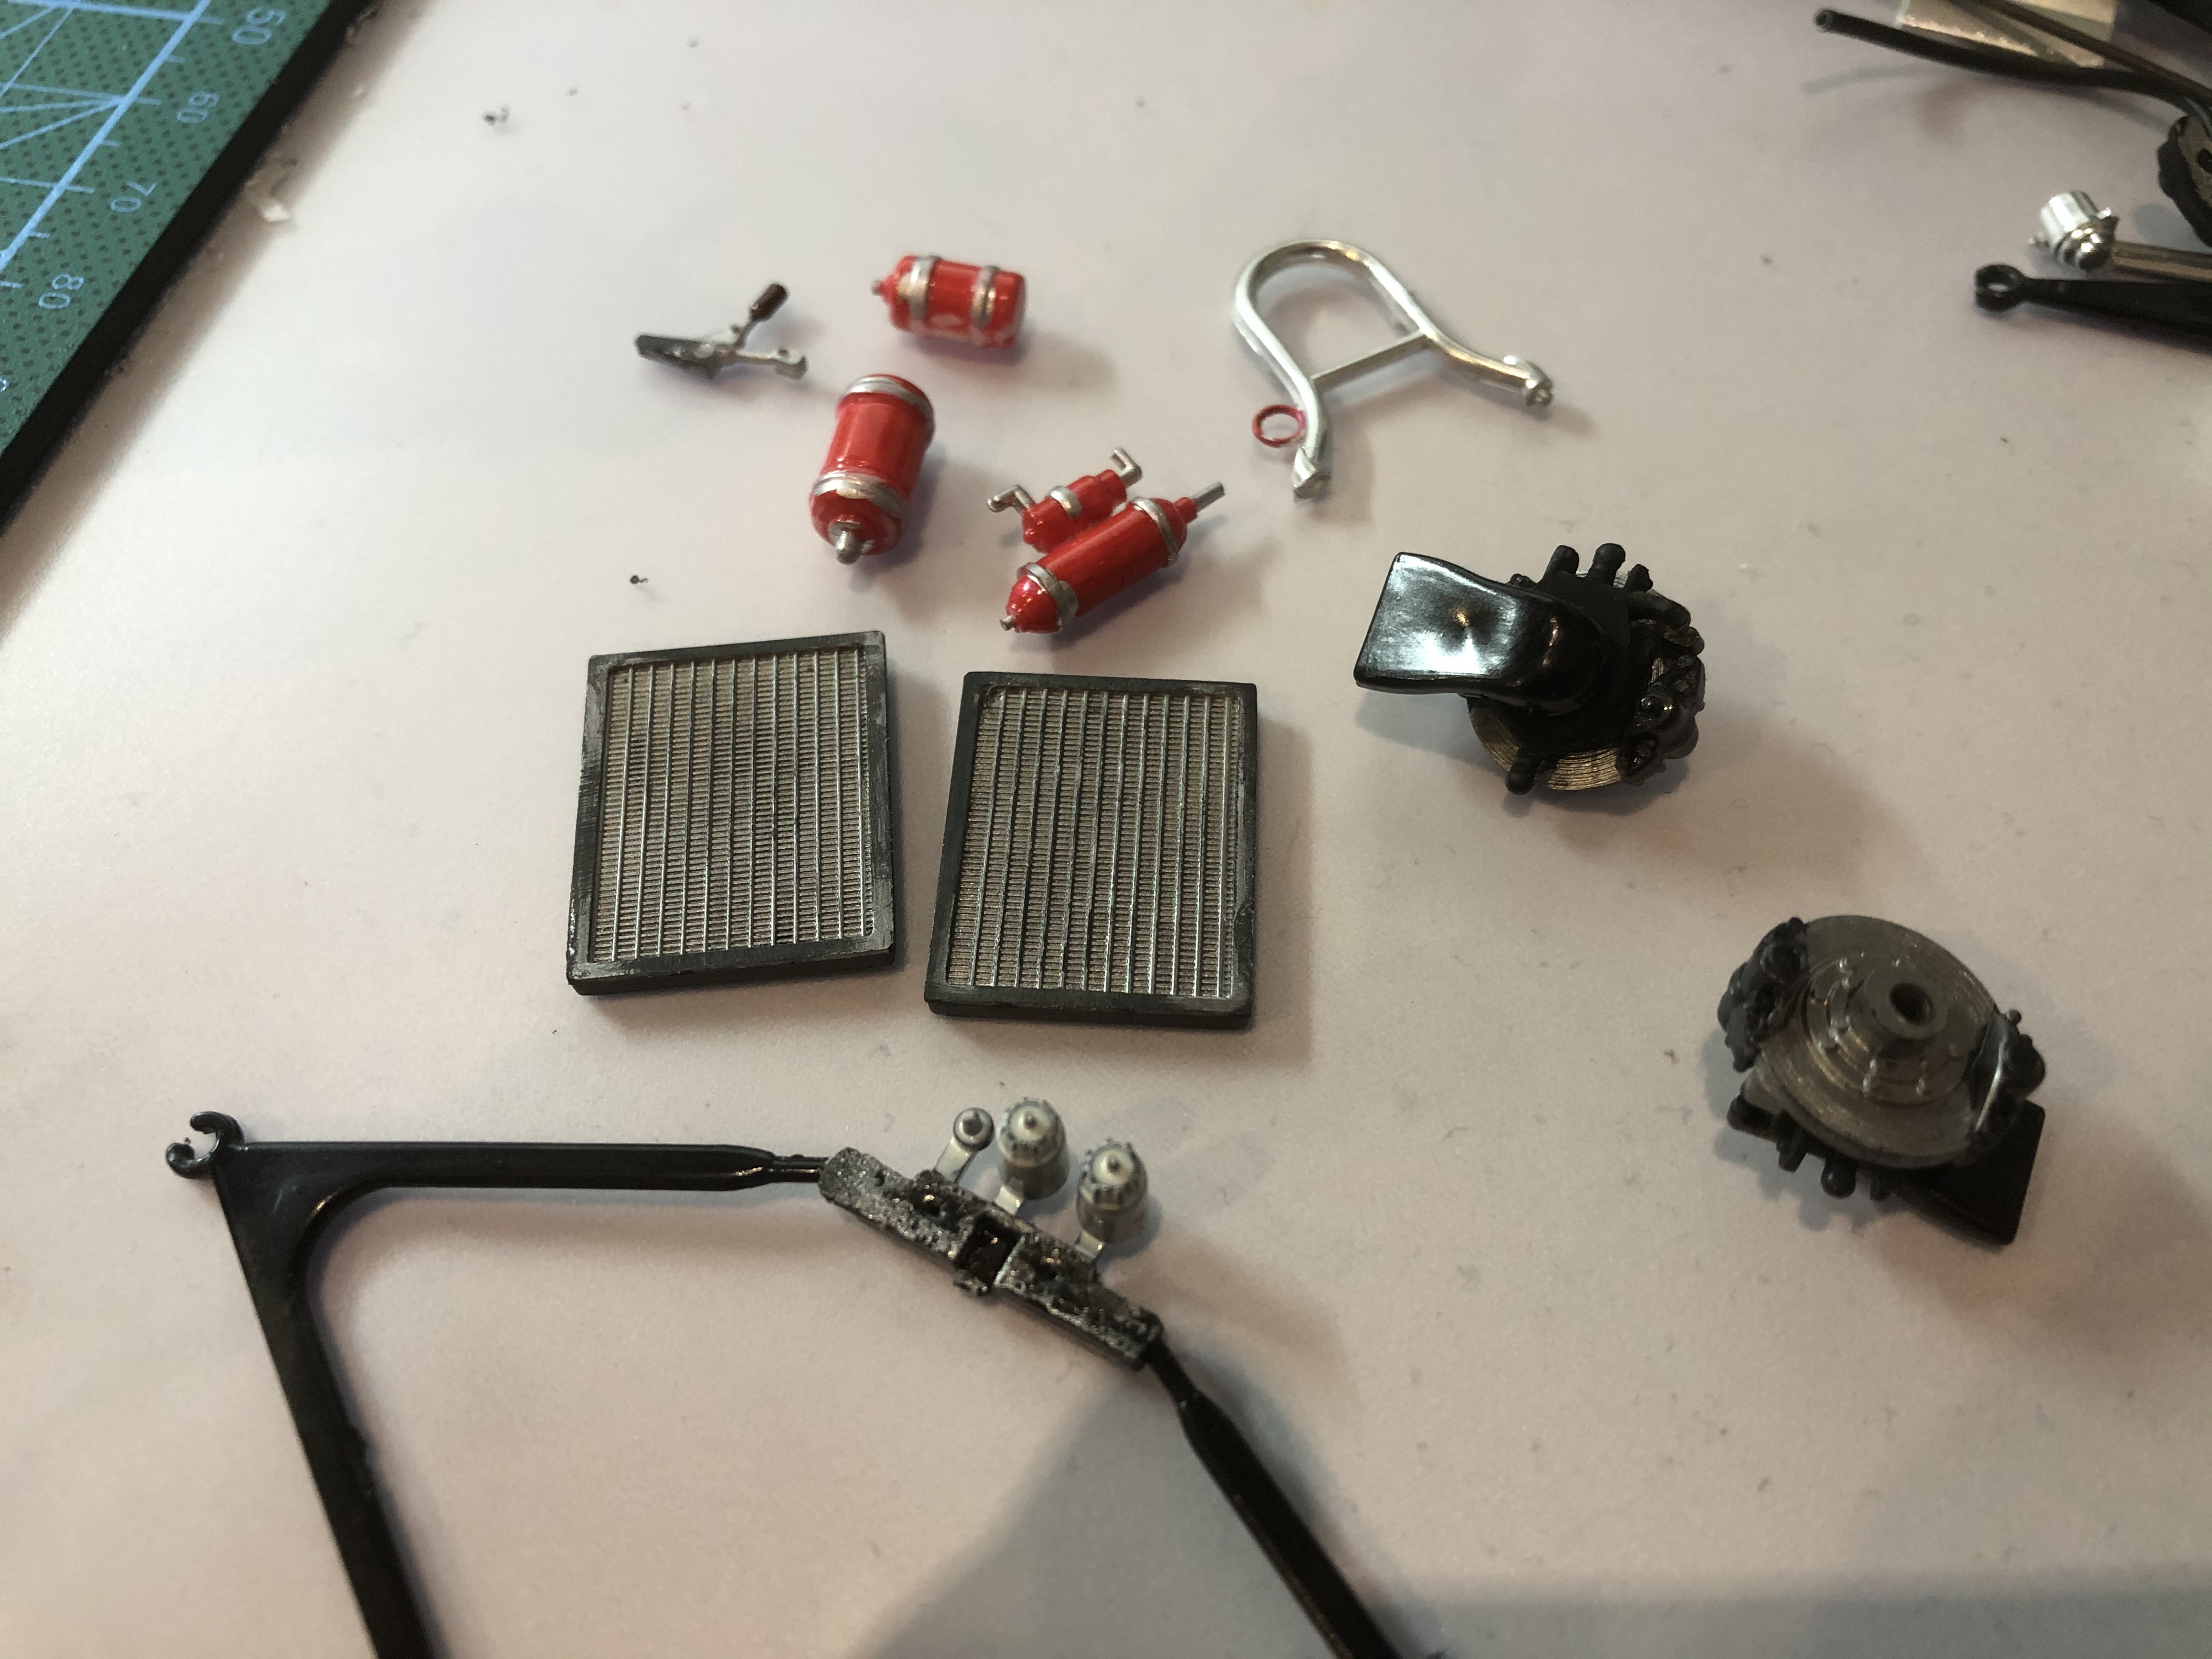
Since I have now disassembled the FW07, I have also picked out a few parts that I want to use if necessary.
The coolers look very good, but I have to check the length again. The rear coolers may be taken over directly from the FW11 and I would have to model very little here.
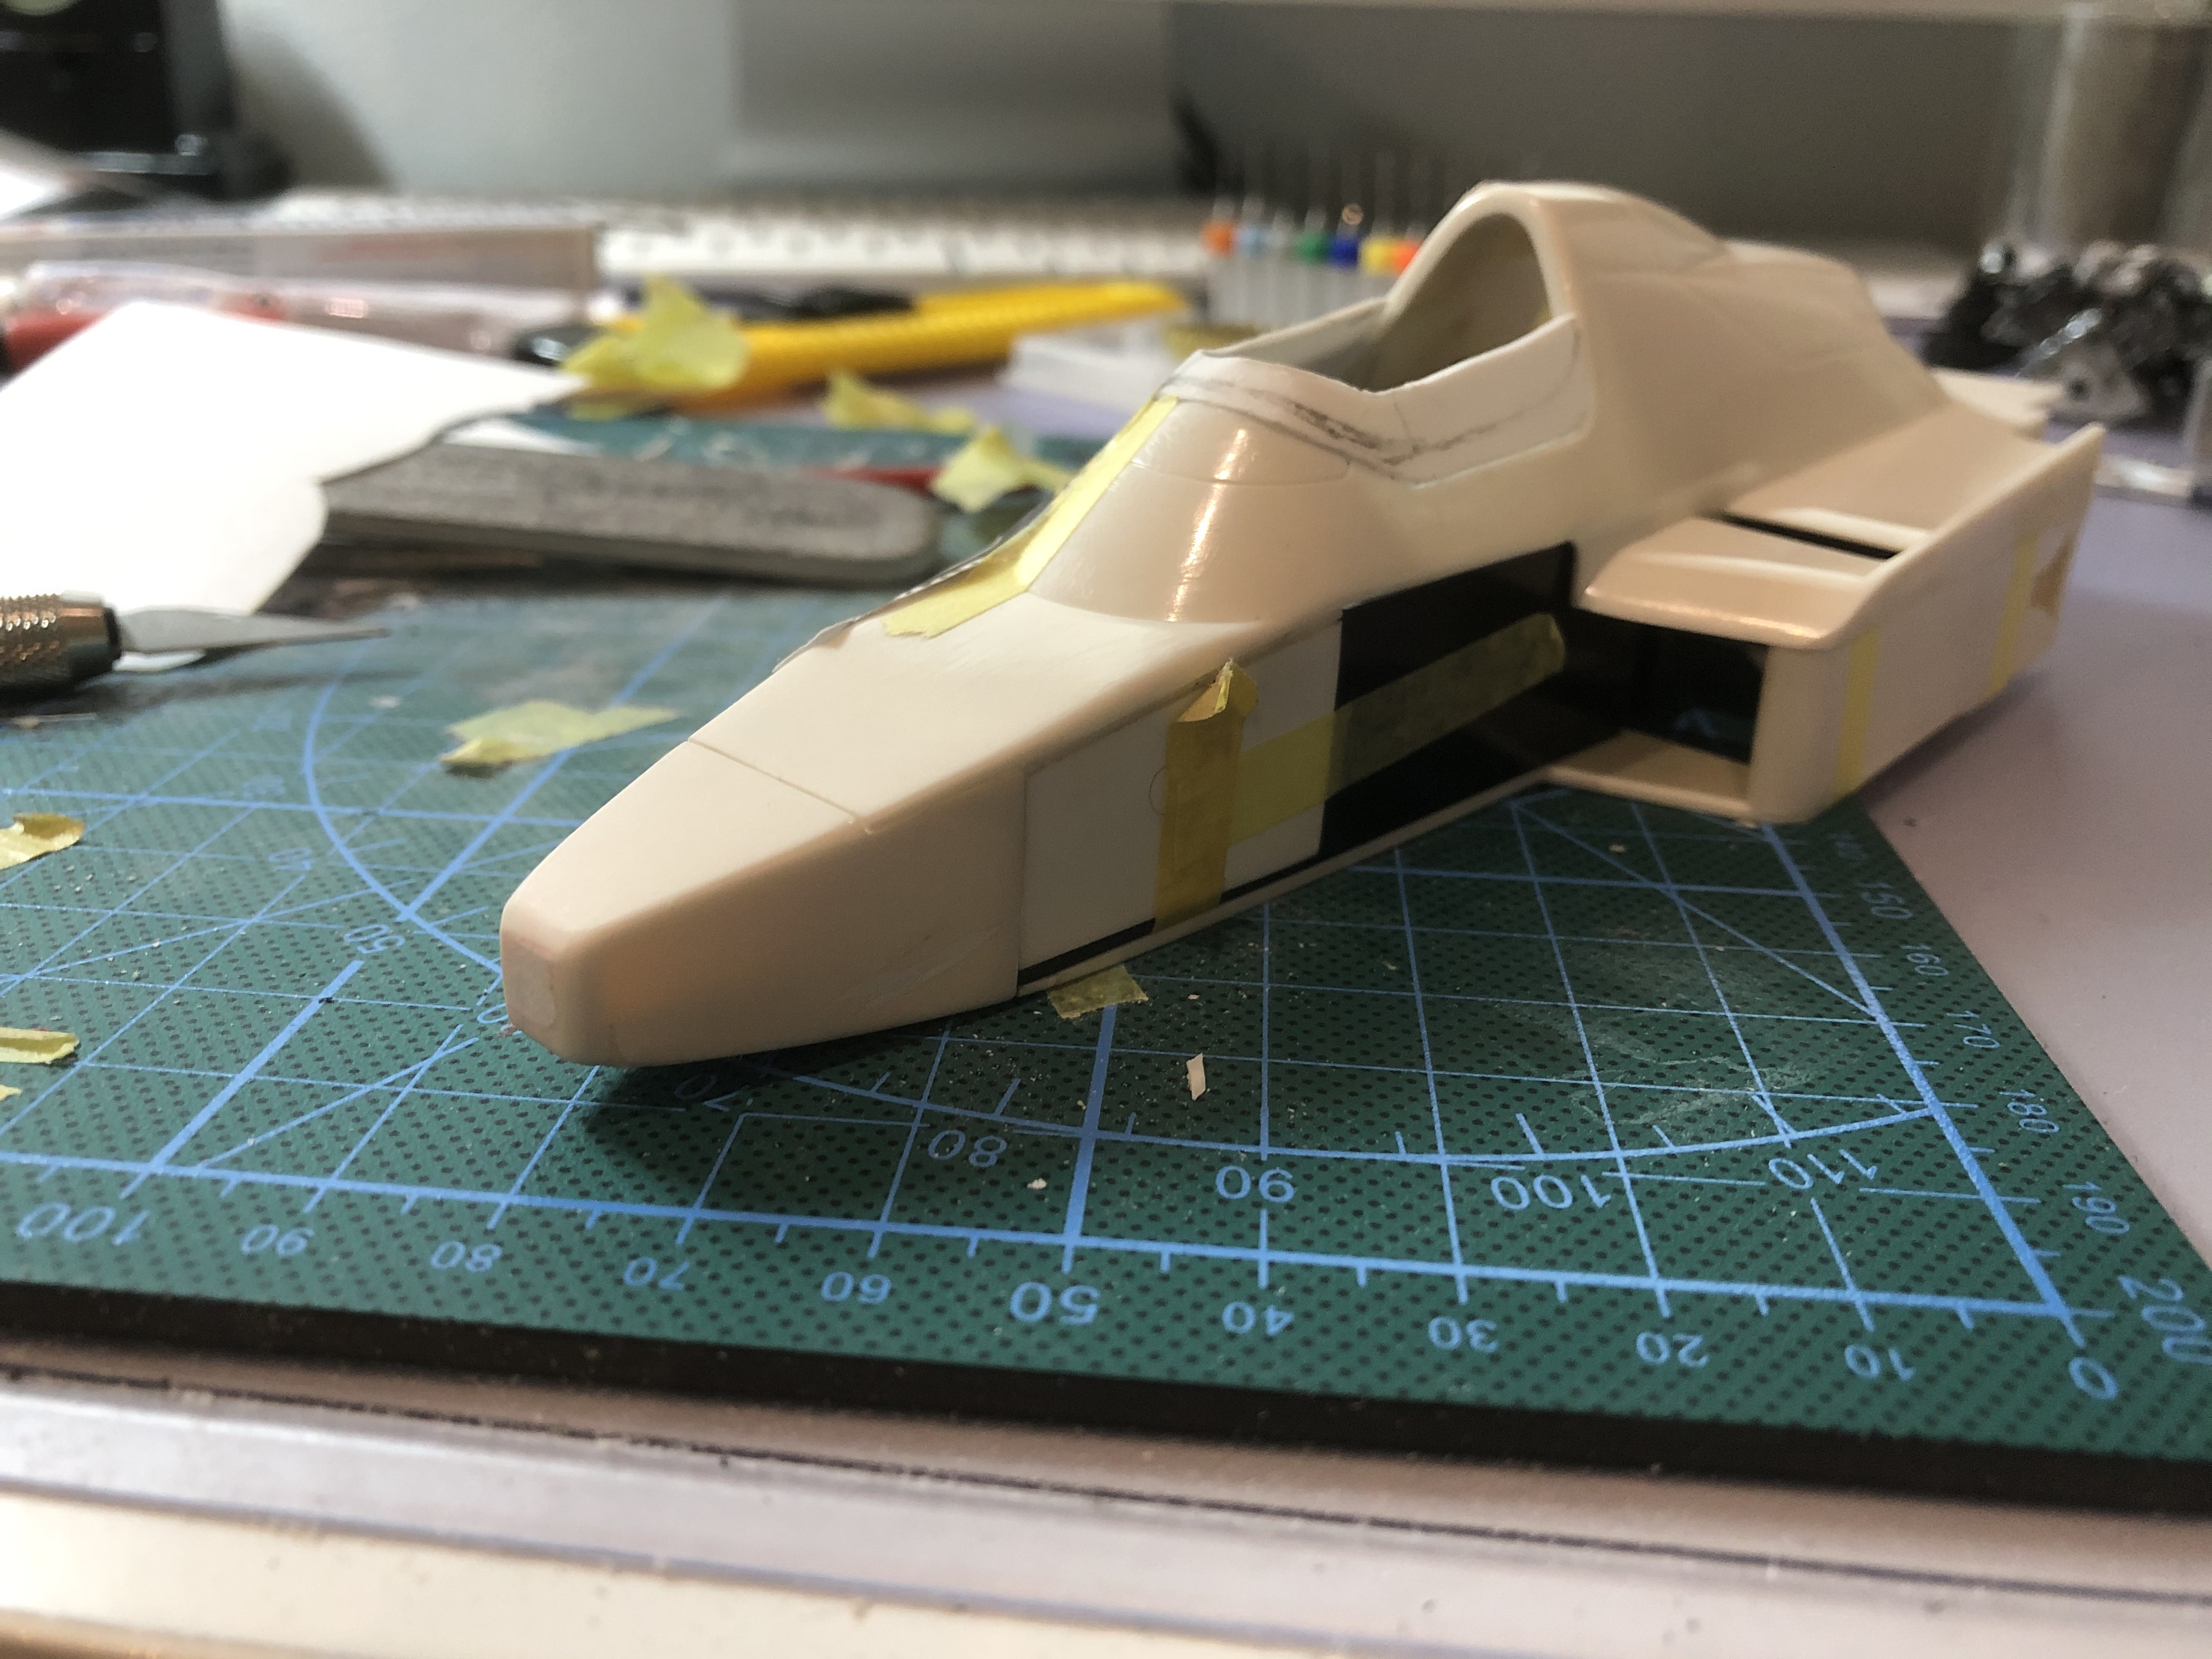
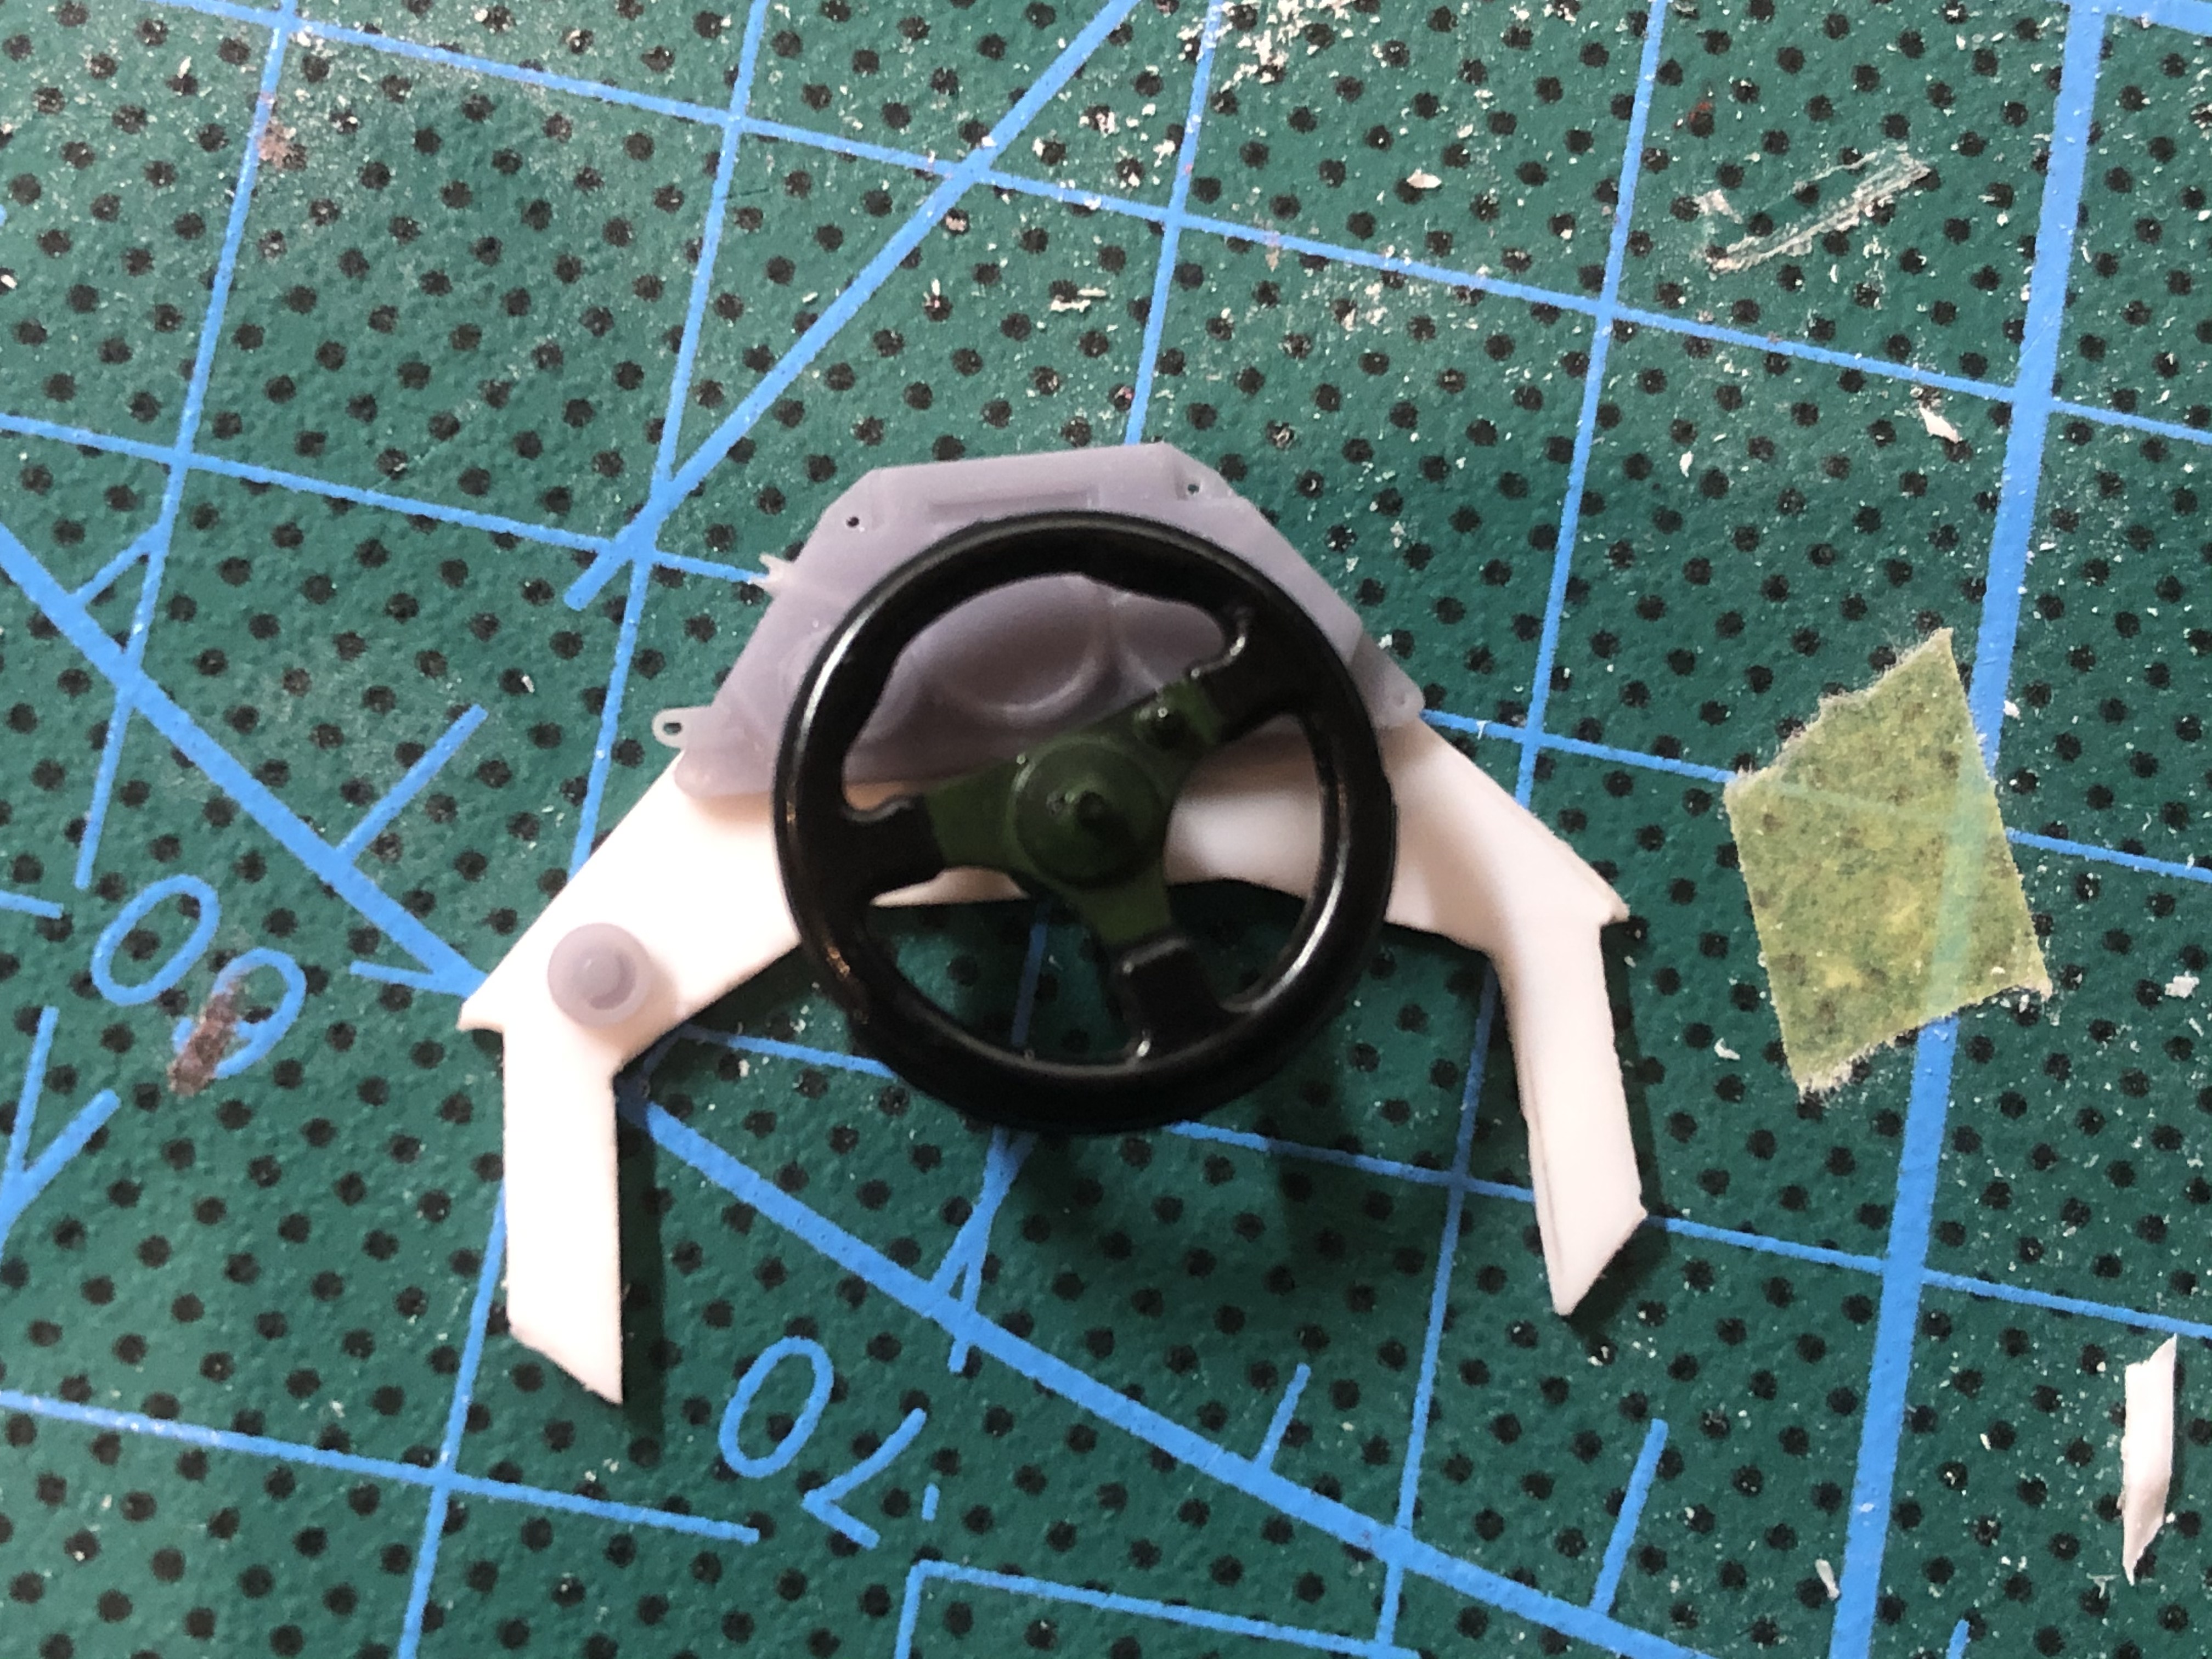
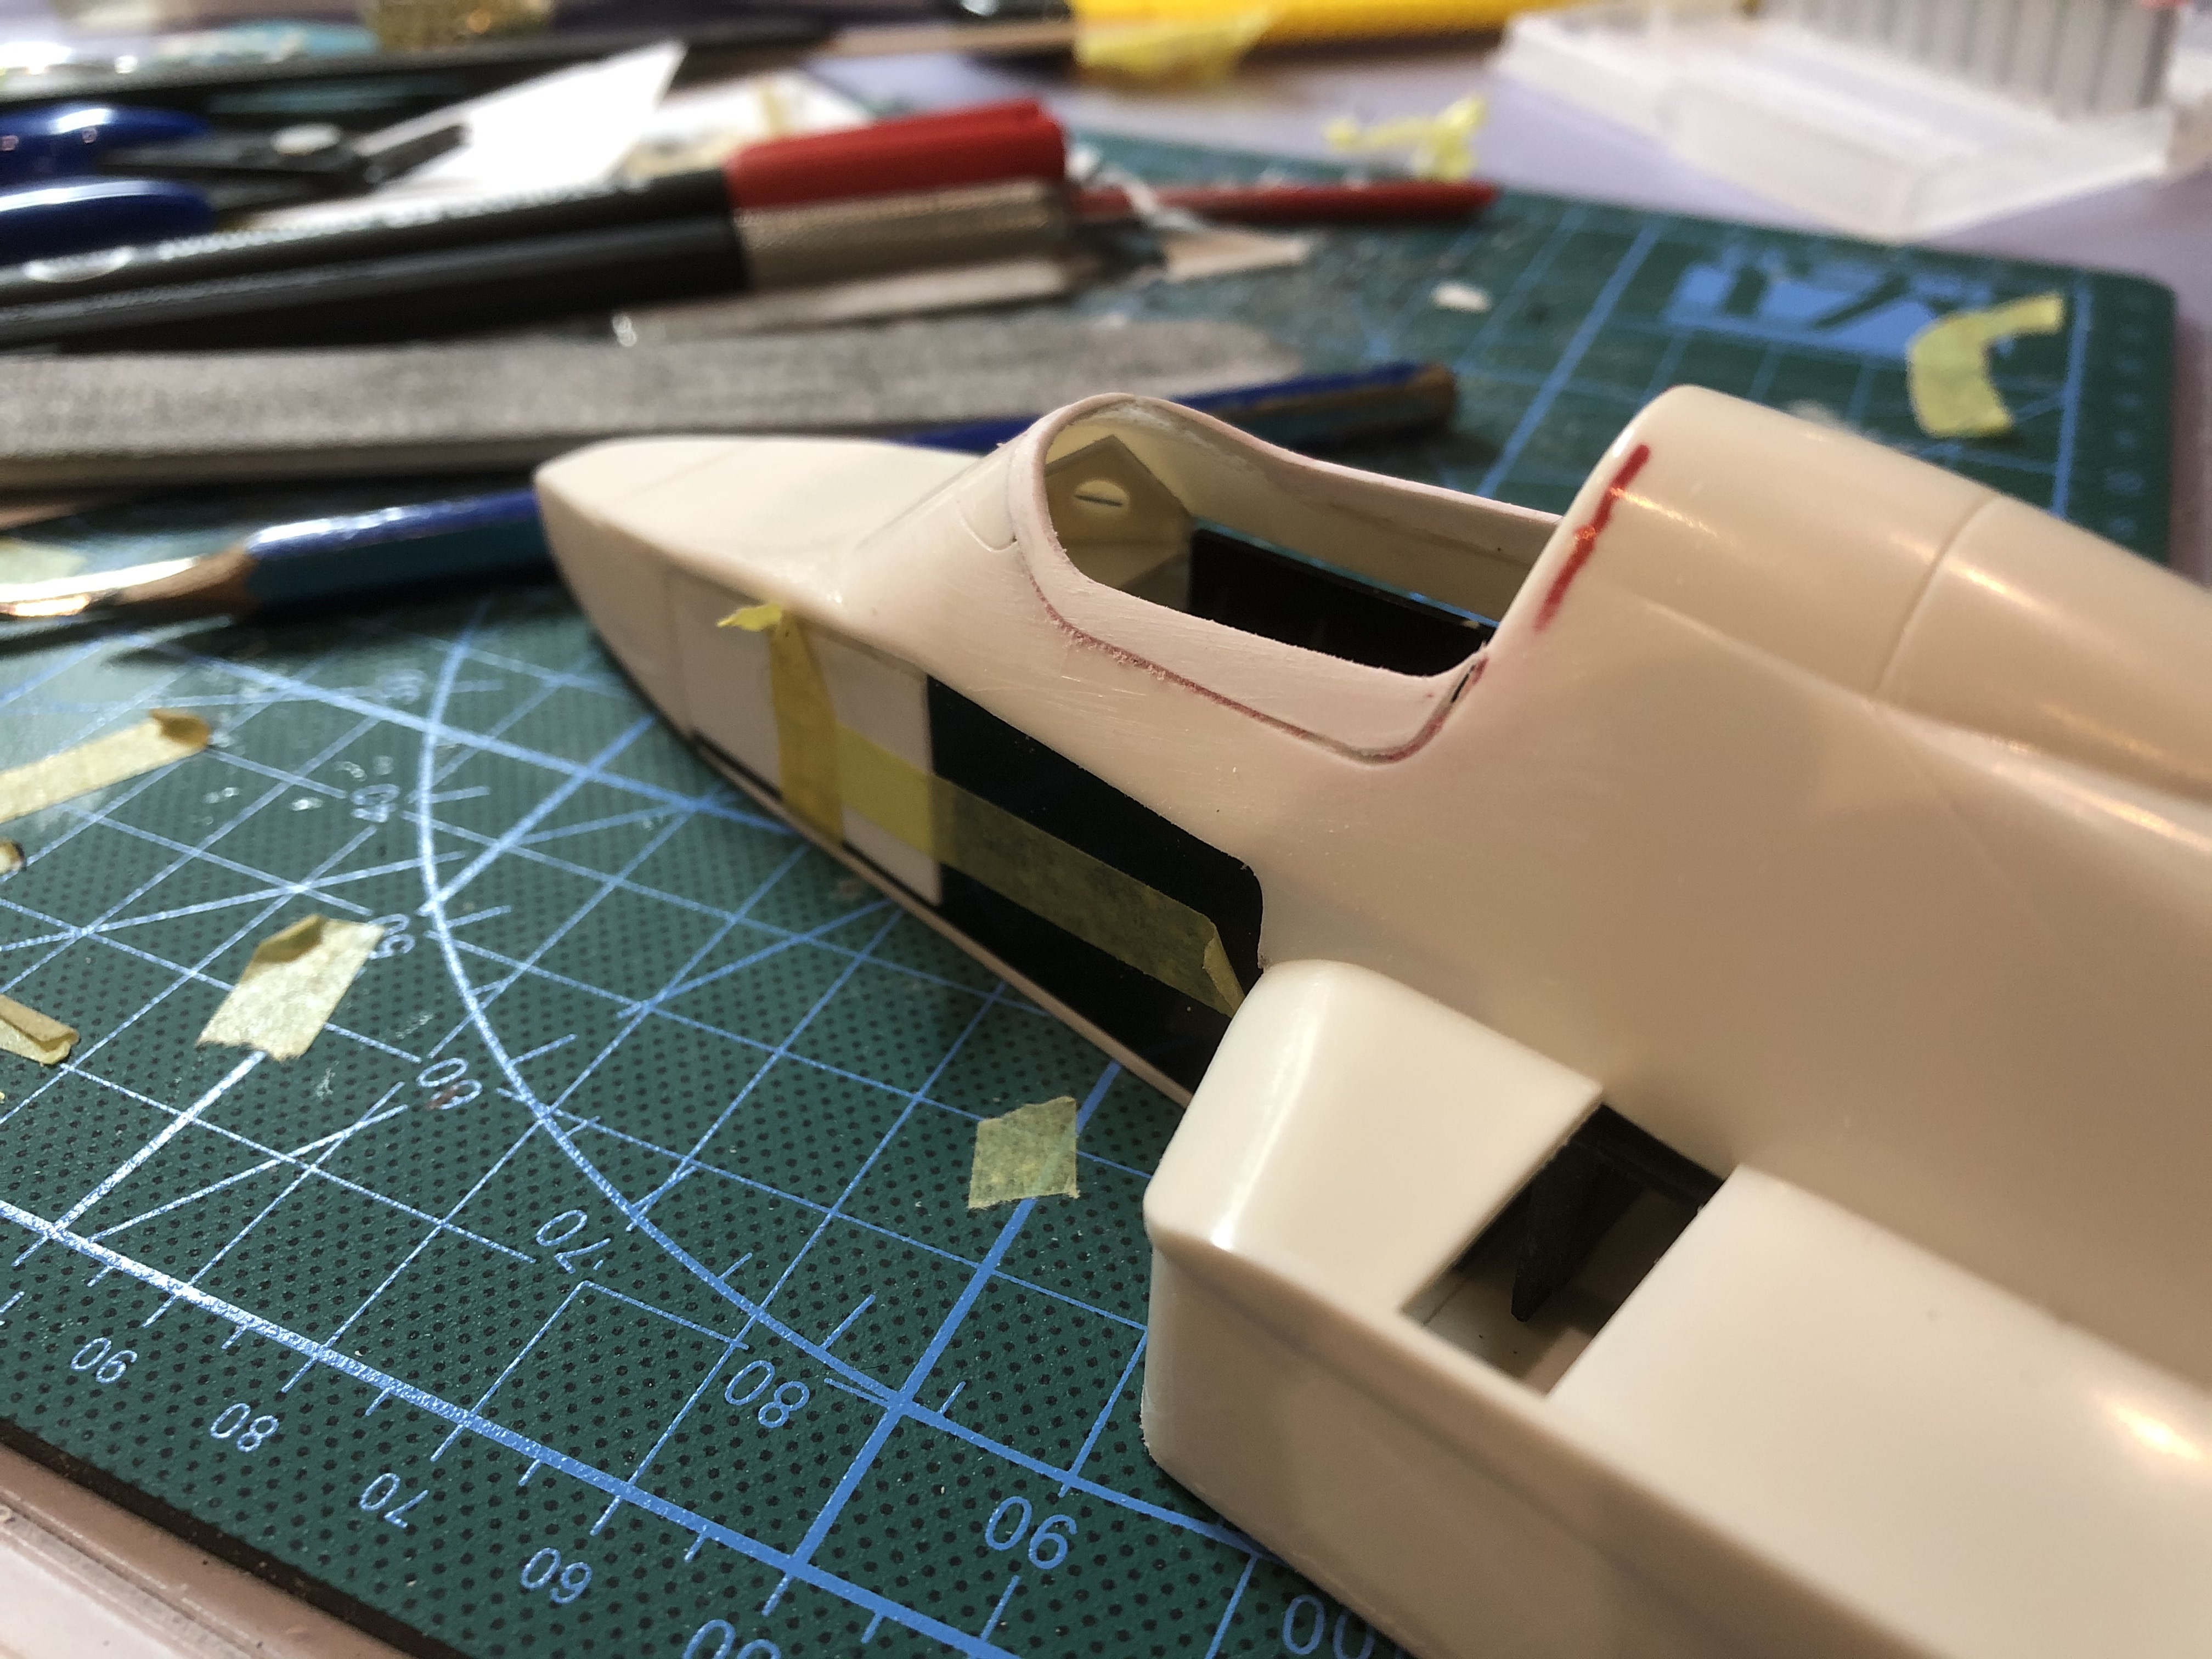
I also finished the cockpit a little further. I didn't take over the rear wall of the dashboard after all and instead made a new part.
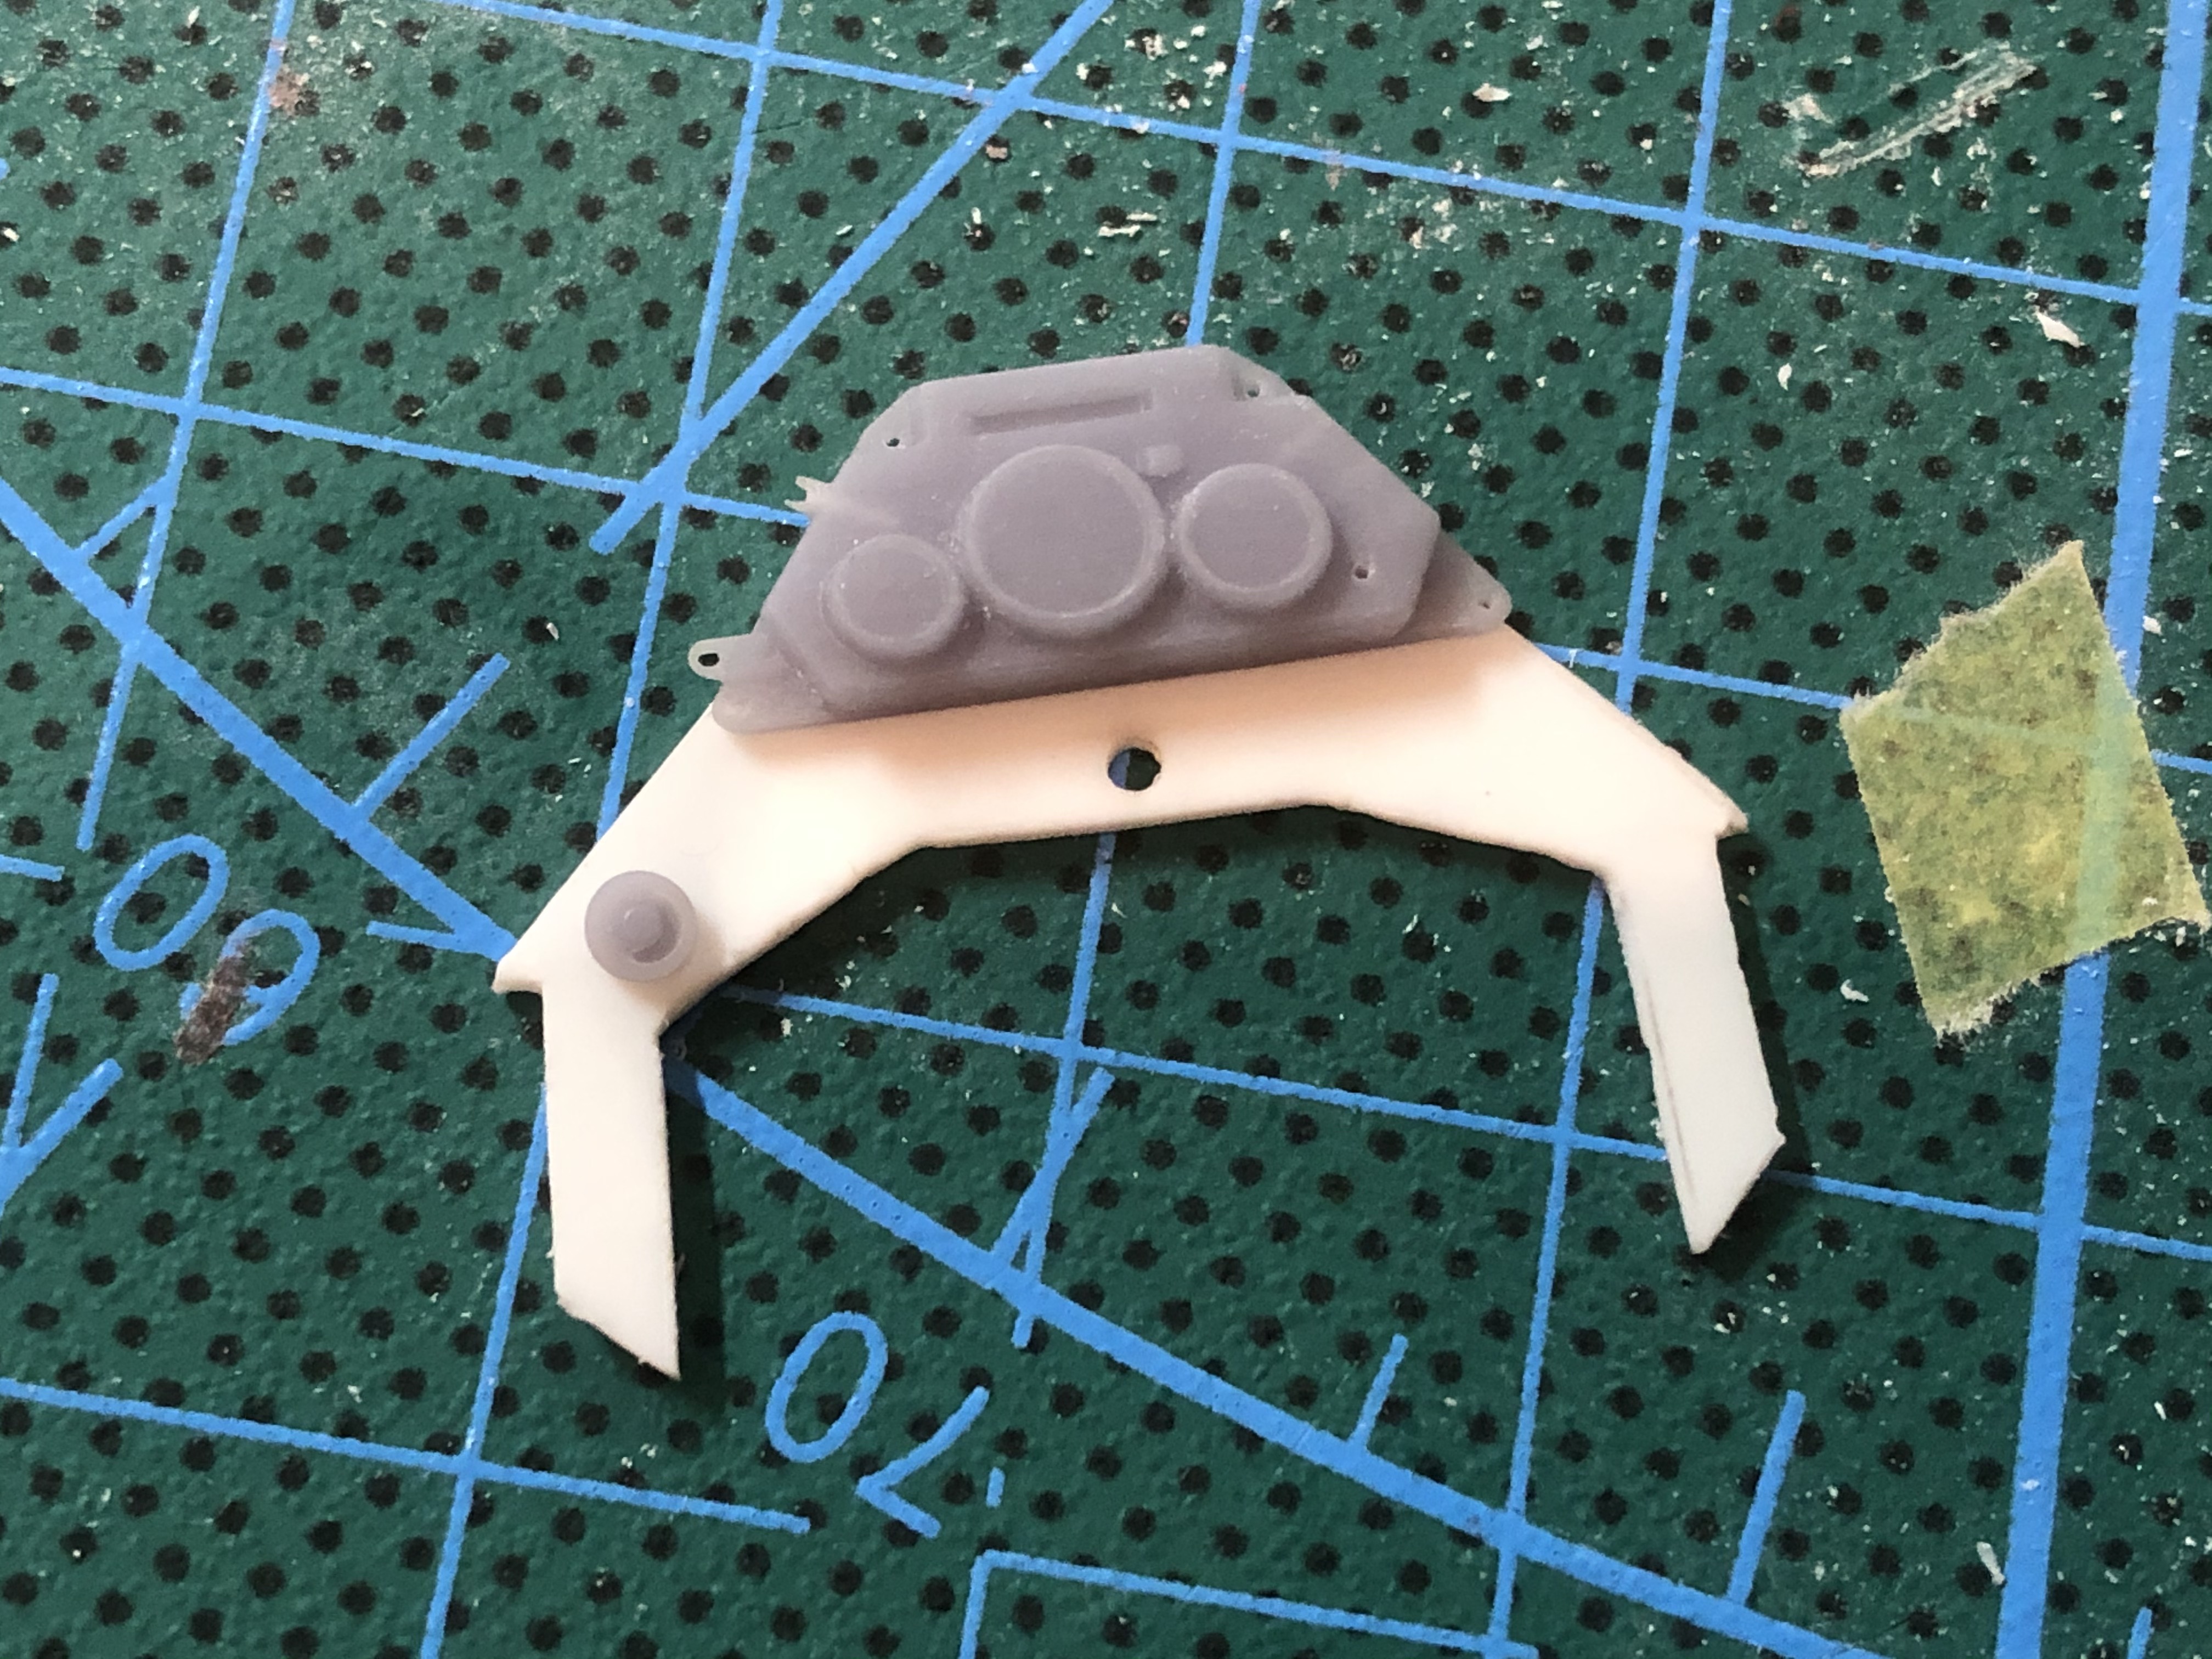
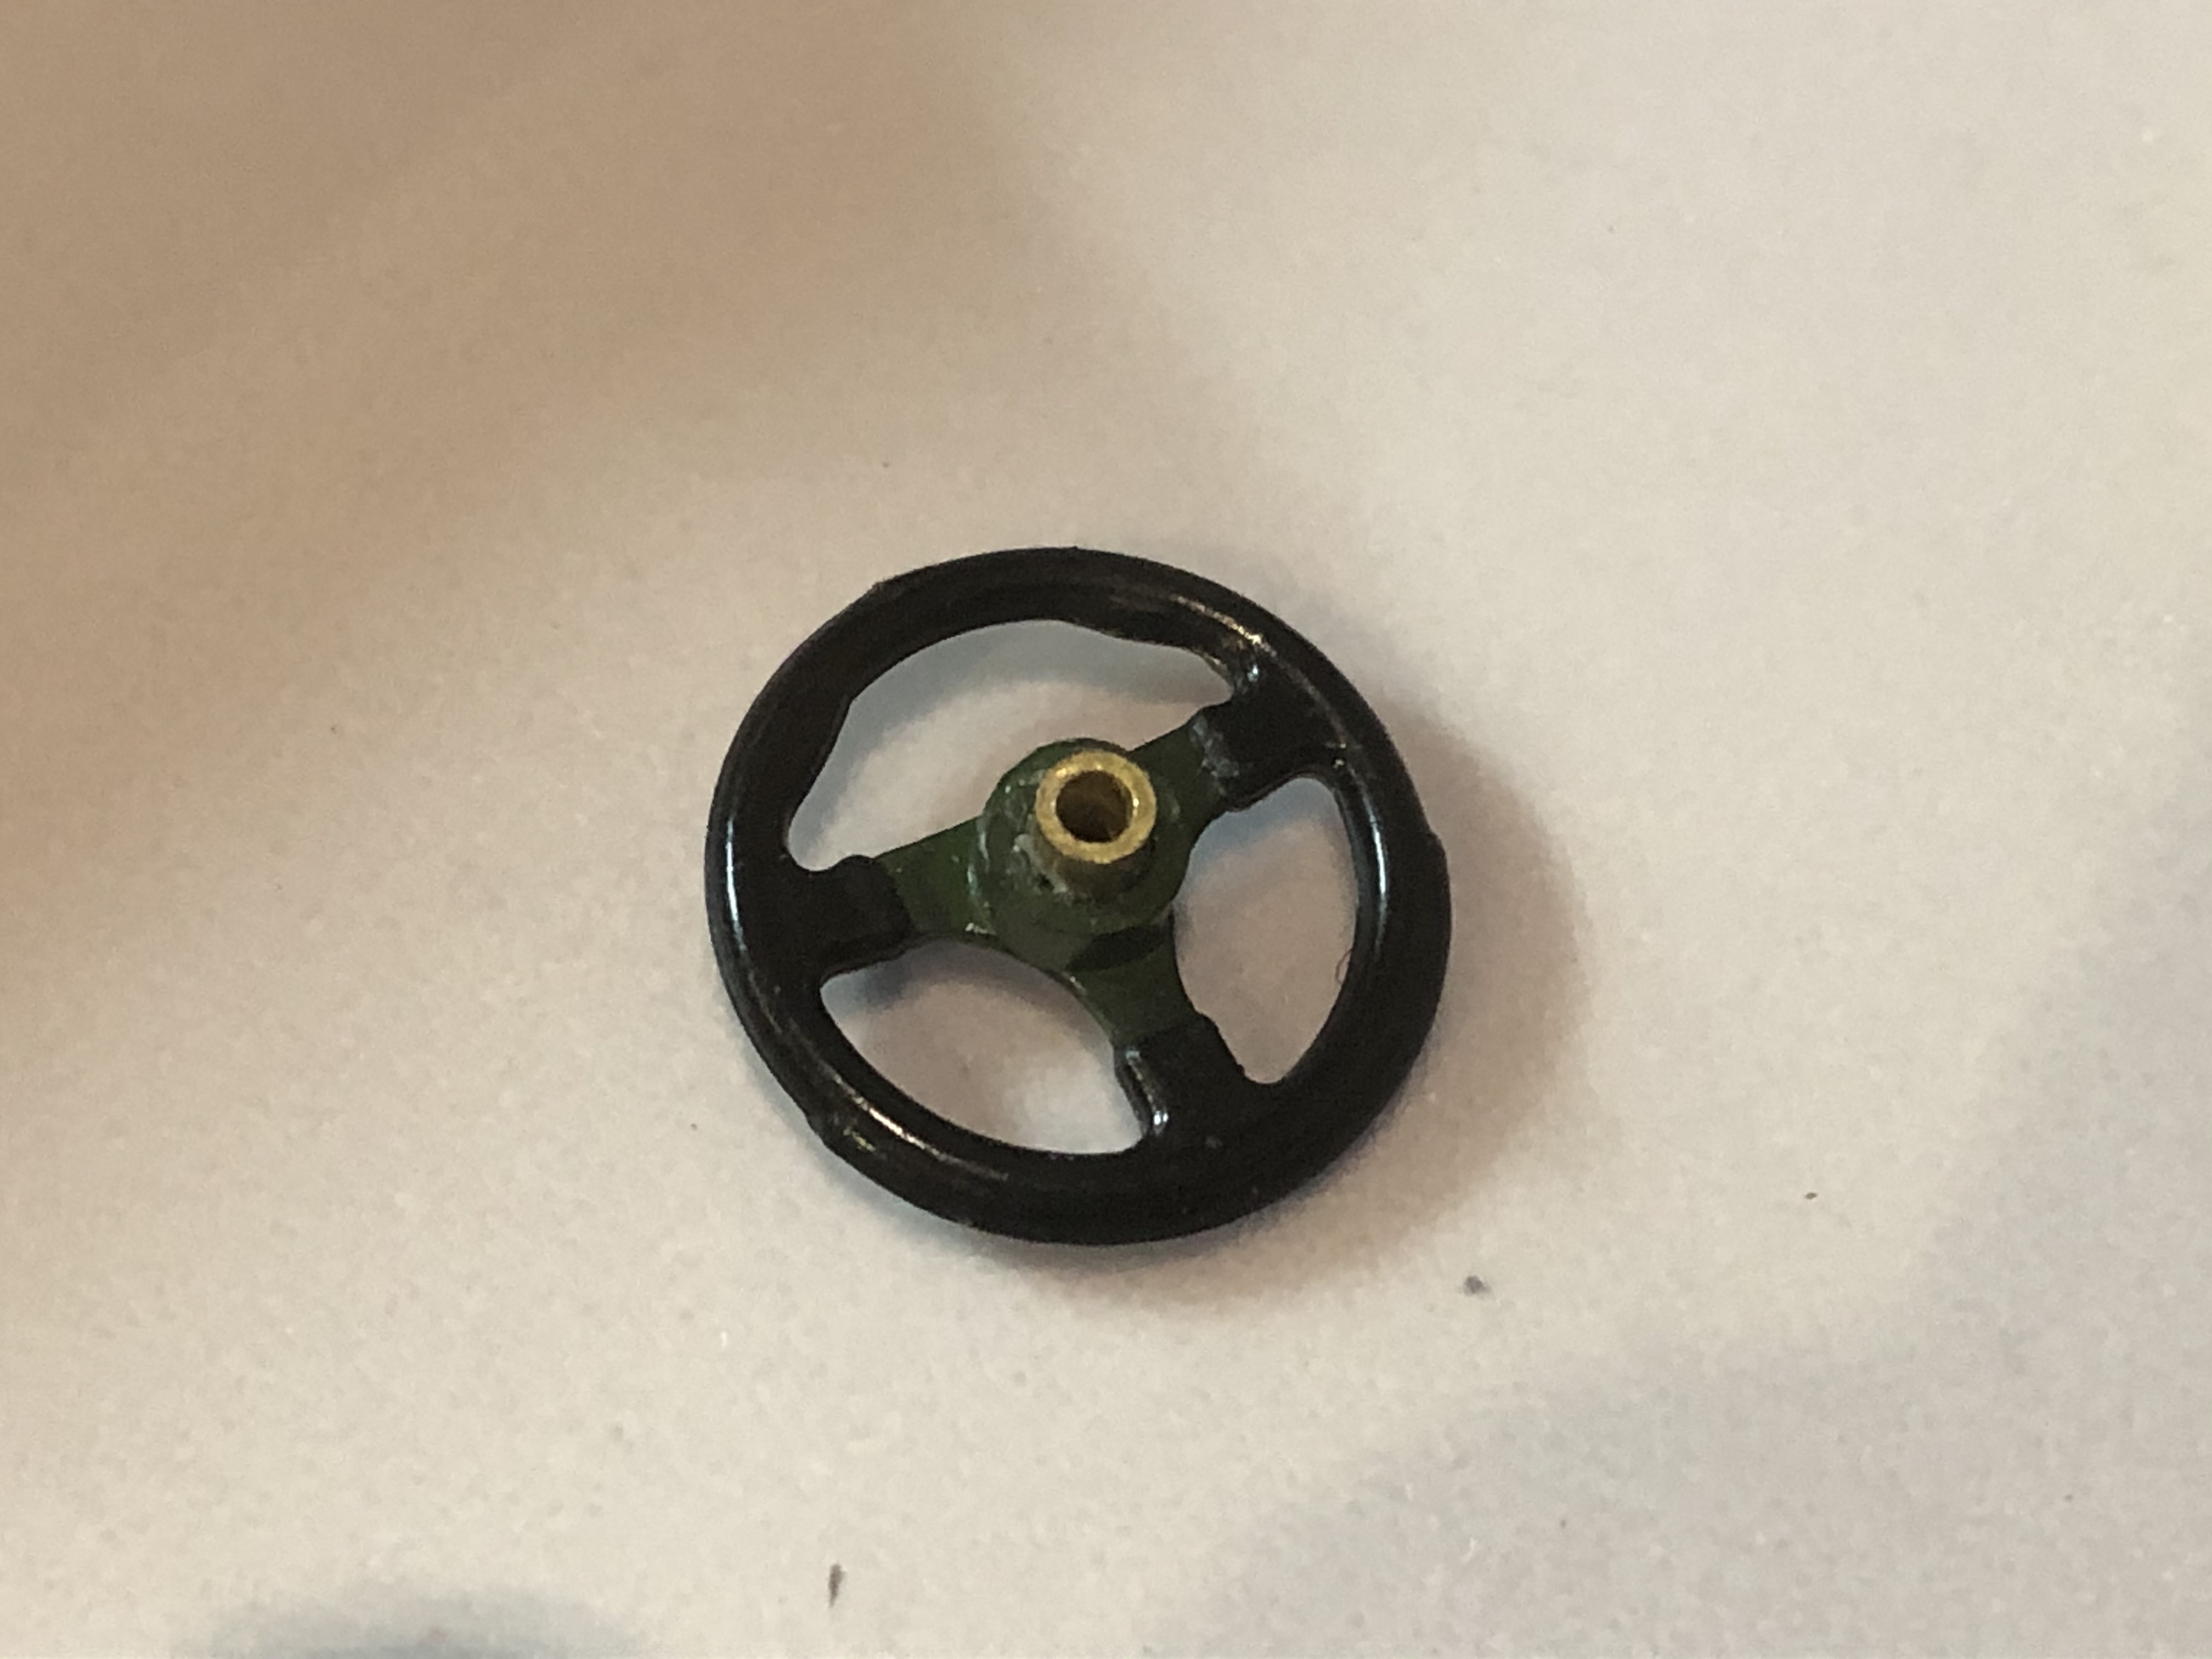
The steering wheel also comes from the FW07, it has now a mount for the handlebar on the back and is therefore also removable.
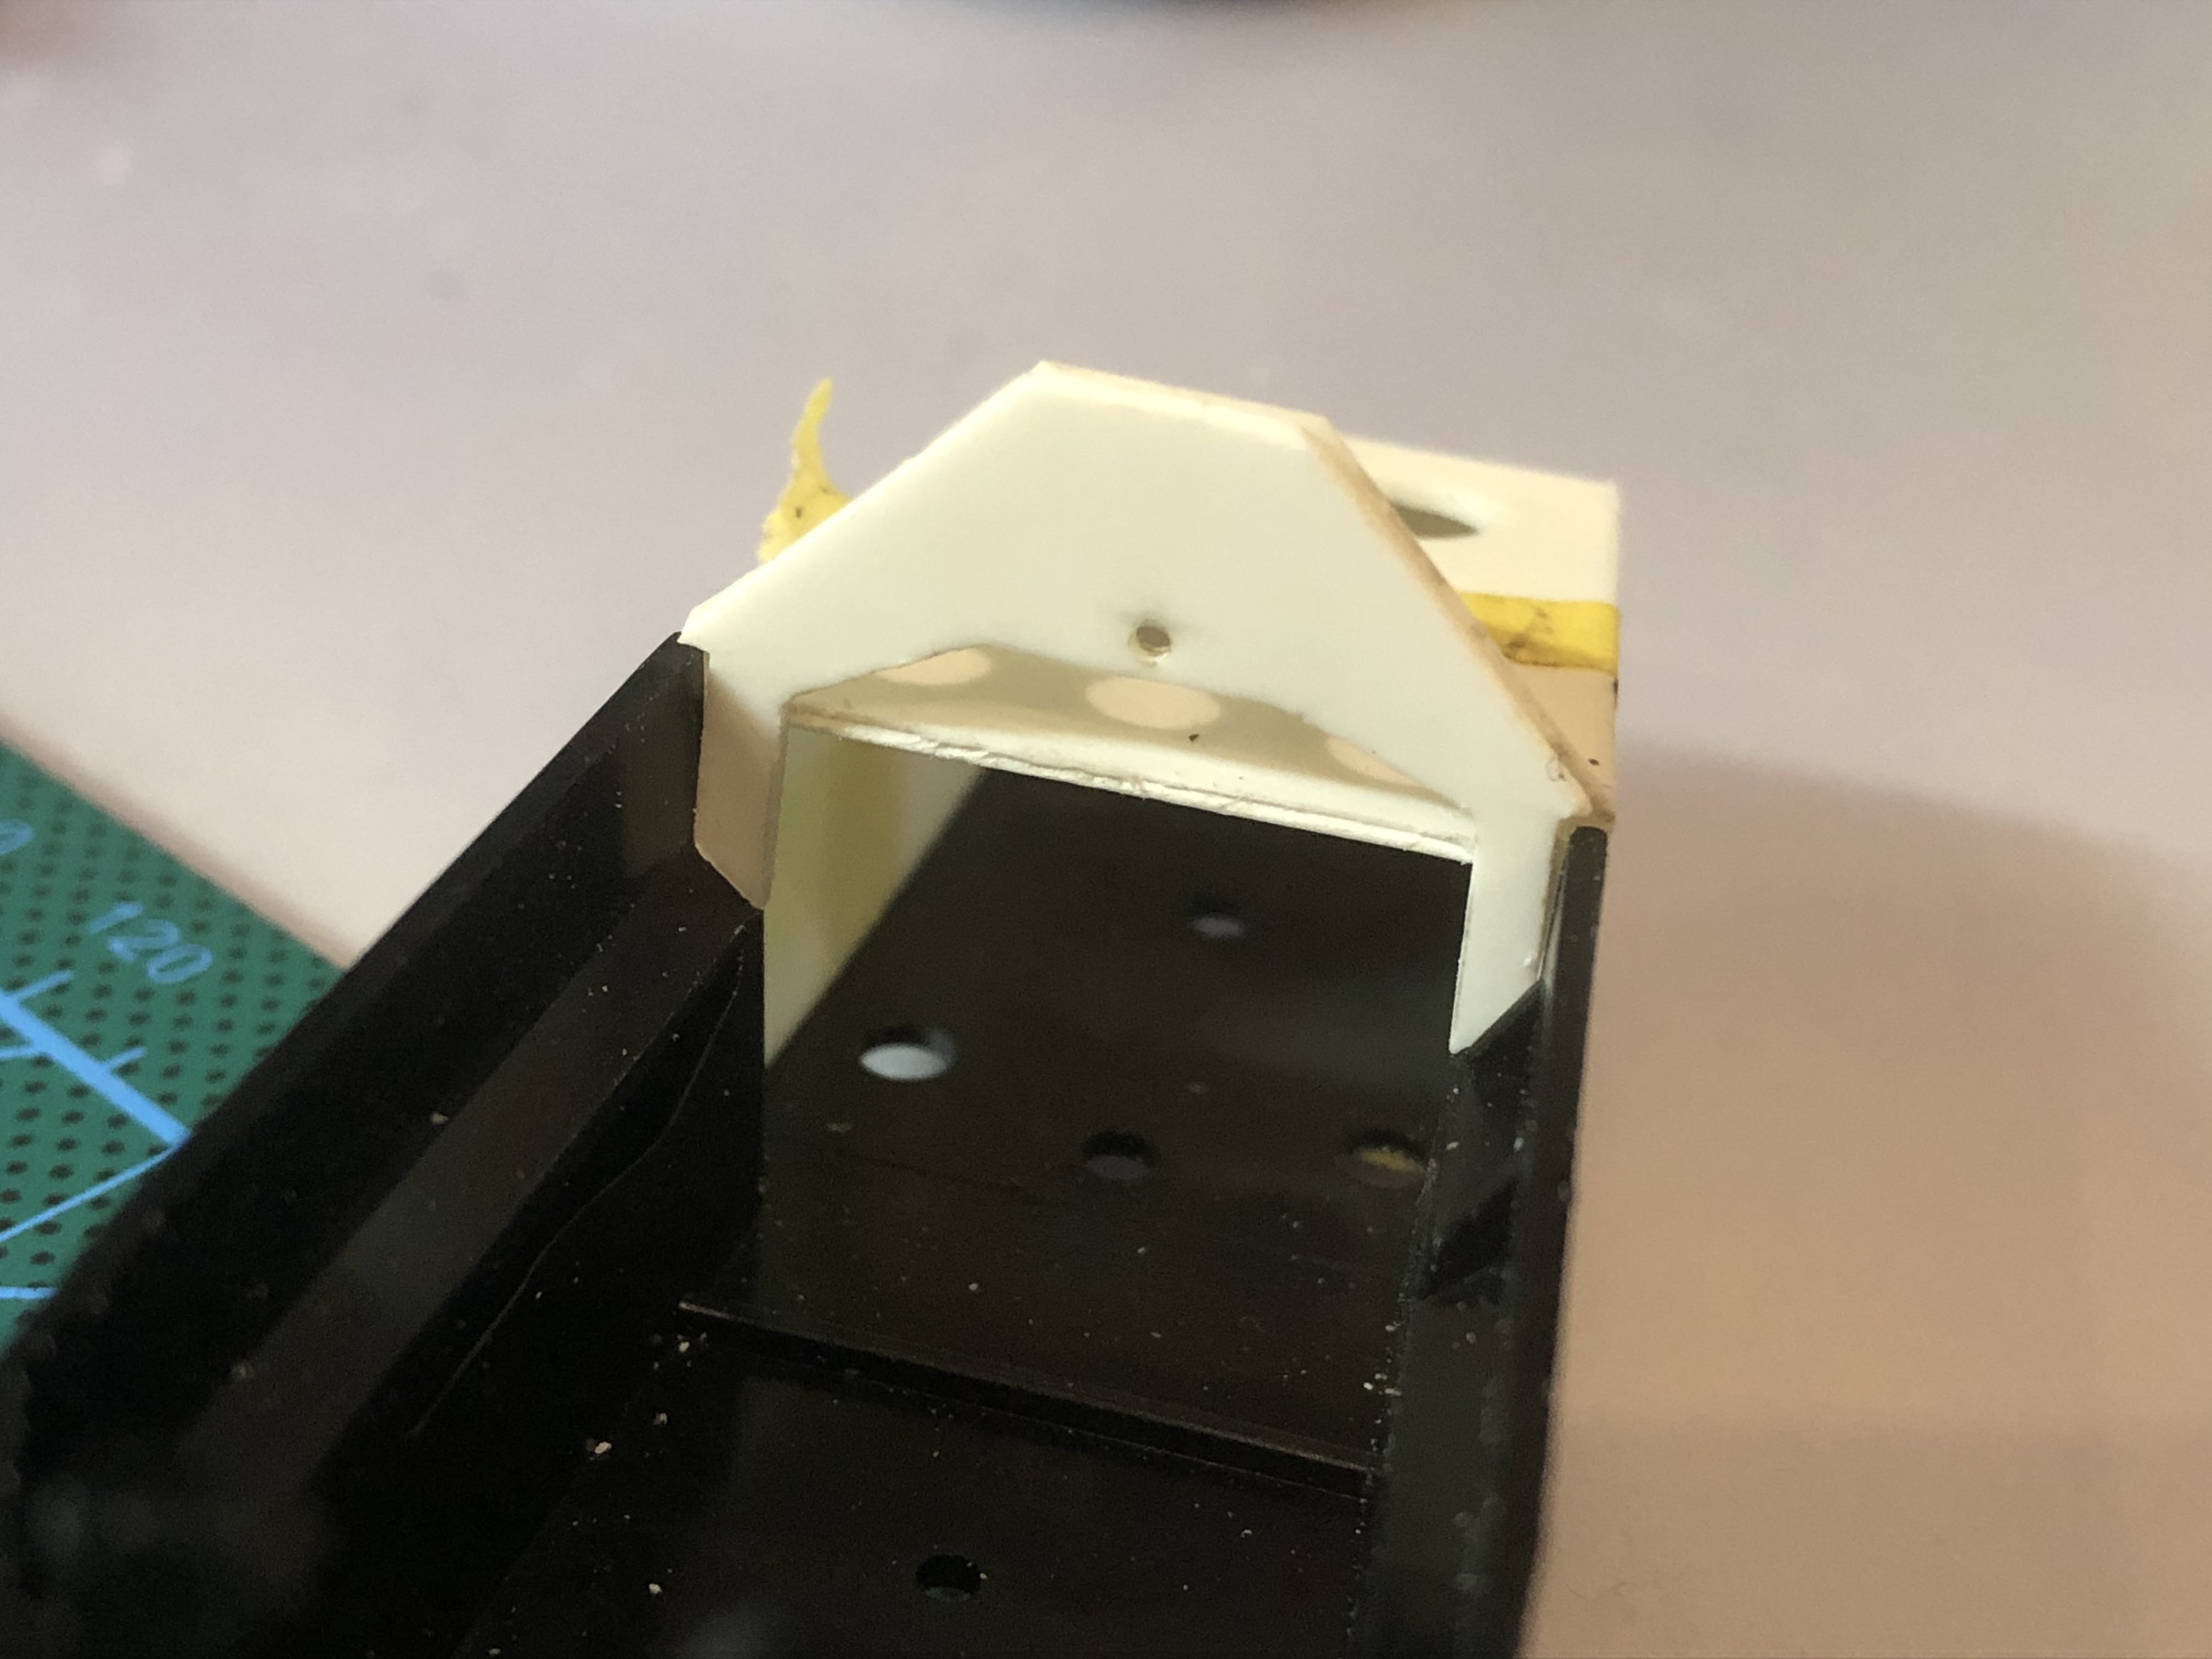
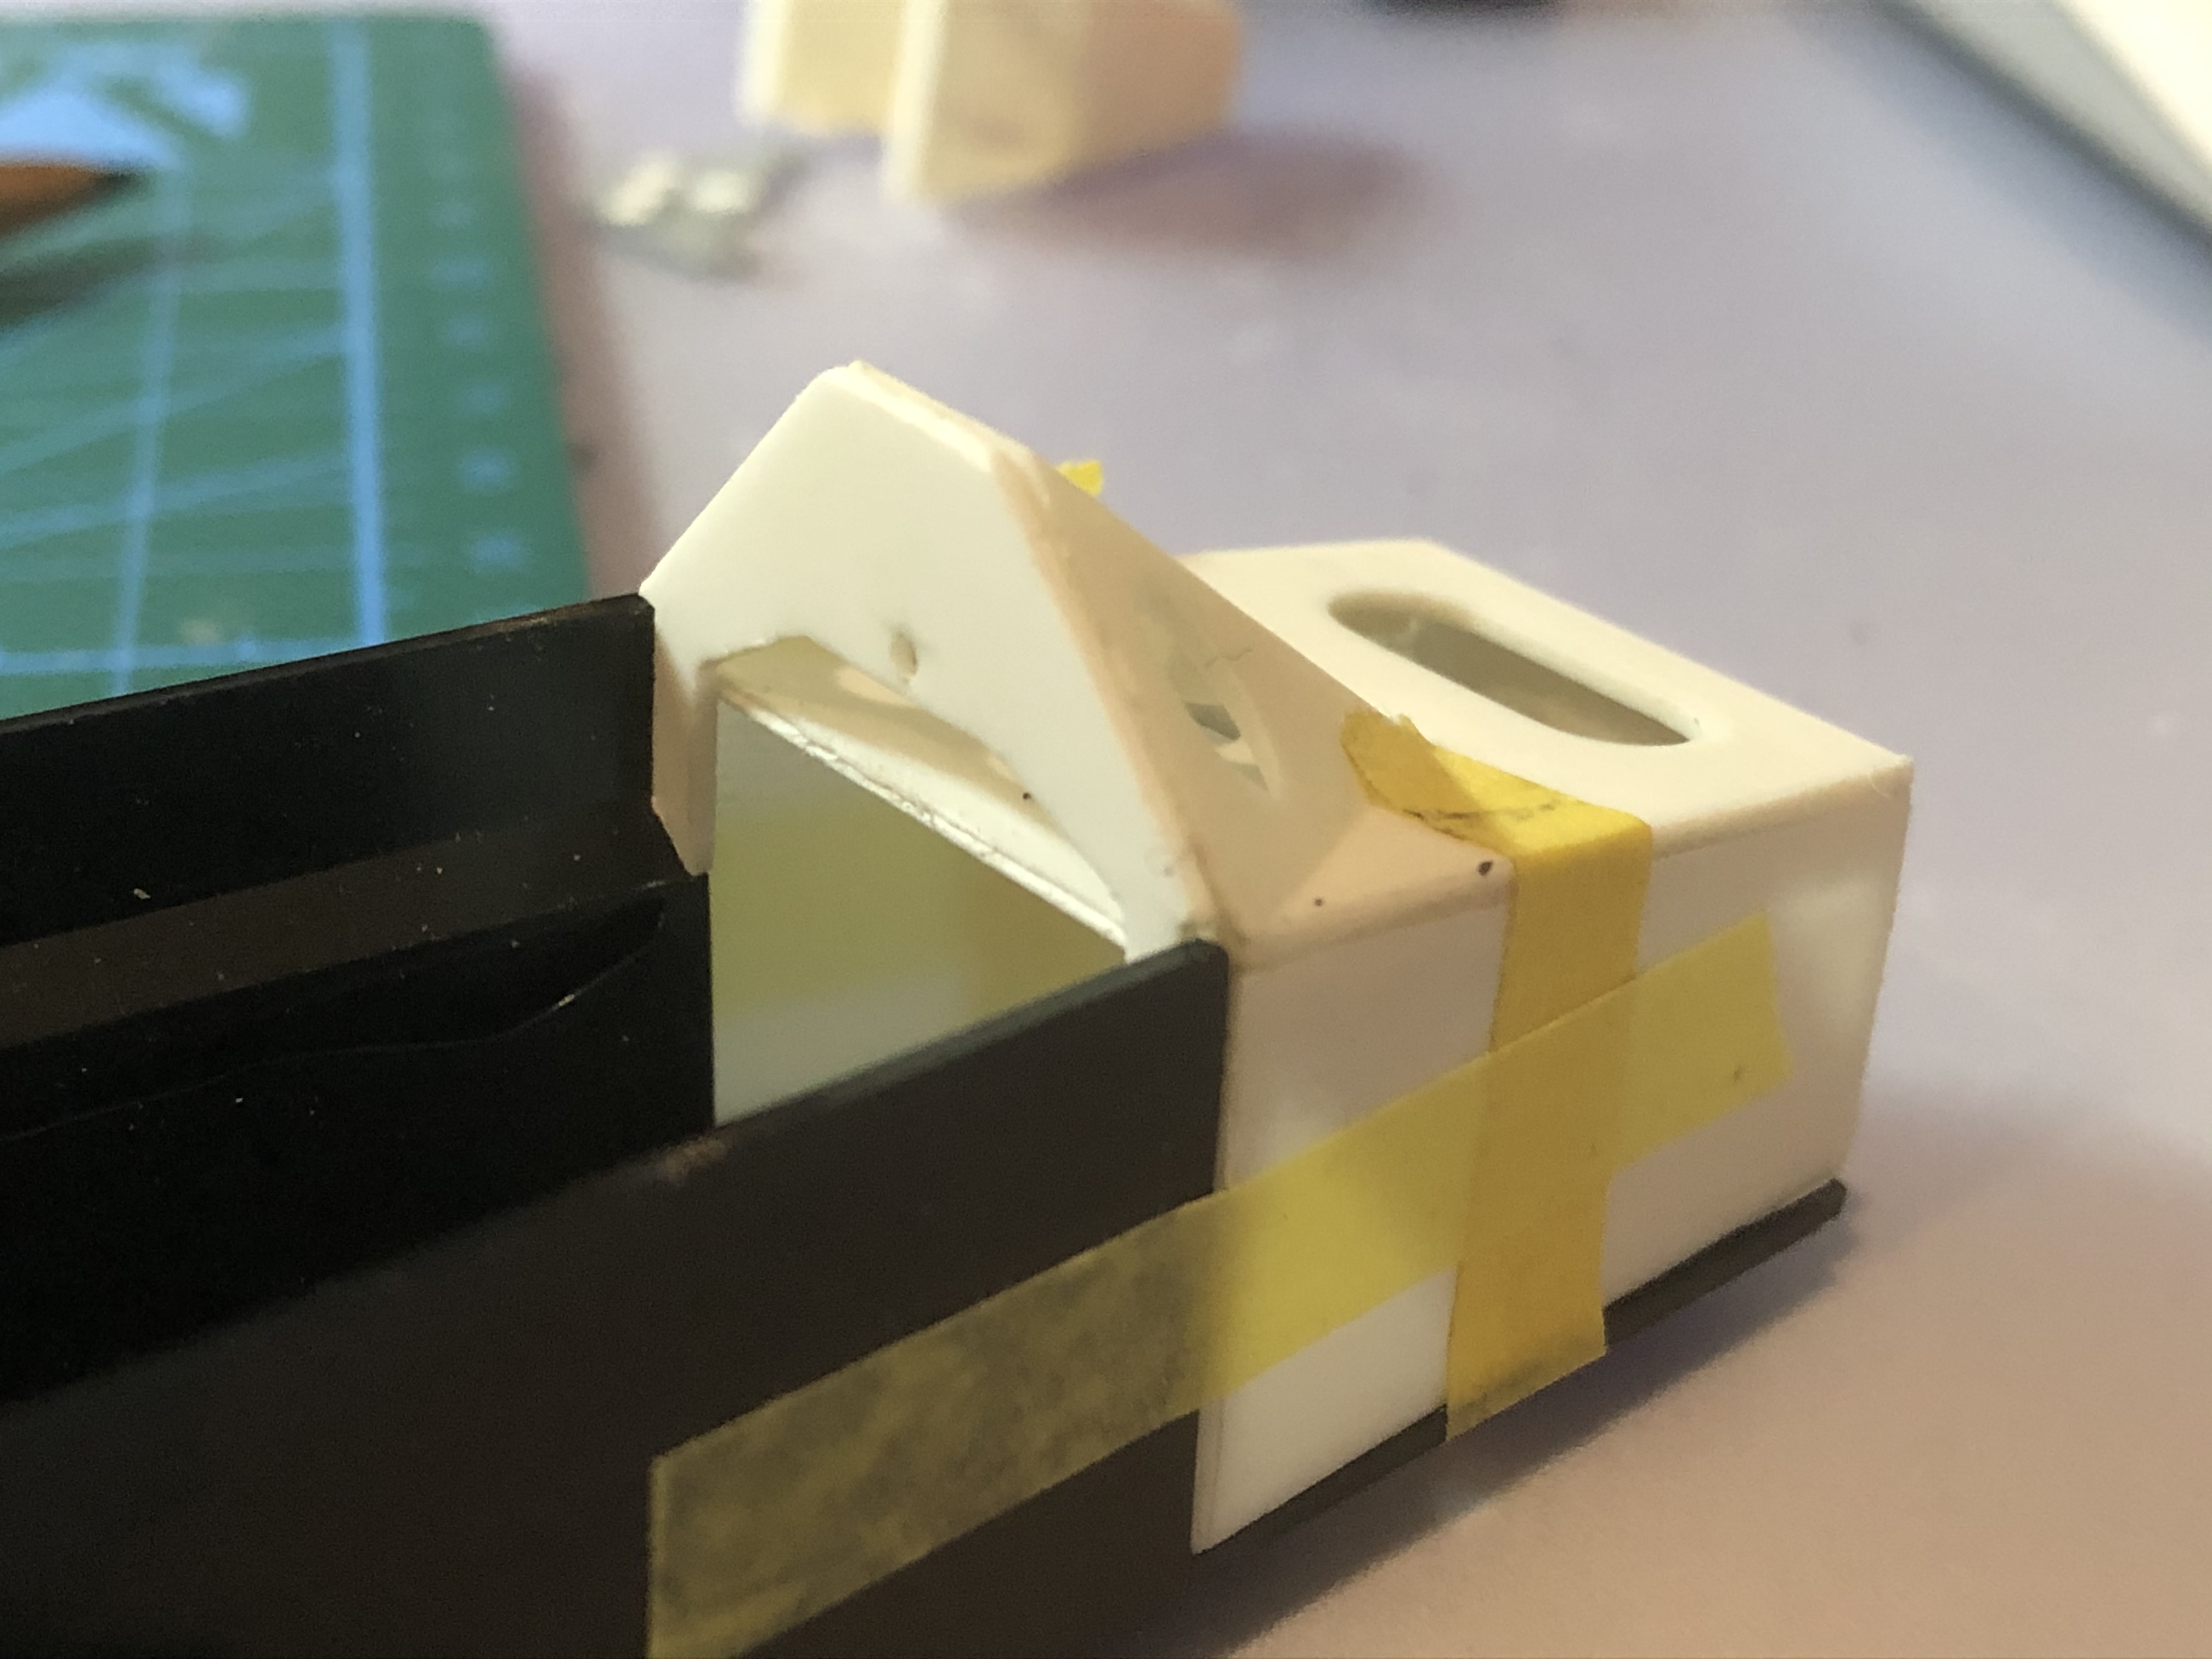
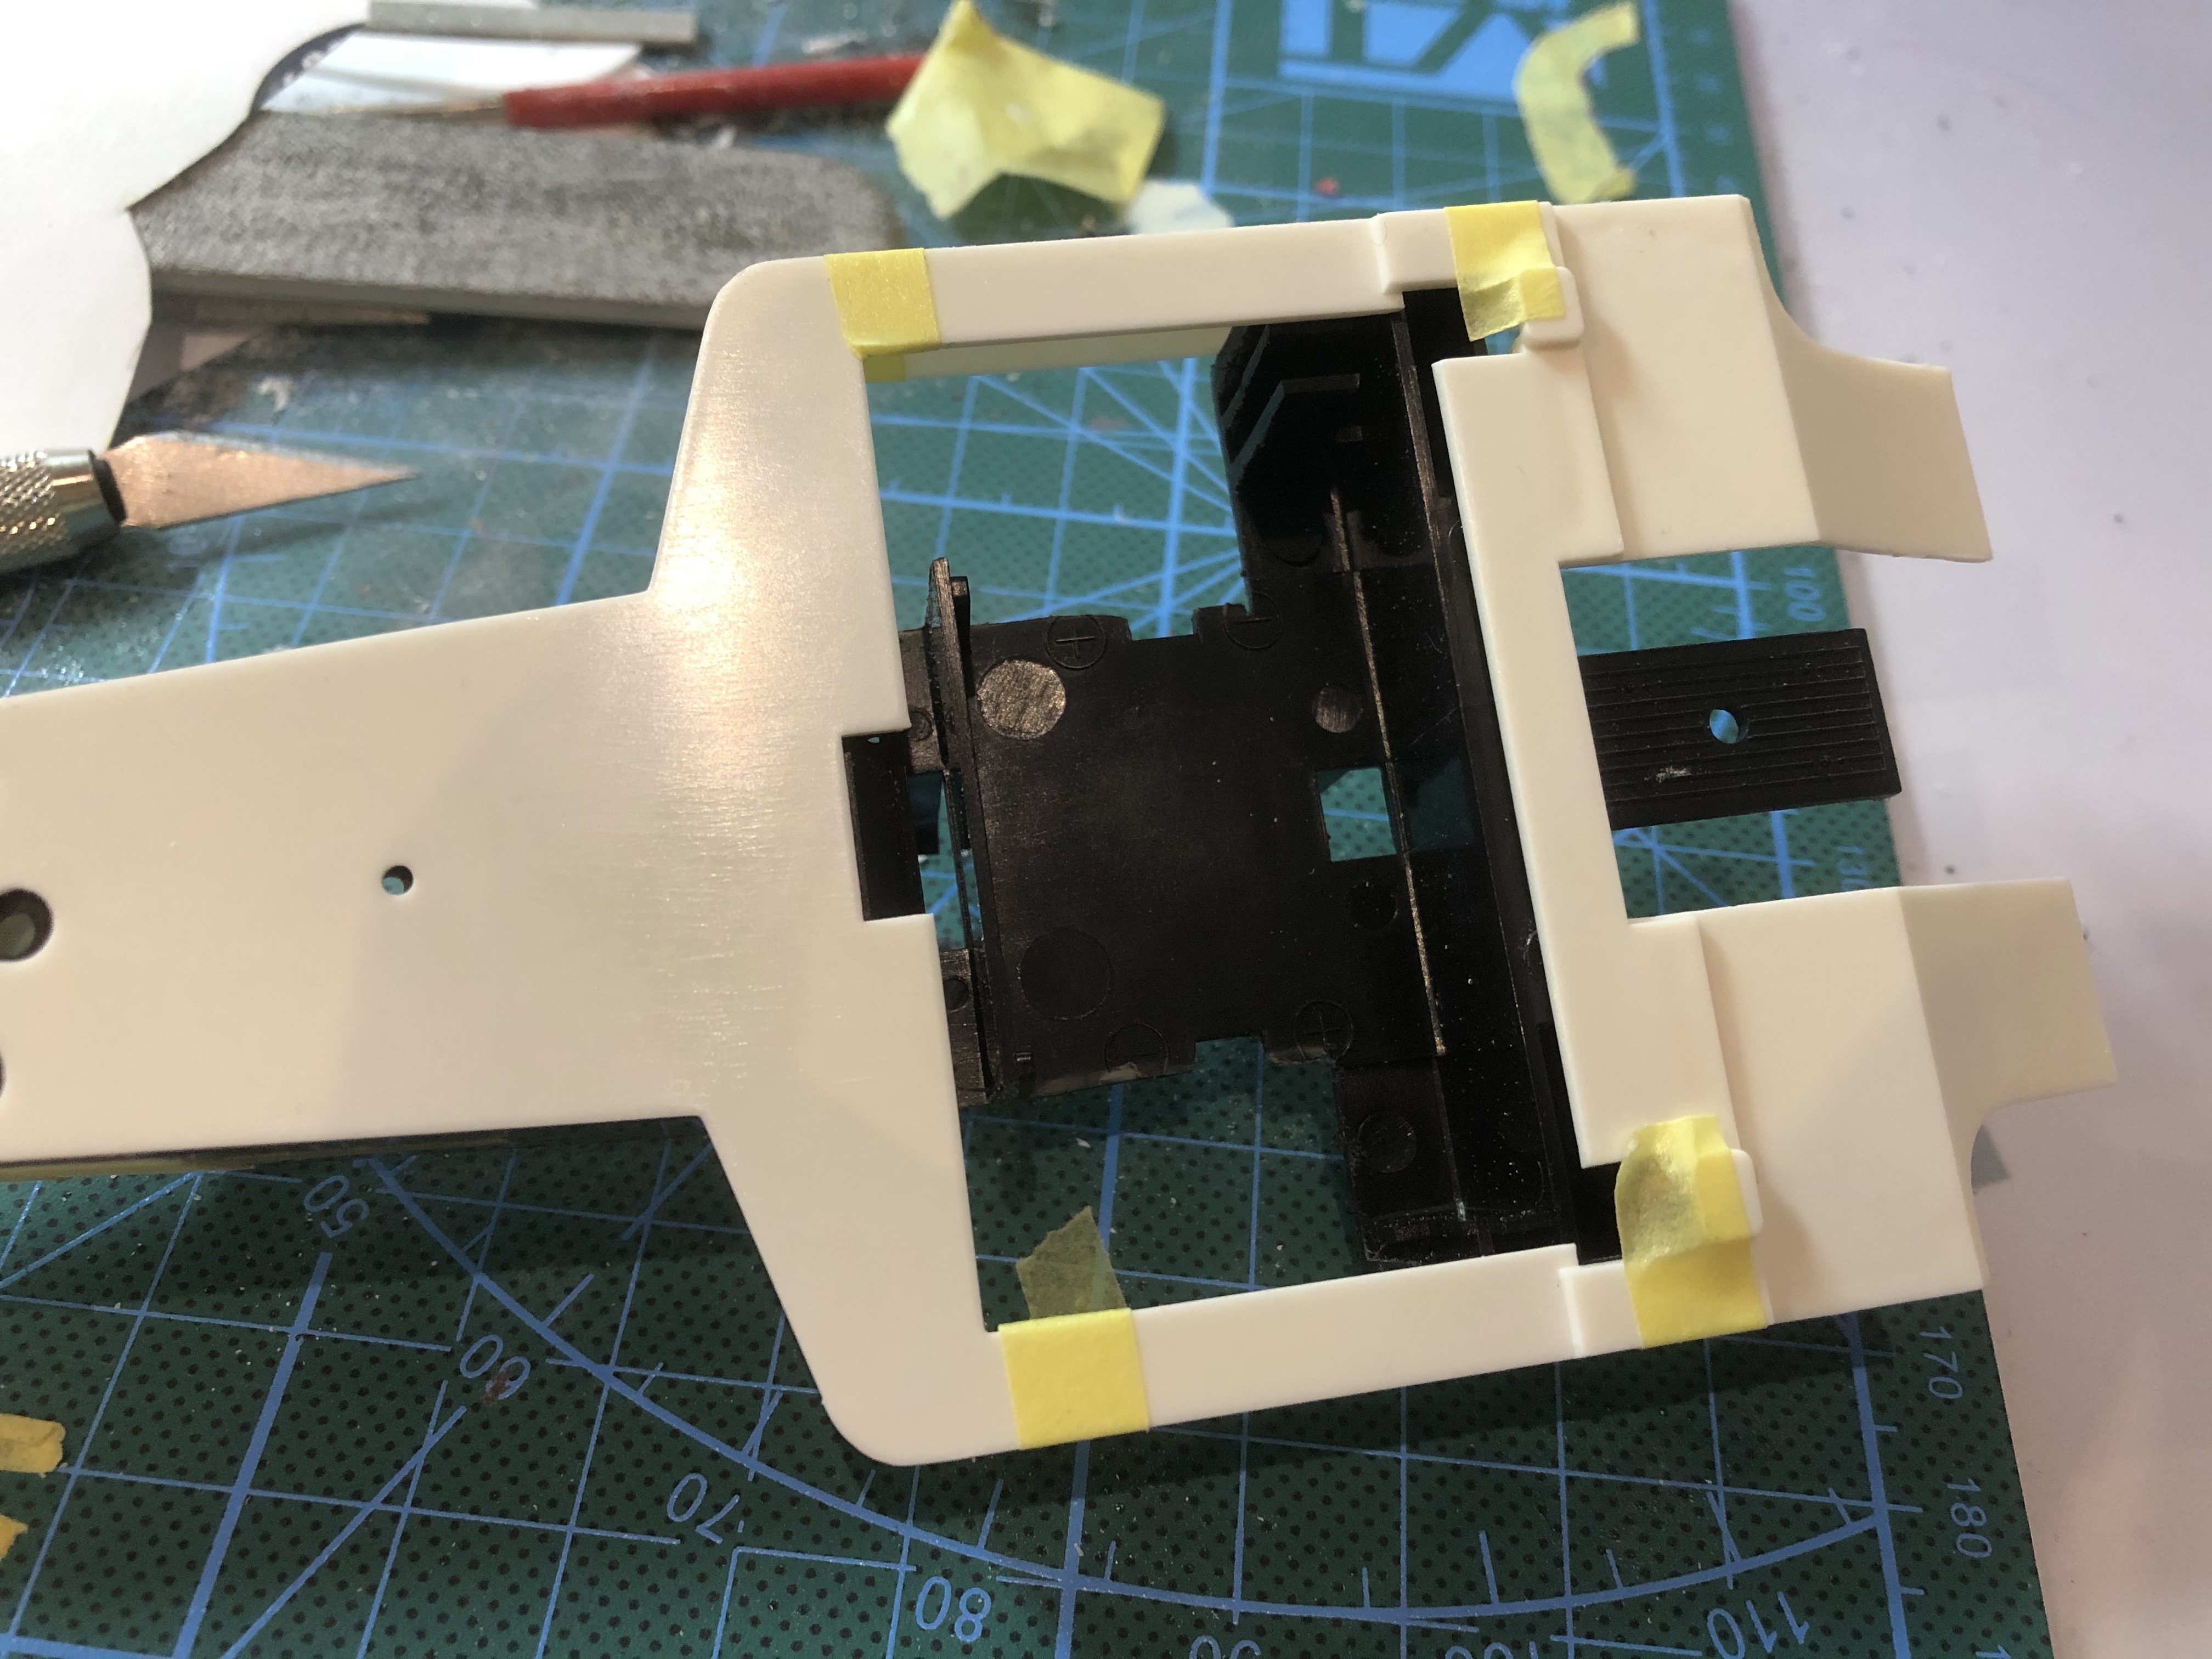
The next point was the cockpit surround. There is clearly a lack of material here.
So I decided to try it with sheet first. So I roughly cut 2 pieces and glued them in place.
Then I determined the dimensions and transferred the lines to the model.
Today I found another template. I scaled, printed and cut them accordingly. And tada!!! It doesn't look bad at all and if it fits it looks almost 1: 1 on top of each other. : D
So the next steps will continue towards the rear of the vehicle.
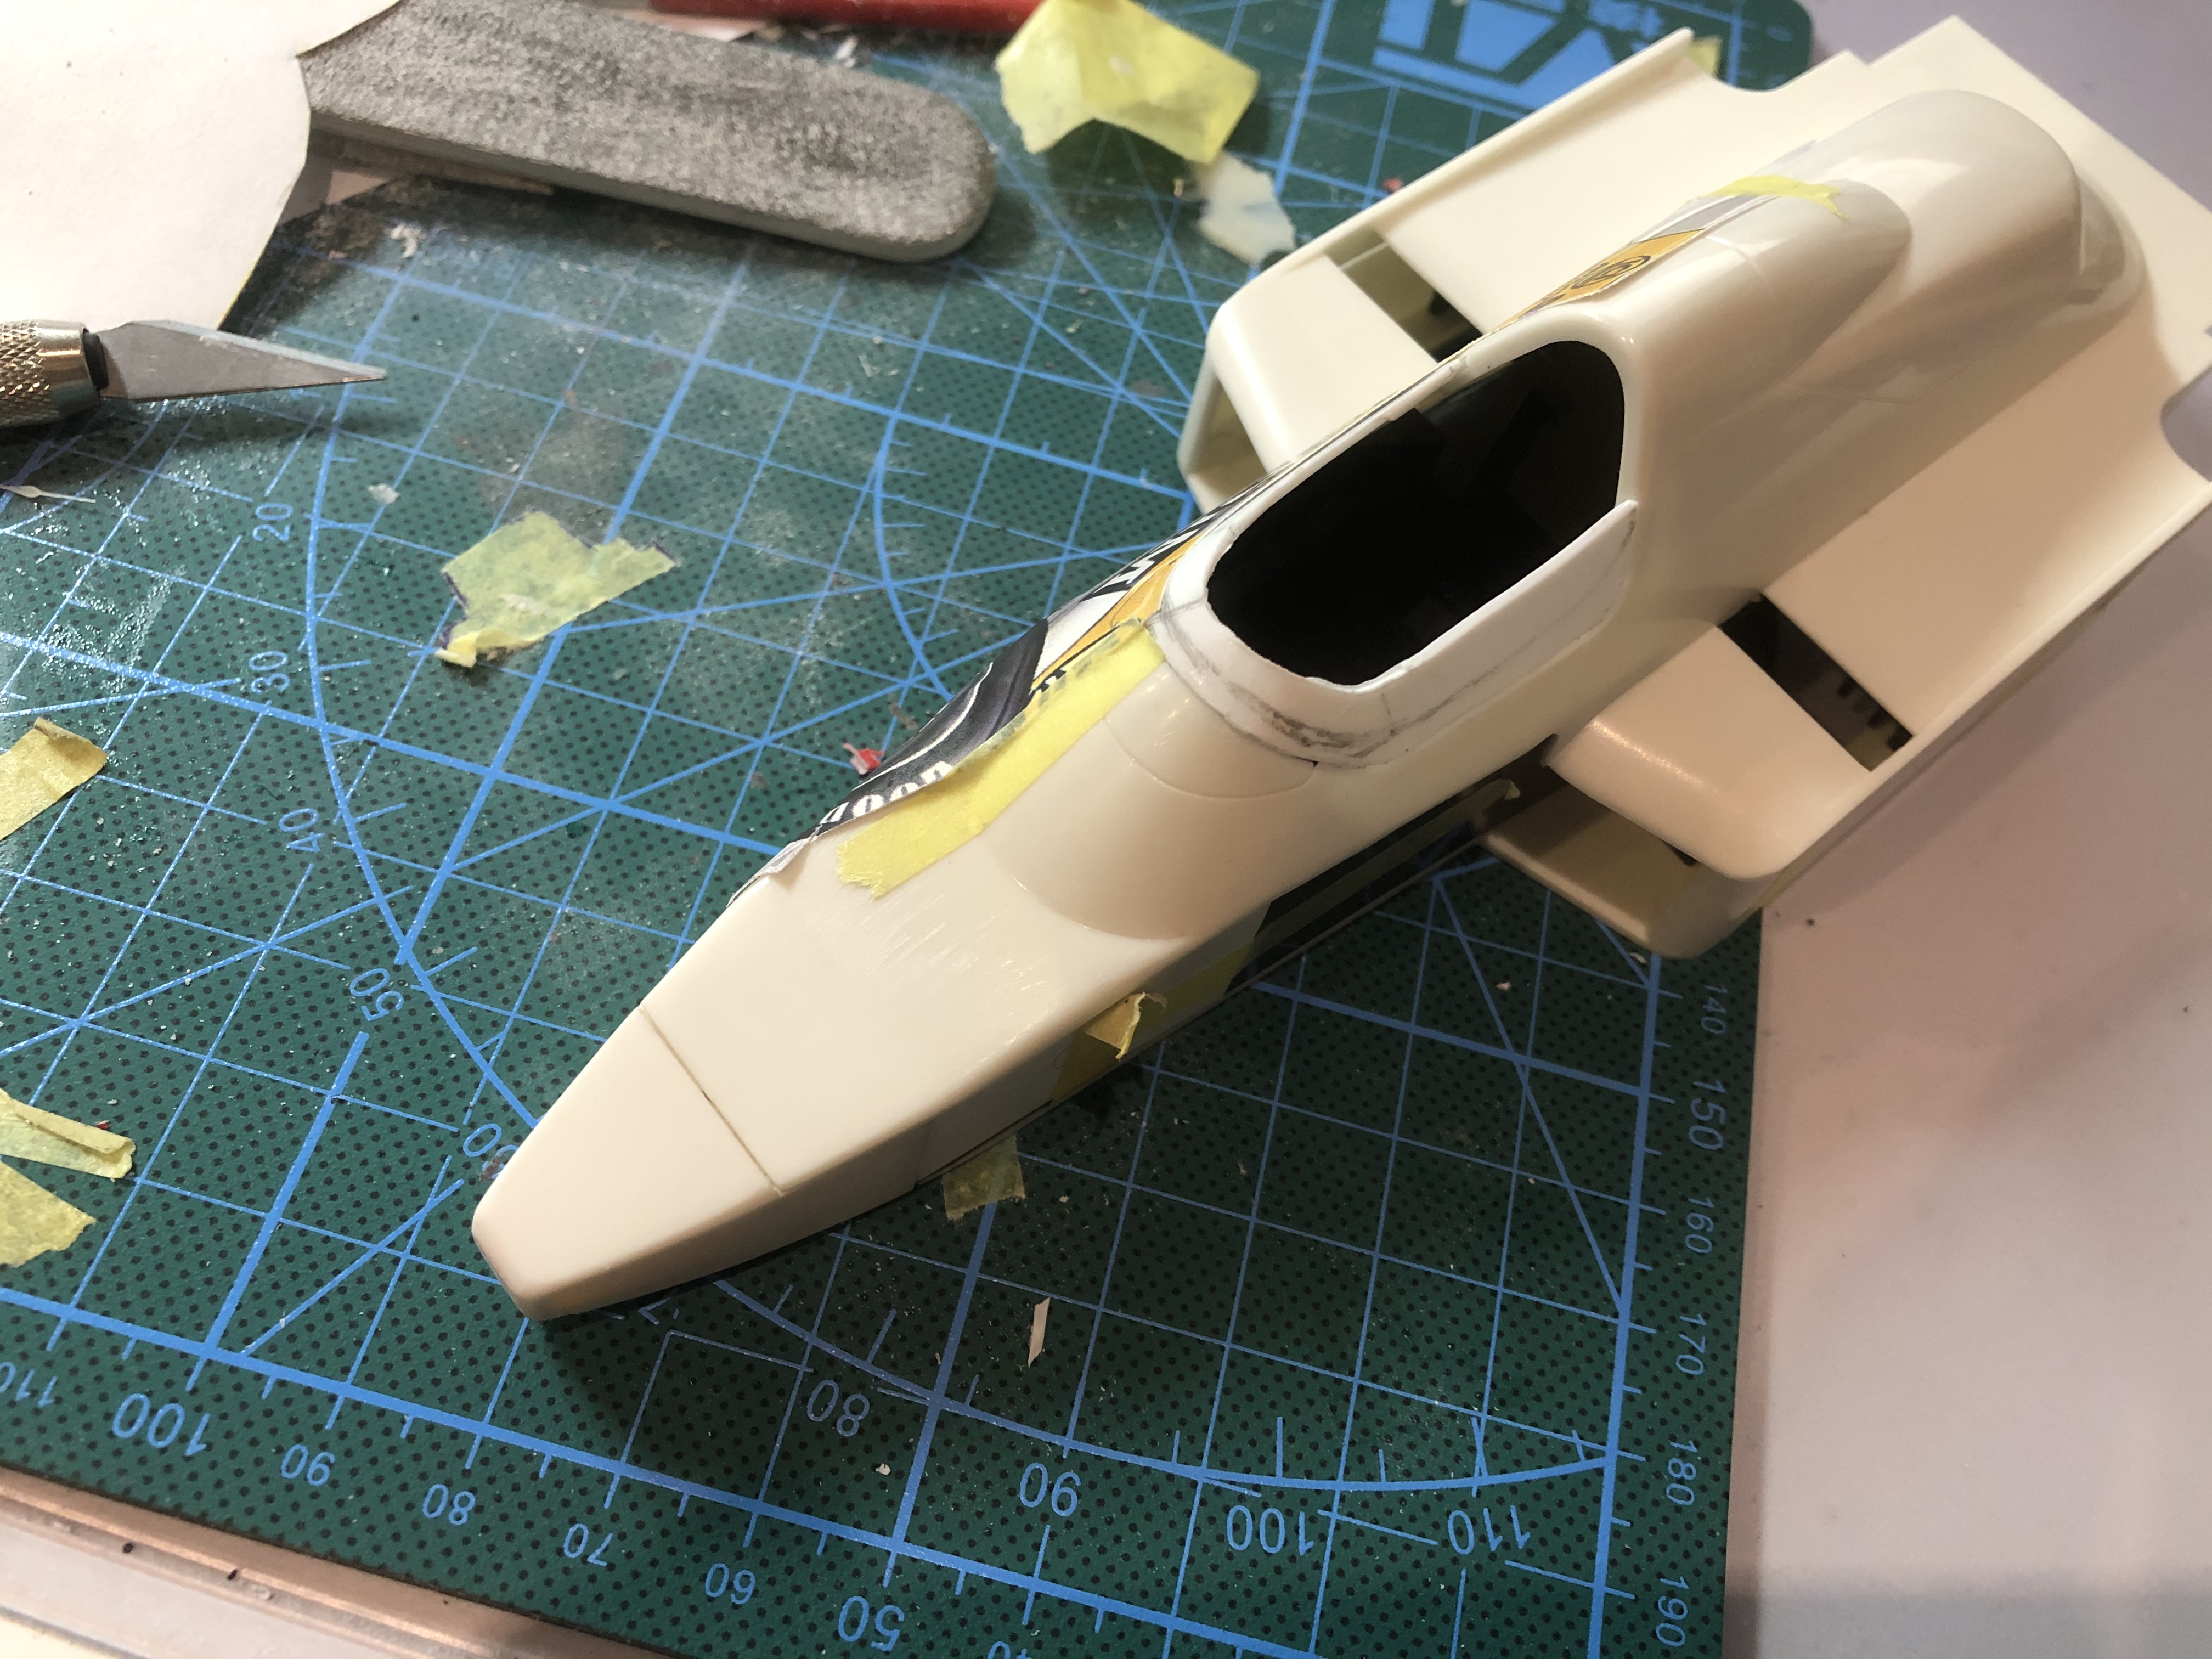
The edge of the cockpit has to be sanded and then also smoothed.
After that, I absolutely have to do the sub-floor. The hole in the battery box needs to be closed - I will use Sheet for this. I had left the rear radiators on the car until now, but I will simply detach them. Then I can also seal the area of the tank with sheet.
Unfortunately I don't have any pictures of the underside of the vehicle - if someone has pictures I would like to take them

Many thanks to all readers and to all helpful answers and your praise!
Then I compared the two engines and rear suspension. It won't be that easy to relocate these properly. With the FW11, the motor and gearbox can actually be separated easily - the only problem I have here is that this is also an old one and has already been glued and not with only a little bit of glue
The motor of the FW07 is directly connected to the gearbox, here I have to think about where and how I separate if I want to get both sensibly.
Since I have now disassembled the FW07, I have also picked out a few parts that I want to use if necessary.
The coolers look very good, but I have to check the length again. The rear coolers may be taken over directly from the FW11 and I would have to model very little here.
I also finished the cockpit a little further. I didn't take over the rear wall of the dashboard after all and instead made a new part.
The steering wheel also comes from the FW07, it has now a mount for the handlebar on the back and is therefore also removable.
The next point was the cockpit surround. There is clearly a lack of material here.
So I decided to try it with sheet first. So I roughly cut 2 pieces and glued them in place.
Then I determined the dimensions and transferred the lines to the model.
Today I found another template. I scaled, printed and cut them accordingly. And tada!!!
So the next steps will continue towards the rear of the vehicle.
The edge of the cockpit has to be sanded and then also smoothed.
After that, I absolutely have to do the sub-floor. The hole in the battery box needs to be closed - I will use Sheet for this. I had left the rear radiators on the car until now, but I will simply detach them. Then I can also seal the area of the tank with sheet.
Unfortunately I don't have any pictures of the underside of the vehicle - if someone has pictures I would like to take them
Many thanks to all readers and to all helpful answers and your praise!
Last edited by steinietrabi on Wed Jan 06, 2021 6:07 am, edited 1 time in total.
Greetings Thomas
-
Chinamalc
- Best of the Rest

- Posts: 514
- Joined: Fri Oct 14, 2005 11:06 am
- Location: about 1985
- Status: Offline
Re: WILLIAMS FW09 Dallas winner KAWAI+some more...
Great thread.
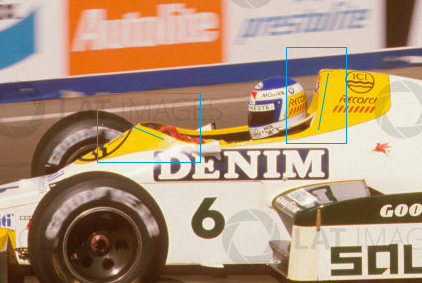
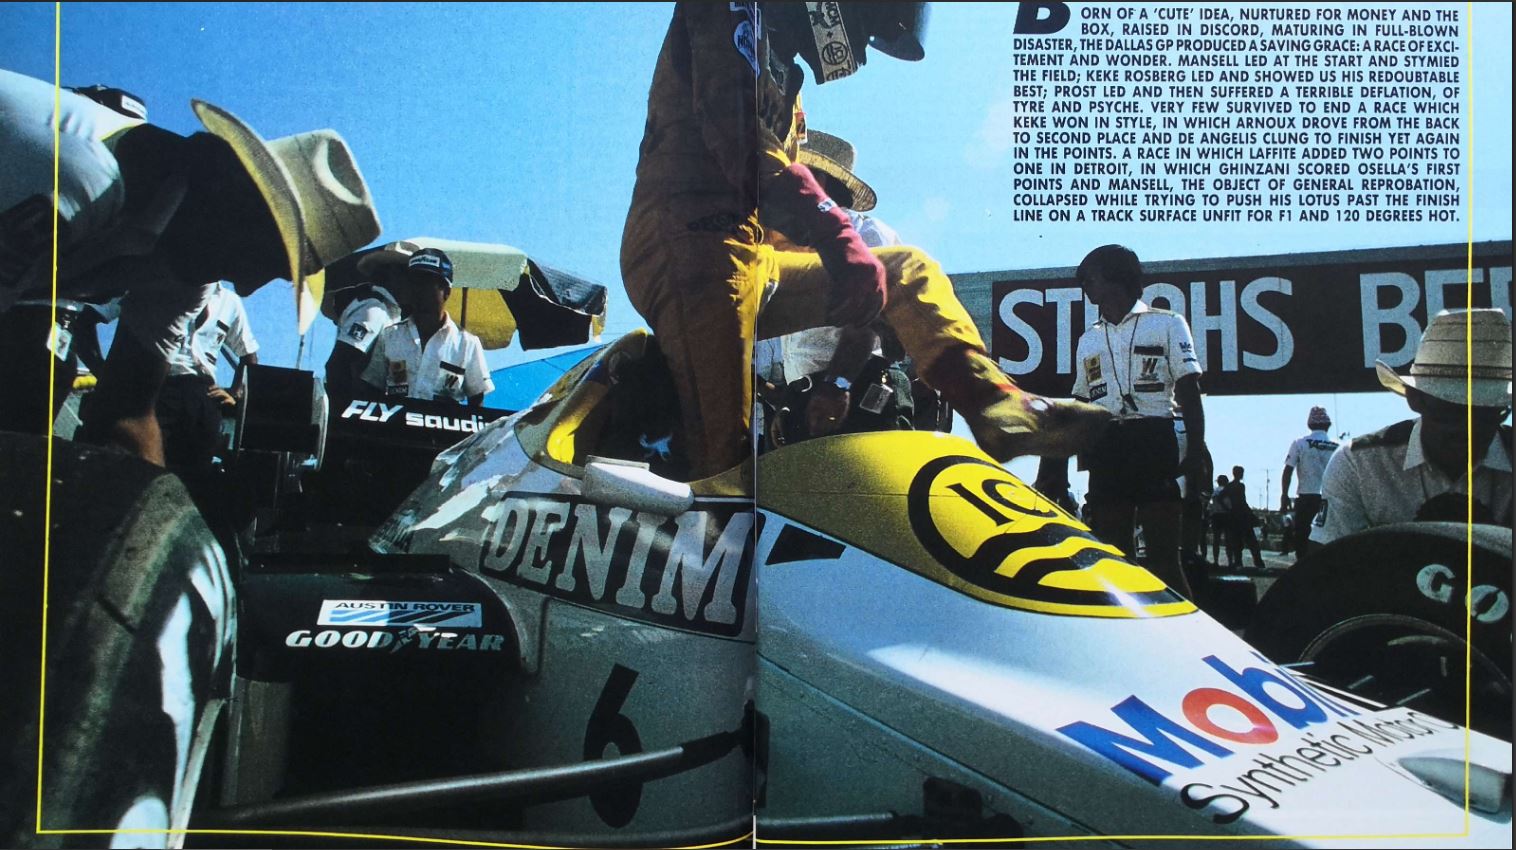
Its the only one I can find of the FW09 underside
Monaco 1984.
Malc.
Its the only one I can find of the FW09 underside
Monaco 1984.
-
steinietrabi
- Constructors Champion
- Posts: 1376
- Joined: Mon Mar 30, 2020 1:56 pm
- Your Name: Thomas
- Favorite F1 Team or Driver: Williams, Ferrari, McLaren... Michael Schumacher
- Location: Crottendorf / Germany
- Status: Offline
Re: WILLIAMS FW09 Dallas winner KAWAI+some more...
Not sure if I can catch up with Thomas' pace!
Hmmm... the template system for the cockpit profile, I dont trust it too much
I honestly prefer to find the exact heigth of two or three significant points.
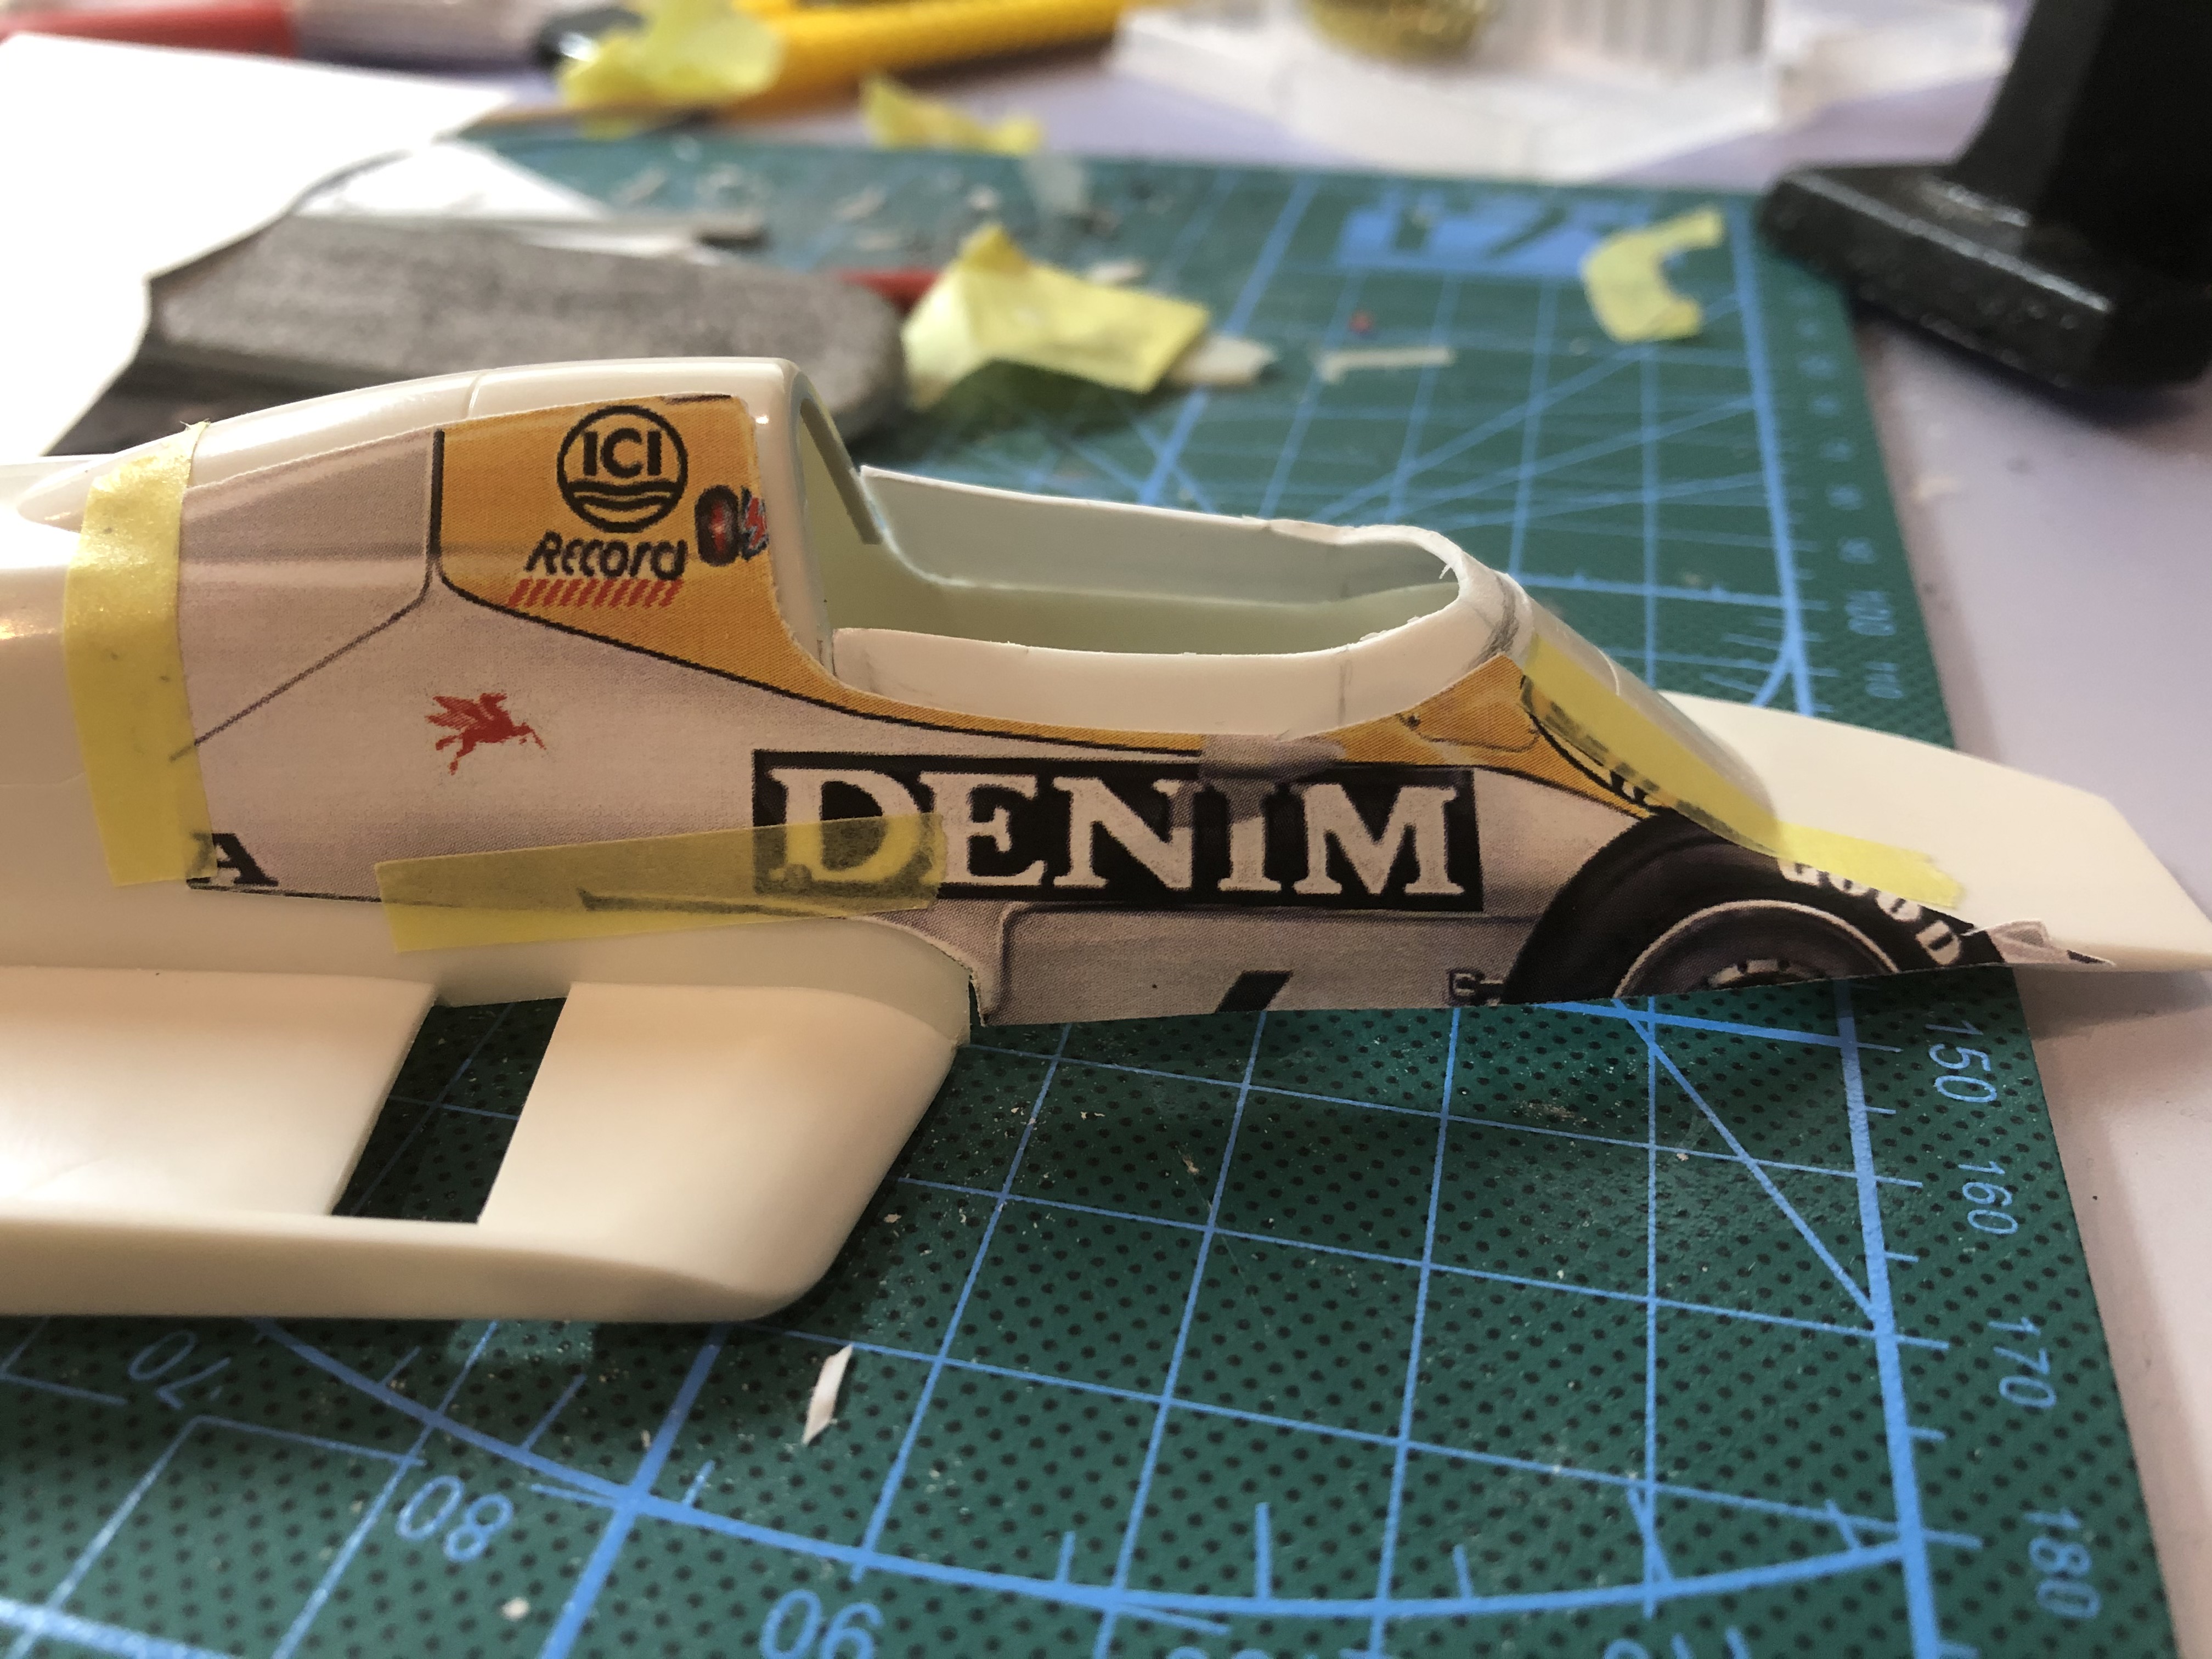
One thing is sure: the "denim" area, so the one that lines the cockpit side, obviously we have to add in heigth, but also a bit on the lower edge, so it'll overlap the chassis a bit.
It's an hazardous thing, as I am not quite sure how the kit plastic likes the Poly glue (the black one, really bad), but I have to do it.
Proof: the lower edge should bw exactly at same level as top sidepod surface, while in the kit it's some 2mm higher. It's also critical as it will receive the DENIM decals.
I also think of it while I resize the decals.
Ahem, I always say "don't stick the thing on a pic" but in this case is fully justified
So there we go. I'll try to dig a bit deeper on the engine subject, and also the cockpit.
Thomas, did the extra plastic adhere well?
Hmmm... the template system for the cockpit profile, I dont trust it too much
I honestly prefer to find the exact heigth of two or three significant points.
One thing is sure: the "denim" area, so the one that lines the cockpit side, obviously we have to add in heigth, but also a bit on the lower edge, so it'll overlap the chassis a bit.
It's an hazardous thing, as I am not quite sure how the kit plastic likes the Poly glue (the black one, really bad), but I have to do it.
Proof: the lower edge should bw exactly at same level as top sidepod surface, while in the kit it's some 2mm higher. It's also critical as it will receive the DENIM decals.
I also think of it while I resize the decals.
Ahem, I always say "don't stick the thing on a pic" but in this case is fully justified
So there we go. I'll try to dig a bit deeper on the engine subject, and also the cockpit.
Thomas, did the extra plastic adhere well?
-
steinietrabi
- Constructors Champion
- Posts: 1376
- Joined: Mon Mar 30, 2020 1:56 pm
- Your Name: Thomas
- Favorite F1 Team or Driver: Williams, Ferrari, McLaren... Michael Schumacher
- Location: Crottendorf / Germany
- Status: Offline
Re: WILLIAMS FW09 Dallas winner KAWAI+some more...
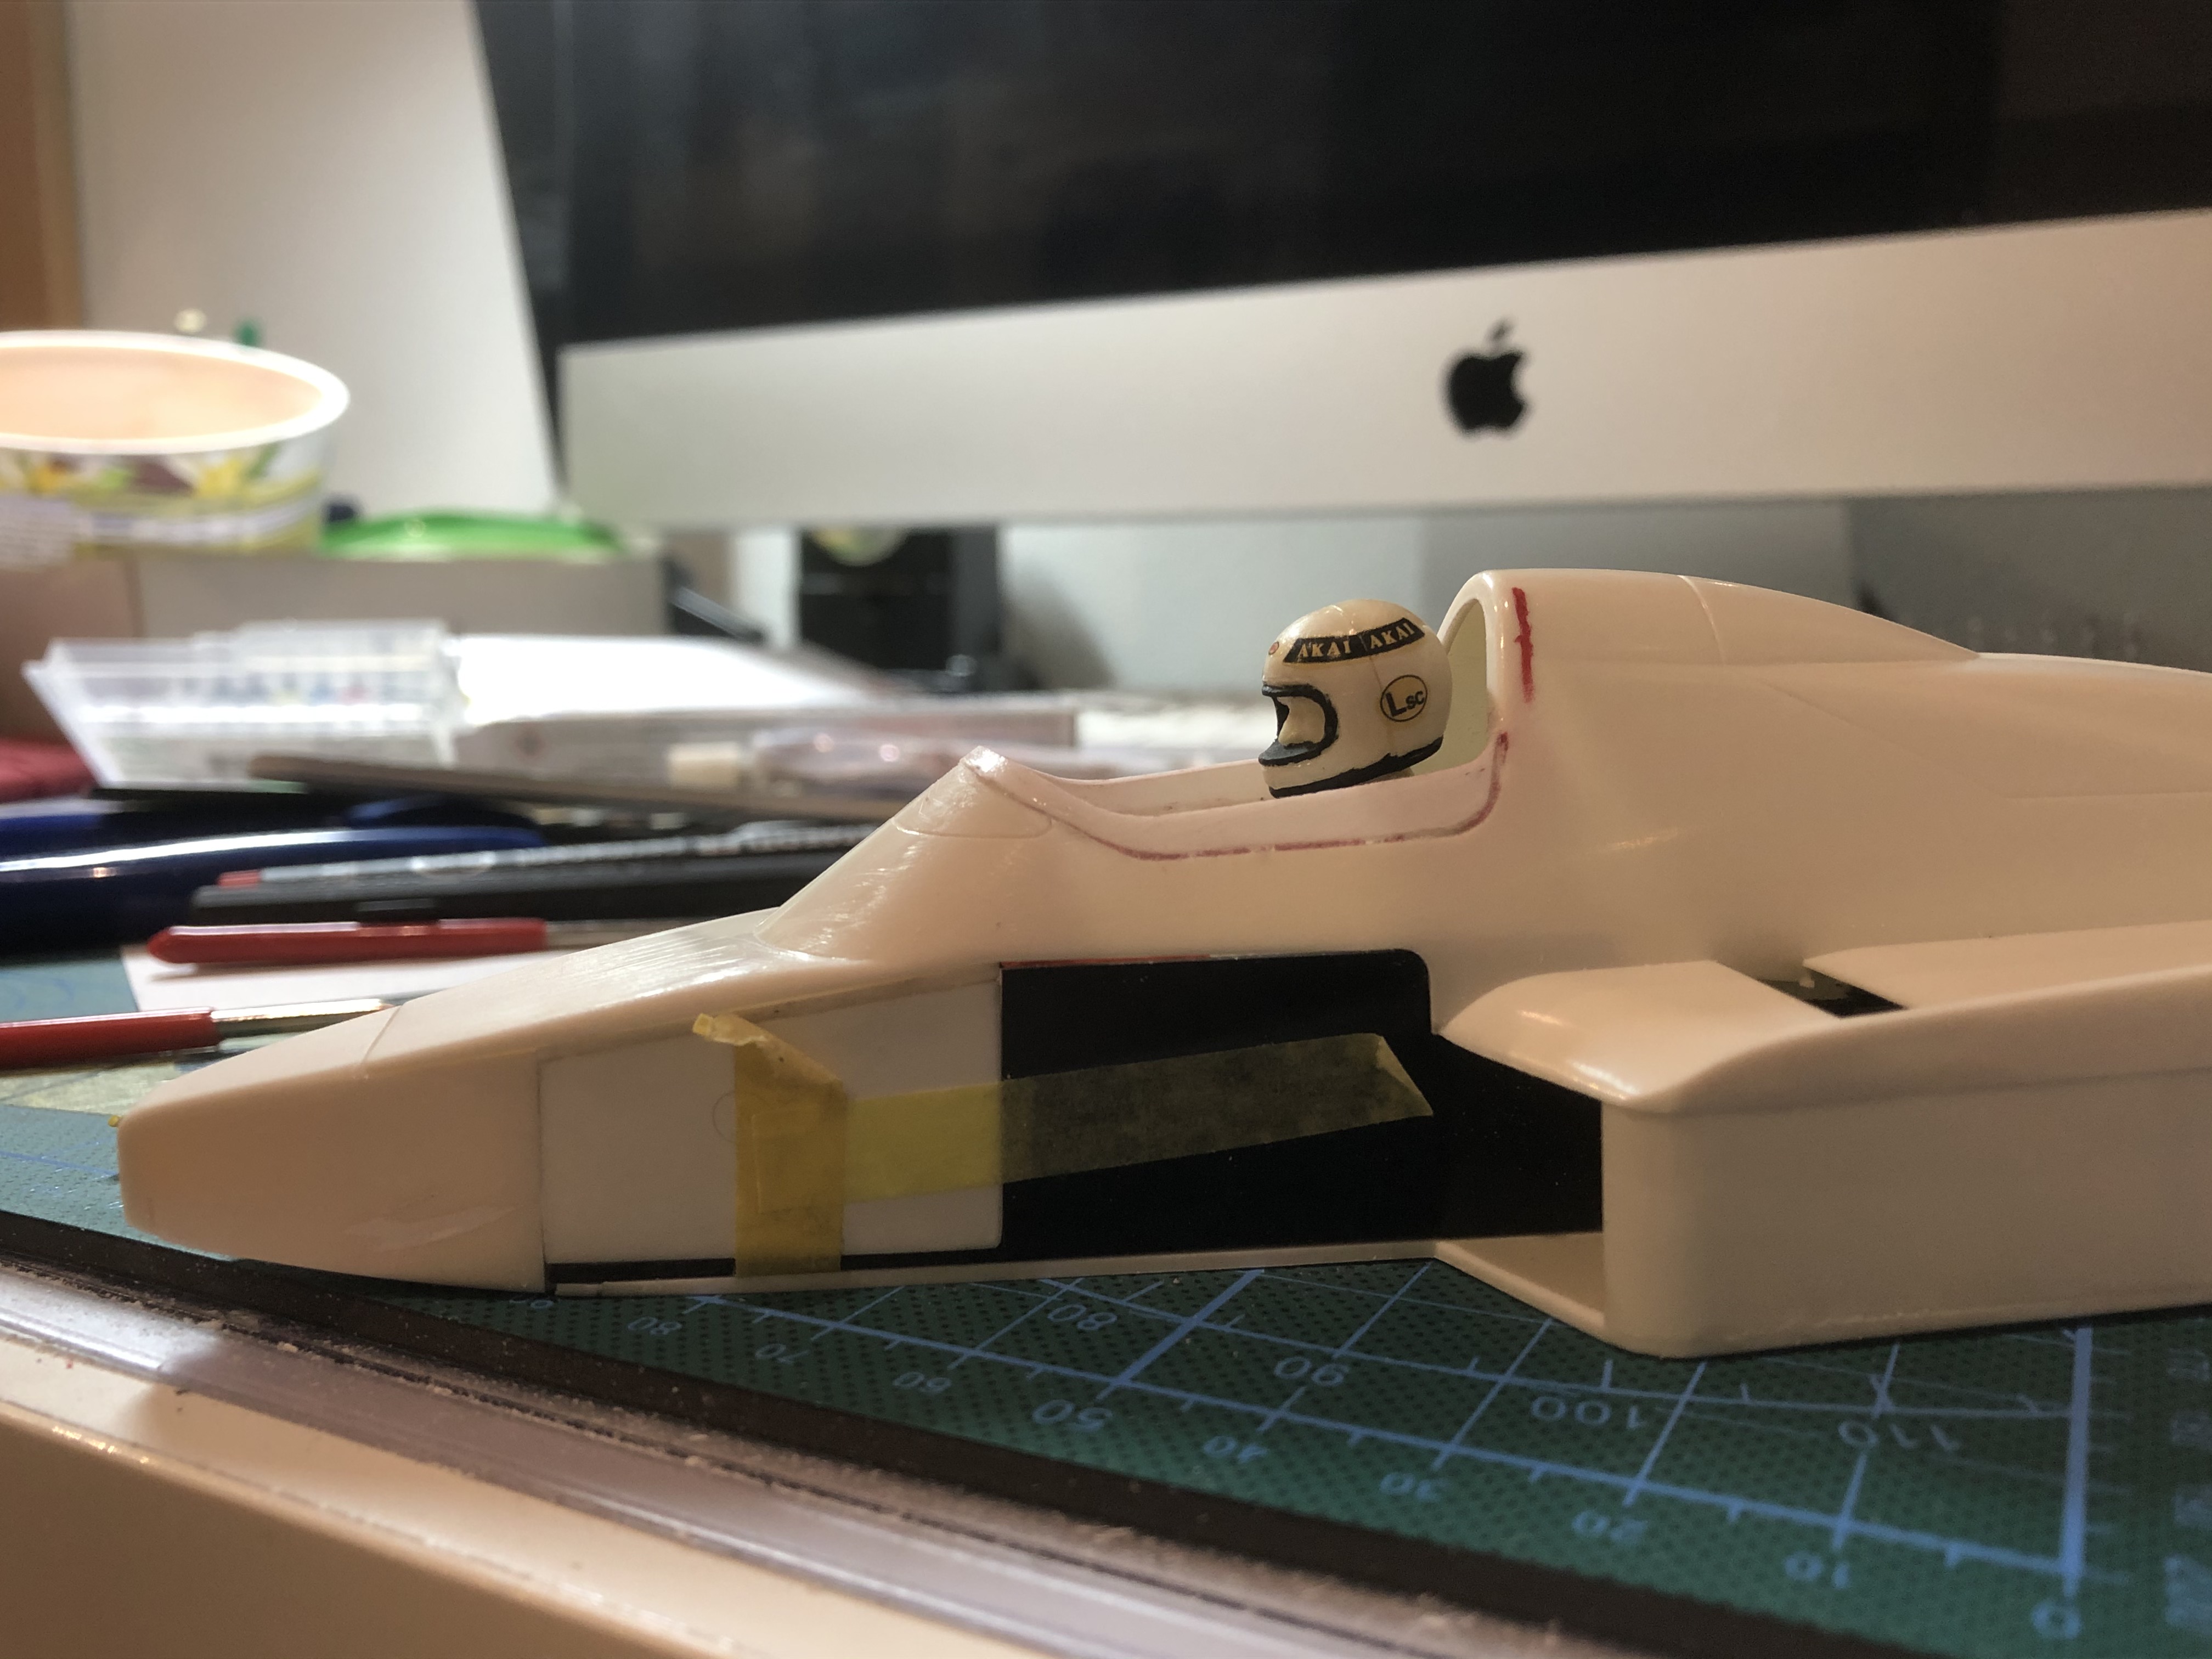
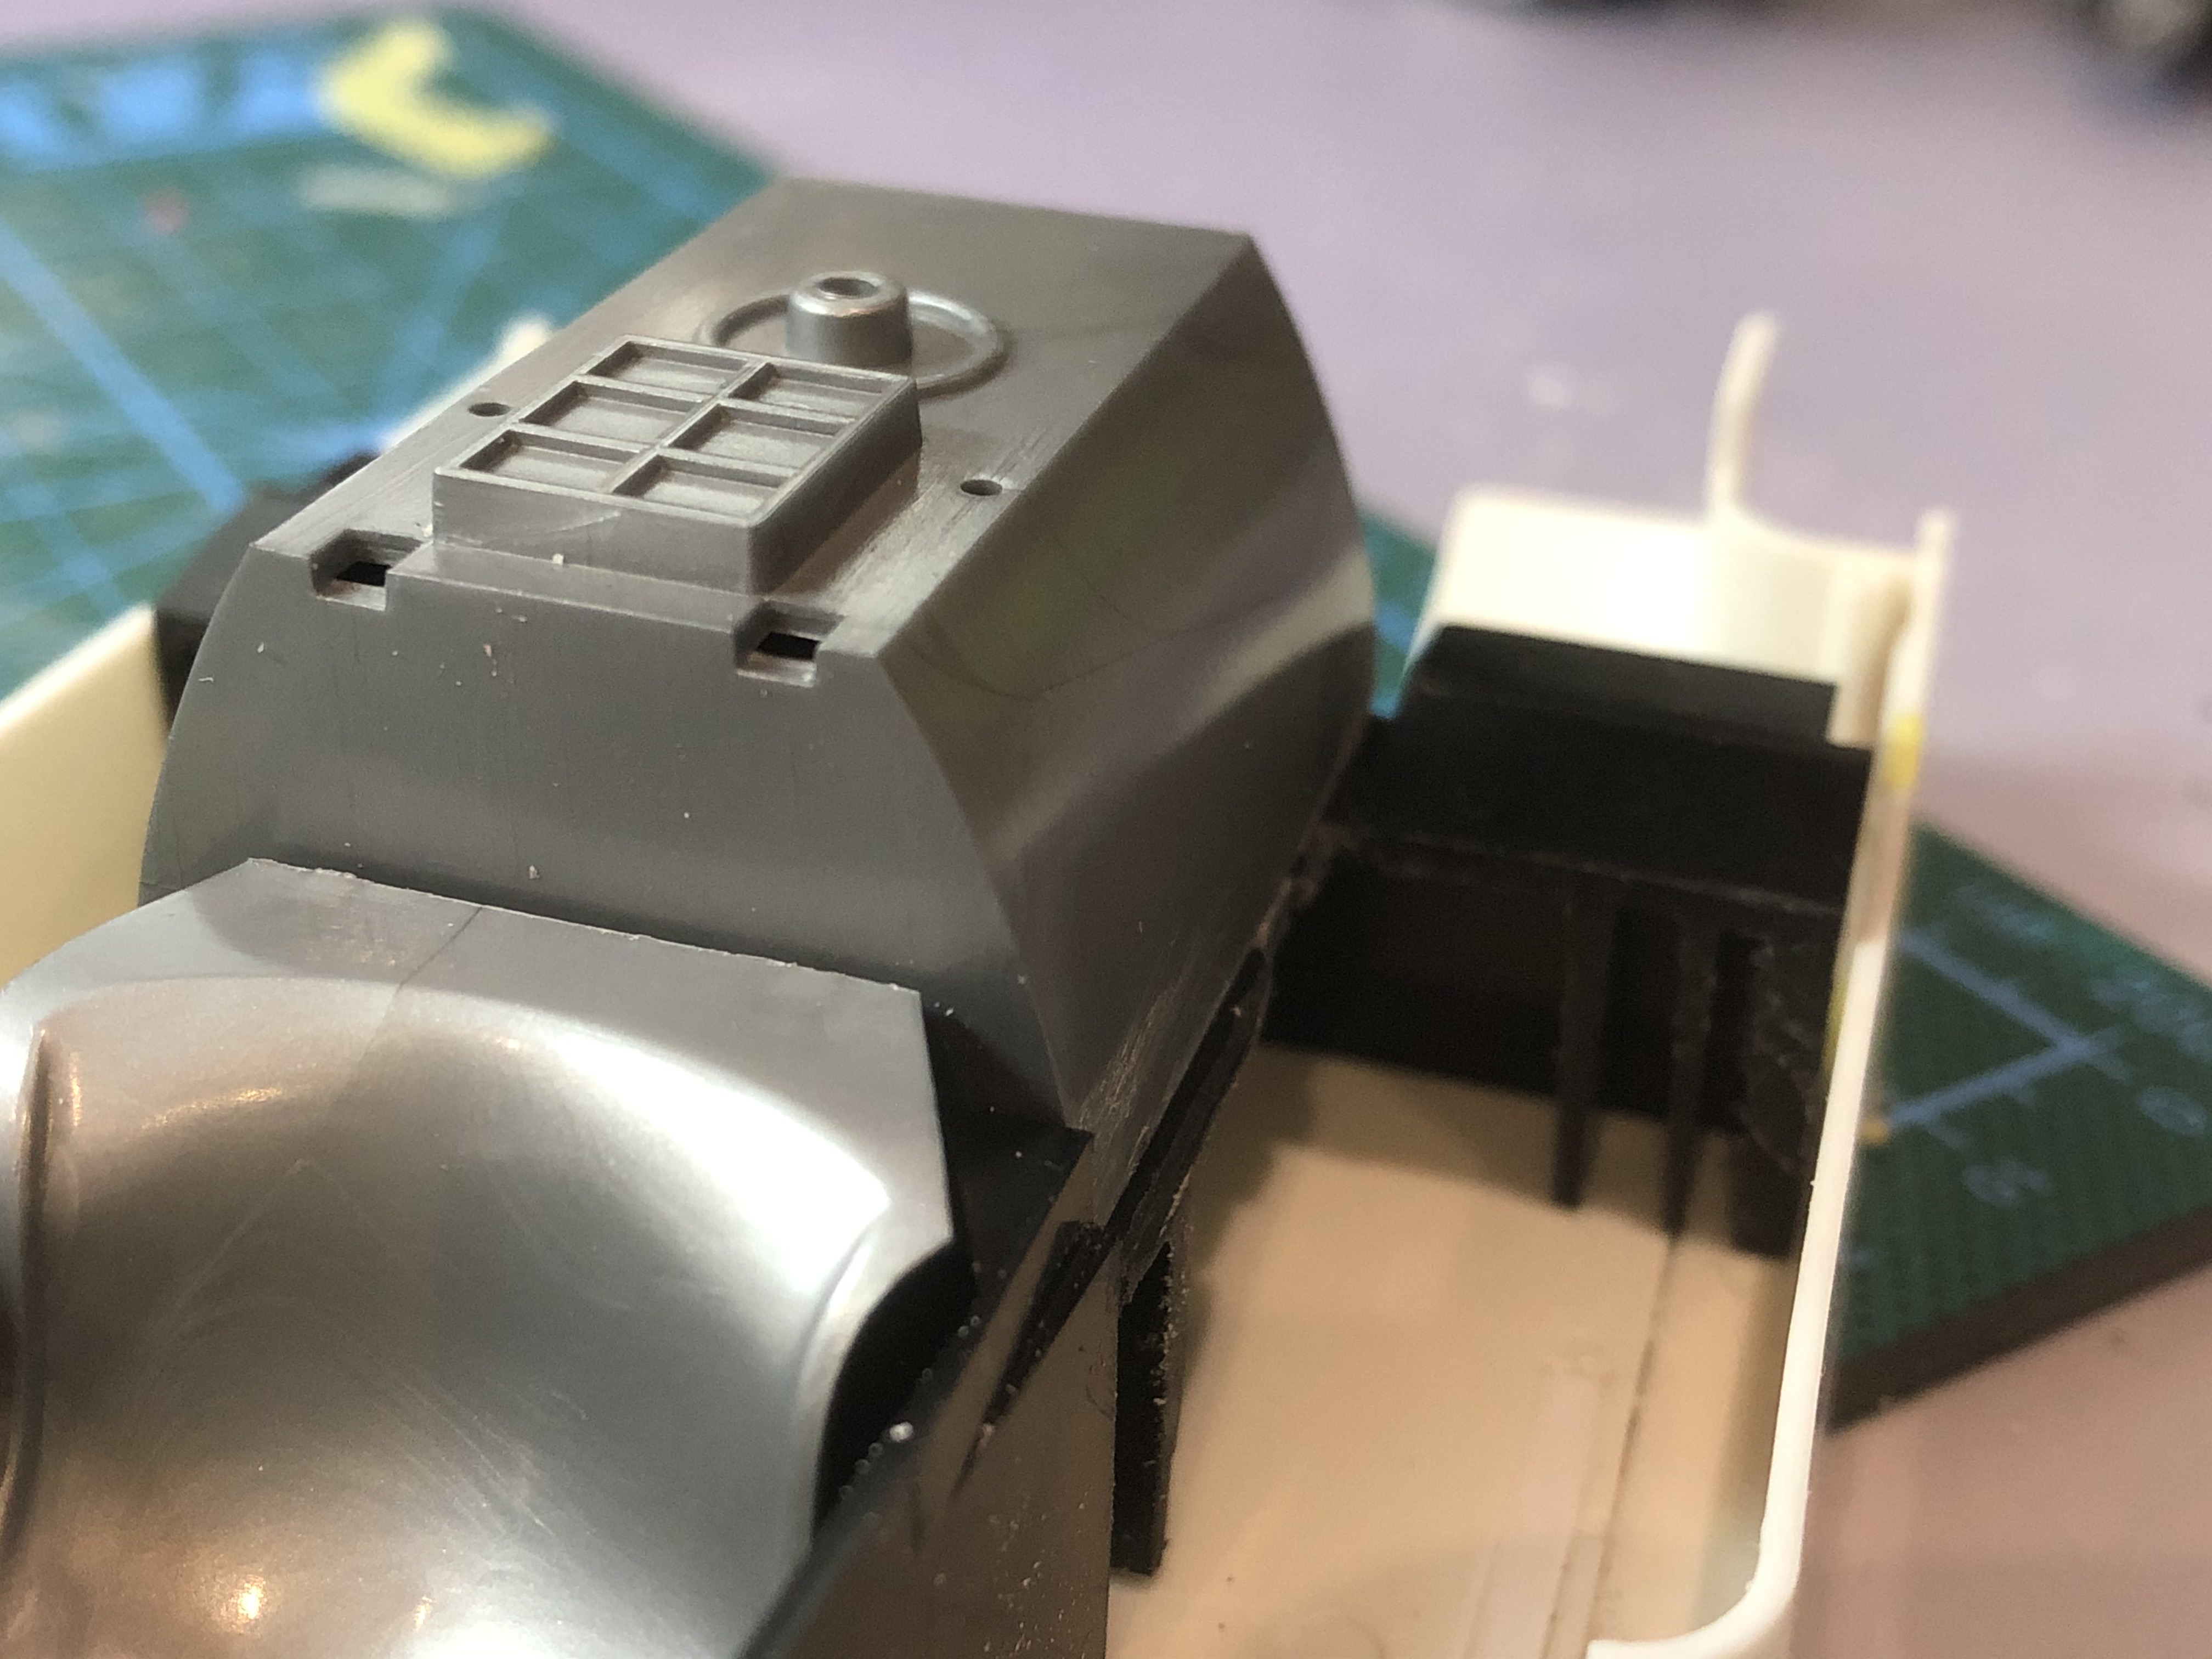
So then I want to post a few pictures again
The bottom is closed...
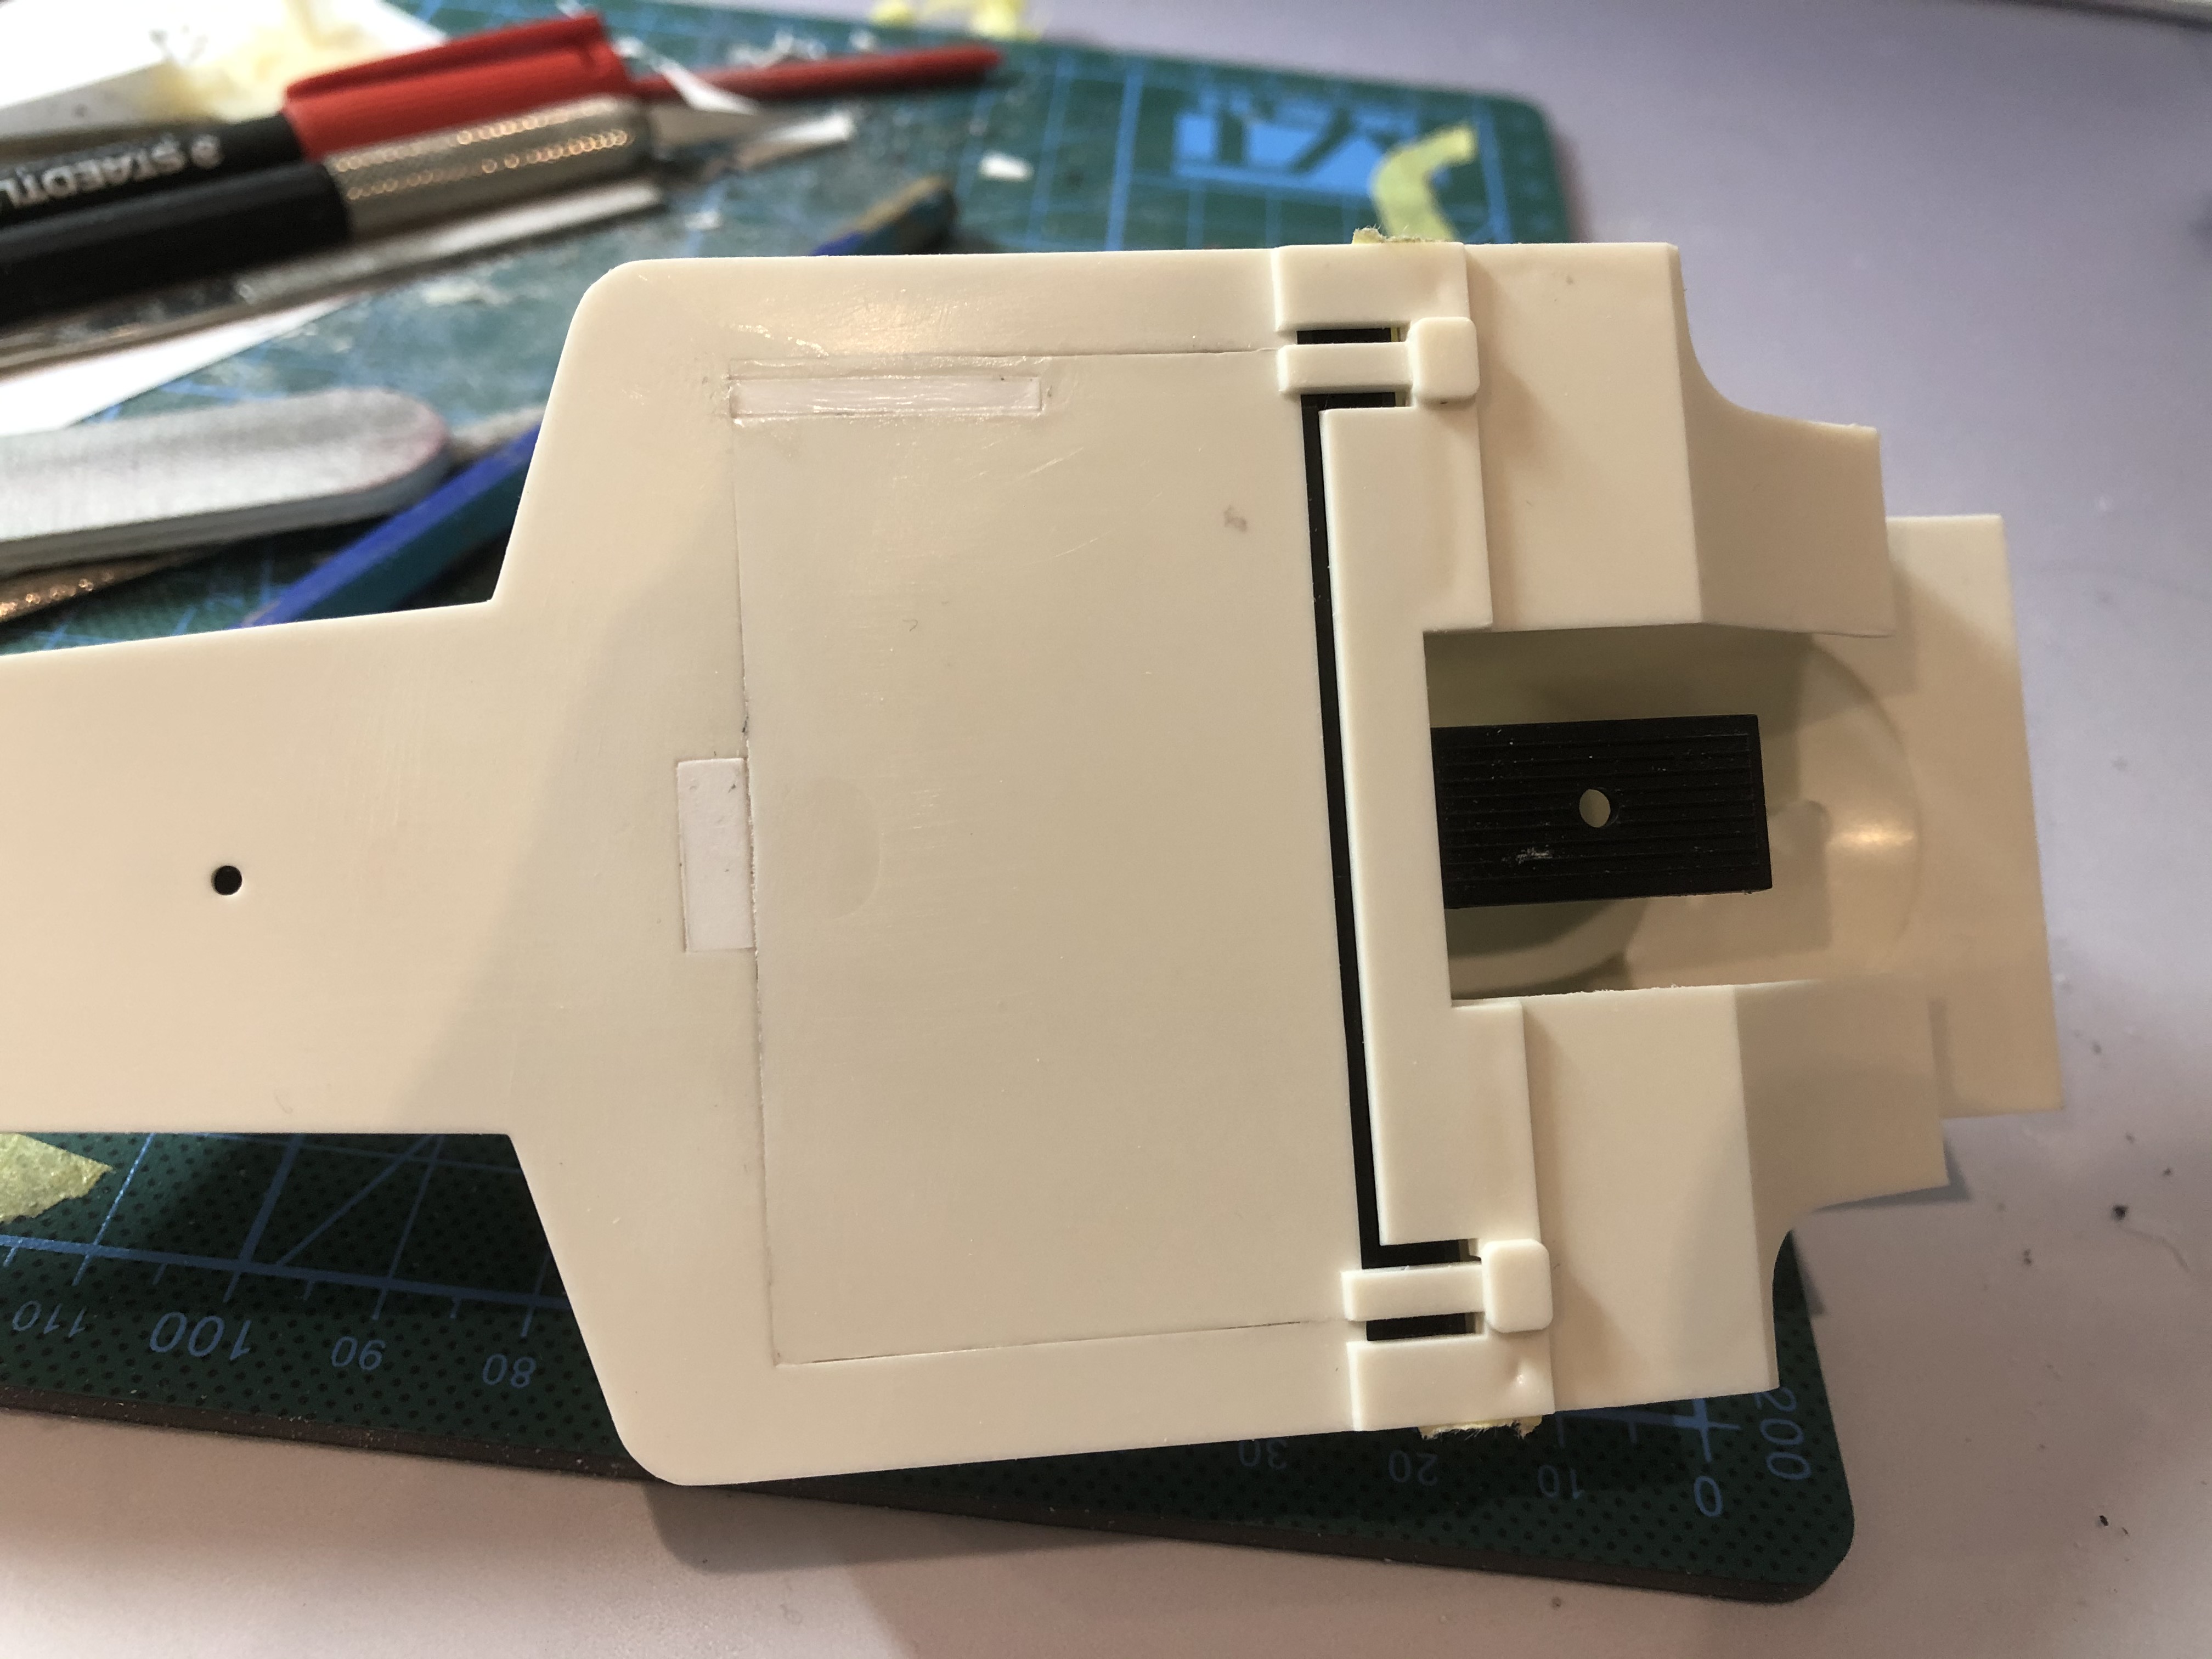
Then I sanded down the edge of the cockpit. This was the result with the template.
After a first visual check and a measurement, I first had to sand down the sides a bit at the back and then also in the transition to the "straight" side line! That is the current result. The height in front is almost at the same height as the panel line of the nose - so it should fit.

And for comparison with "the" pilot...
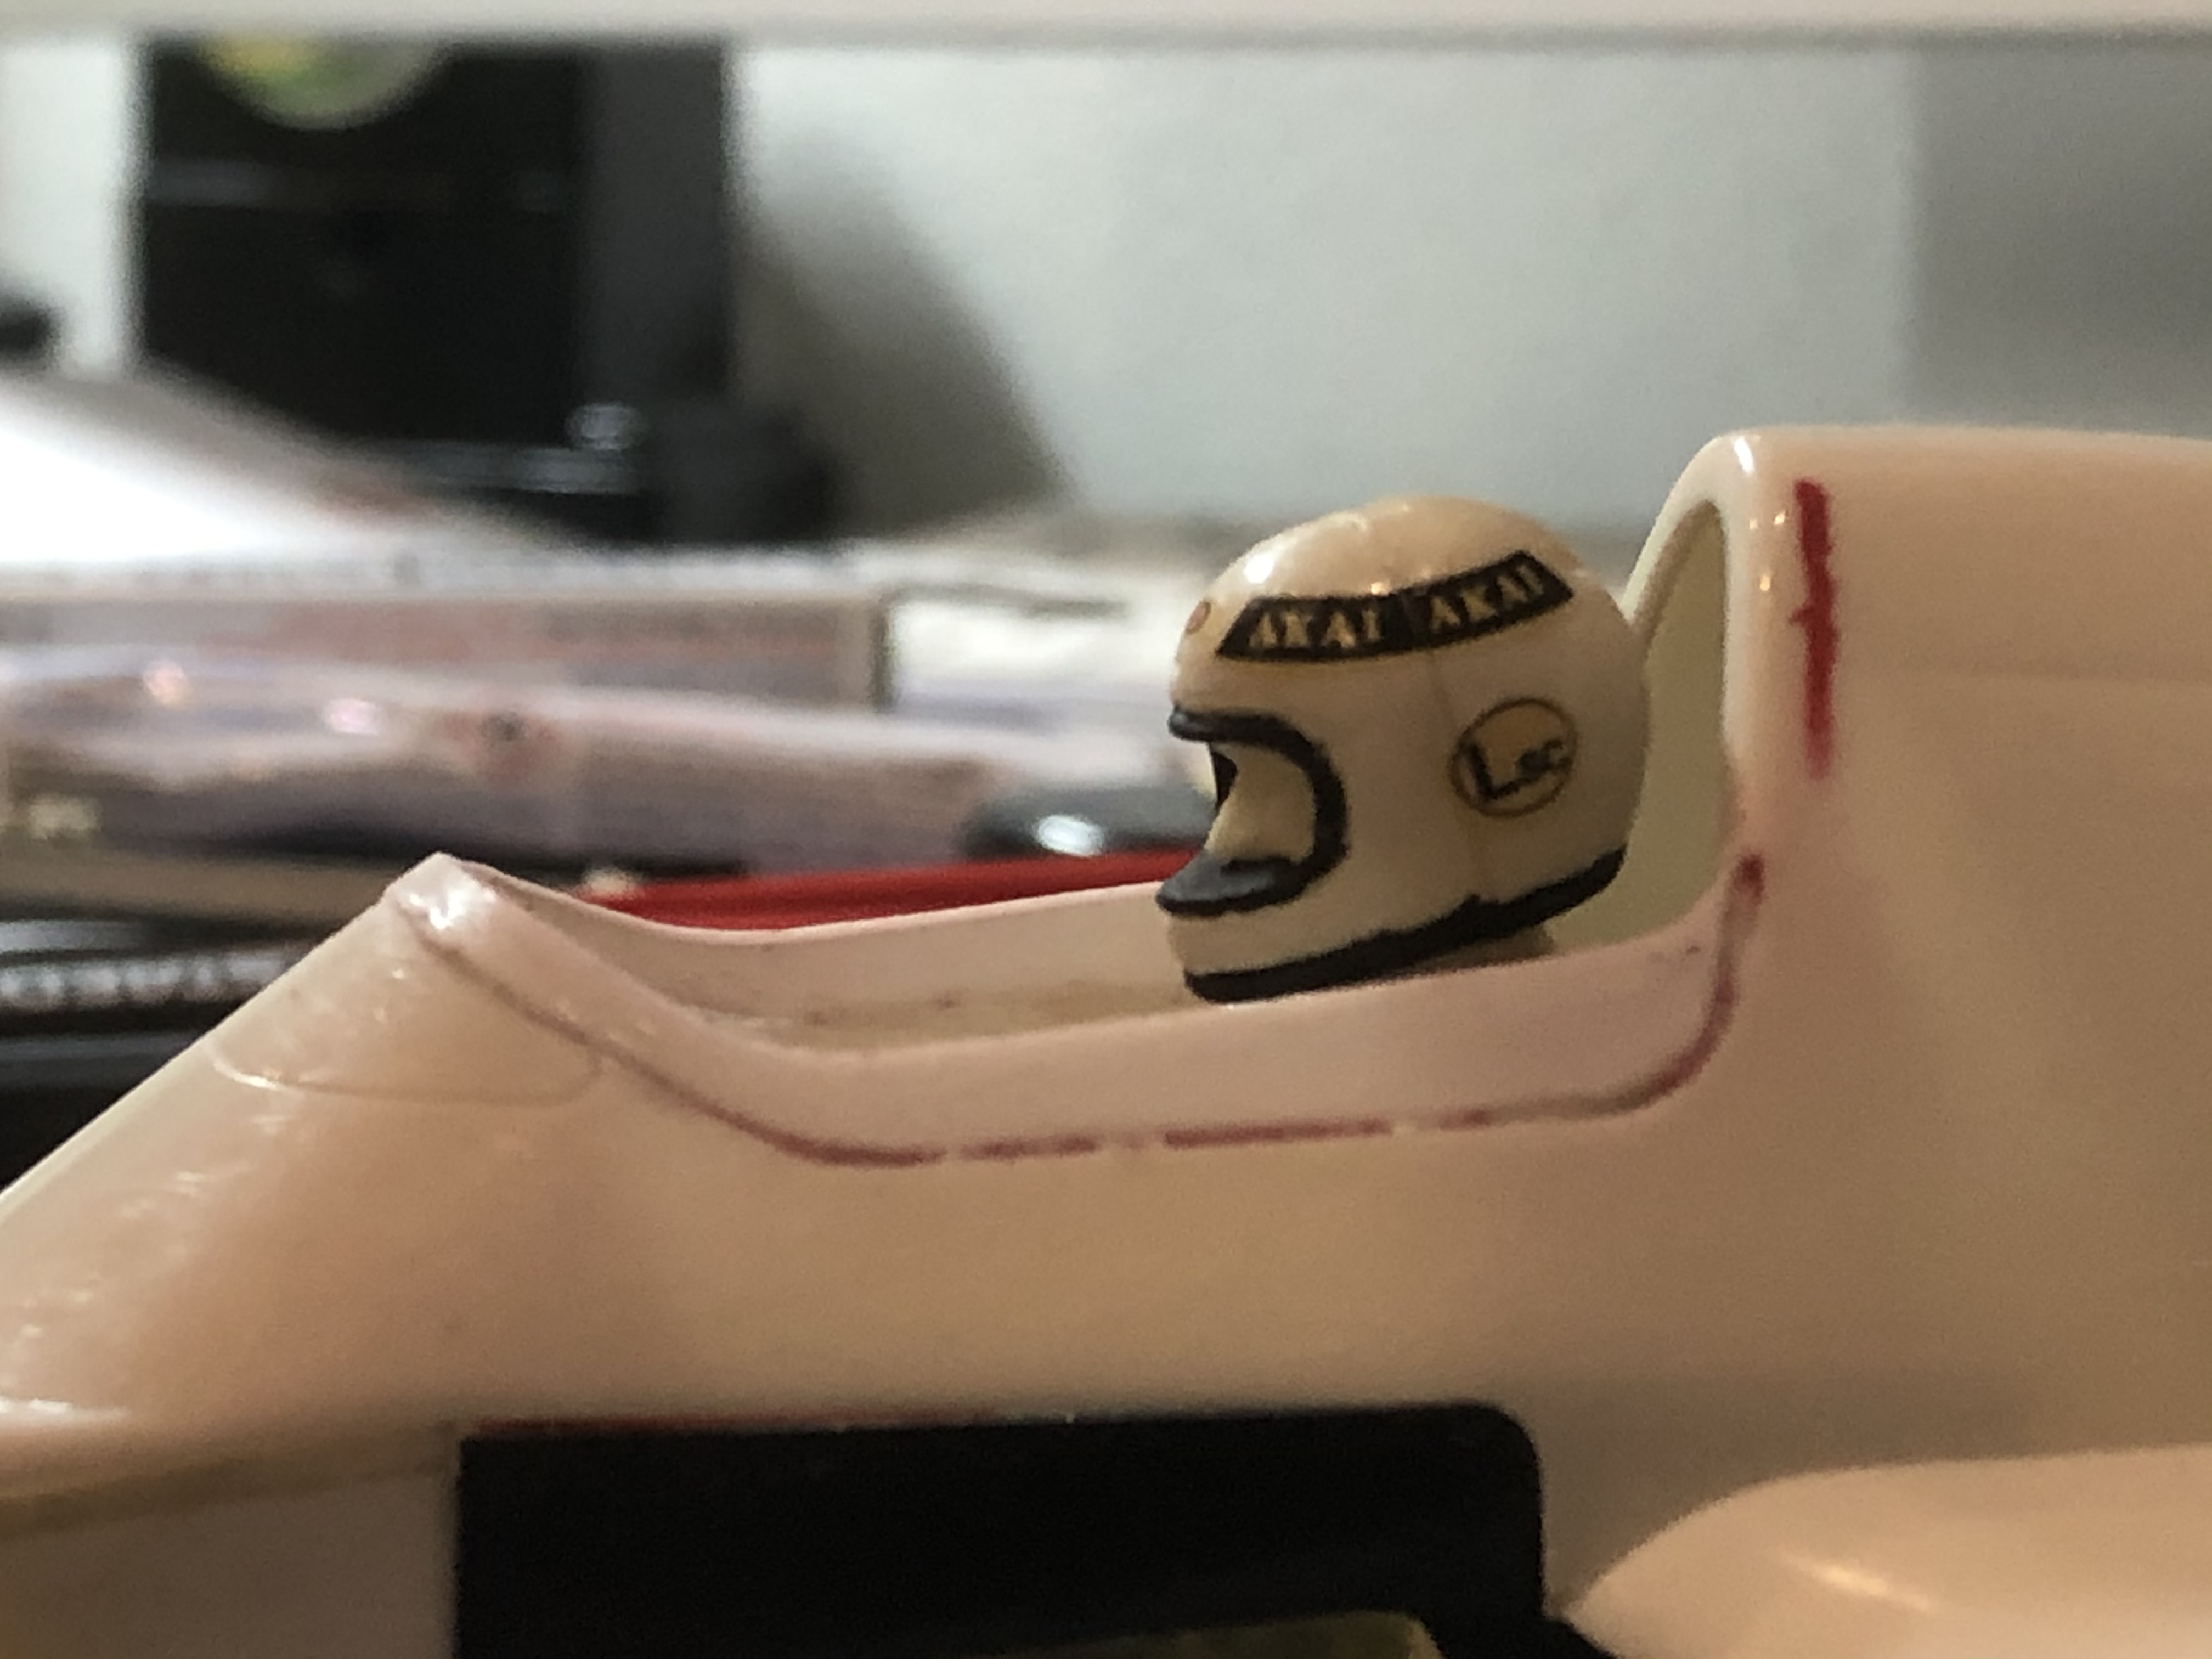
Where I am not 100% sure is the area of the roll bar. In my opinion, this should slide further back and also be more inclined than the kit. But I haven't sanded anything here yet.
And the area in the middle should also have a slightly different radius. This would make the line a little lower again.
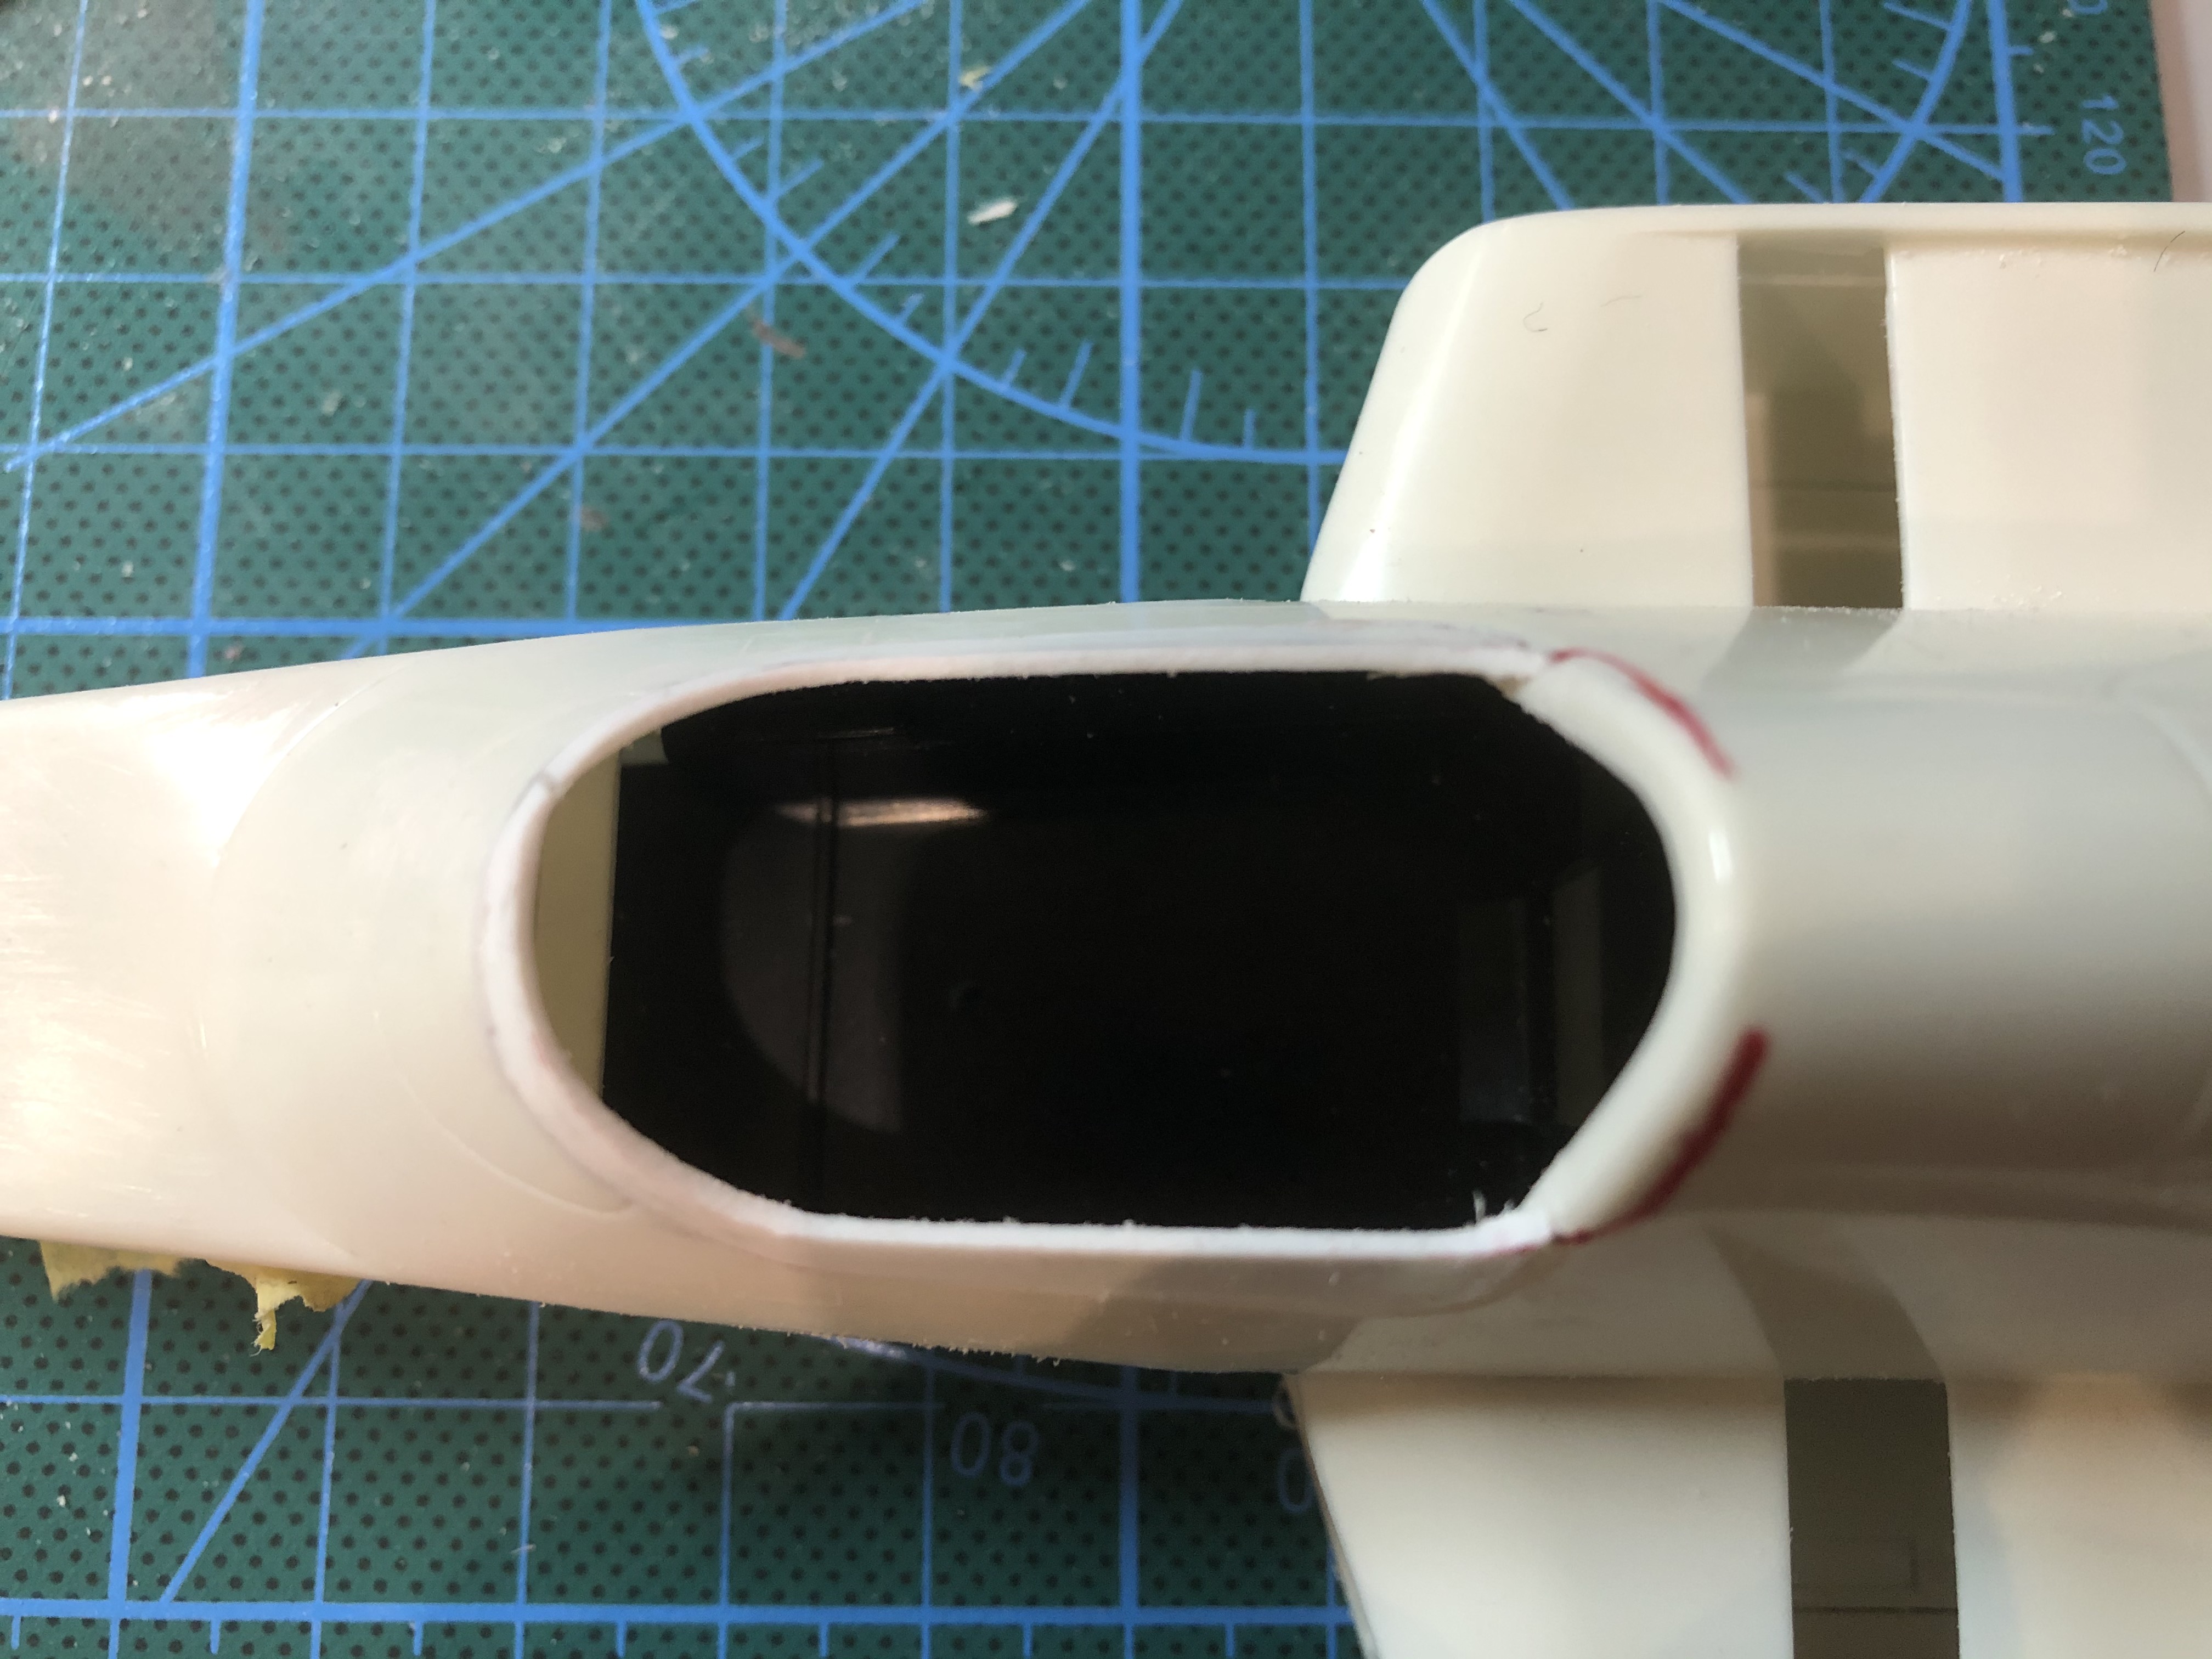
After this picture I will also adjust the air inlet on the nose again. The rear area doesn't fit, but I hadn't been able to see that in a picture until now.
@James: So far I have used superglue or the Tamiya Extra Thin Cement (Quick Setting), they bonded everything perfectly. I haven't had any success with the Revell glue.
Additional note: I will definitely cut out the rear coolers, as I also need space up to the engine / tank and these are currently connected to the inside. I will probably have to rebuild the tank, it is rounded on the sides in the kit - for whatever reason: evil: - the sides have to be straight in any case.
The bottom is closed...
Then I sanded down the edge of the cockpit. This was the result with the template.
After a first visual check and a measurement, I first had to sand down the sides a bit at the back and then also in the transition to the "straight" side line! That is the current result. The height in front is almost at the same height as the panel line of the nose - so it should fit.
And for comparison with "the" pilot...
Where I am not 100% sure is the area of the roll bar. In my opinion, this should slide further back and also be more inclined than the kit. But I haven't sanded anything here yet.
And the area in the middle should also have a slightly different radius. This would make the line a little lower again.
After this picture I will also adjust the air inlet on the nose again. The rear area doesn't fit, but I hadn't been able to see that in a picture until now.
@James: So far I have used superglue or the Tamiya Extra Thin Cement (Quick Setting), they bonded everything perfectly. I haven't had any success with the Revell glue.
Additional note: I will definitely cut out the rear coolers, as I also need space up to the engine / tank and these are currently connected to the inside. I will probably have to rebuild the tank, it is rounded on the sides in the kit - for whatever reason: evil: - the sides have to be straight in any case.
Last edited by steinietrabi on Wed Jan 06, 2021 6:08 am, edited 1 time in total.
Greetings Thomas
Re: WILLIAMS FW09 Dallas winner KAWAI+some more...
Some quick notes
Thanks about the glue: in my case, Revell (after all same active ingredients as Tamiya) does not bond black and white parts of the kit. It does, momentarily, as if it was white glue, but it does not melt the black stuff. I suspect it's ABS. Maybe your batch is different.
Nice cockpit, but I have calculated that it's windshield edge that should go forward.
Roll hoop body (read head rest) is well where it is. Also, windshield is more square, unlike original FW09 "JS11 style" rounded one.
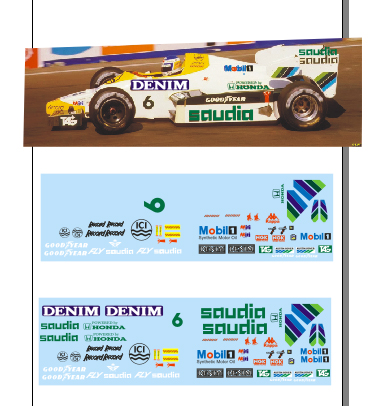
DENIM decals will be 8mm tall, FWIW!!
I won't use the fuel cell upper half, it should be flat walls, easy to make with styrene.
I have been watching the engine thing: I don't get a consensus about the spacer-engine-fuel cell lengths. It seems we have to make the fuel cell a bit shorter.
FW07 spacer will also be made some 2-3mm shorter.
Also I have noticed we have to remove a big chunk on camcover upper front corner, so the camshaft skin shape is seen. We'll see.
Ah! I made initially the intercoolers as long as yours, but finally chopped them shorter, removing the foremost block.
I see you have not removed (yet) the big plastic beam that closes the former battery port. I don't dare yet, either!!!
That's all for today!
PS: any plan for the rear of engine cover??? I am not very clear on this yet
Thanks about the glue: in my case, Revell (after all same active ingredients as Tamiya) does not bond black and white parts of the kit. It does, momentarily, as if it was white glue, but it does not melt the black stuff. I suspect it's ABS. Maybe your batch is different.
Nice cockpit, but I have calculated that it's windshield edge that should go forward.
Roll hoop body (read head rest) is well where it is. Also, windshield is more square, unlike original FW09 "JS11 style" rounded one.
DENIM decals will be 8mm tall, FWIW!!
I won't use the fuel cell upper half, it should be flat walls, easy to make with styrene.
I have been watching the engine thing: I don't get a consensus about the spacer-engine-fuel cell lengths. It seems we have to make the fuel cell a bit shorter.
FW07 spacer will also be made some 2-3mm shorter.
Also I have noticed we have to remove a big chunk on camcover upper front corner, so the camshaft skin shape is seen. We'll see.
Ah! I made initially the intercoolers as long as yours, but finally chopped them shorter, removing the foremost block.
I see you have not removed (yet) the big plastic beam that closes the former battery port. I don't dare yet, either!!!
That's all for today!
PS: any plan for the rear of engine cover??? I am not very clear on this yet
-
 Dede
Dede
- FOTA Chairman
- Posts: 2075
- Joined: Sat Aug 02, 2008 4:52 pm
- Your Name: Dede
- Favorite F1 Team or Driver: ....
- Location: Ireland.
- Status: Offline

Re: WILLIAMS FW09 Dallas winner KAWAI+some more...
This is a great thread, enjoyed going through it this evening, nice collaborative builds guys.!
Dede.
-
steinietrabi
- Constructors Champion
- Posts: 1376
- Joined: Mon Mar 30, 2020 1:56 pm
- Your Name: Thomas
- Favorite F1 Team or Driver: Williams, Ferrari, McLaren... Michael Schumacher
- Location: Crottendorf / Germany
- Status: Offline
Re: WILLIAMS FW09 Dallas winner KAWAI+some more...
I think that shouldn't be a problem, then only the angle to the front would be a little flatter. So should be feasible!JamesB wrote:Nice cockpit, but I have calculated that it's windshield edge that should go forward.
After the first sanding it looks really not bad either. Pictures come tomorrow...
Can you visualize that Do you have a good picture of it?JamesB wrote:Also, windshield is more square, unlike original FW09 "JS11 style" rounded one.
That would be great, then I would have a little space below (really almost nothing) and above. That should be spot onJamesB wrote:DENIM decals will be 8mm tall
I have now cut out all the coolers so that you can adjust them individually and put them back in again.JamesB wrote:I don't get a consensus about the spacer-engine-fuel cell lengths.
I left it in so that I can position the entire front end. But basically I could just cut it out now. However, a piece of the base plate must then be cut out over the entire width so that a whole strip can be inserted!JamesB wrote:I see you have not removed (yet) the big plastic beam that closes the former battery port. I don't dare yet, either!!!
Greetings Thomas
-
- Similar Topics
- Replies
- Views
- Last post
-
- 6 Replies
- 311 Views
-
Last post by Seema