


Bravo; I can't work in 1/43 as it's too small for me so I applaud those which have a go at it. And this kit does really look very nice. I always liked the shape of this car. Subscribed!
You work with some cool people.
Cheers,
AJ
Tameo 1:43 Ferrari 156/85
-
Formulamike
- World Champion

- Posts: 671
- Joined: Fri Jan 09, 2009 7:00 am
- Favorite F1 Team or Driver: Lotus
- Status: Offline

Re: Tameo 1:43 Ferrari 156/85
Great start, great to see this Kit.
Mike
Mike

Re: Tameo 1:43 Ferrari 156/85
Thanks guys!
Re: Tameo 1:43 Ferrari 156/85
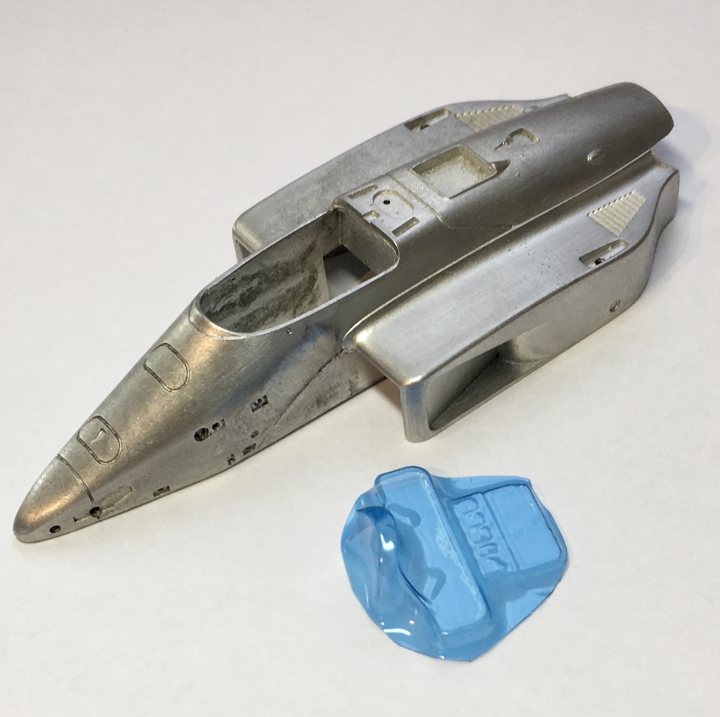
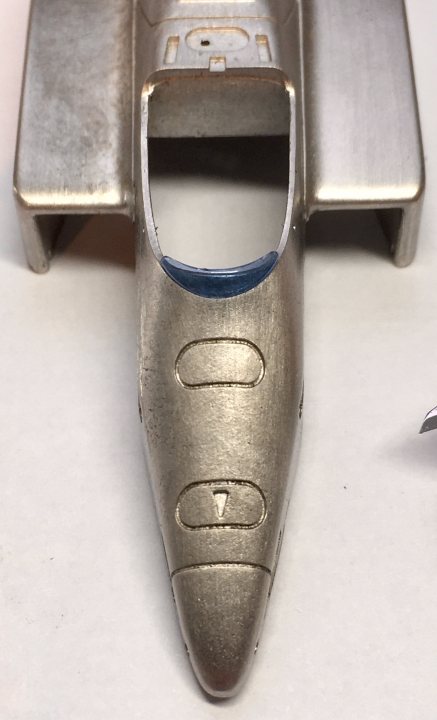
The tiny windscreen needed cutting from its huge vac-formed backing. Not too difficult with a new blade and some wet and dry to smooth the edges. Might need a bit more off the top edge, but the lower profile is a good fit:
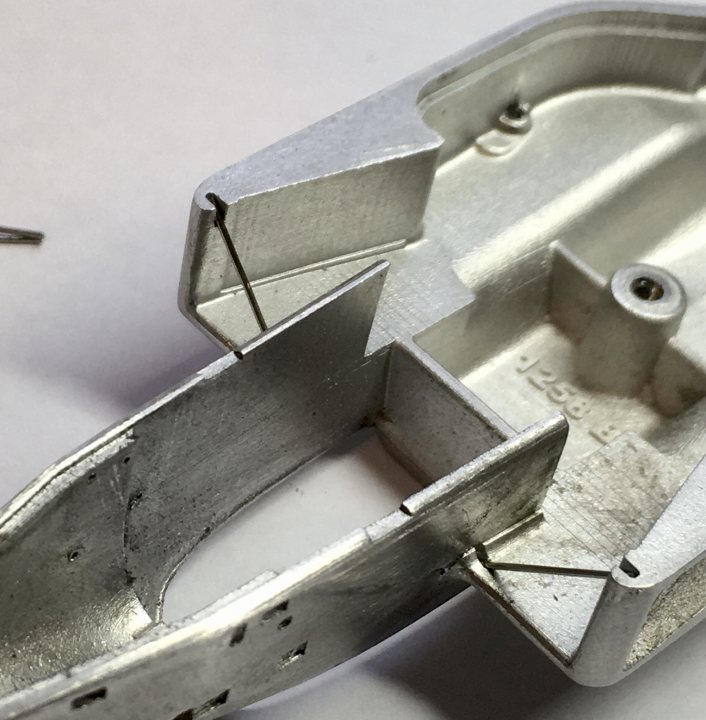
Also used the p/e jig to form the 0.4mm wire front suspension pullrods:
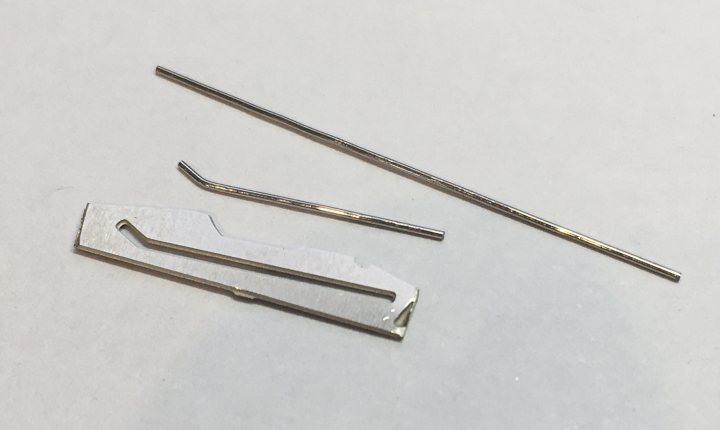
and the sidepod mouth stays:
One of the engine Cover NACA ducts has a couple of flaws, which I’ve tried to eliminate using some small modelling chisels:
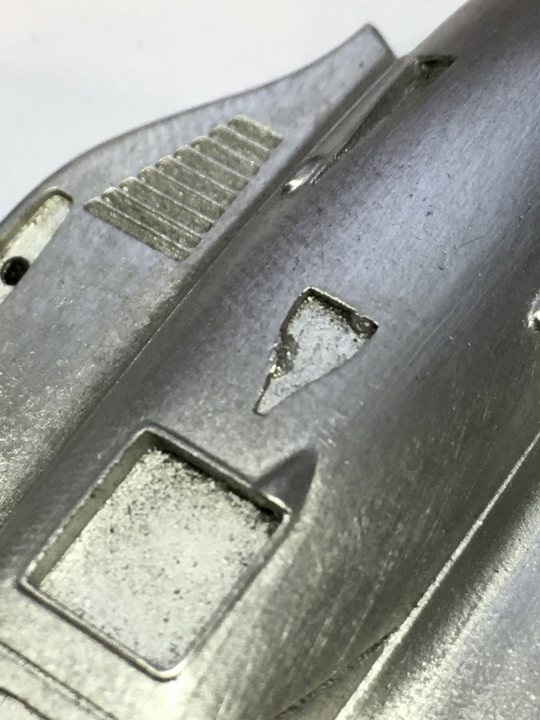
Next, a guide coat of primer and some minor filling no doubt. I think the surface flaws as so shallow that filler wouldn’t be suitable, so I might use Mr. Surfacer 1000 applied locally with a cocktail stick.
Also used the p/e jig to form the 0.4mm wire front suspension pullrods:
and the sidepod mouth stays:
One of the engine Cover NACA ducts has a couple of flaws, which I’ve tried to eliminate using some small modelling chisels:
Next, a guide coat of primer and some minor filling no doubt. I think the surface flaws as so shallow that filler wouldn’t be suitable, so I might use Mr. Surfacer 1000 applied locally with a cocktail stick.
Re: Tameo 1:43 Ferrari 156/85
I used Surfacer on the tub mould lines and flaws in the diffuser sides:
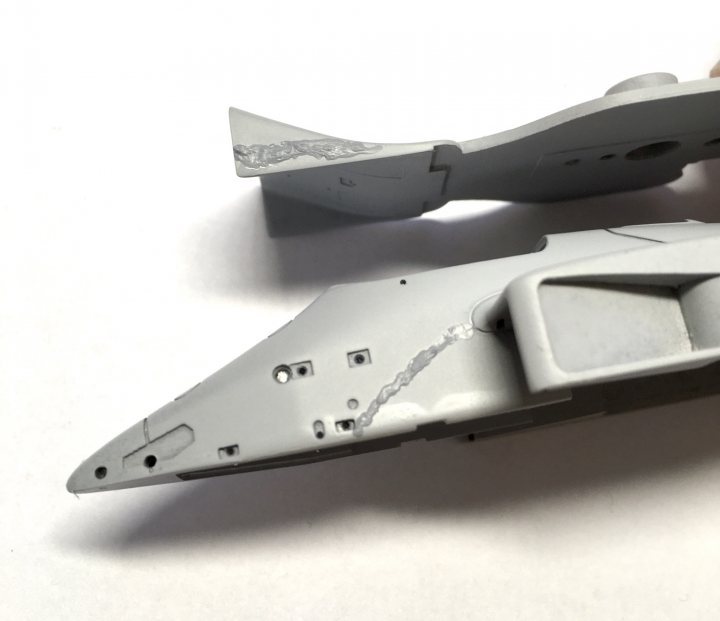
Cleaned up ok:
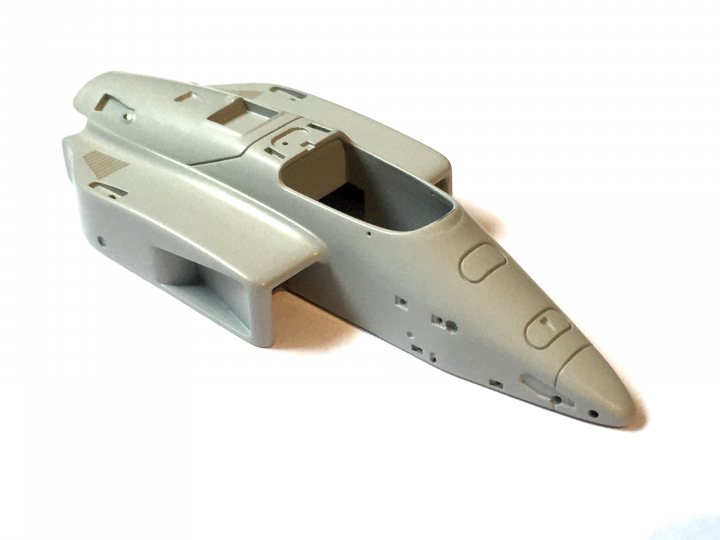
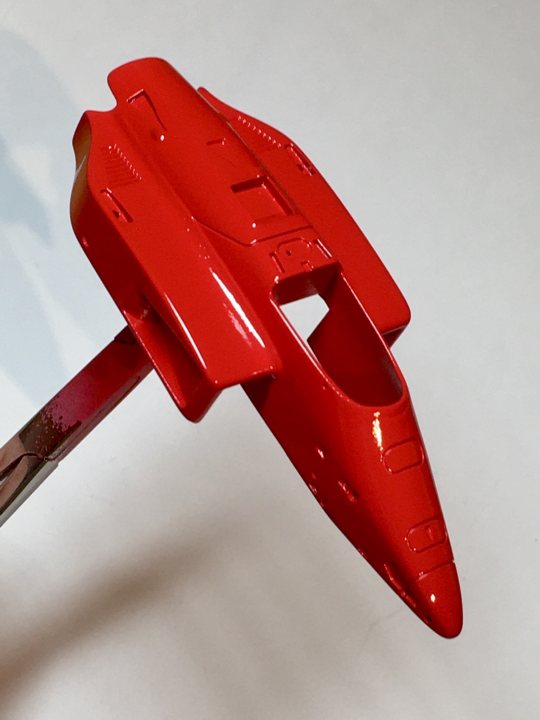
Base coat of white primer, bit of a flat, then on to the red.
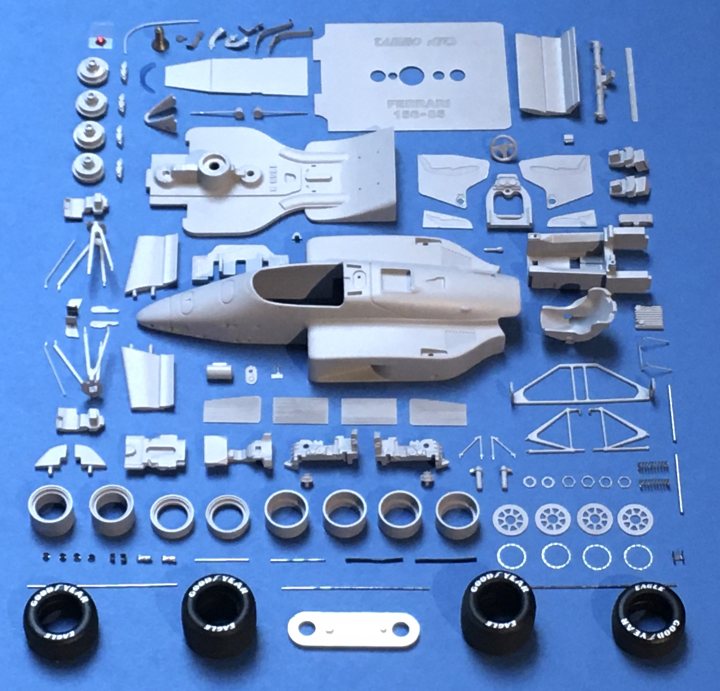
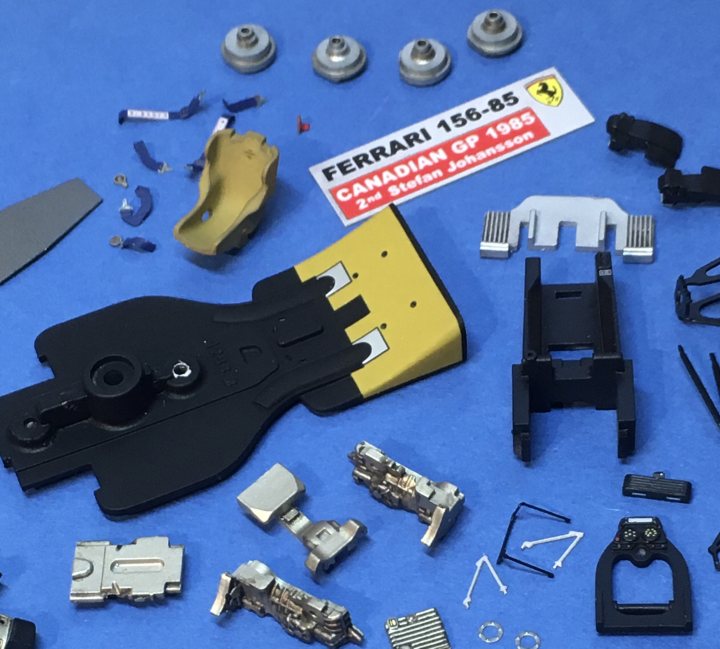
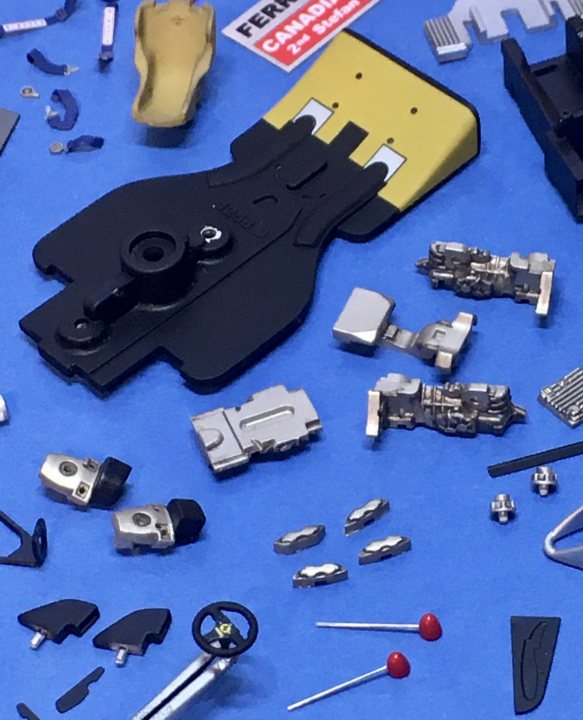
Can’t get over how great these little kits are; these are all the components, just for a kerbside model with no engine detail:
Cleaned up ok:
Base coat of white primer, bit of a flat, then on to the red.
Can’t get over how great these little kits are; these are all the components, just for a kerbside model with no engine detail:
-
 Shunter
- FOTA Chairman

- Posts: 2887
- Joined: Sat Sep 20, 2003 12:38 am
- Favorite F1 Team or Driver: Alfa Romeo, McLaren, Williams
- Location: Melbourne, Australia
- Contact:
- Status: Offline

Re: Tameo 1:43 Ferrari 156/85
Great job and enjoyed looking at your progress. Bring on some colour...
Re: Tameo 1:43 Ferrari 156/85
OK!Shunter wrote:Great job and enjoyed looking at your progress. Bring on some colour...
I’ll leave it to harden until the weekend, then polish with Tamiya compounds and get some decals on.
Re: Tameo 1:43 Ferrari 156/85
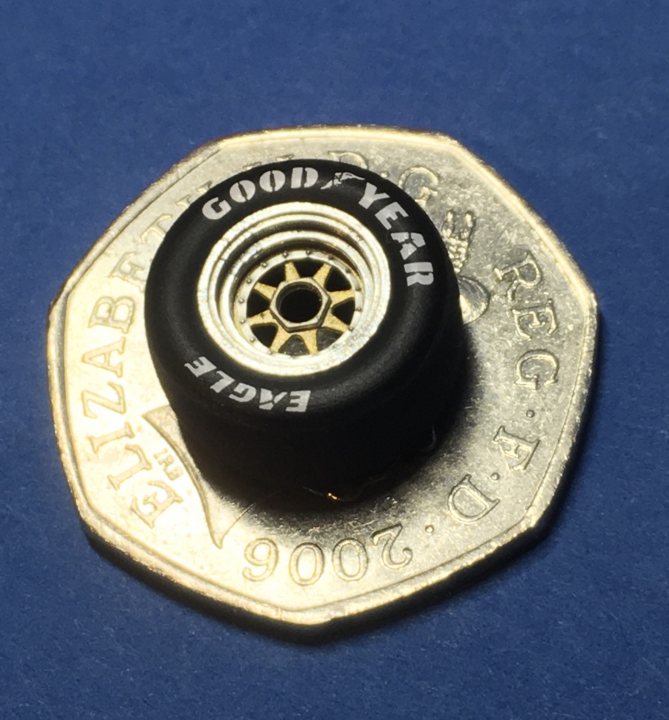
Stripped the primer off the wheels and spun them up in the lathe to polish the rims. I gave the centres a coat of Vallejo Air gold, and satin varnish. Couldn’t resist dry assembling them into the tyres:
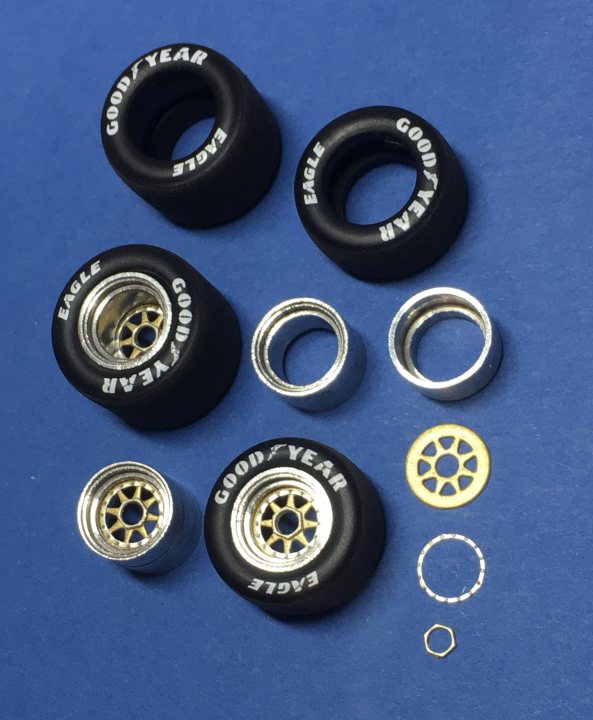
I think I’ll not bother with glue, then if they ever need polishing again I can just press them out if the tyres and they’ll fall to bits.
I think I’ll not bother with glue, then if they ever need polishing again I can just press them out if the tyres and they’ll fall to bits.
Re: Tameo 1:43 Ferrari 156/85
Most of the individual parts are now painted, decalled and clear coated pretty much to the finishes specified in the instructions. I used a dark wash and weathering powers on the gearbox casings and some other bits. The diffuser has a 3-piece decal to represent Kevlar. That was something I didn’t remember seeing, but a look at my photos confirmed it was correct. I used some old Pheon 1:32 SE.5a decals cut into thin strips to represent the black edging pieces, rather than risk masking and spraying. I used Vallejo Dark Stone with Tamiya mud weathering powder to represent the suede seat and head rest:
There were two tiny decals that weren’t shown in the instructions; a small one that looked like a Magneti Marelli logo, which I put on the ECU, and a silver Ferrari data plate, which I put in the appropriate place just behind the gear lever gate surround.
A nice touch is the embossed photo-etched name plate, onto which a couple of decals are placed, and the main lettering blocked in with black and polished back.
Now to assemble a few things, and no doubt have to touch-in the inevitable paint chips that seem to go with the territory of a metal kit.
-
 R.Wells
- FOTA Chairman
- Posts: 2003
- Joined: Thu Sep 16, 2004 2:31 pm
- Location: Spring, TX
- Status: Offline
Re: Tameo 1:43 Ferrari 156/85
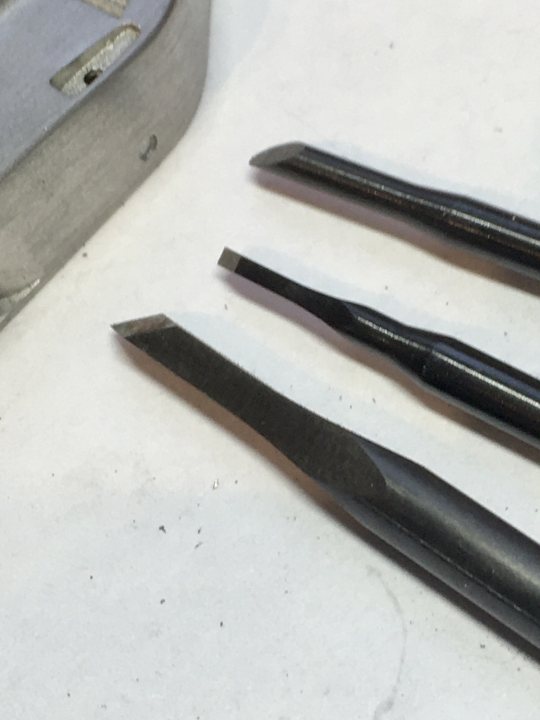
Great work so far. can you tell me where you got the small chisels from?
Thank you in advance.
Thank you in advance.
Perfectionist in the art of the unfinished kit......
Russell Wells
Russell Wells
-
- Similar Topics
- Replies
- Views
- Last post
-
- 4 Replies
- 219 Views
-
Last post by marlborored