Page 5 of 6

Re: Ferrari 312F1, Chris Amon, Monaco 1967. MFH 1/12.

Posted: Wed Mar 25, 2020 4:26 am
by pgarat
Hi,


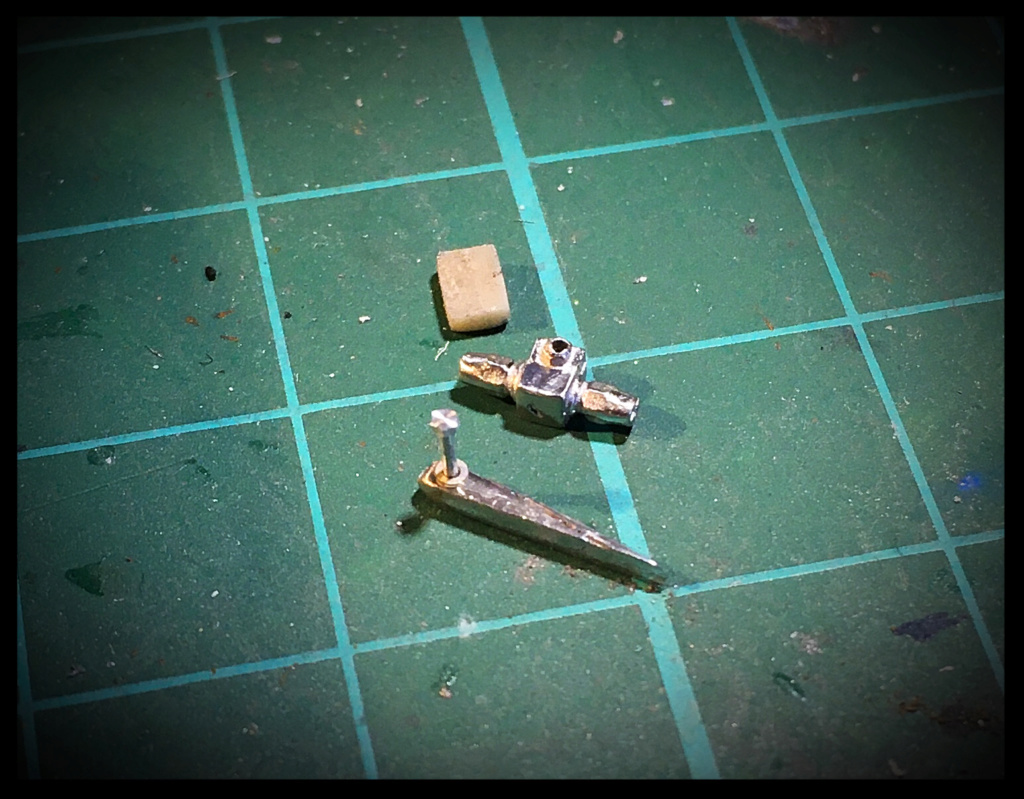
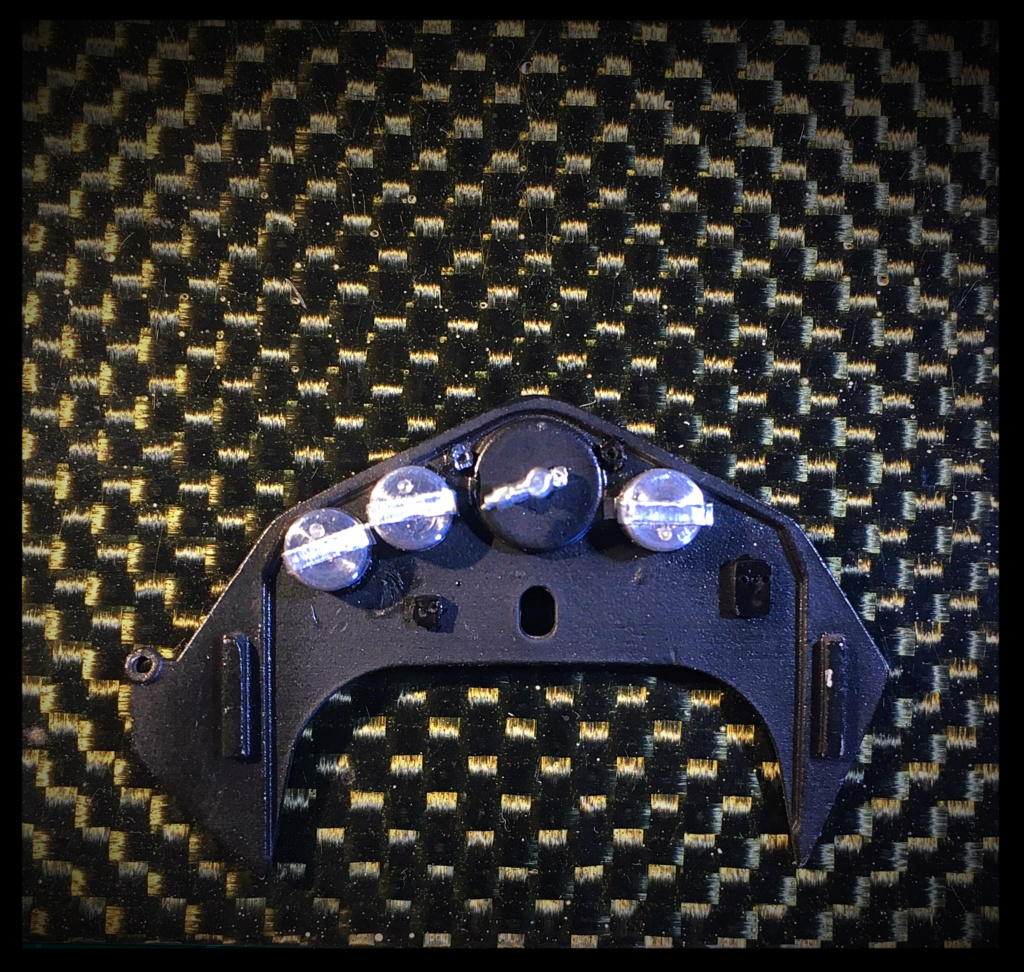
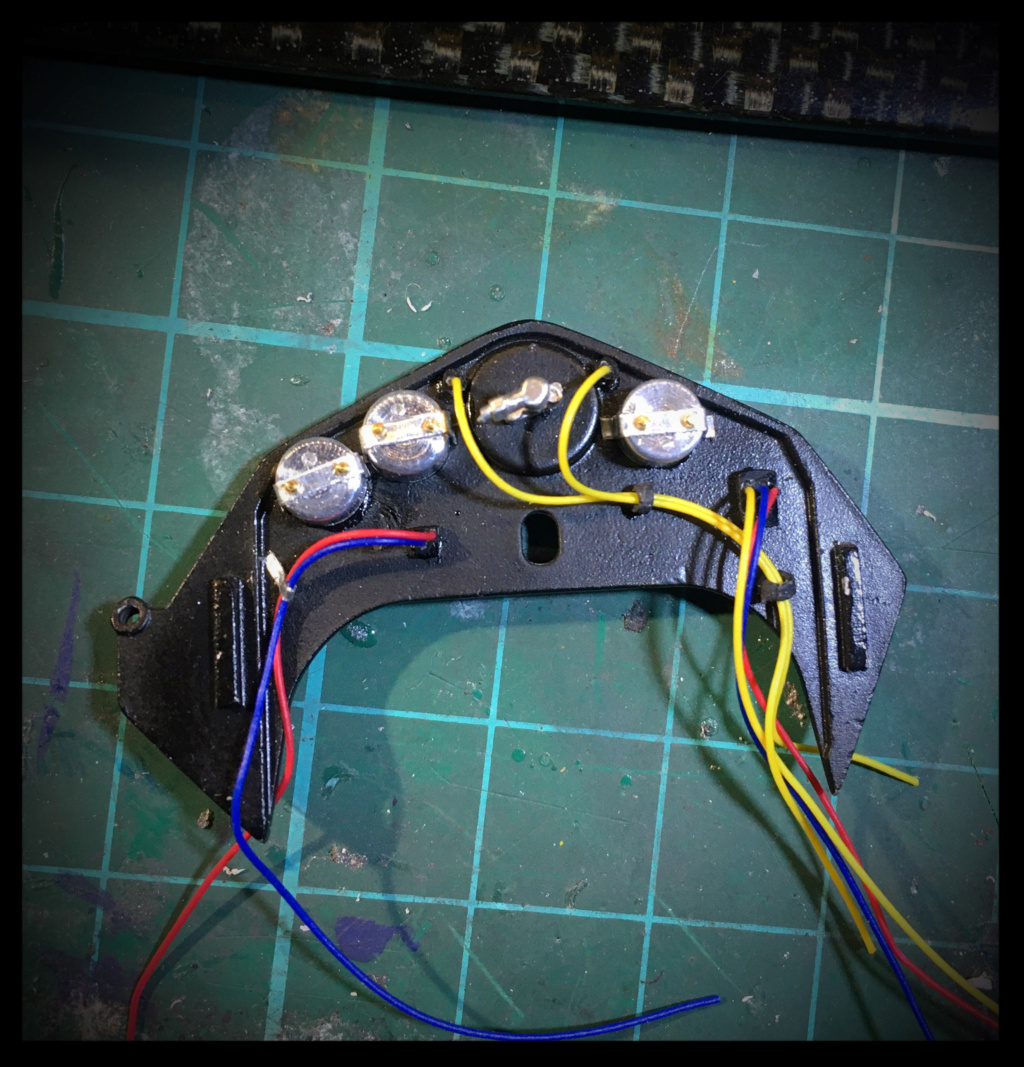
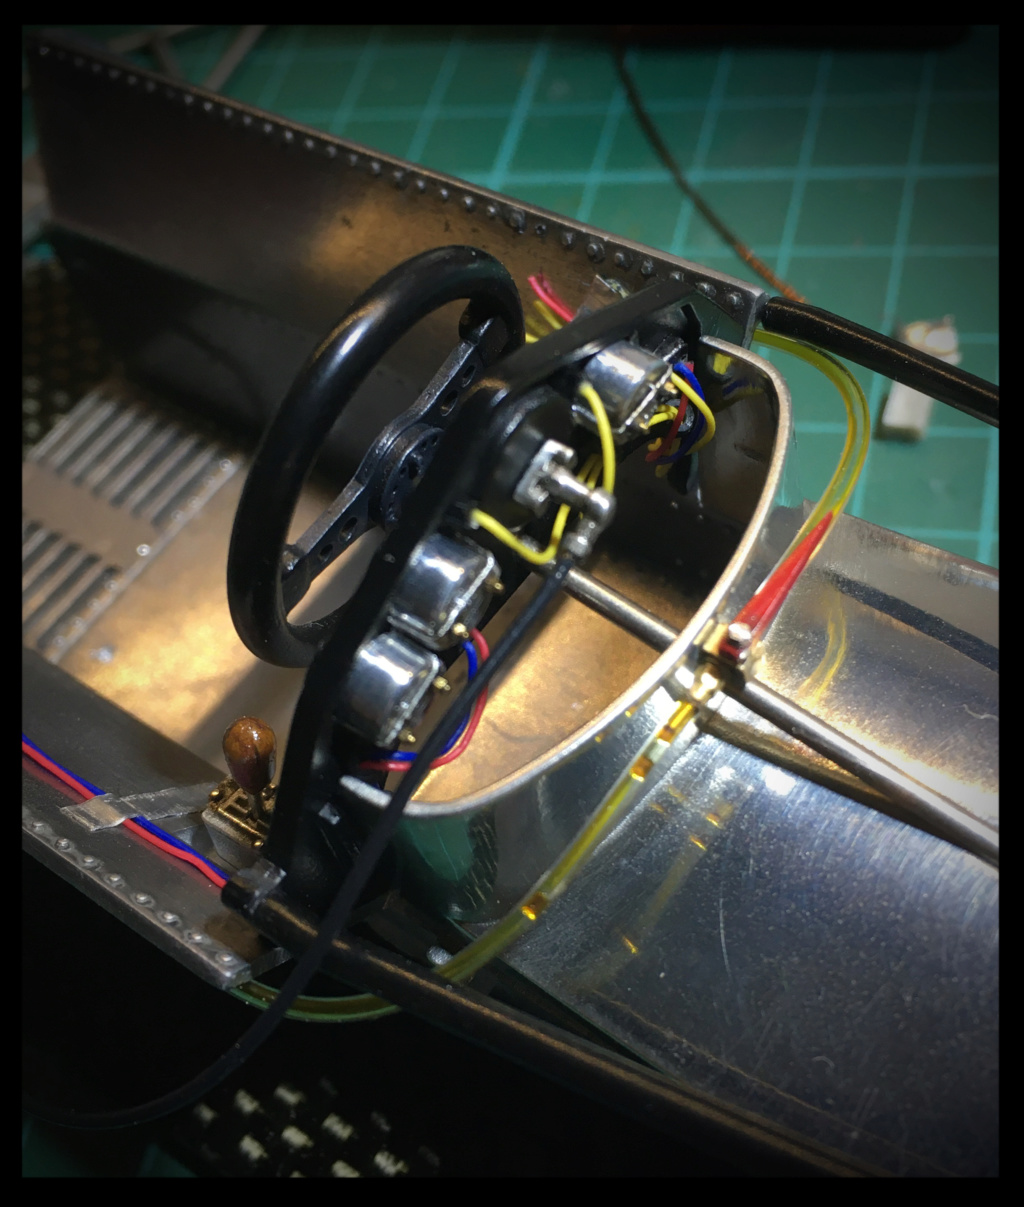
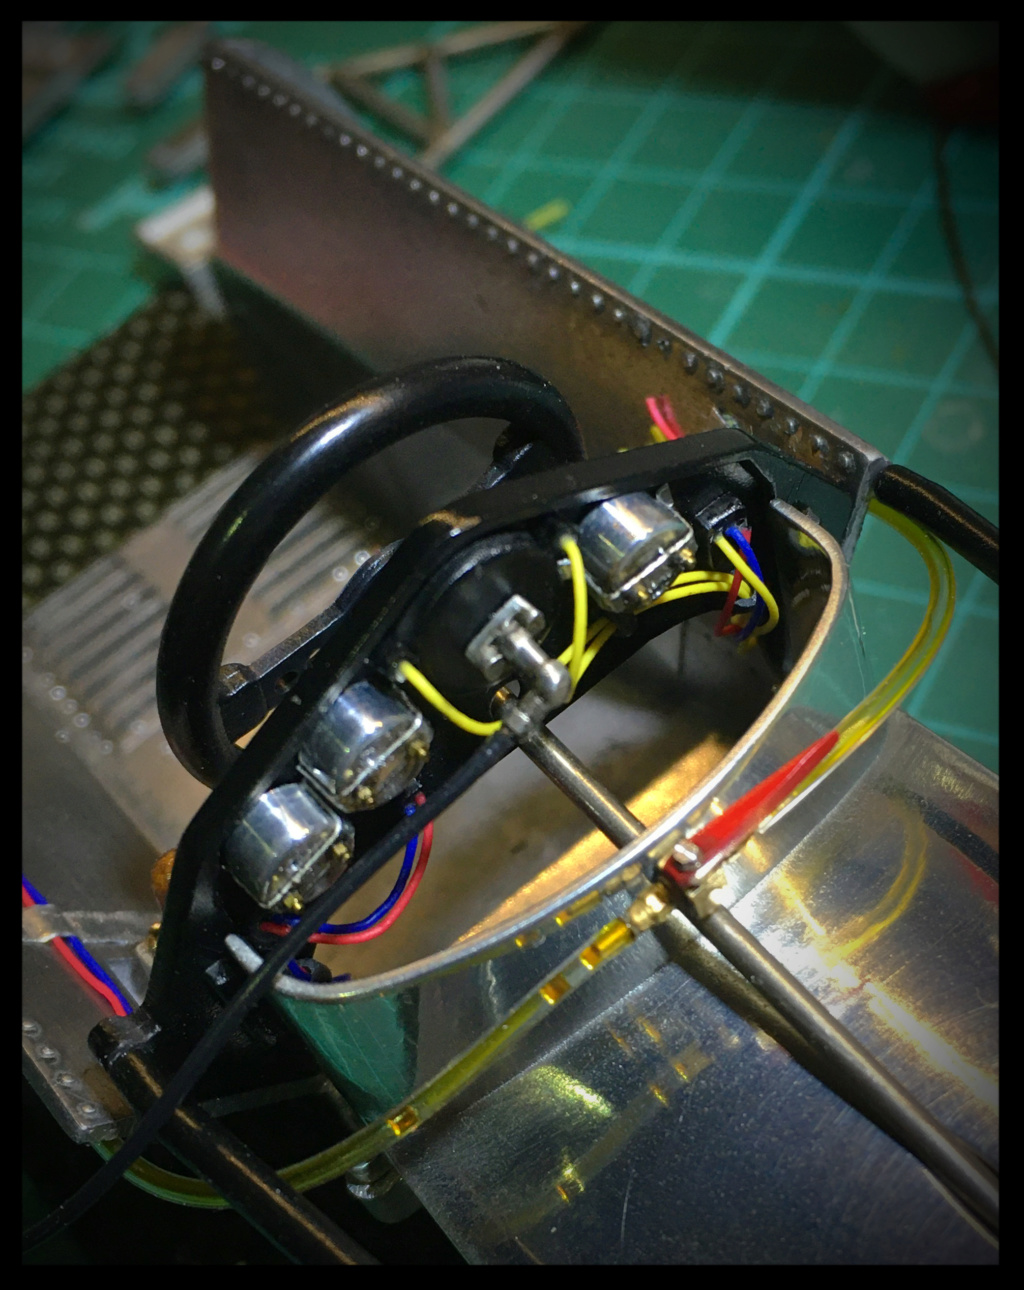
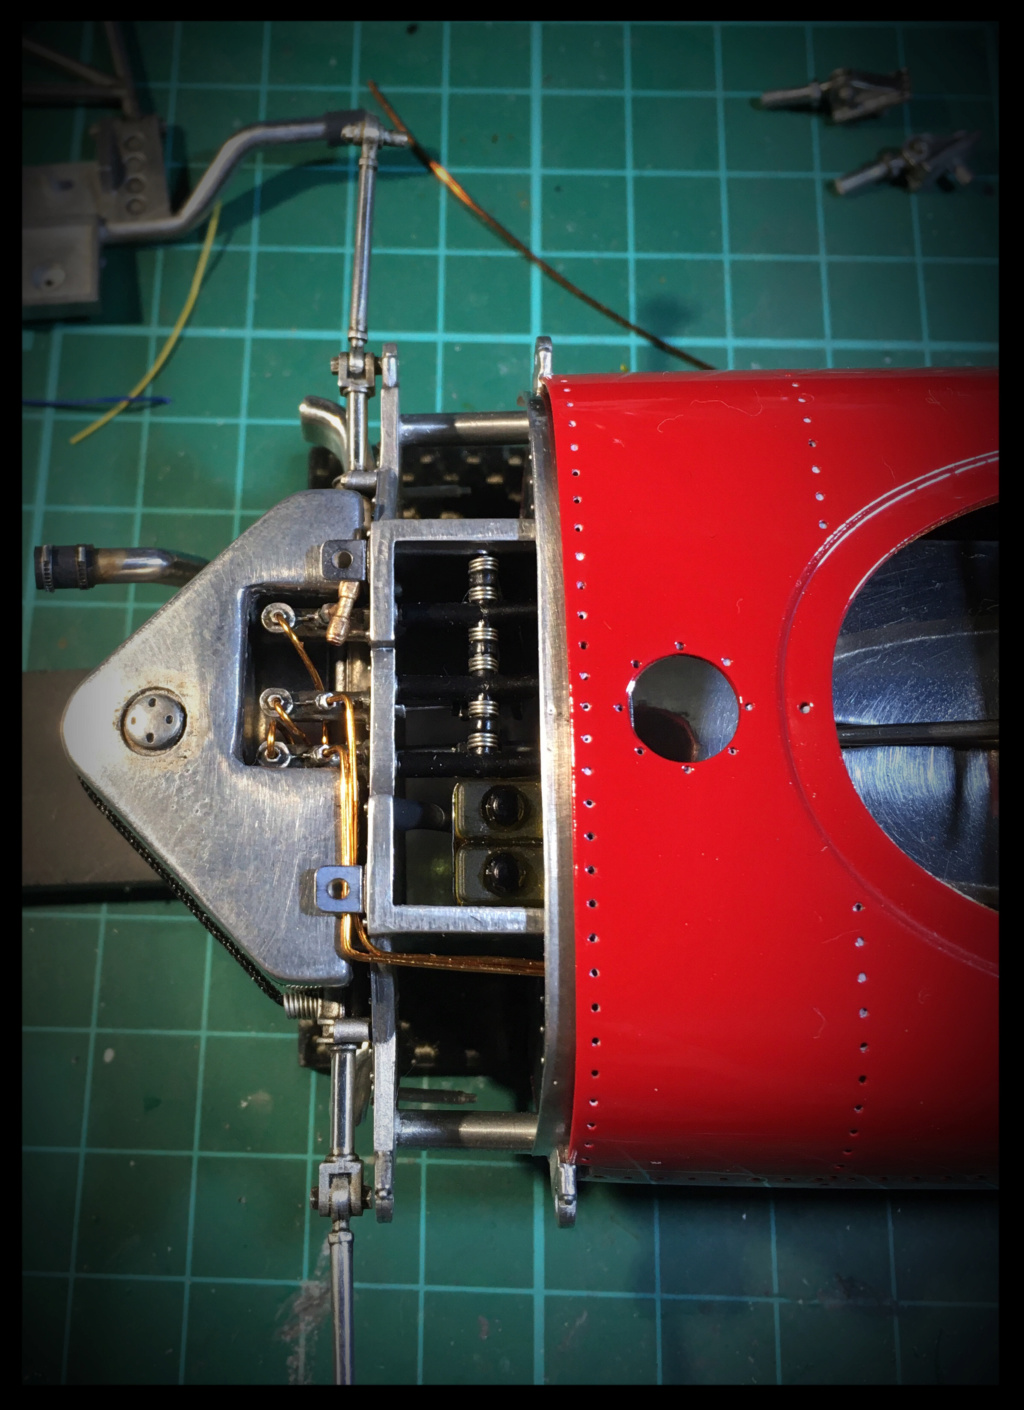
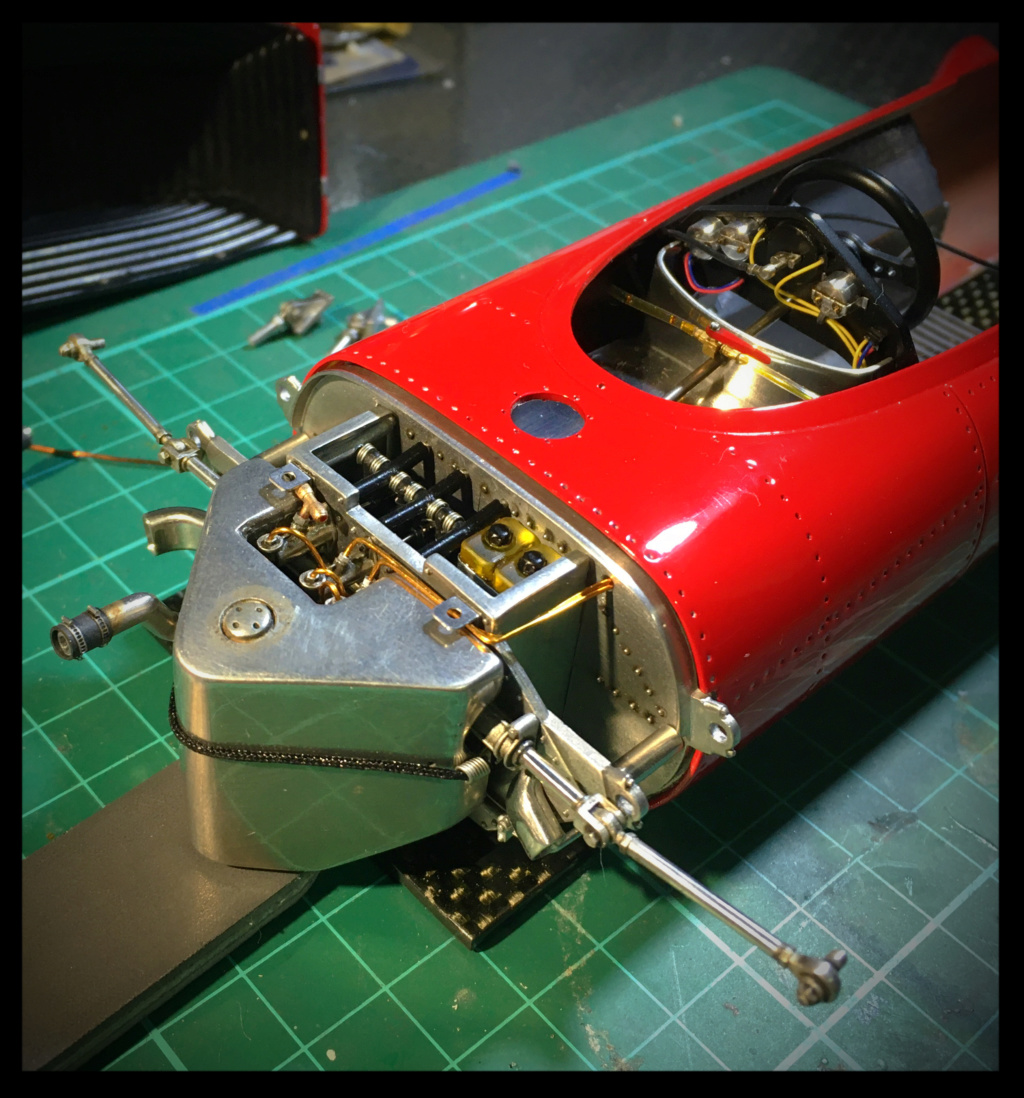
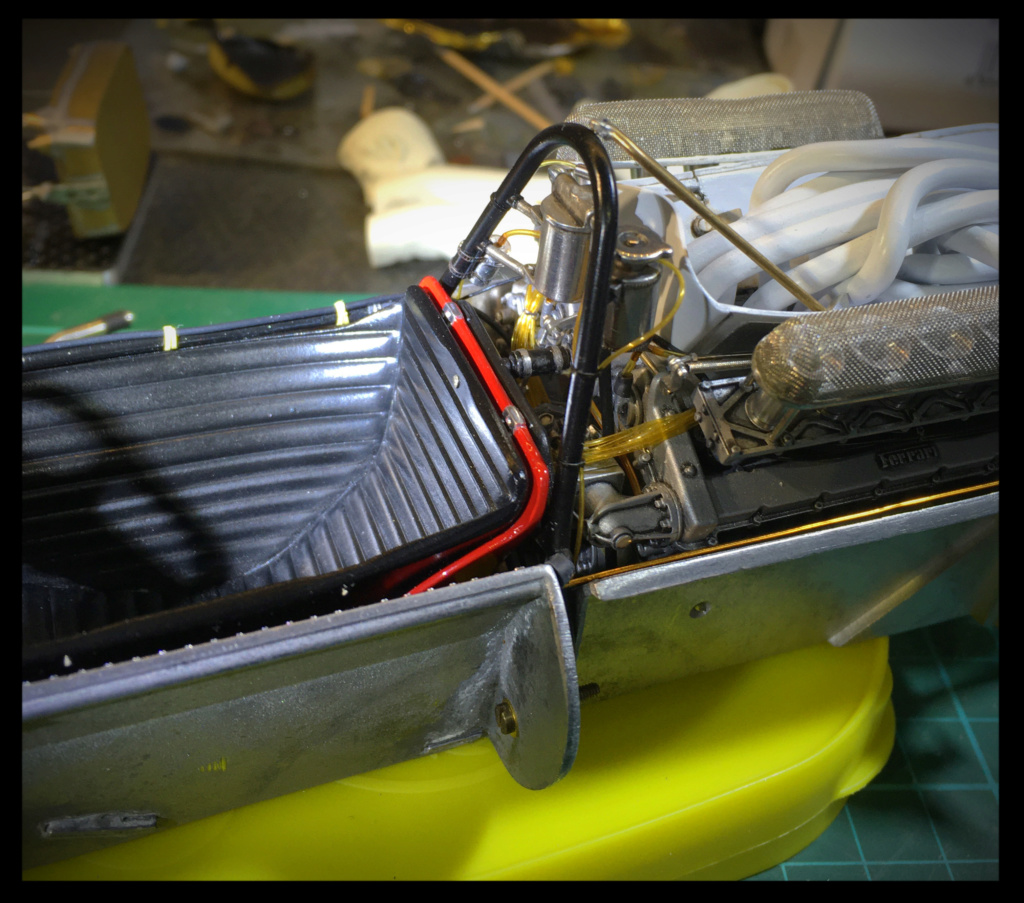
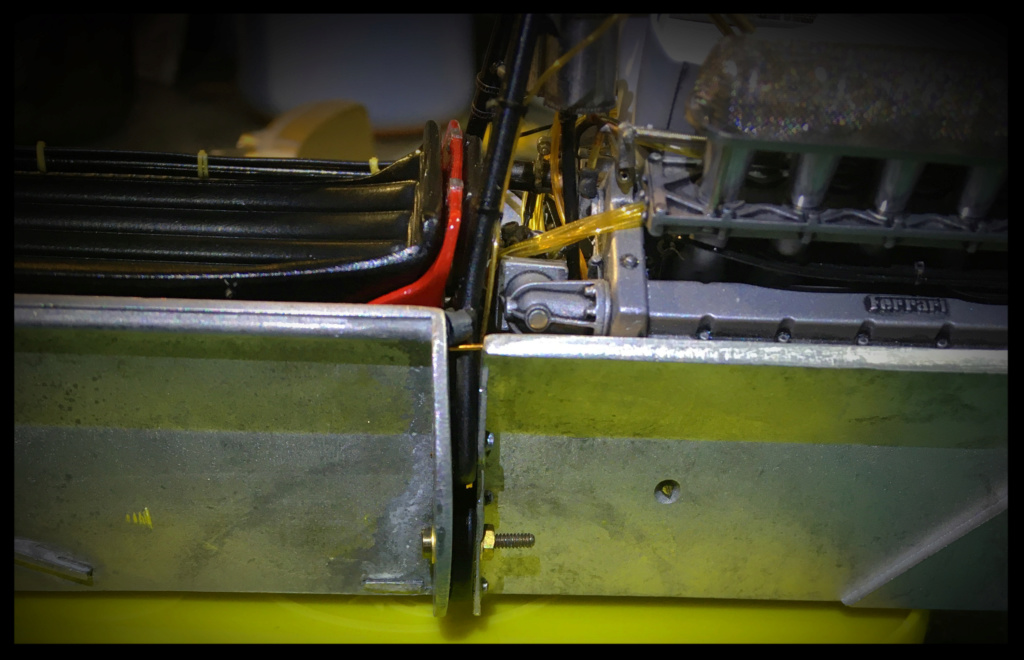
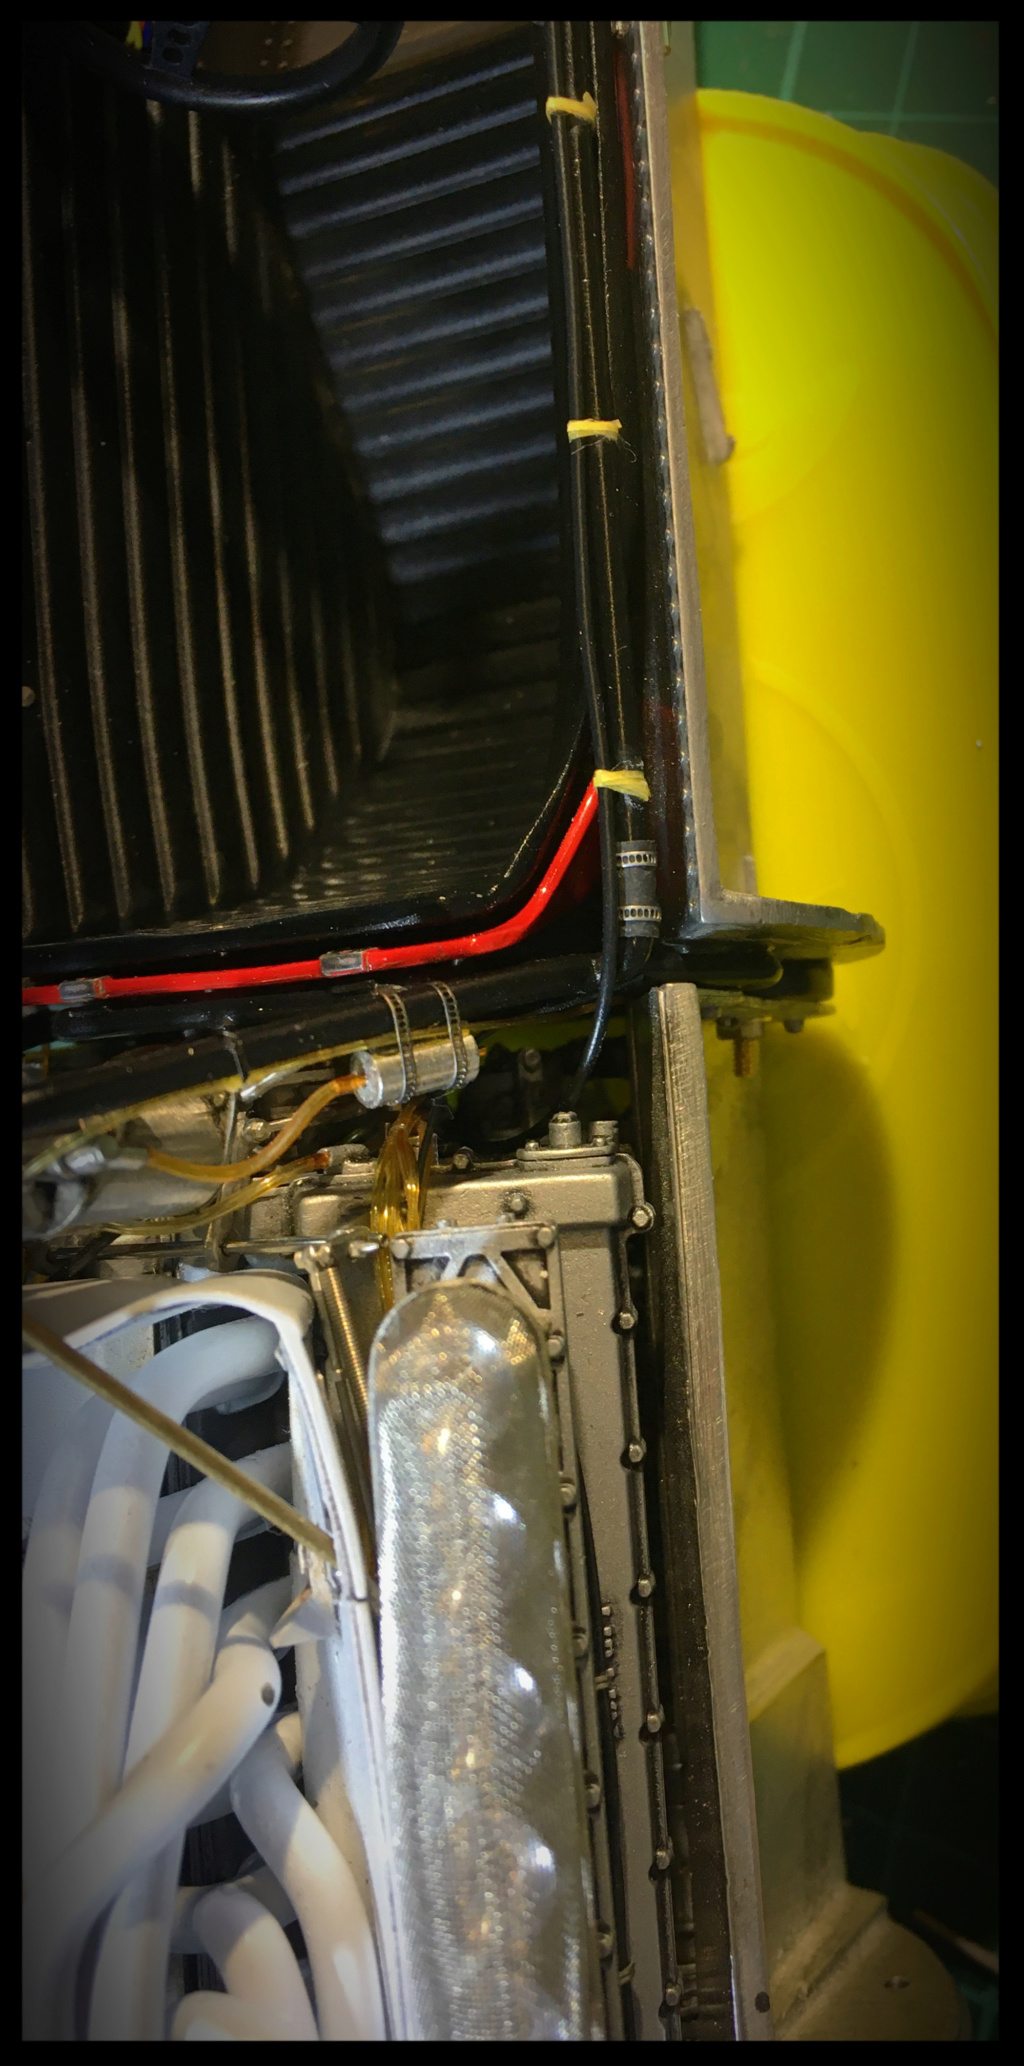
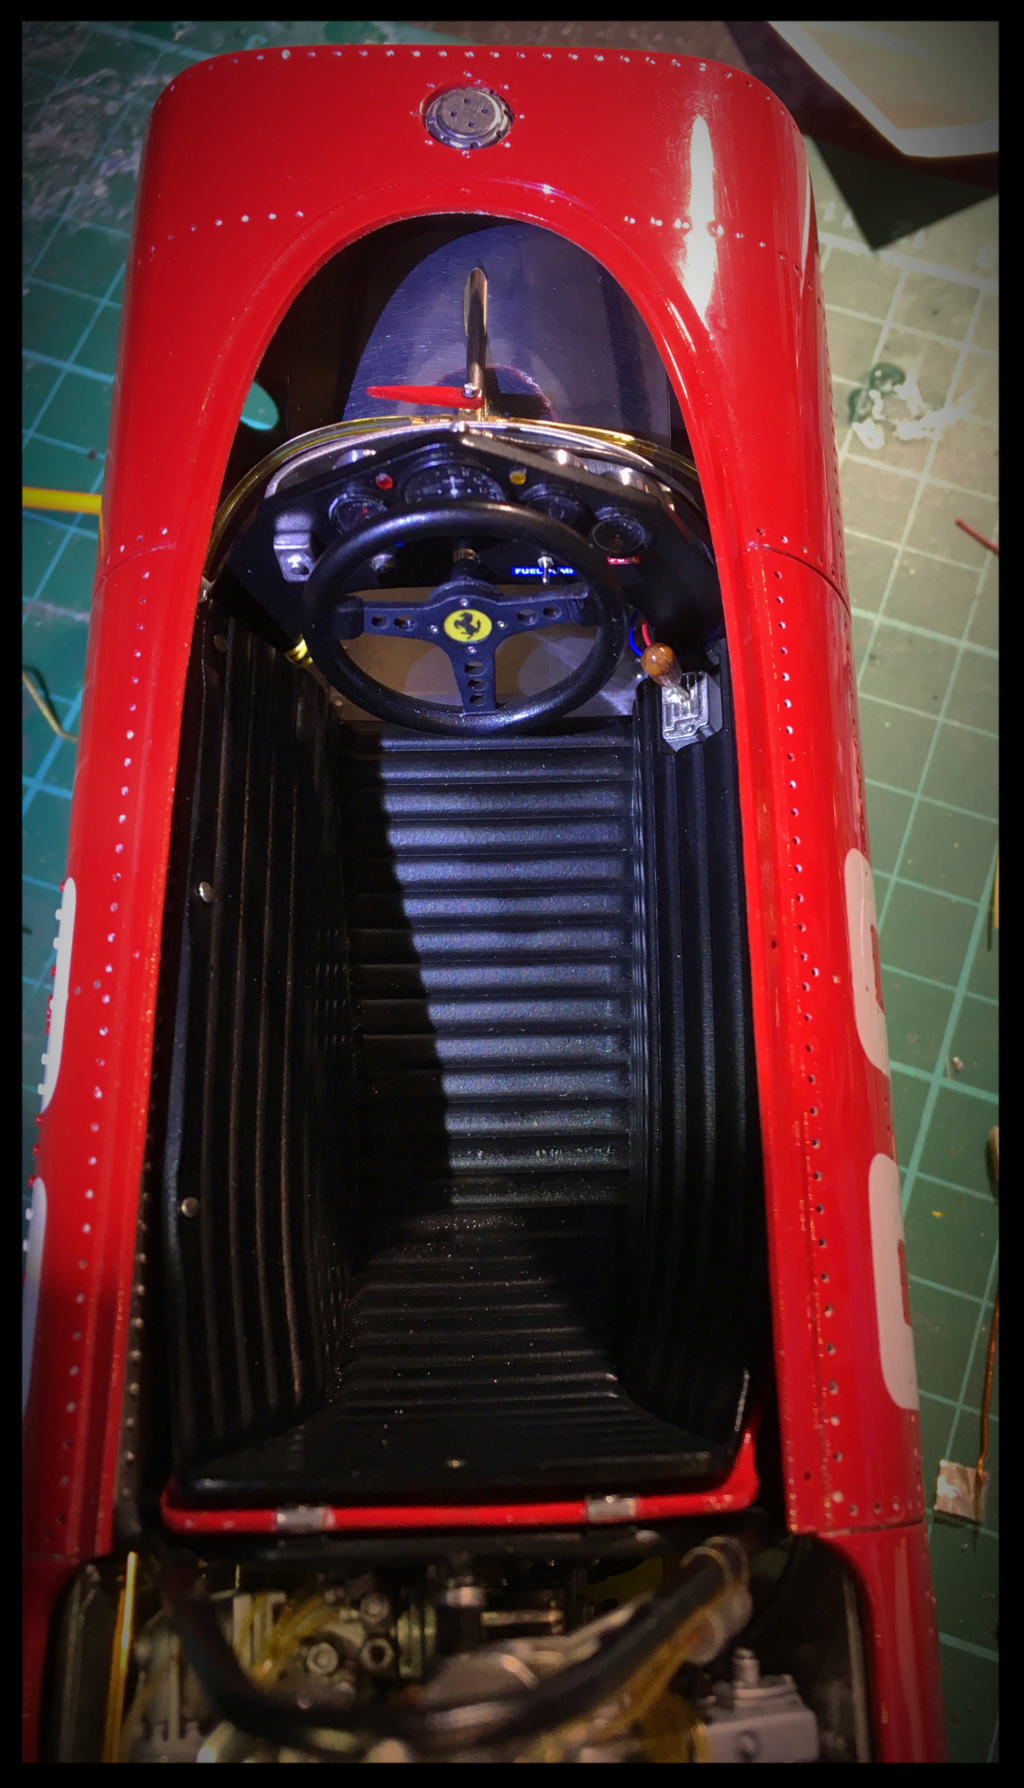
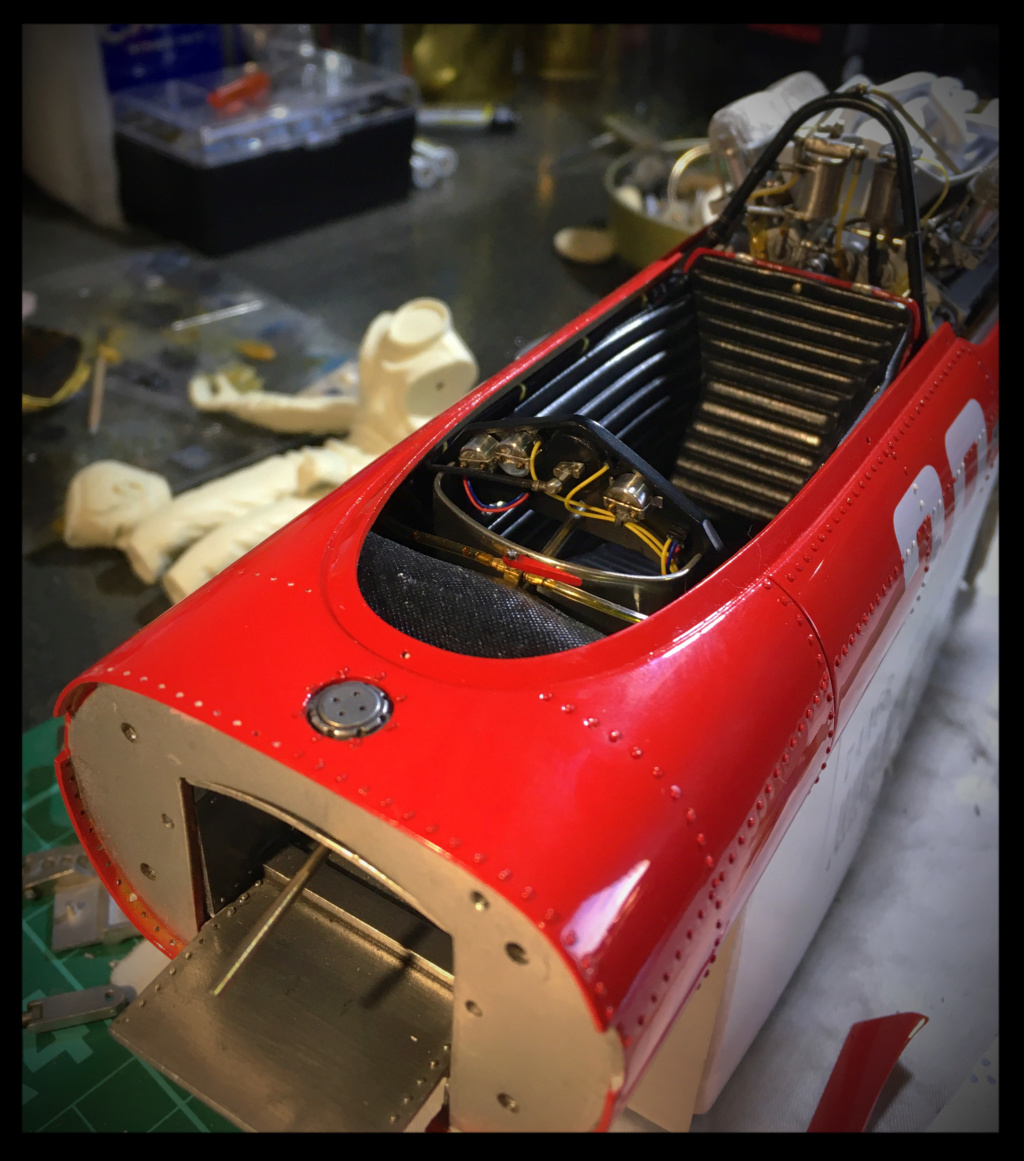
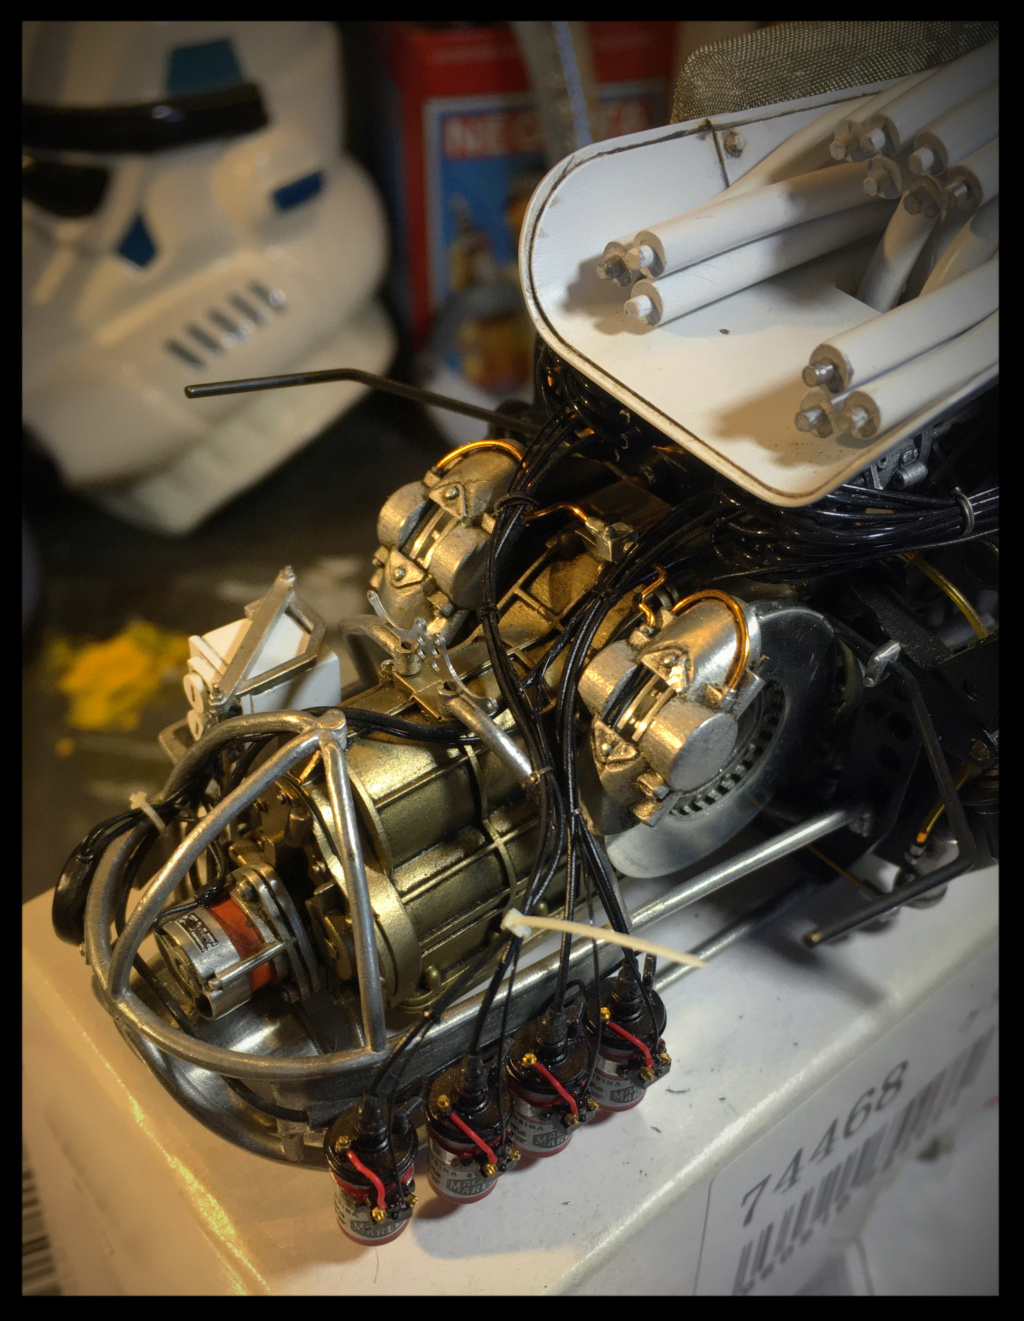
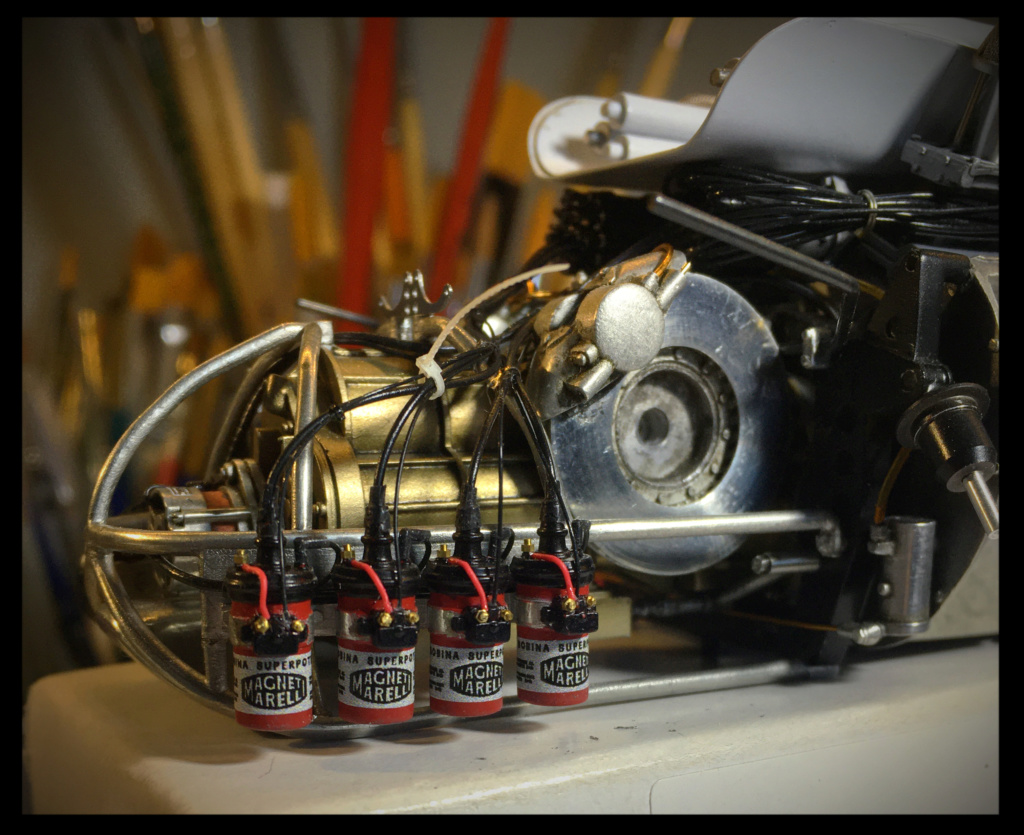
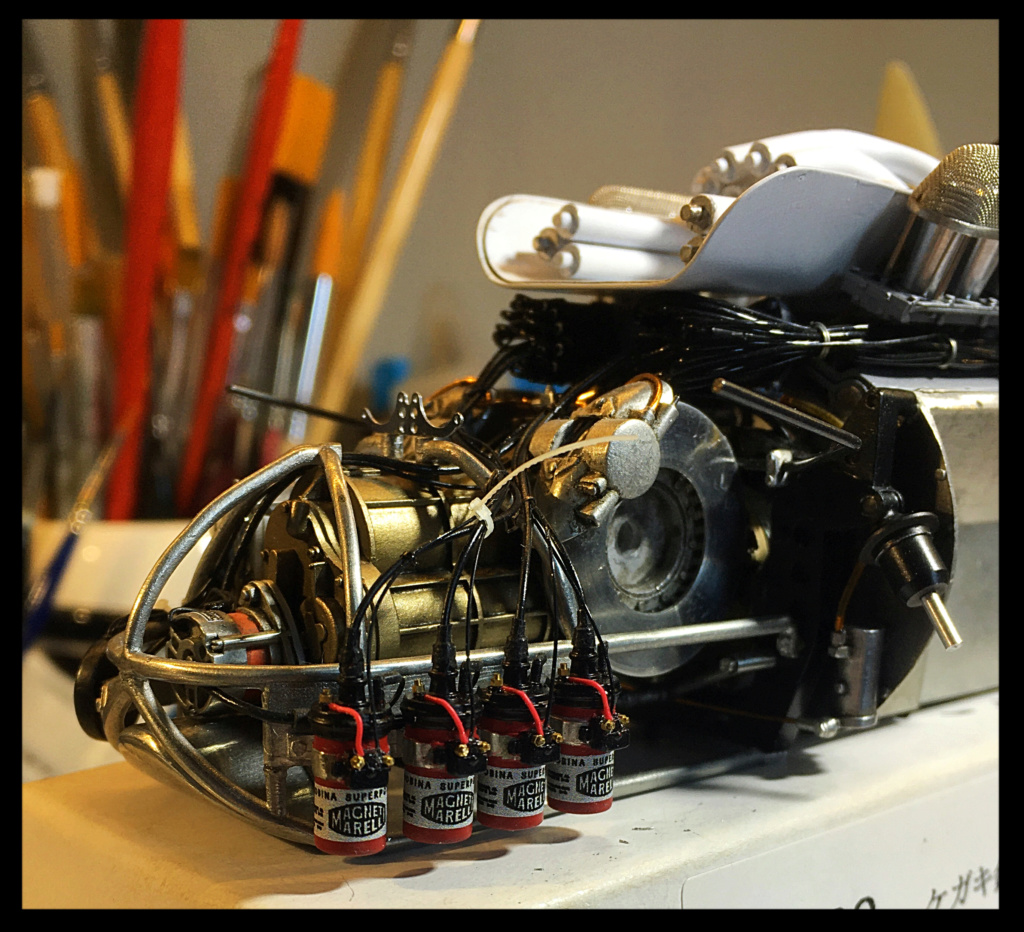
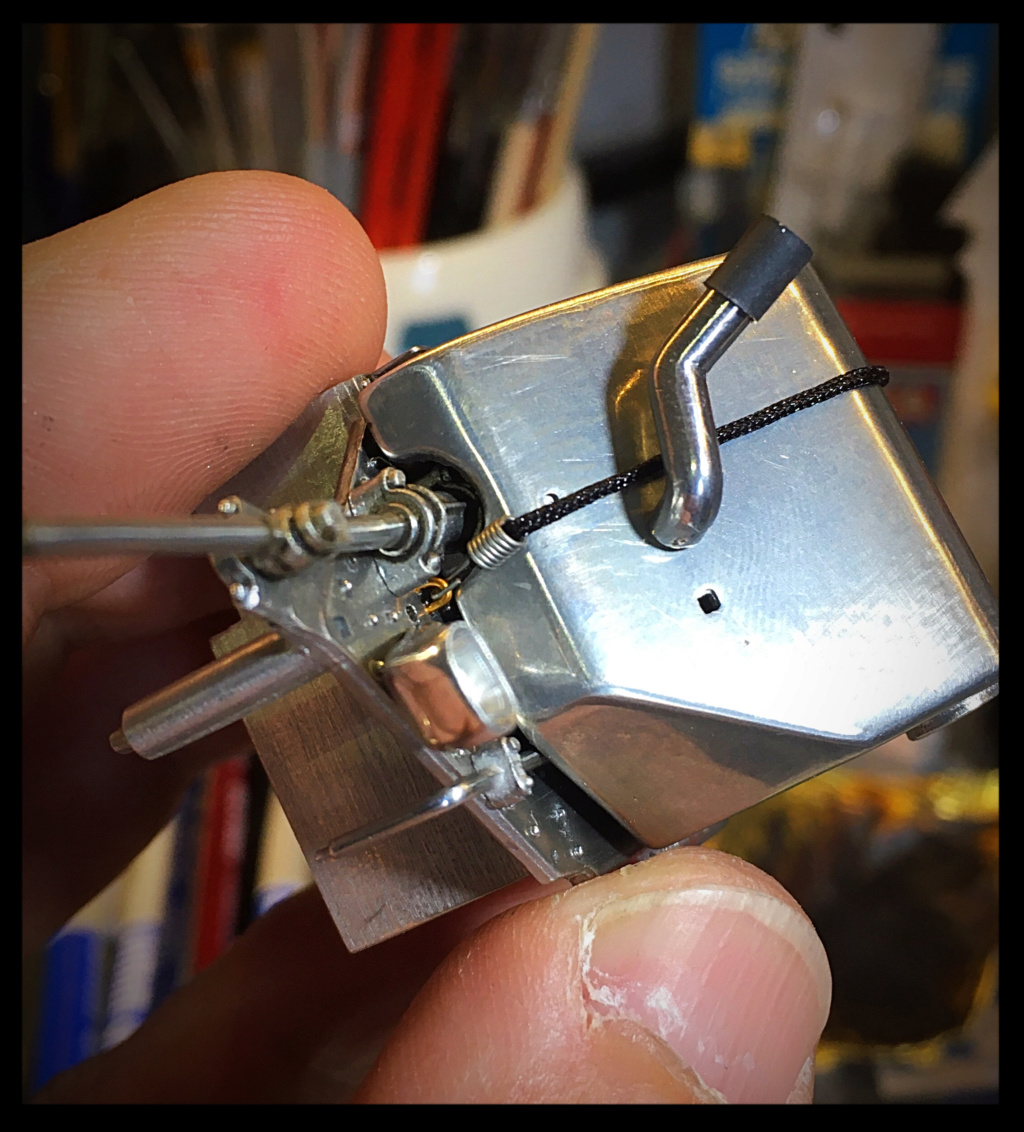
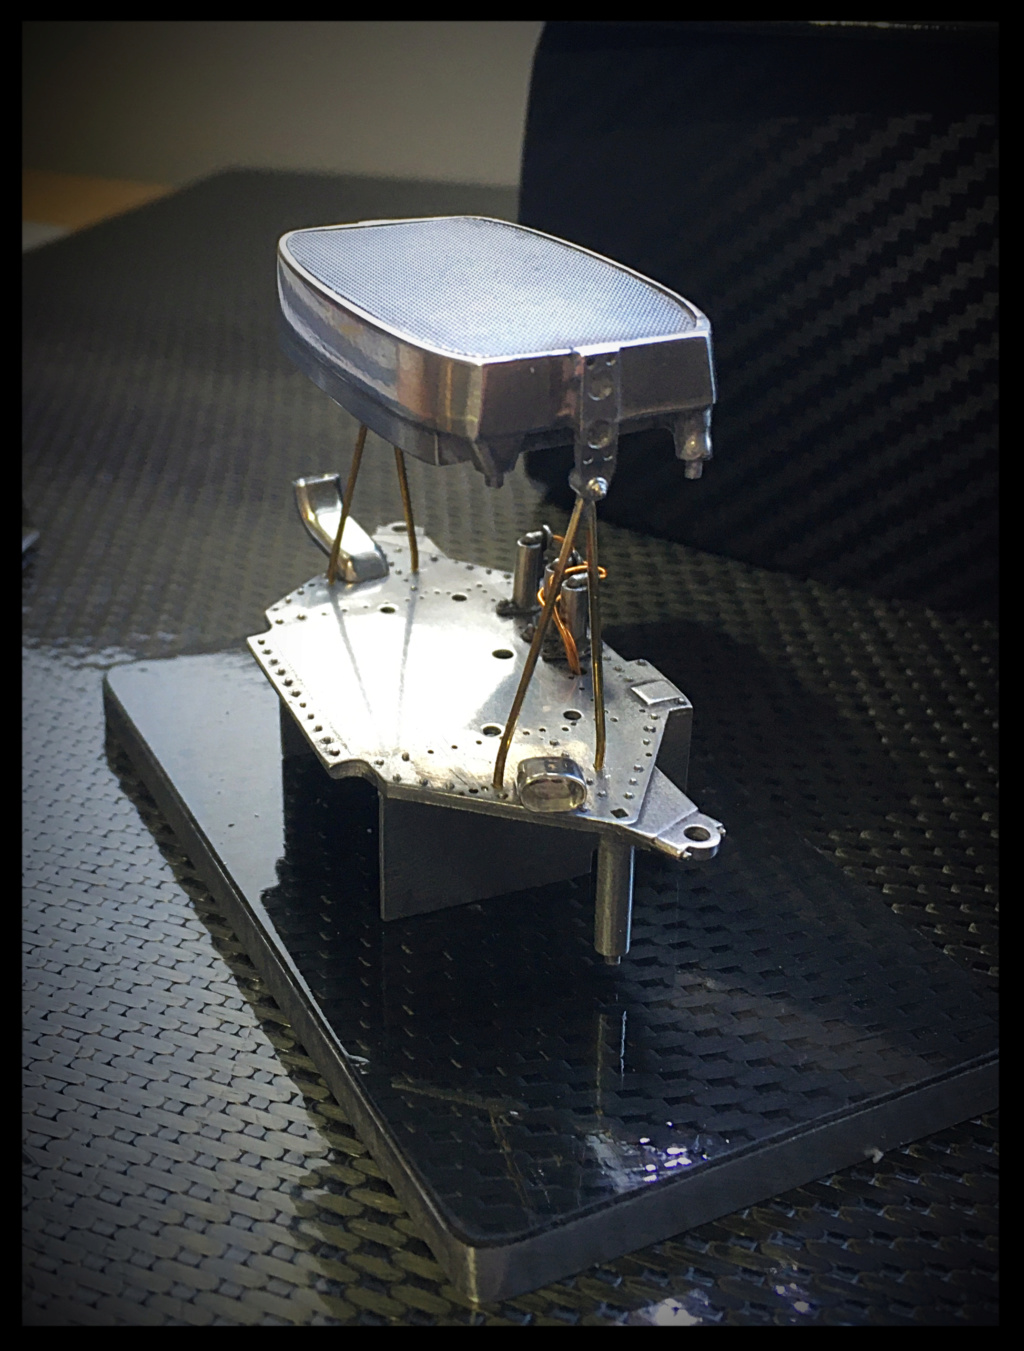
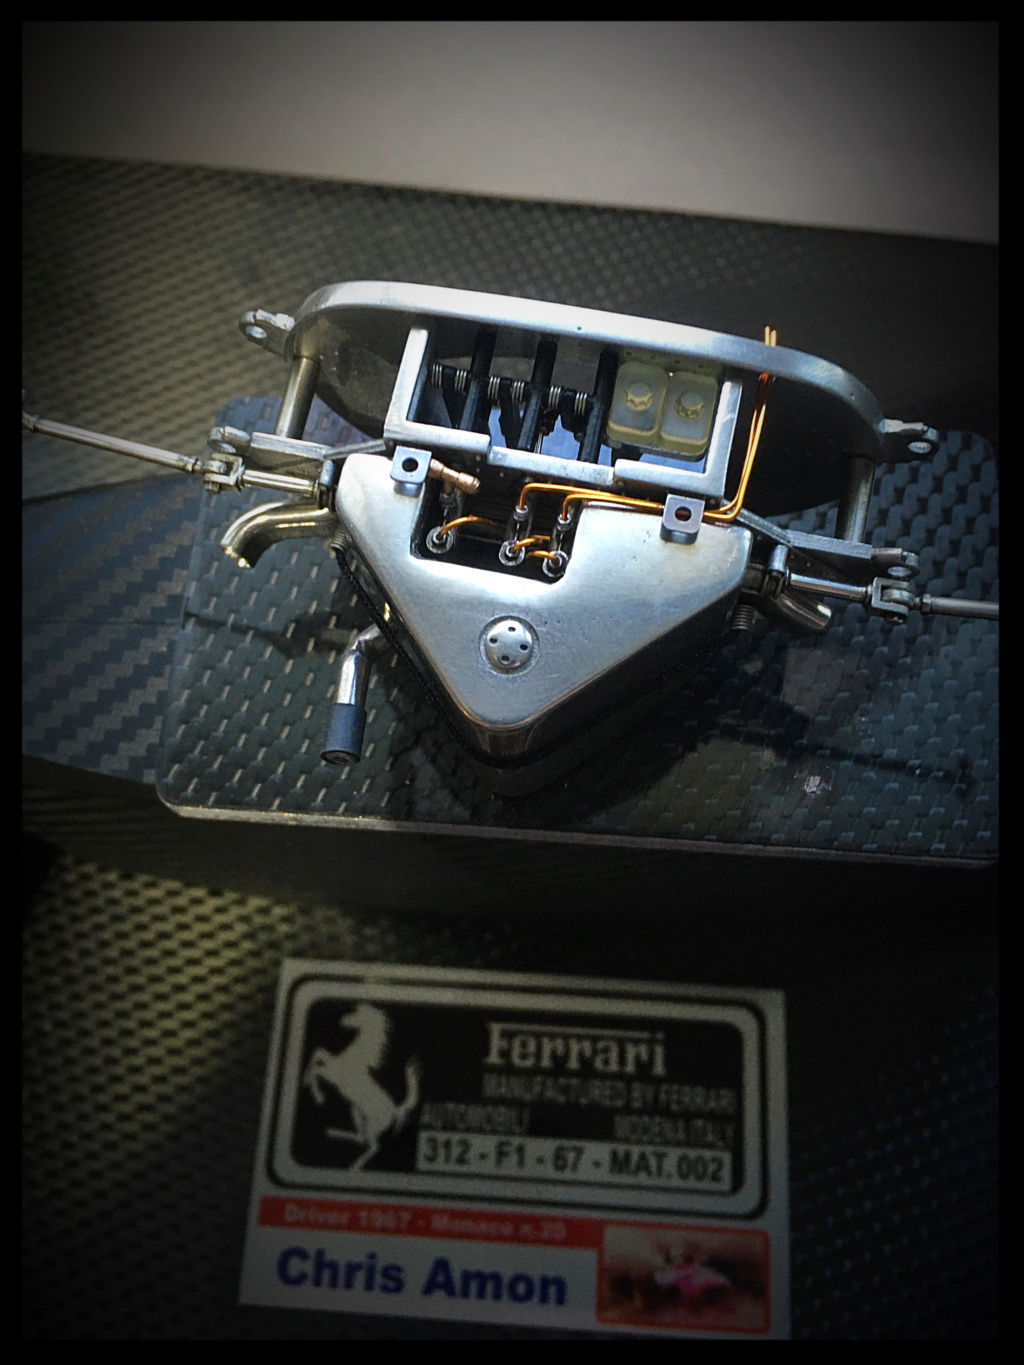
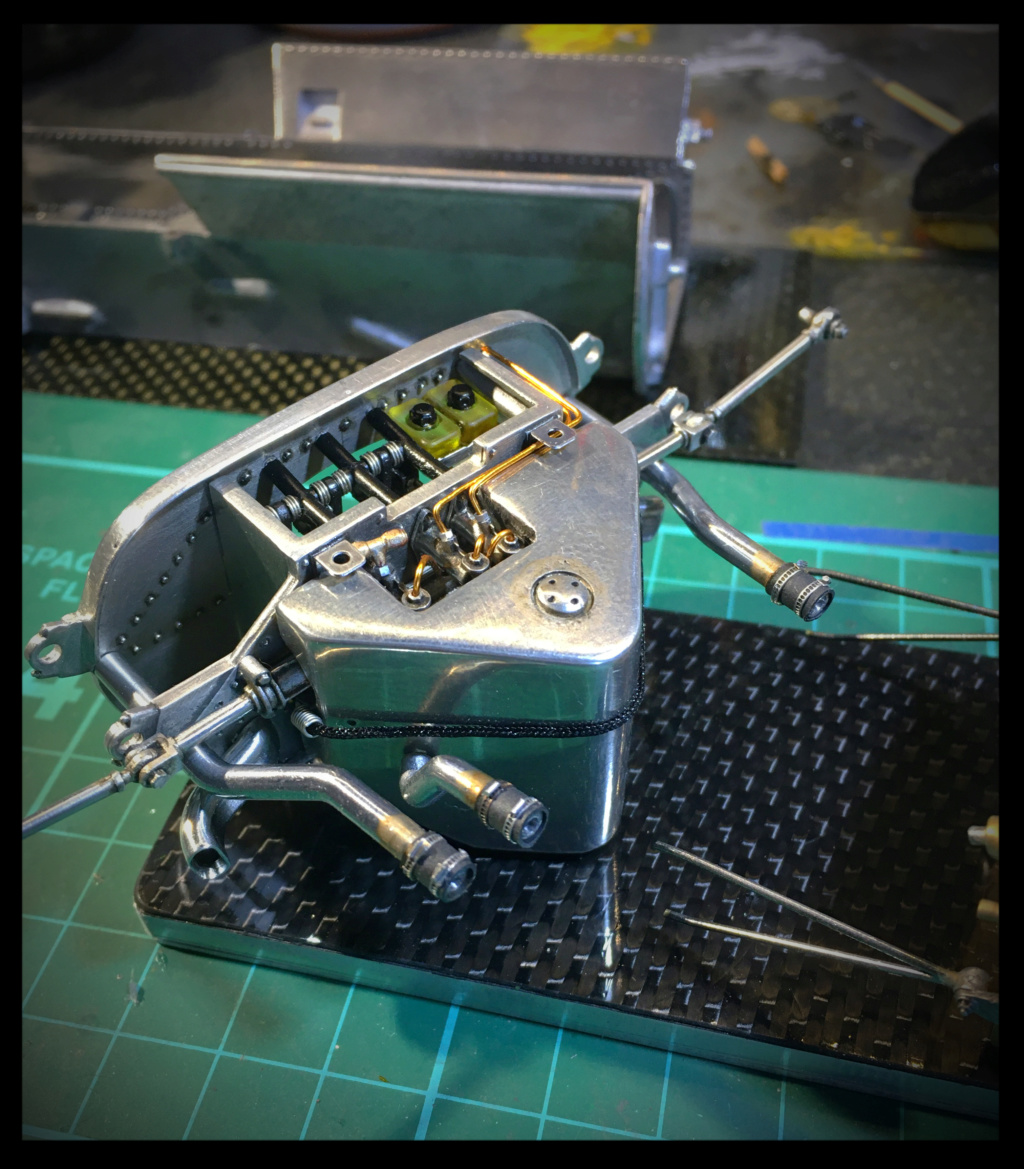
I finally managed to finish the ignition coils system, after a last modification.

Image

Image

Image


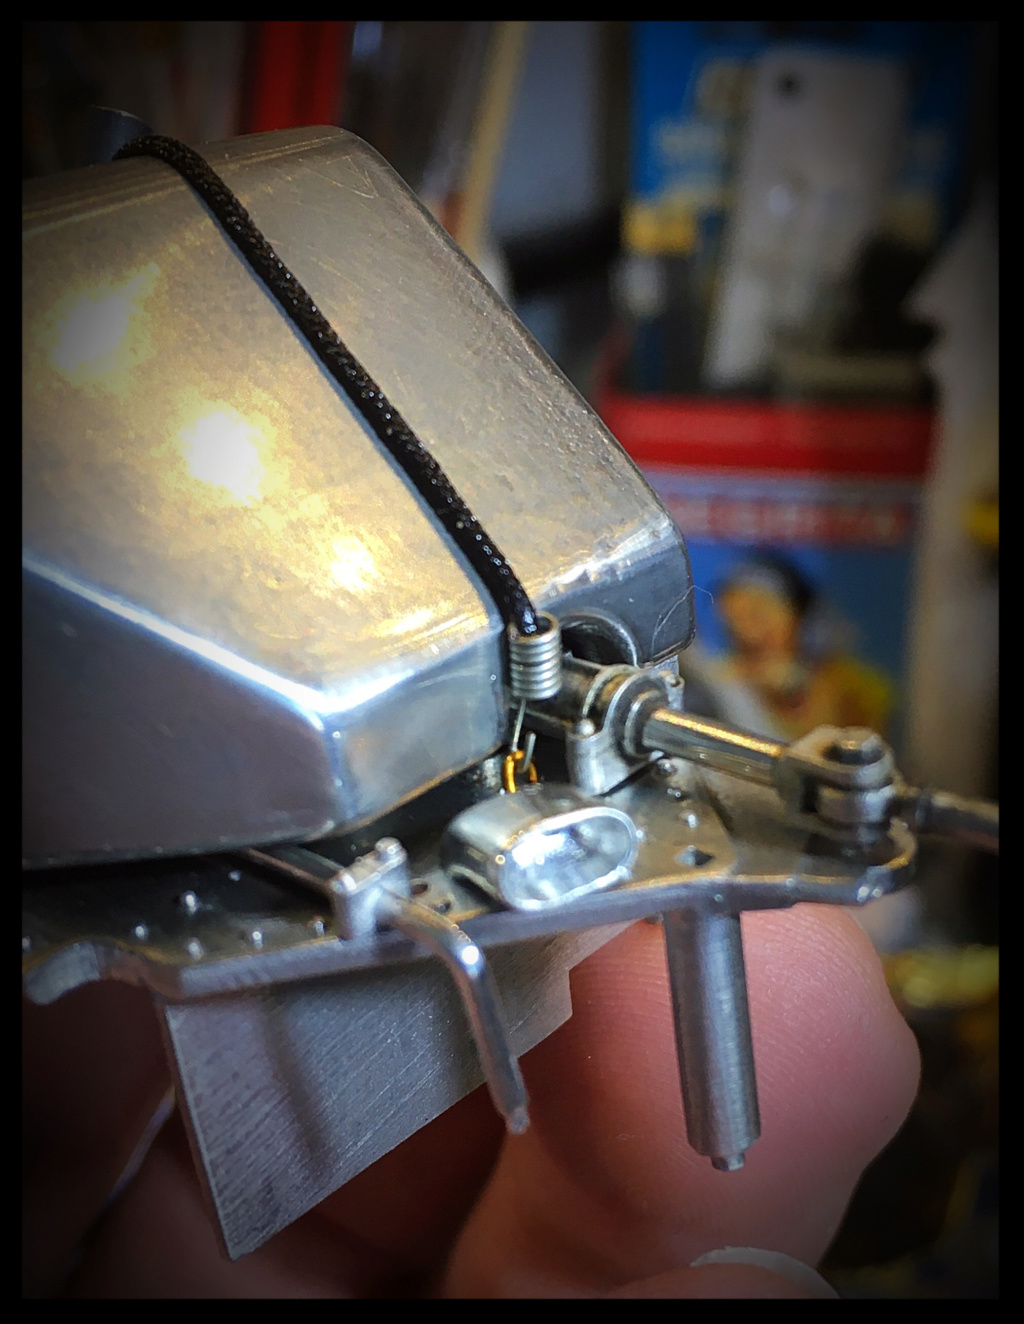
Small brass bridges of 0.5 were installed on each side of the water / oil tank to hold the "bungee cord" in place after having stretched it.

Image

Image

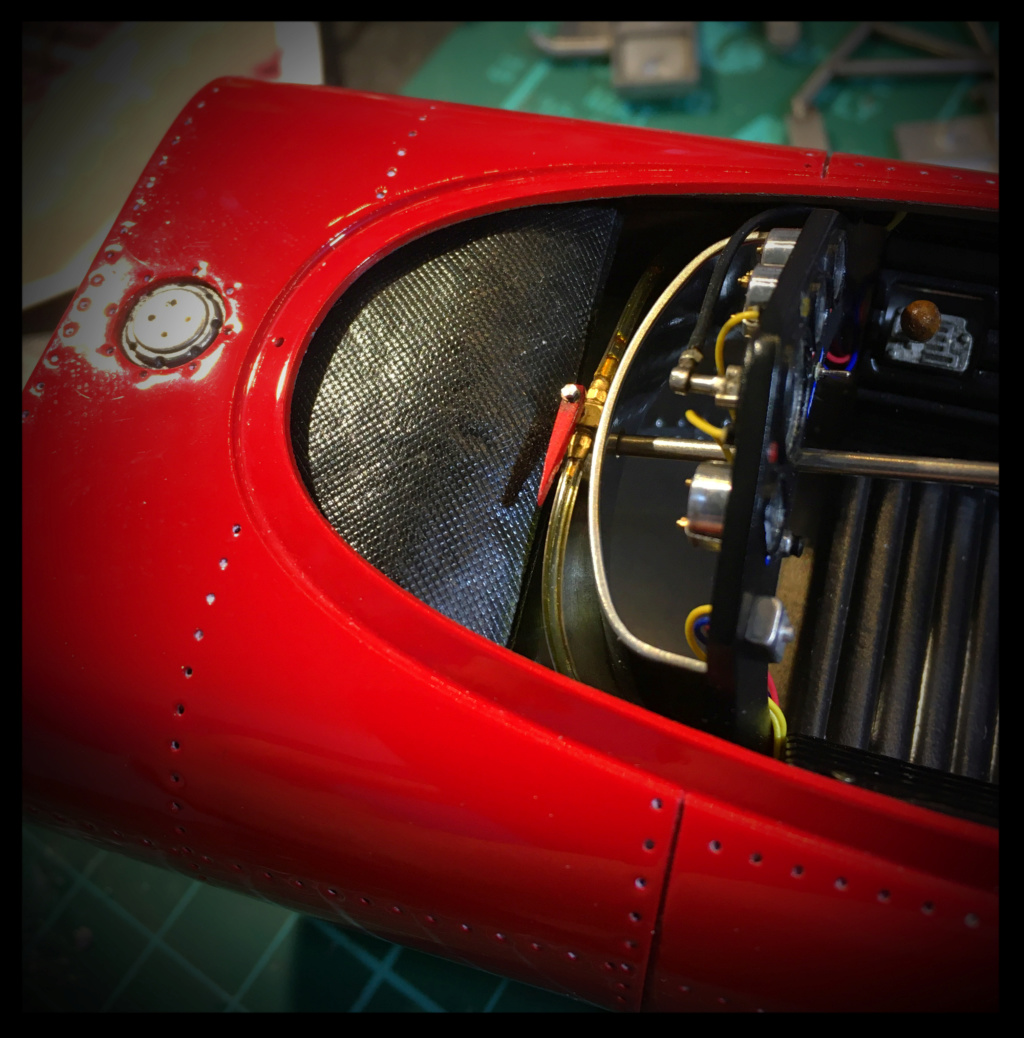
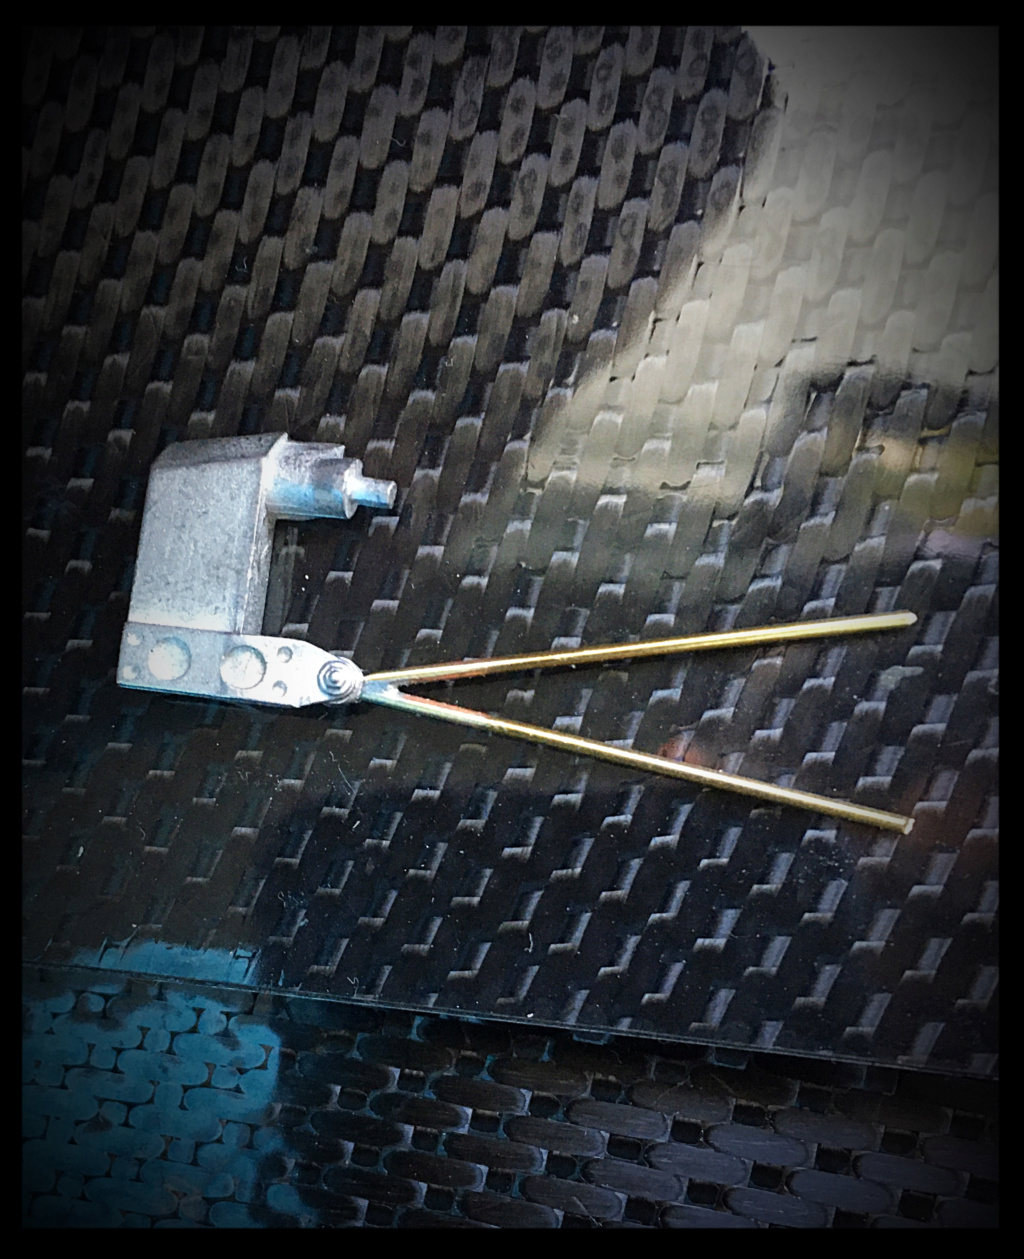
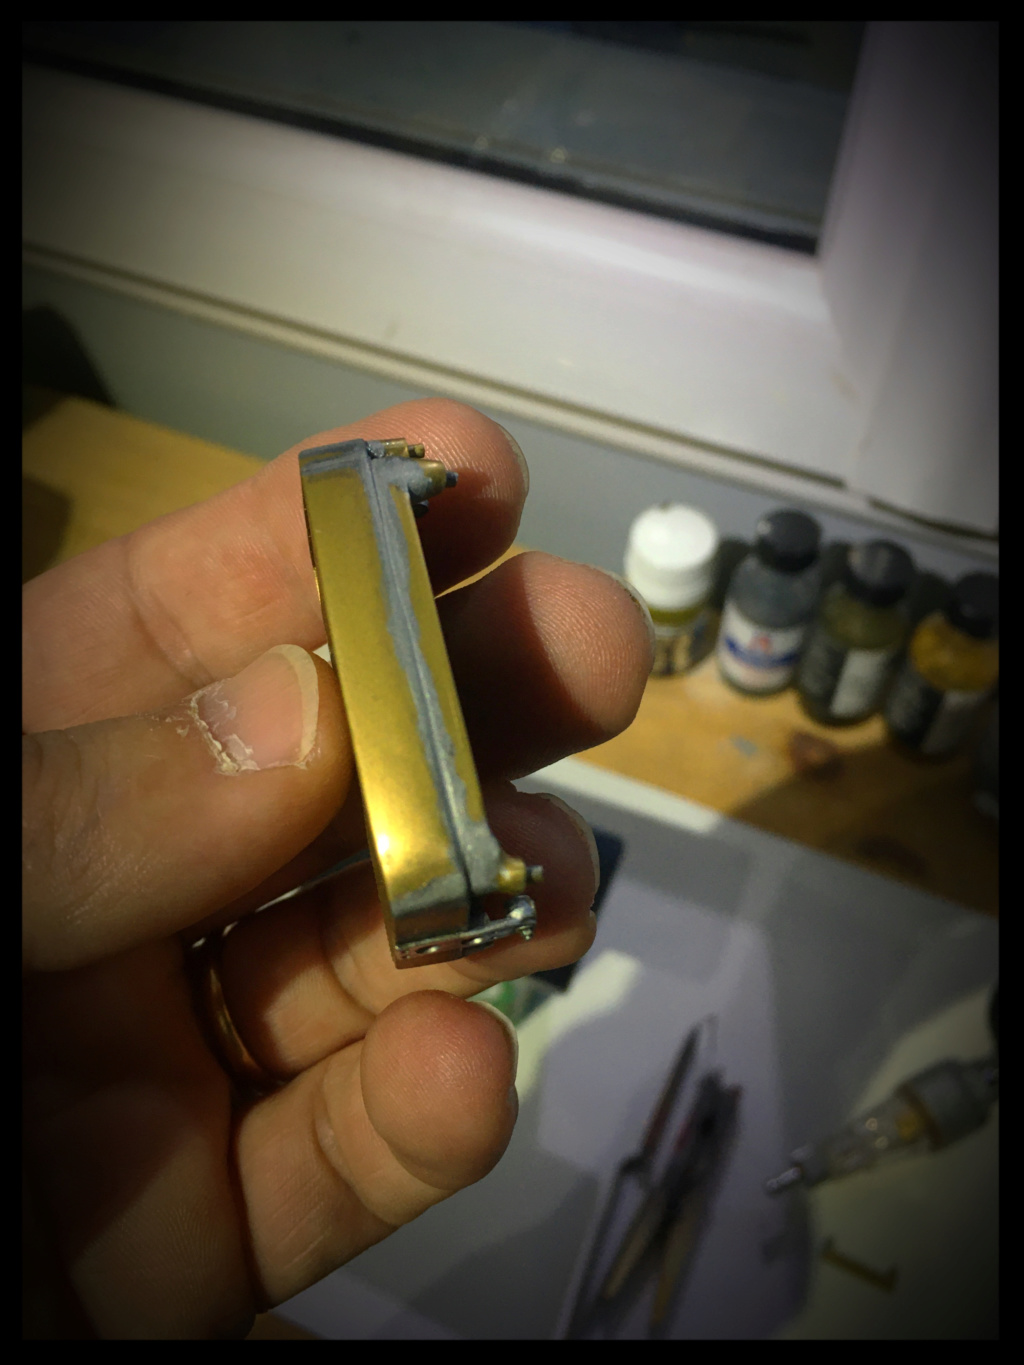
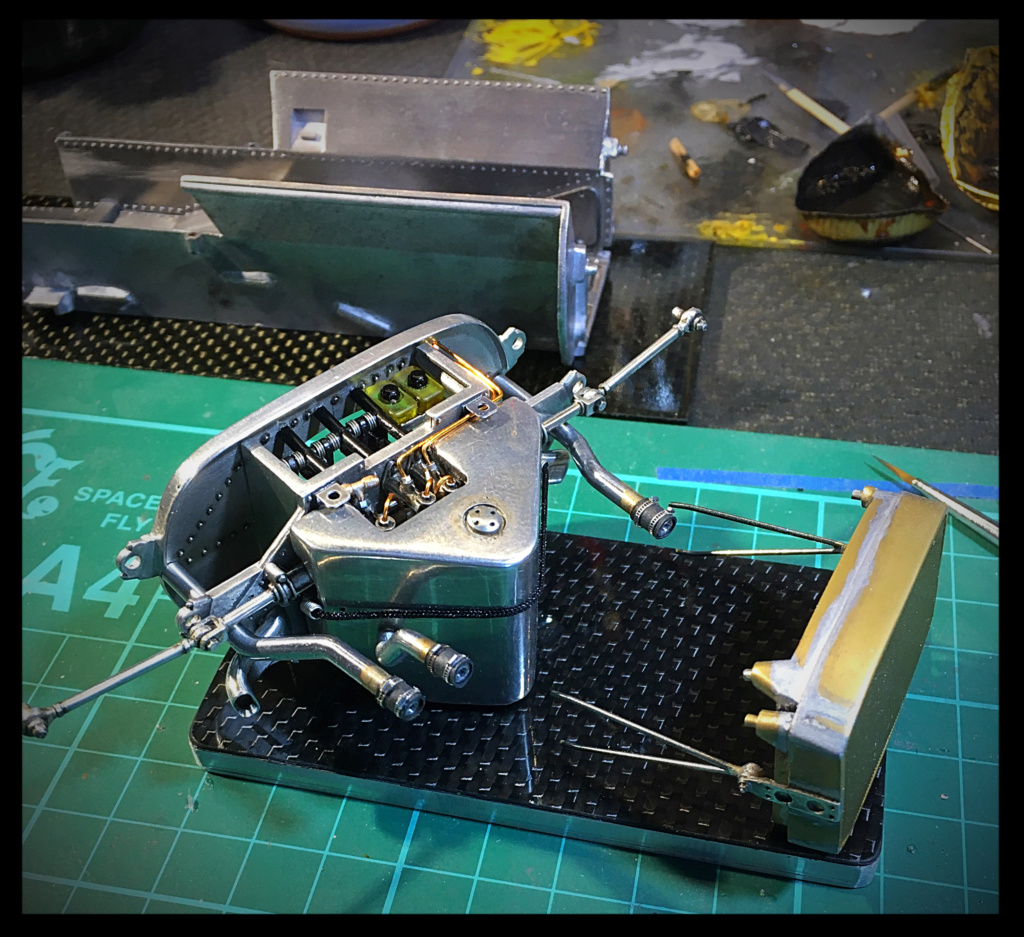
There was a problem with the length of the radiator supports, I redid them in brass of 0.8 which I brazed with silver solder.

Image

Image

Image

Image

Image

Image

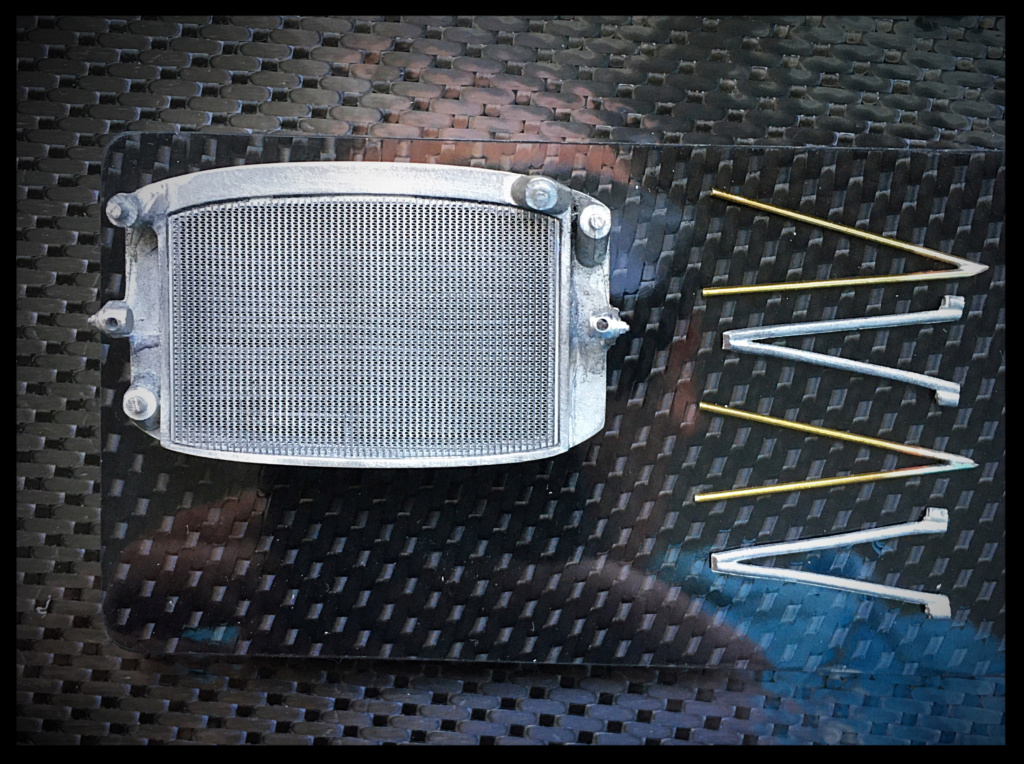
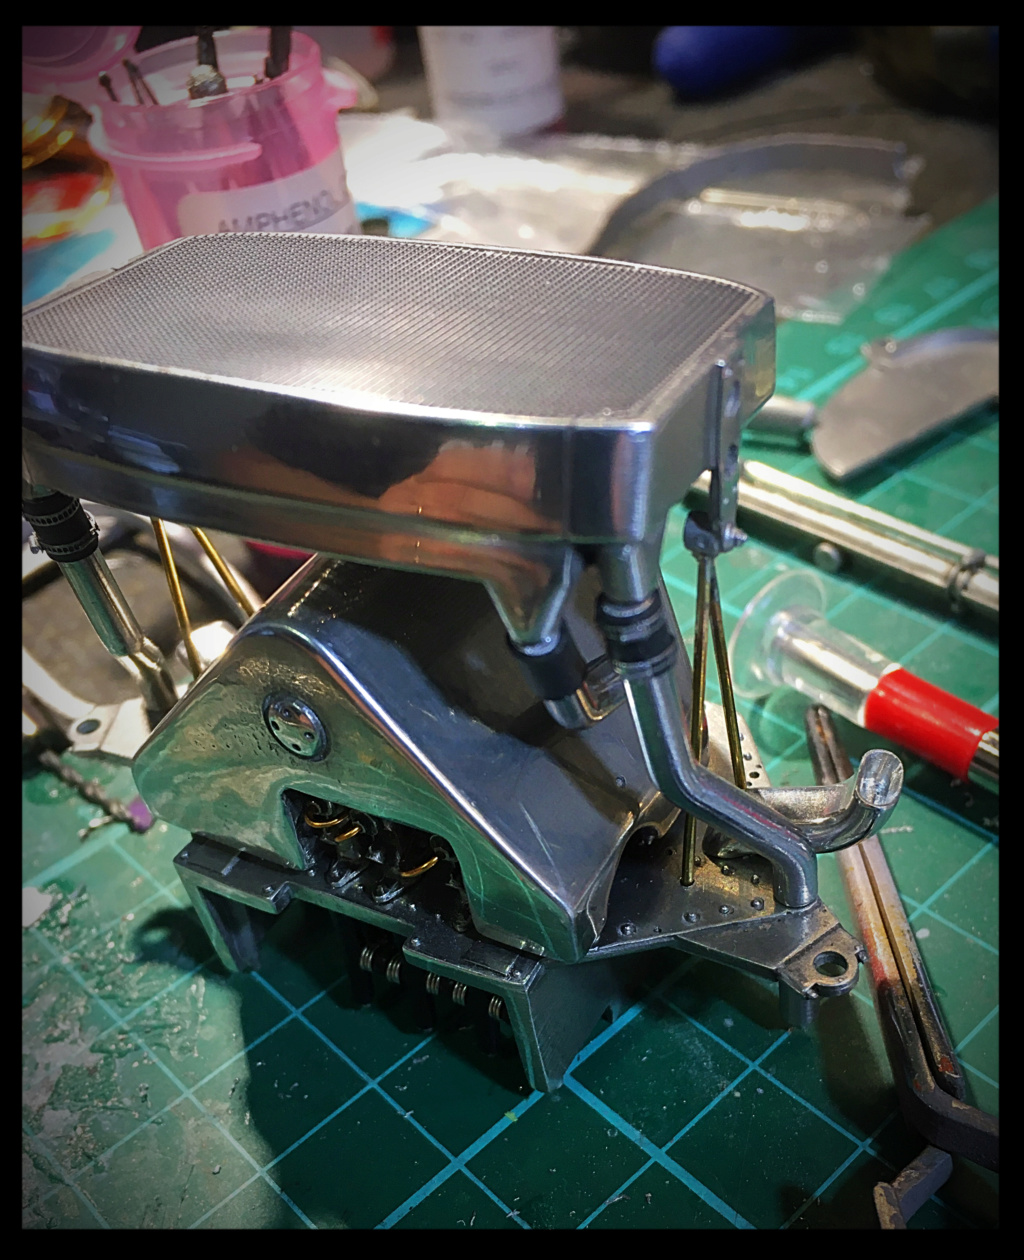
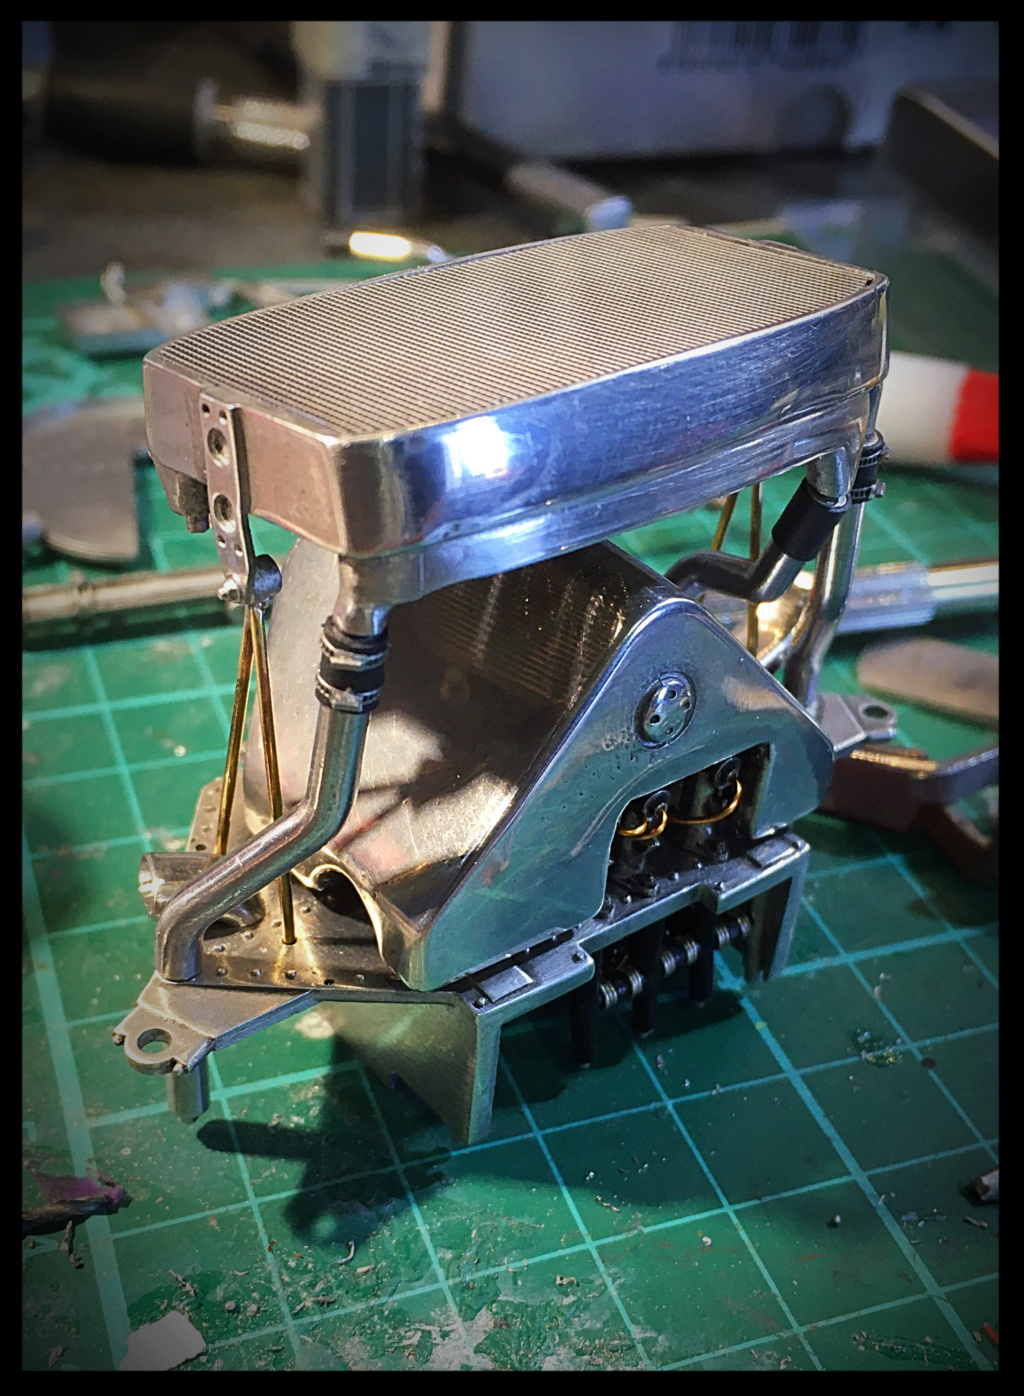
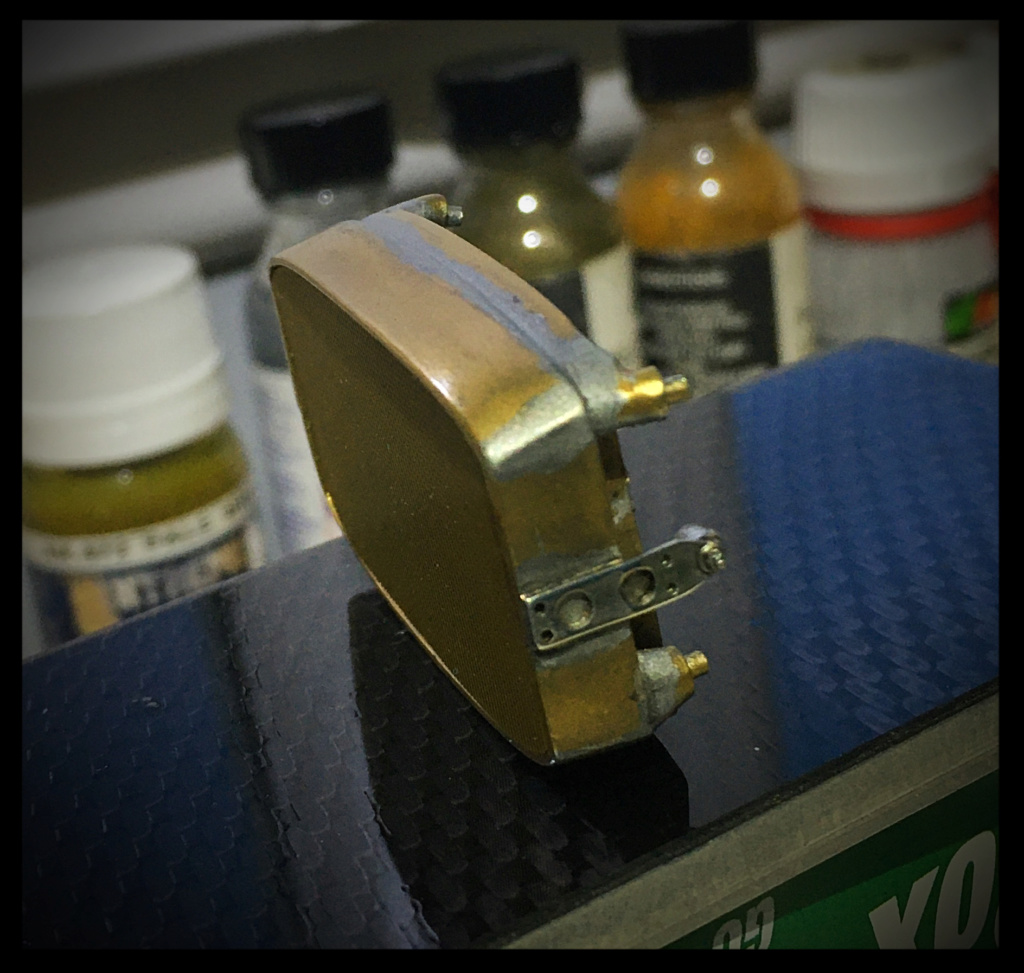
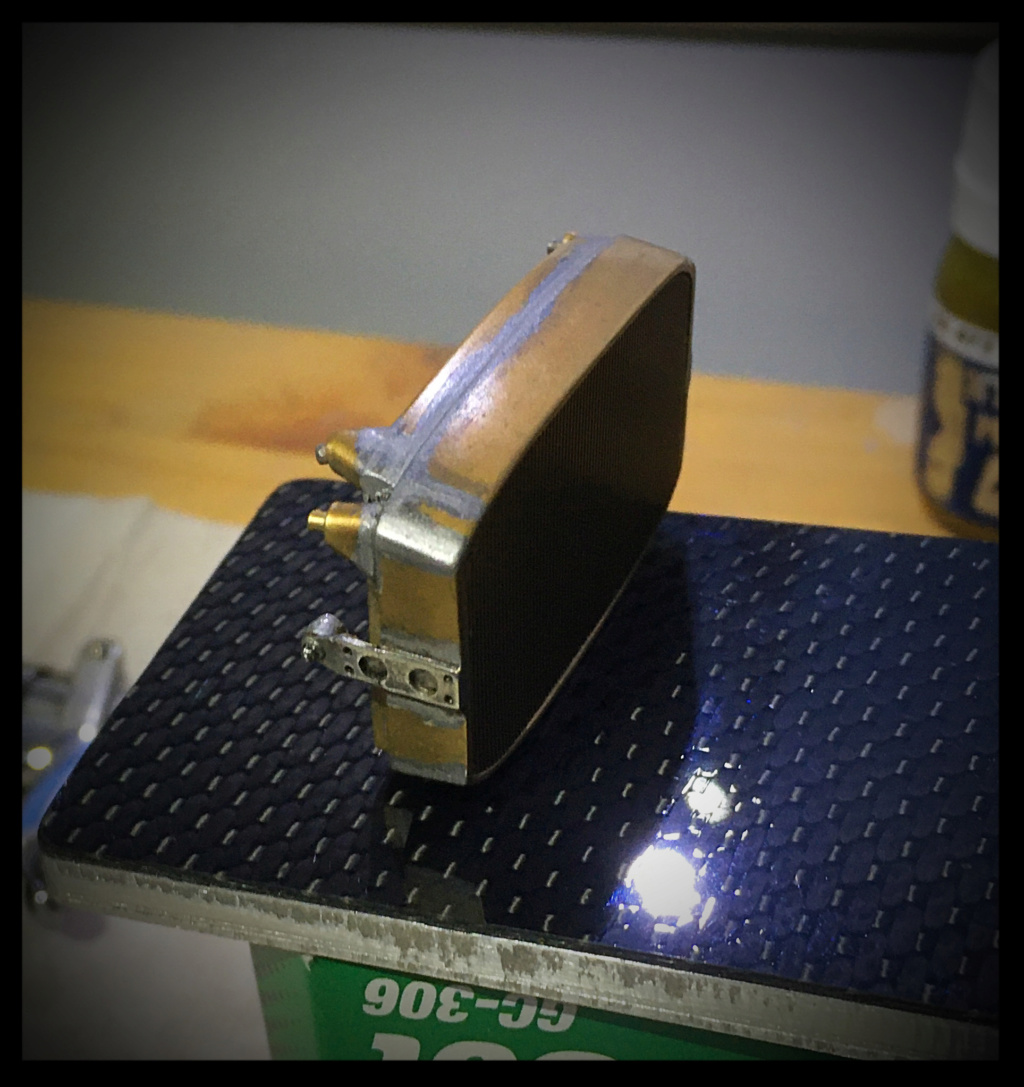
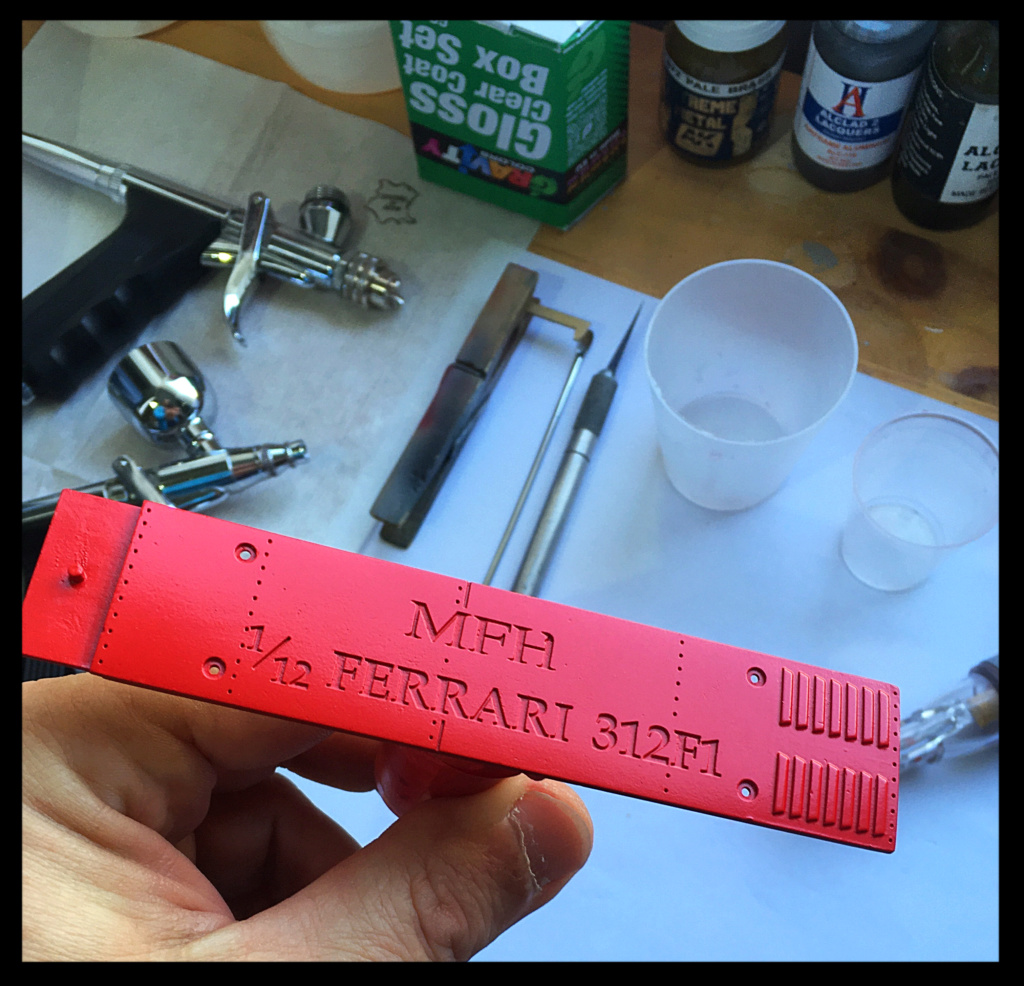
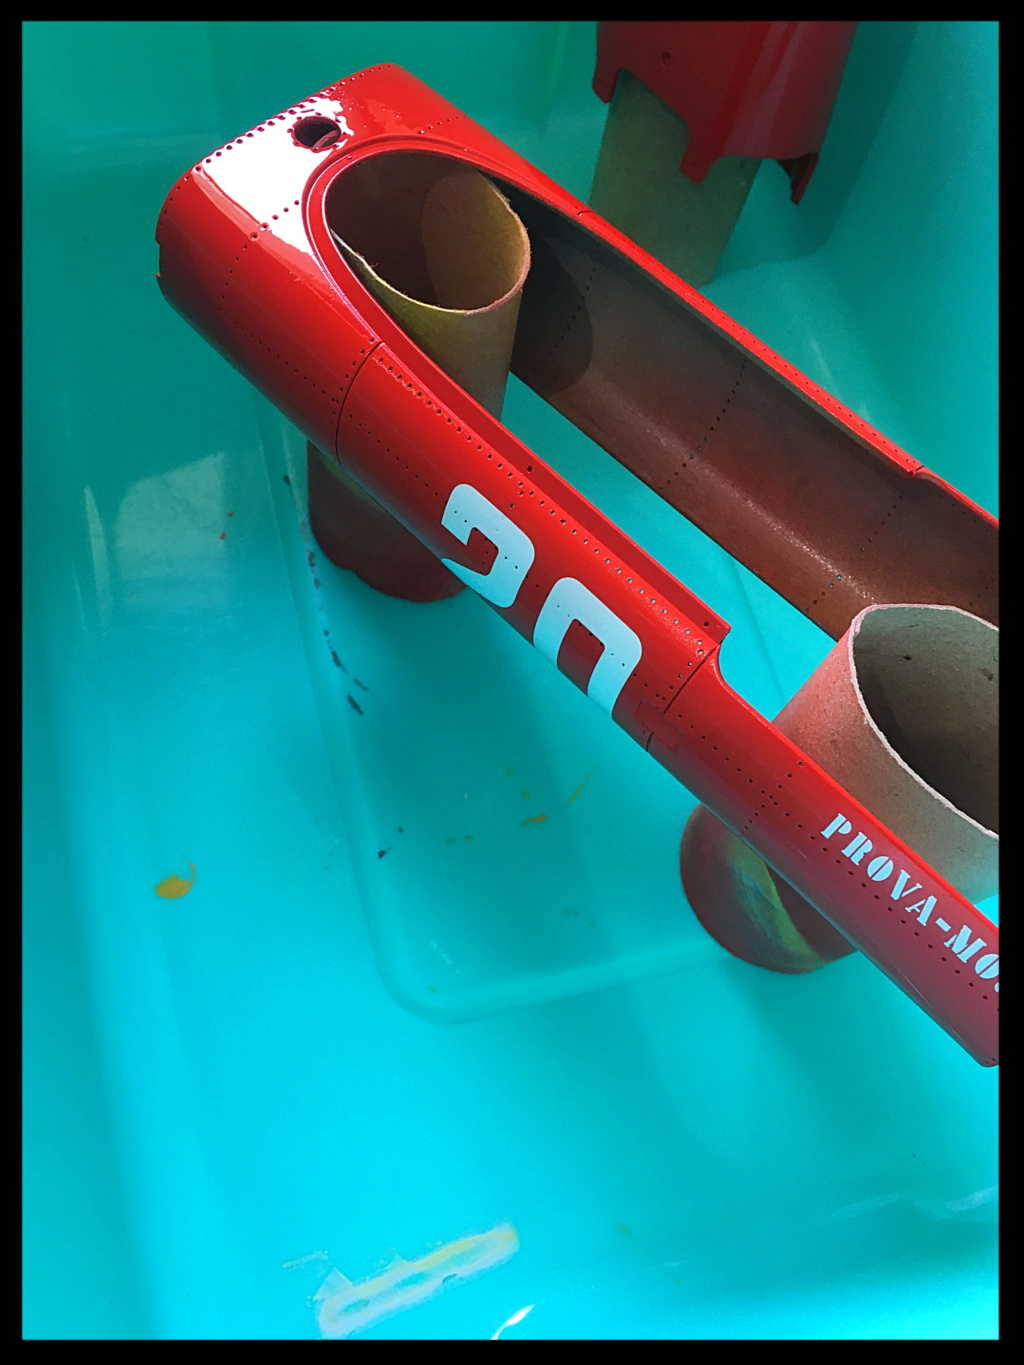
It was also time to paint the radiator(s): No more beautiful polished metal appearance and place for brass.

Image

Image

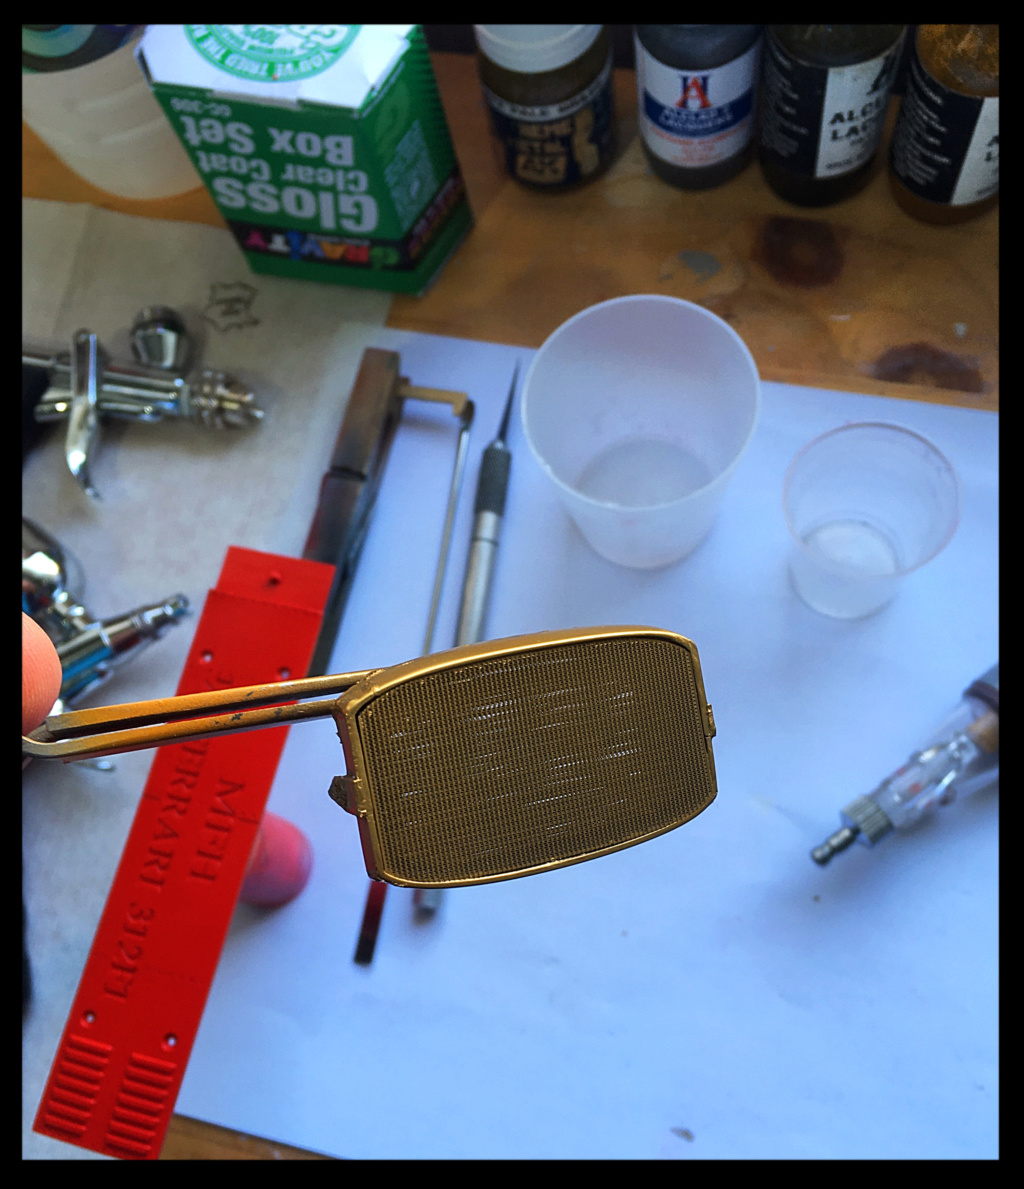
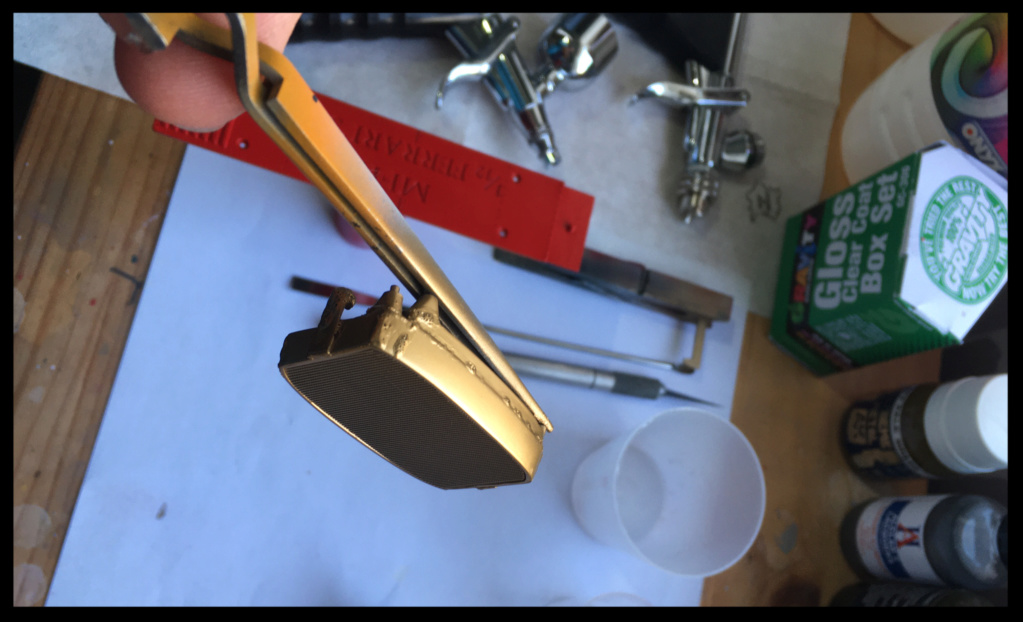
... And decided to represent the welded appearance of brass radiators.
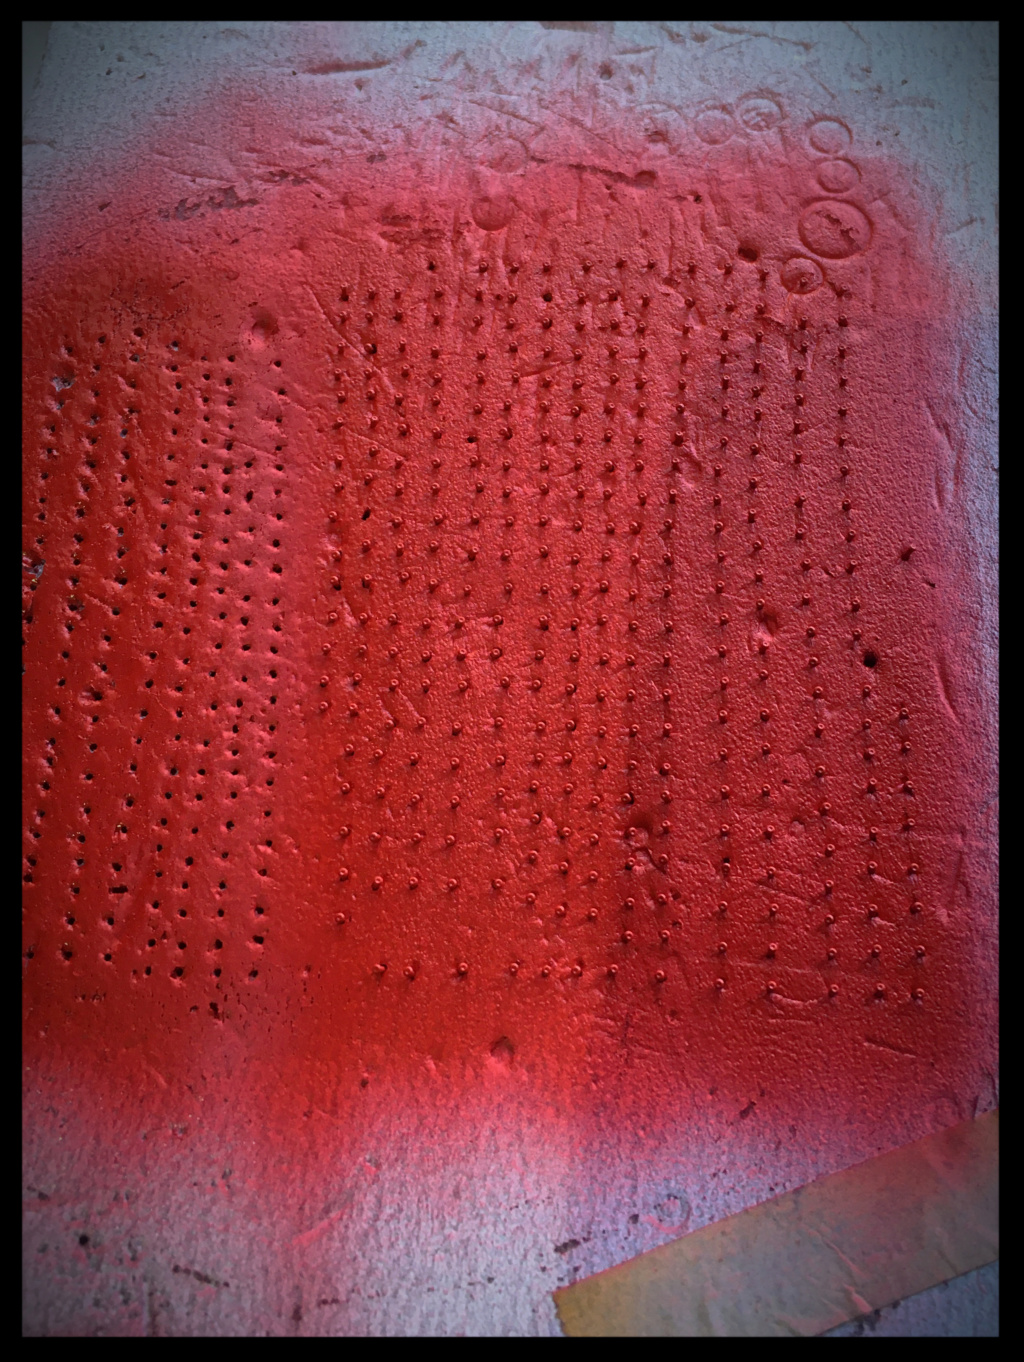
Metalcote Alu, oils ...

Image

Image

Image

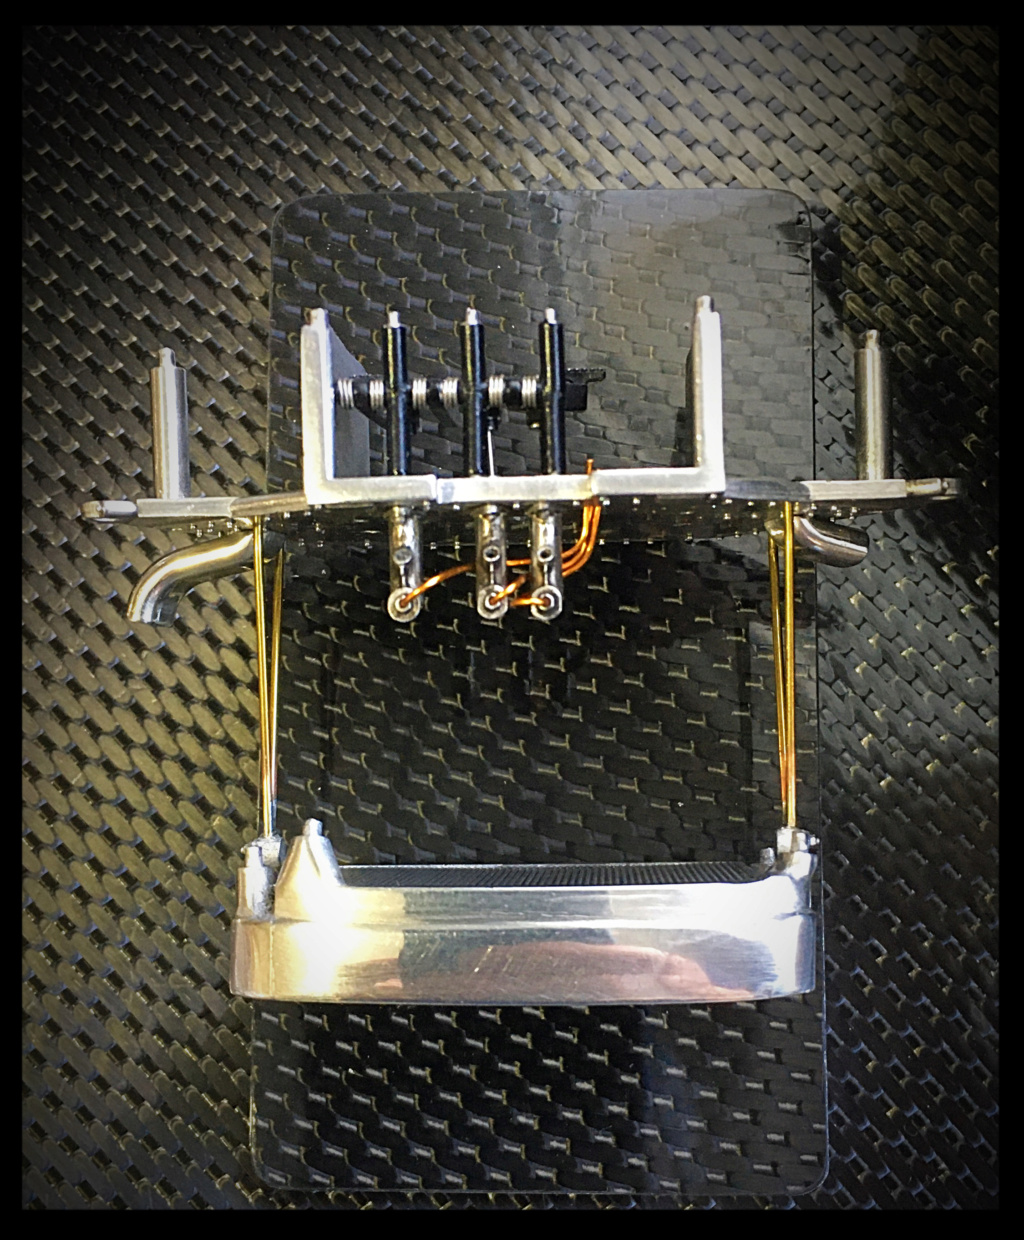
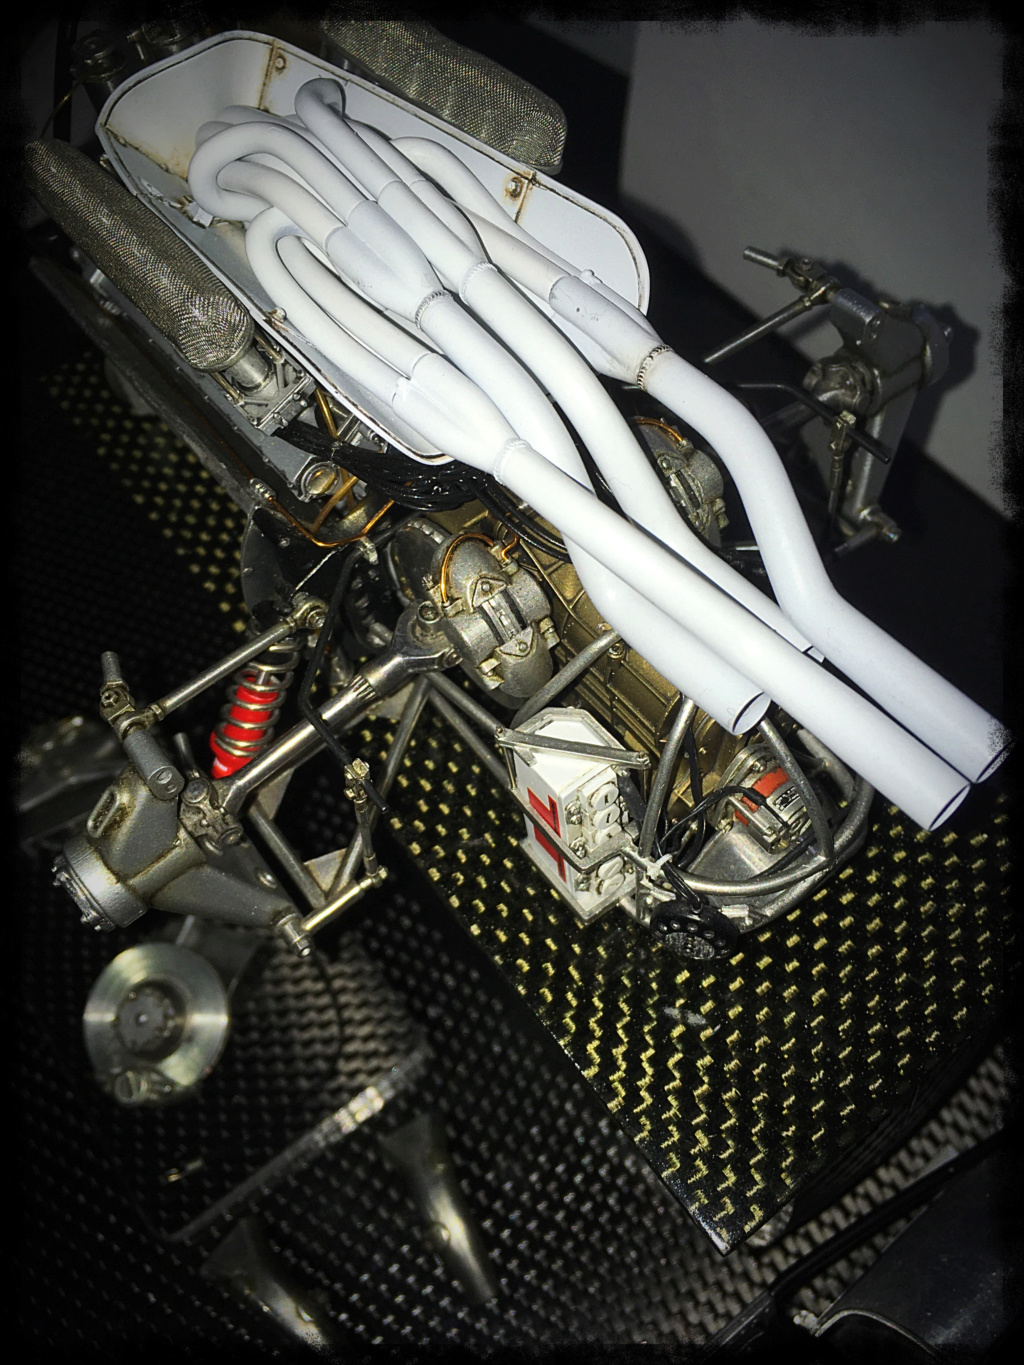
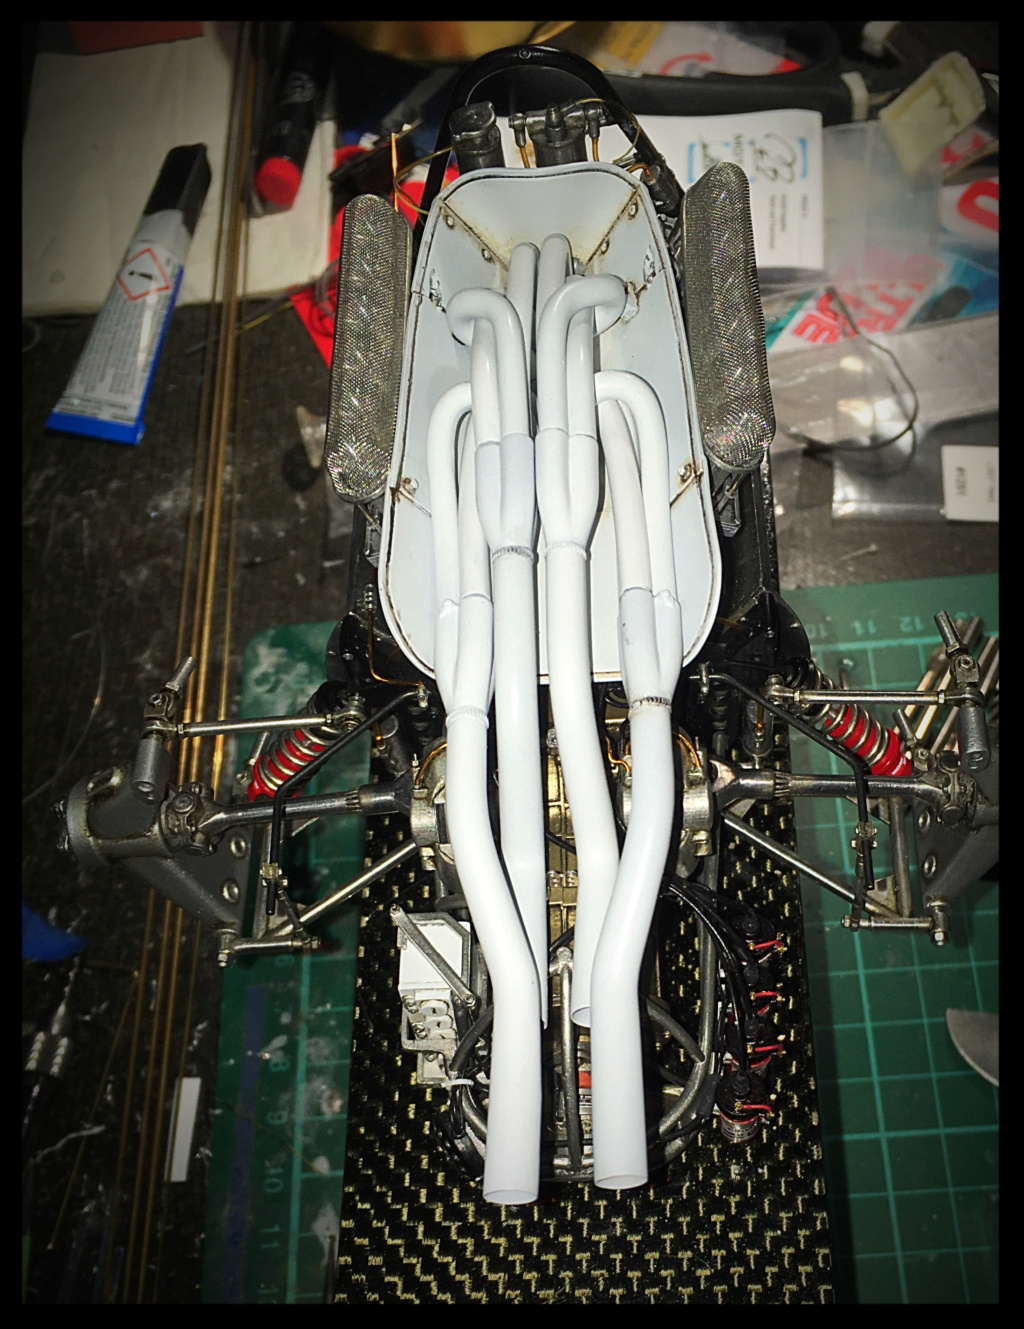
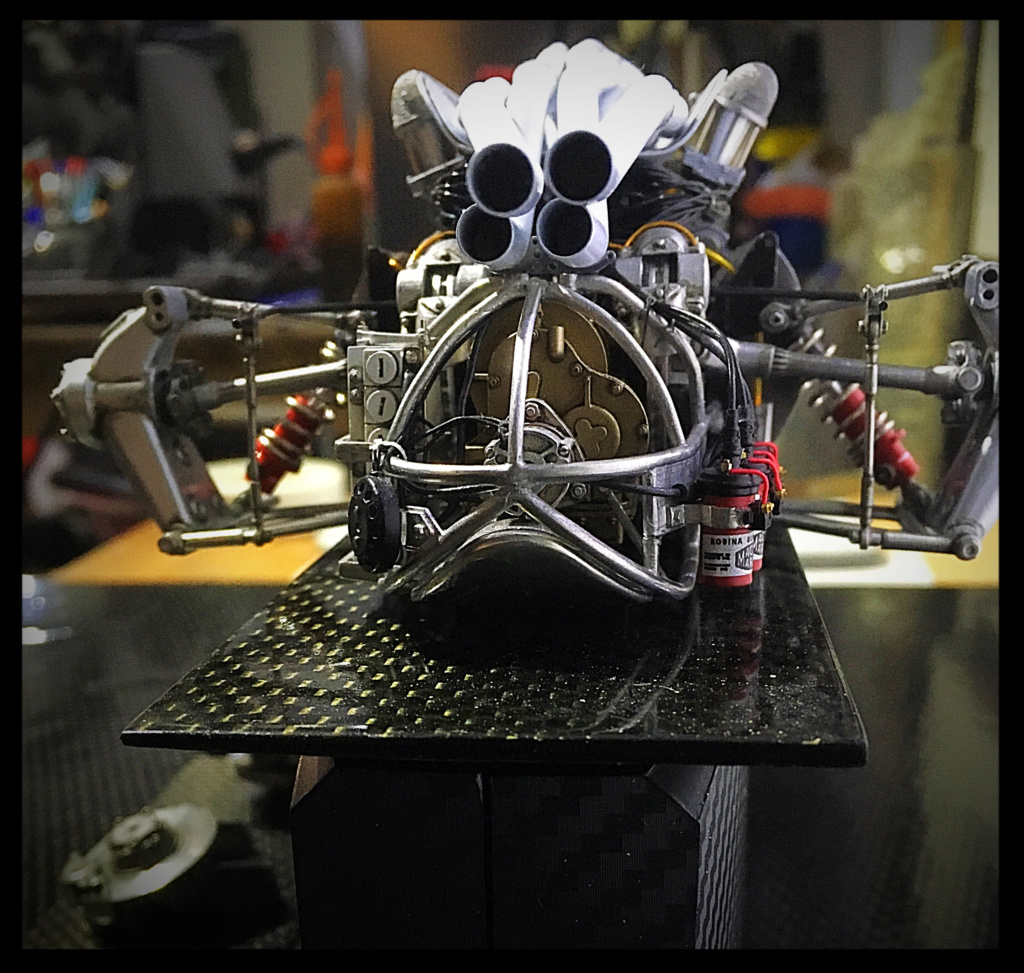
A blank assembly of the various components of the rear axle and the exhausts to confirm that we are going in the right direction

Image

Image

Image

It only remains to connect the lines to the master cylinder of the front brakes, this is done for the clutch and the rear.

Image

Just have to finalize the assembly of the elements

Image

Image

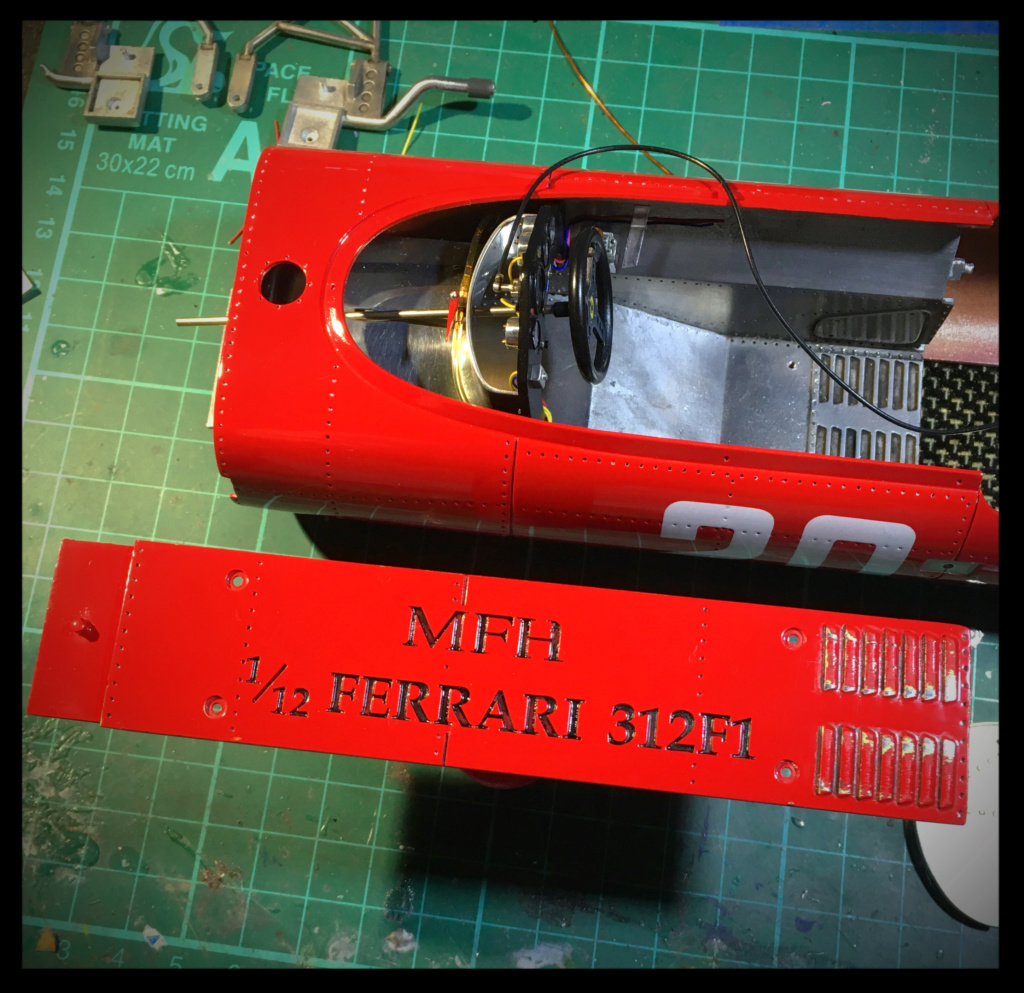
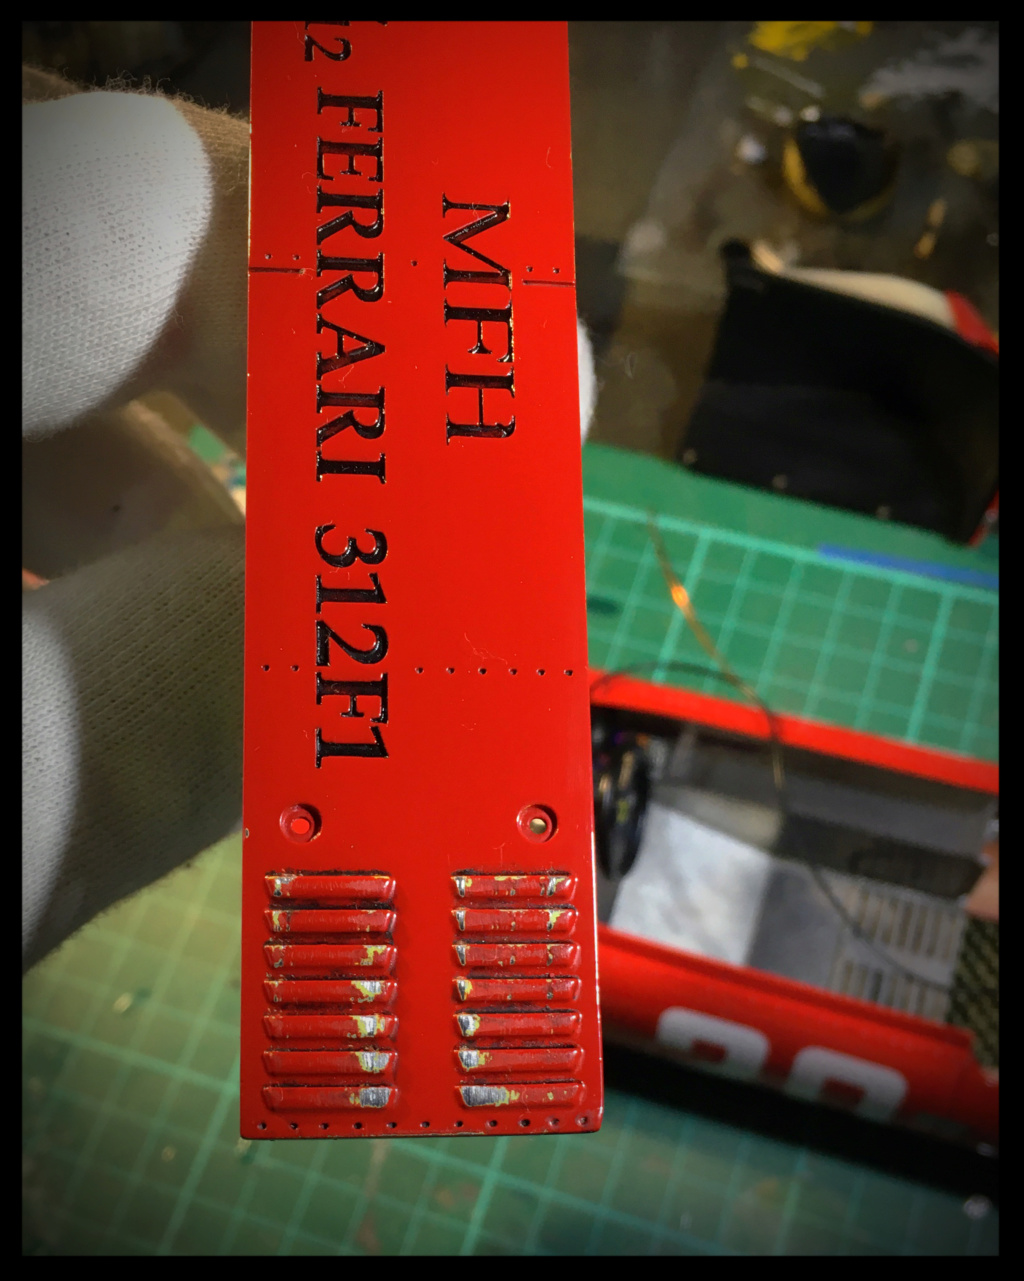
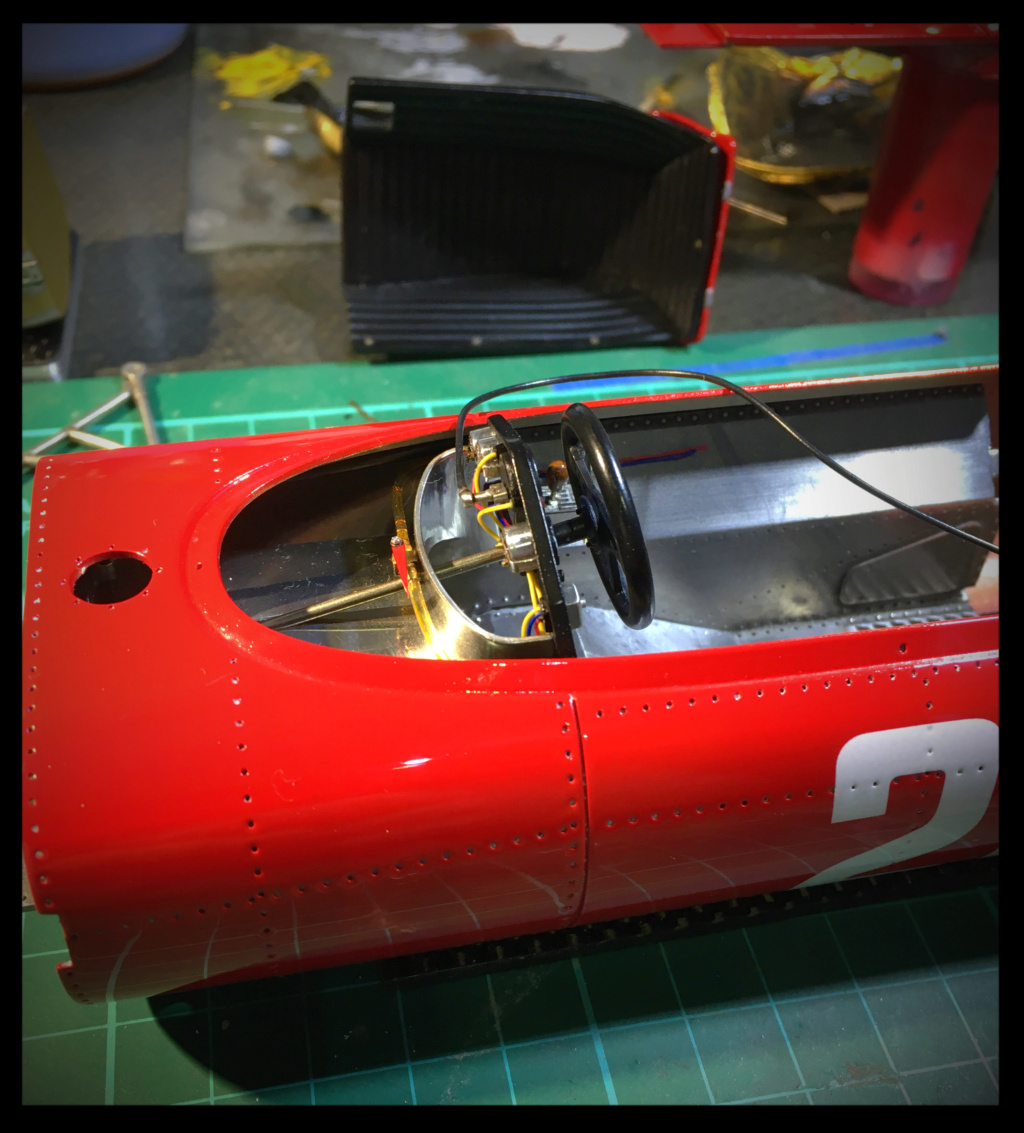
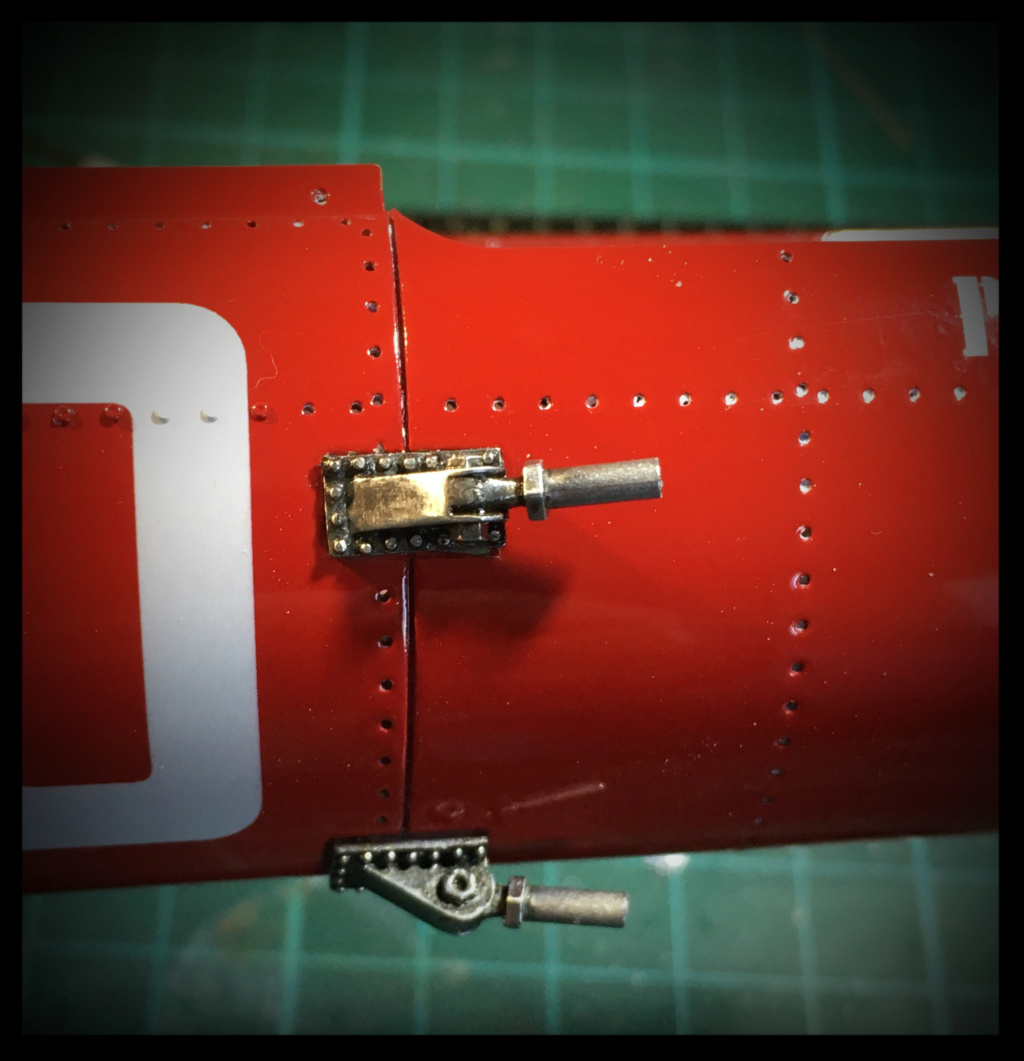
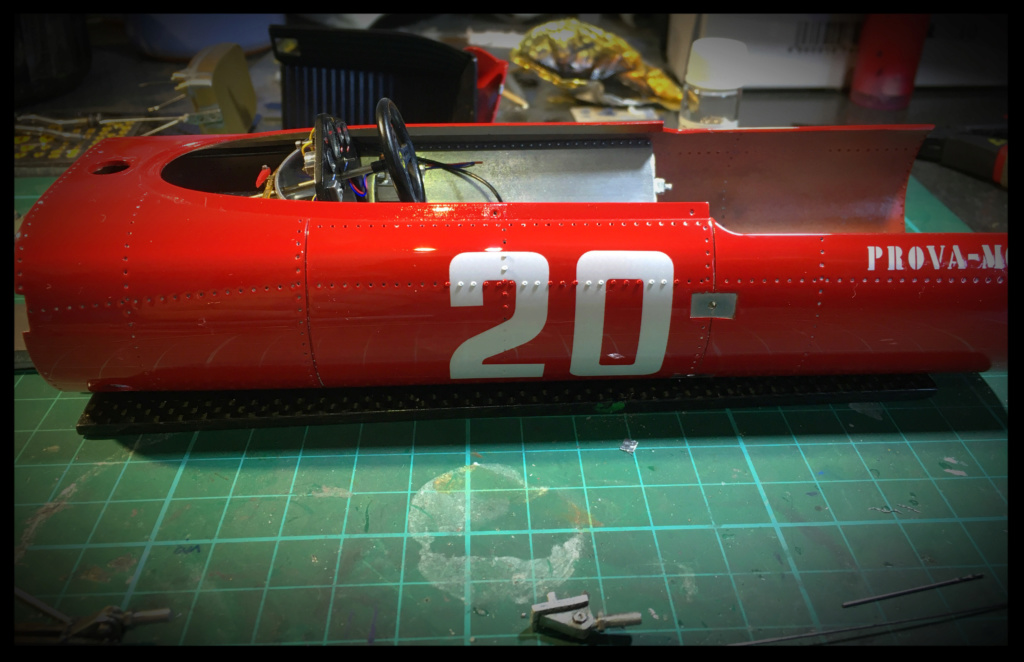
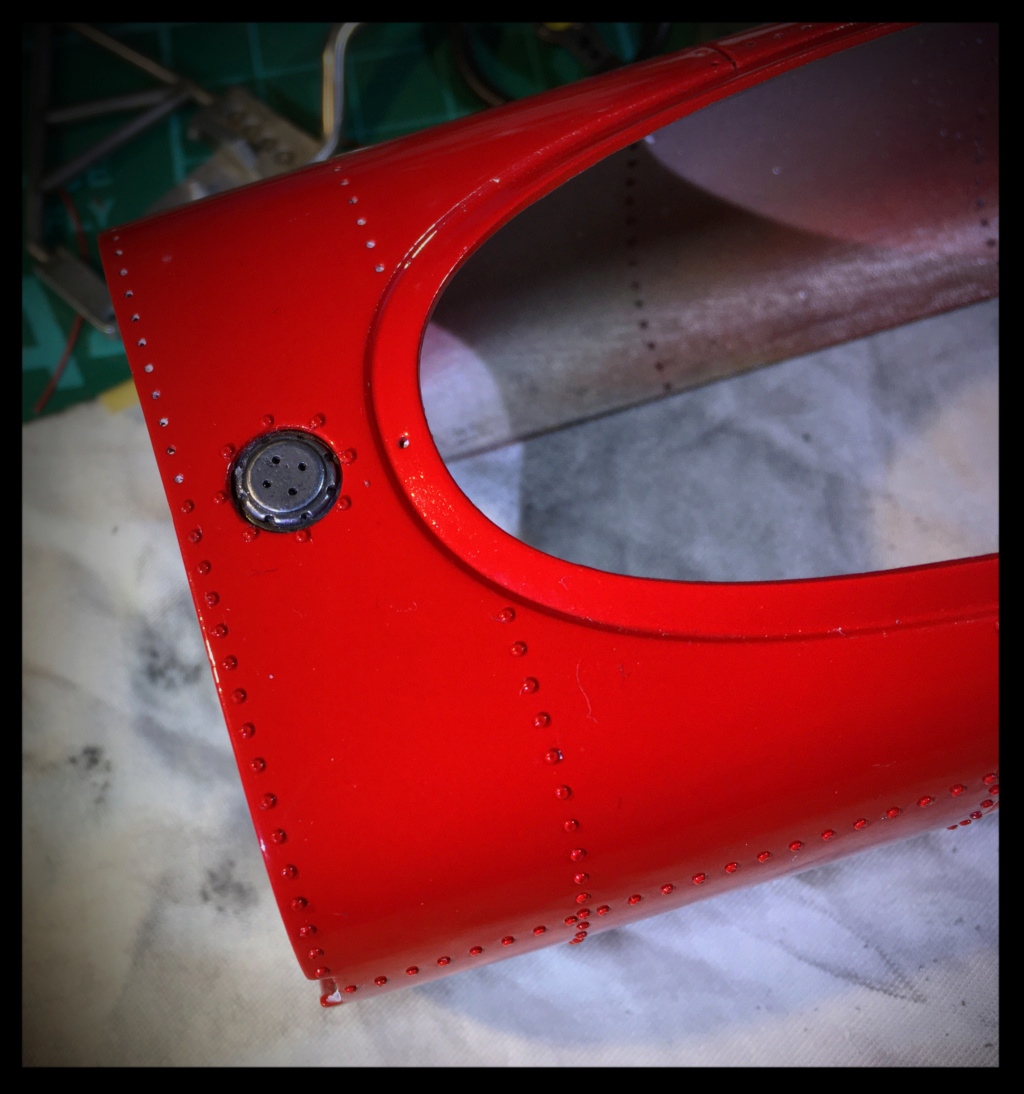
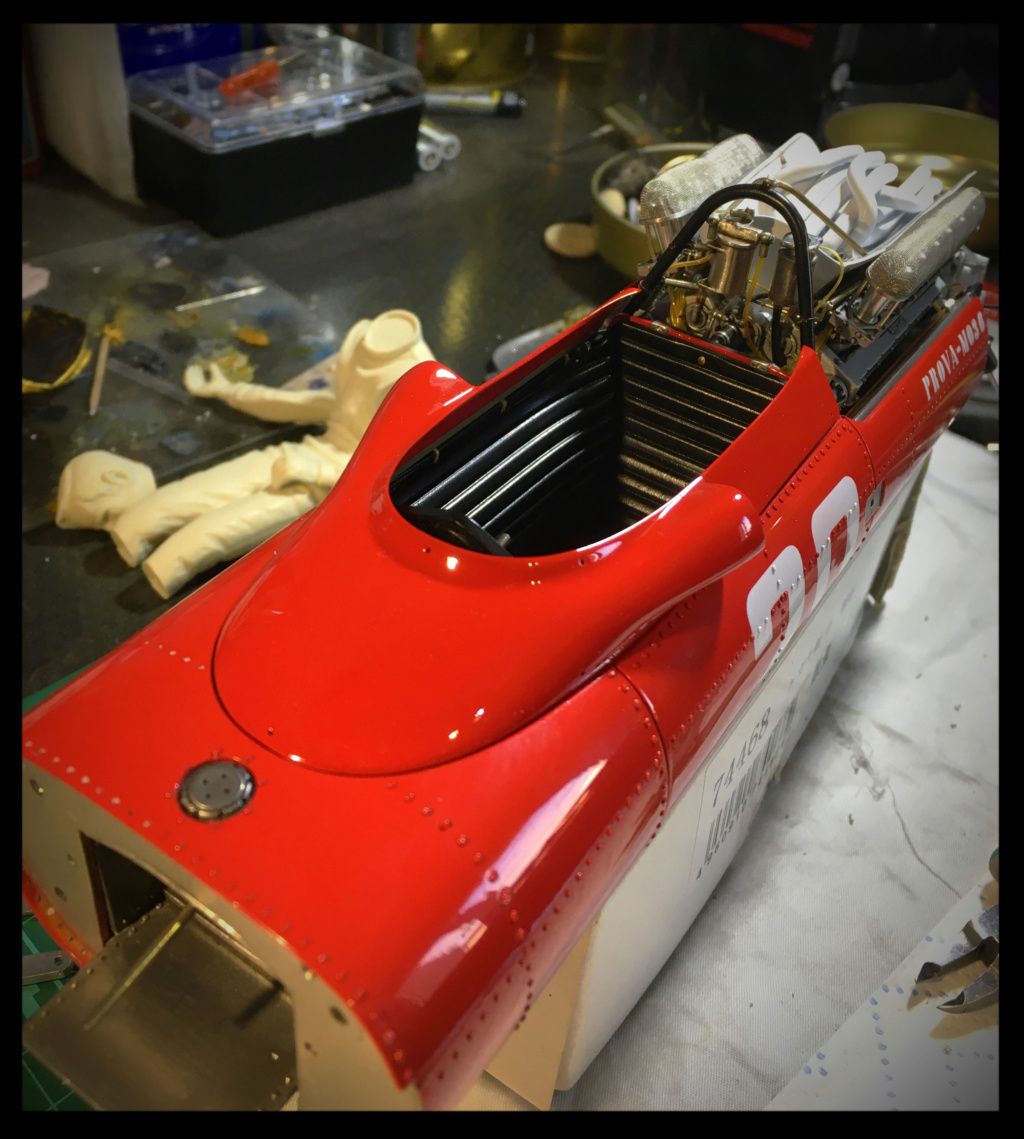
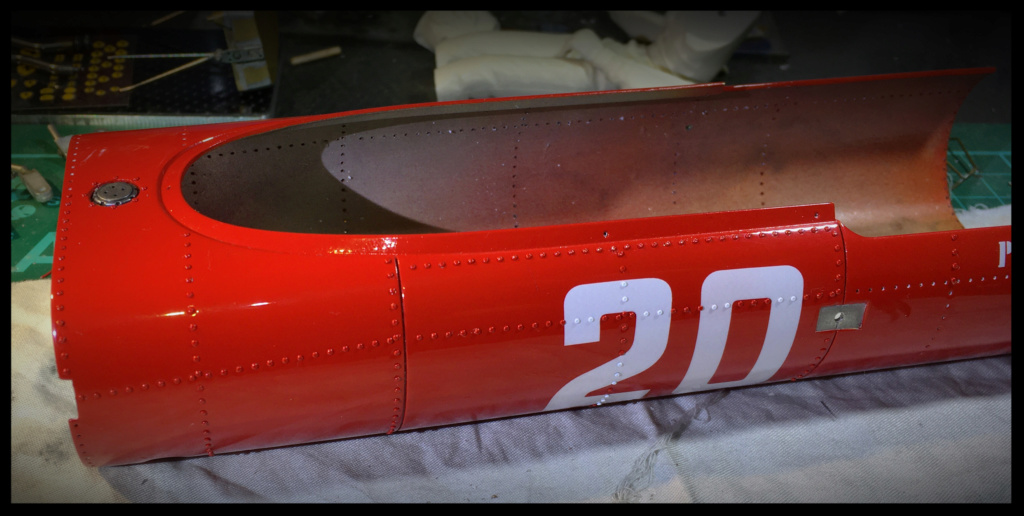
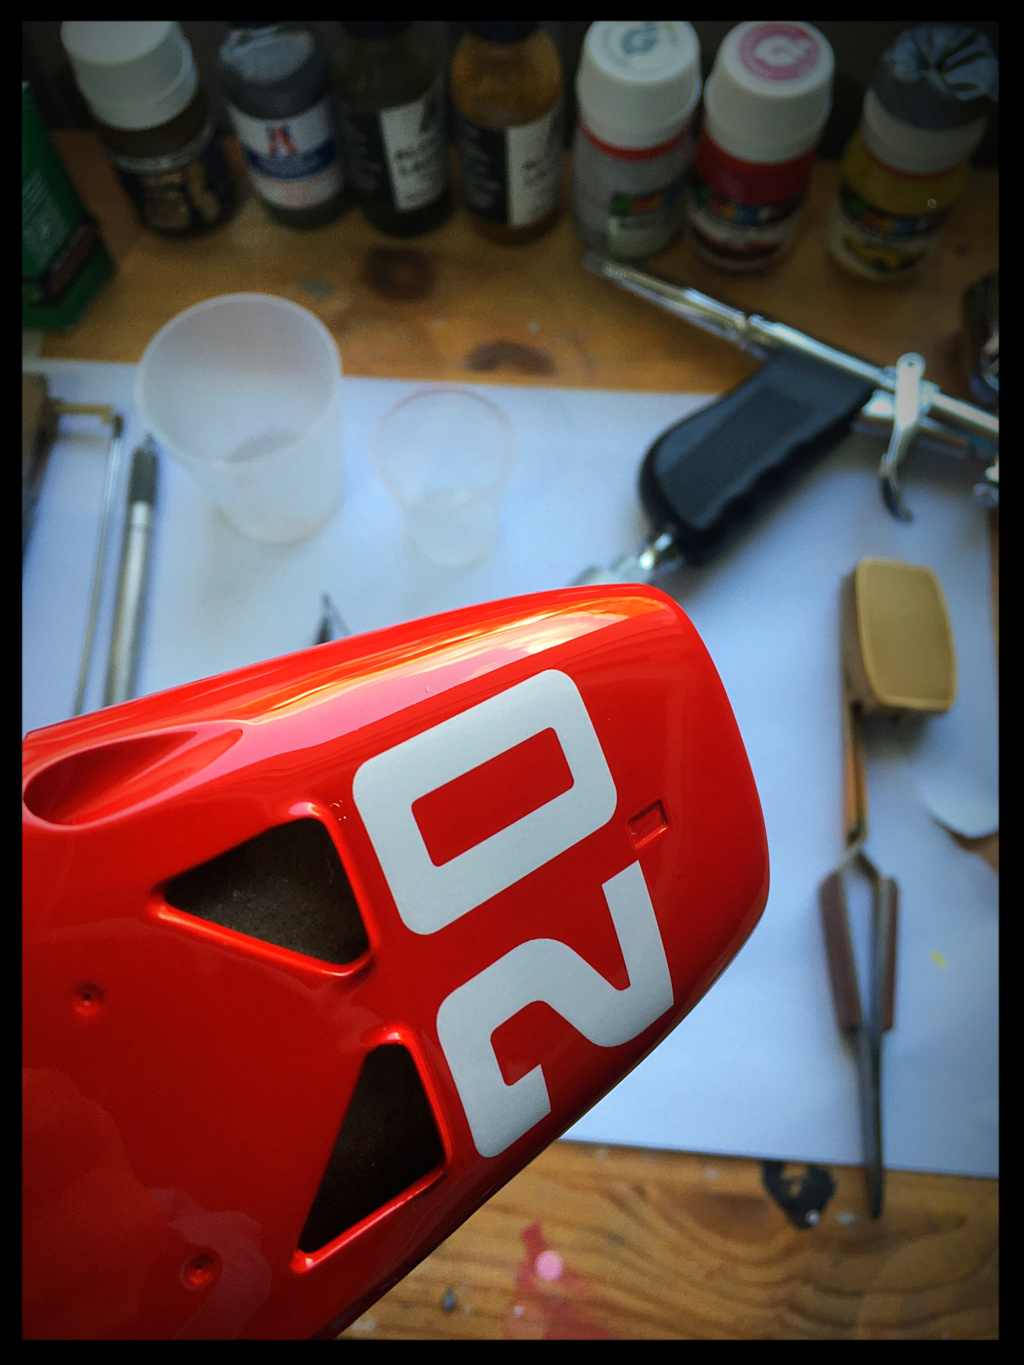
I touched up the varnish and painted the underside of the hull.
Image

Image

Image

Voili voilou.

More soon.

Pascal 8)

Re: Ferrari 312F1, Chris Amon, Monaco 1967. MFH 1/12.

Posted: Sat Mar 28, 2020 9:29 am
by pgarat
Hi

I decided to make the fuel cells connection faucet. It's made of white metal and a spare / modified distributor.

Image

Image

Working on the dashboard.

Image

Image

installed

Image

Image

Image

the lower body part is now done and weathered

Image

Image

All the body parts are now fully dry. White dust is coming from the varnish dust while reopening the rivet holes.
The CAVALLINO is installed on the nose and the original decal is replaced by an "enamelled" badge from an old MFH reference.

Image

Image

Image

Fit test of the front area.

Image

Image

Starting the riveting process...

Image

Image

Image

Ainsi que sur les platines d'ancrage des tirants de suspension:

Image

More soon... Maybe.

Pascal

Re: Ferrari 312F1, Chris Amon, Monaco 1967. MFH 1/12.

Posted: Sat Mar 28, 2020 9:48 am
by testarossa
Some years ago I showed a WIP of the same car here in the forum and, I think it wasn't bad. But yours is a hundred times better than mine. Congratulations.
regards
ferrarissimus

Re: Ferrari 312F1, Chris Amon, Monaco 1967. MFH 1/12.

Posted: Sat Mar 28, 2020 10:50 am
by cesar418
Amazing!

Re: Ferrari 312F1, Chris Amon, Monaco 1967. MFH 1/12.

Posted: Sat Mar 28, 2020 11:49 am
by PTR
Fabulous work! It is inspiring to see such great craftsmanship.

Re: Ferrari 312F1, Chris Amon, Monaco 1967. MFH 1/12.

Posted: Mon Mar 30, 2020 11:23 am
by jaydar
Pascal:
Such beautiful work. I am really rethnking getting this kit. I have the Eagle and Lotus 49 it would look nice with them if I could do half as well as you!!

Best regards,

Joe.

Re: Ferrari 312F1, Chris Amon, Monaco 1967. MFH 1/12.

Posted: Mon Mar 30, 2020 11:33 am
by Jordan2.0
You did study very good !AMAZING good work :shock: :shock: Congrats !

Alex.

Re: Ferrari 312F1, Chris Amon, Monaco 1967. MFH 1/12.

Posted: Mon Mar 30, 2020 3:03 pm
by pgarat
Hi,

Thank you very much.

Decisive assembly if any, the engine is assembled with the chassis.

Image

Image

Assy is done with Loctite 401 and reinforced, as usual, with screws, washers and bolts.

The inside of the bathtub is done, the seat is finally installed as the side water pipe and the gear selector.

Image

The fuel valve is installed.

Image

Image

More soon.

Pascal

Re: Ferrari 312F1, Chris Amon, Monaco 1967. MFH 1/12.

Posted: Mon Mar 30, 2020 3:21 pm
by gp-models
Very nice detail work and great paint job, keep it comin!

Re: Ferrari 312F1, Chris Amon, Monaco 1967. MFH 1/12.

Posted: Wed Apr 01, 2020 2:50 pm
by pgarat
Hi,

Thank you ;)

I made and temporary installed the soft fuel cell. We call it Bladder for aircrafts...
It was not modeled by MFH and, even if the polished metal part is nice, the front end was too empty for my taste.
The fuel cell fills the both sides and the front body above the pilot legs.
I made it from self amalgamating tape which depicts pretty well the rubber bladder.

Then, rivets..
I finally installed about 300 and need around 300 more.
So I primed, painted and varnished those ...300 rivets.

Image

Image

Image

Image

Image

Image

Image

Wheels done and Balancing weights installed, made of... Lead.

Image

Image

More soon.

Pascal