WIP – Project Z (aka Nissan 300ZX Twin Turbo)

Models in progress... including non-F1 models.
Post Reply
User avatar

Topic author
CBartholomew4677
FOTA Chairman
FOTA Chairman
Posts: 3178
Joined: Sat May 14, 2005 8:50 am
Your Name: Chris Bartholomew
Favorite F1 Team or Driver: Forza Ferrari!!!
Location: Michigan, USA
Status: Offline
United States of America

WIP – Project Z (aka Nissan 300ZX Twin Turbo)

Post by CBartholomew4677 »

So, despite my lack of posting, I have been working on a project, albeit not F1. I’d like to share what’s going on.

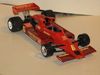
The kit in question is the Nissan 300ZX Twin Turbo, 1/24 scale from Tamiya. I built the kit about 13 years ago for a friend of mine when he had one. I included some small added details, mainly plumbing and wiring, and a revision to the exhaust (dual--> single outlets). About 6 years ago the exhaust broke, so I brought it back to the shop for repairs, and there it sat under cover. I had decided I would fix and upgrade some other light items, next thing I know, the kit was torn down, ready to be stripped for repainting.
Next Project.jpg
My friend then jokingly asked me to upgrade the turbos, so I graciously conceded and then the project went completely off the rails :roll: . All in all, here are the fixes/revisions/improvements/upgrades:
Nissan 300ZX TT Changes.pdf
(203.59 KiB) Downloaded 15 times
And some further explanation for some of the upgrades so far.
Interior:
Originally painted 90’s grey, decided to update/upgrade the color scheme and materials.
Interior 2.jpg
Larger Turbos:
I had some aftermarket turbos from Hobby Design on hand, which were quite a bit larger than the originals. Going to larger turbos brought a whole host of packaging problems, including crashing into the wheel wells and the engine mounts blocking any inlet ducting. After some re-orientation and a change to the engine mounts to open some space, it all fits together.
Turbo Installation.jpg
Heat Exchangers:
New heat exchangers (Intercoolers and Oil Cooler) were scratch-built to offset the higher heat from larger turbos. The plumbing of it all is gonna be *ahem* “challenging”.
Cooler Revisions.jpg
Battery:
With the addition of a front shock-tower brace, to be explained at a later time, the battery had an interference issue. Turns out Li-Ion batteries are quite a bit smaller than regular batteries, so I investigated automotive applications and scratch-built a new one based on those available in the market.
Battery Revision.jpg
Super-HICAS Actuator:
The kit part is a pretty lifeless lump of plastic, and since it’s right out on display when the hood’s up, I figured it needed some improvement. So, more detailed actuator, accumulator and mounting brackets were scratch-built. Painting in progress; to be plumbed and installed at a later time.
HICAS Actuator 1.jpg
So, that’s where things stand, at the moment, in a brief nut shell. From a simple fix, it’s turned into quite a project……kind of like taking your car in for service, but I digress.
Anyhow, onward and upwards.

Cheers,
Chris
User avatar

Topic author
CBartholomew4677
FOTA Chairman
FOTA Chairman
Posts: 3178
Joined: Sat May 14, 2005 8:50 am
Your Name: Chris Bartholomew
Favorite F1 Team or Driver: Forza Ferrari!!!
Location: Michigan, USA
Status: Offline
United States of America

Re: WIP – Project Z (aka Nissan 300ZX Twin Turbo)

Post by CBartholomew4677 »

Hello All,
Still working on the Fairlady Zed, figured it's time for an update, as there's been quite a bit of progress made.
The powertrain and chassis are now all complete. Quite a few things were scratch-built, including the induction system (plumbing and intercoolers), oil cooler and plumbing, Super-HICAS actuator and plumbing, brake booster.
What I am most proud of is the front shock-tower brace. I couldn't go straight over the top, for fear of crashing into the hood, so I had them connect at the firewall. Scratch-built bracket on the shock towers and at the firewall, and connected them with stainless steel tubing, which was flattened to shape. Here's what it looks like.
Engine 7.jpg
Engine 8.jpg
Engine 15.jpg
Engine 16.jpg
The chassis is all complete, added machined aluminum fasteners, cross-drilled brake rotors, and some further bracing from the front under cover back to the floor, made from aluminum tube, the ends flattened, shaped and drilled for fasteners.
Chassis 5.jpg
The interior got a little update. Running high boost pressures and high temperatures, so I added a fire extinguisher w/ mounting bracket. Not that I don't trust my own design and engineering, but better safe than sorry. All scratch-built.
Cockpit 1.jpg
Fire Extinguisher 3.jpg
So, that's where things stand at the moment. Getting the body painting and details finalized, so it can be mated to the chassis, and it ought to start looking like a car.
Onward and upward.
Cheers,
Chris
User avatar

vekkuli
FOTA Chairman
FOTA Chairman
Posts: 4438
Joined: Wed Dec 21, 2005 3:20 pm
Favorite F1 Team or Driver: Stake Sauber
Location: Oulu-Uleåborg Finland
Status: Offline
Finland

Re: WIP – Project Z (aka Nissan 300ZX Twin Turbo)

Post by vekkuli »

Stunning Development there :) . Keep 'Em comin'.
User avatar

Starr
Major Constructor
Major Constructor
Posts: 1060
Joined: Fri Mar 18, 2011 2:31 pm
Location: New Hampshire - USA
Status: Offline

Re: WIP – Project Z (aka Nissan 300ZX Twin Turbo)

Post by Starr »

Excellent job Chris!

I like all the additions under the hood and everywhere else on your Z.

I have a big smile on my face looking at the pictures of the Z's engine bay and my mind went back to when I built my '67 Camaro Z/28 Trans-Am and all the additions I put on it. It was very enjoyable and I believe you are enjoying your project as well.

Thanks for share it.

Cheers,

Starr
Classic Plastic Model Club - Lowell, MA
User avatar

Topic author
CBartholomew4677
FOTA Chairman
FOTA Chairman
Posts: 3178
Joined: Sat May 14, 2005 8:50 am
Your Name: Chris Bartholomew
Favorite F1 Team or Driver: Forza Ferrari!!!
Location: Michigan, USA
Status: Offline
United States of America

Re: WIP – Project Z (aka Nissan 300ZX Twin Turbo)

Post by CBartholomew4677 »

Hello All,
OK, I finally finished the Nissan 300ZX TT update. In the end, what started out as a simple fix and update, morphed into a full-blown project, being that it was pulled apart, stripped down, and remade with a significant amount of revisions and upgrades. I think this was the project with the most revisions I have ever done. Attached is a list of all the updates/revisions, it’s a little too extensive to list in the body of the post here.
Nissan 300ZX TT Updates.pdf
(215.24 KiB) Downloaded 7 times
Let me start with a quick run-down of some small points before final assembly.

- Induction System: With the new, larger turbos, I didn’t want them to be pulling hot air from the engine bay, not to mention sucking in debris to mangle the turbine blades, so the front of the car was modified slightly, adding inlets to pull in cooler, clean air to the turbos. Very simply, I cut the fog lights down to half-size, covered the opening with some p.e. mesh, built some ducting on the inside, and plumbed it to the turbo inlet ducting.
Turbo Intakes.jpg
- Wheels: Molded-in lug nuts were removed with a rotary tool, and replaced with machined metal parts from Hobby Design. Added machined metal tire valves.
Wheels Final.jpg
- Brakes: Replaced the kit rotors with p.e. cross-drilled parts. Kept the kit brake calipers to ensure clearance to the wheels
(OE parts). As the original parts had the rotor and caliper molded together, the calipers had to be cut off, then cut and clean a groove down the middle.

- Windows: The glass from the B-pillar back was given a medium tint with a couple mist coats of Tamiya TS-71 Smoke. Windshield wipers were replaced with p.e. parts.

- Painting and Finishing: As such-
Tamiya Light Grey Primer x2
Tamiya White Primer x3
Tamiya Yellow x2 light + x2 medium
Tamiya Pearl Clear x2
Tamiya TS-13 Clear x 3
Tamiya Polish Coarse~Finish

Once that was all put together, the body and chassis were mated, and amazingly all the revisions I made underhood fit. A little snug, but fit nonetheless.
Body Assembled 11.jpg
Body Assembled 8.jpg
Once the mating ritual was finished, just had to install the remaining parts, and it was all sewn up, and here’s how it all came out.
Complete 2.jpg
With all the underhood modifications, I like to display this kit with the hood open. I considered to build hinges to make it “openable”, however those same said modifications ate up all the space. So, to hold and display the hood when it’s off the car, I made a storage rack. Once nestled into place, the hood is held in place by a retaining bar, and latched down. To prevent scratching, there is soft-touch material on the inside of the retaining bar. I gave it wheels and an adjustable pull bar so the owner could move it around, and store it upright or flat, depending on space.
Hood Rack 8.jpg
As I mentioned before, this project was a gift for a friend of mine who used to have a 300ZX TT, so he could relive his youth, albeit in a slightly smaller scale.
This was the last project completed in my condo, before moving to the new house. Still getting everything unpacked and organized (turns out I have A LOT of stuff….), and am looking forward to embarking on the first project in the new facilities.

For some more pics of the completed project, you can go here:
https://www.f1m.com/forums/viewtopic.ph ... 23#p318223

Onward and upward as always!
Cheers,
Chris
Post Reply