Page 10 of 15
Re: 1/12 Ferrari 330P4
Posted: Tue Oct 23, 2018 10:38 pm
by CBartholomew4677
Fantastic work, it's really coming together well. The improvement to the windshield wiper is great, funny how little things can make a big impact.
Looking forward to seeing more.
Cheers,
Chris
Re: 1/12 Ferrari 330P4
Posted: Wed Oct 24, 2018 7:00 am
by gtziaf
Wow Marcus, wow.
I steal it for my 1/12 builds. Thanks for sharing!
George
Re: 1/12 Ferrari 330P4
Posted: Wed Oct 24, 2018 7:50 am
by gp-models
Very nice progress Marcus, great paint job!

Re: 1/12 Ferrari 330P4
Posted: Mon Mar 04, 2019 5:44 pm
by mvc
Hi all,
It's been a long time, again, since the last update but the project is still alive. There are a few nasty problems that need to be overcome that I didn't have the energy for lately -- but after all weren't that hard to fix.
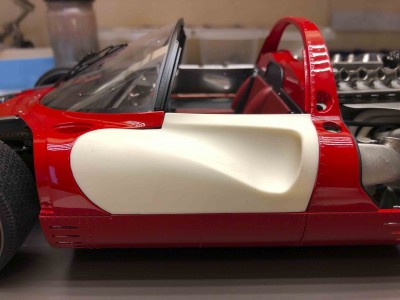
- One problem: panel gaps on the left side
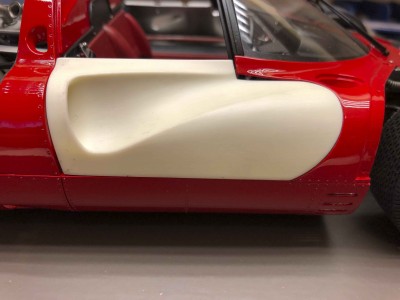
- Worse, panel gaps on the right side
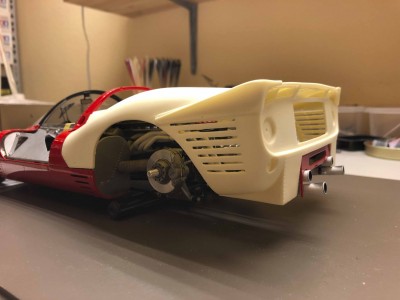
- Even worse: the whole rear subframe section is way too high, so the rear cowling doesn't fit at all. I knew this for a while, but tried to deny it as long as possible :P
Solution time now

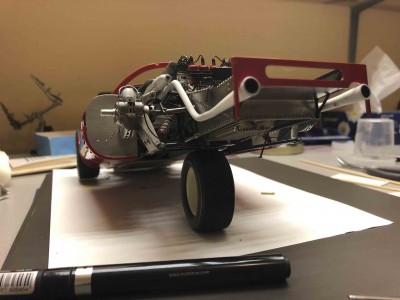
- Took some material away from the subframe's lower tubes, now the angle is ok. Had to take apart quite a lot, very frustrating, but I'll spare you the gory details. It could even be that there was nothing wrong with the subframe at all, but that the whole engine assembly is (still) incorrectly mounted to the chassis. But I'm definitely not going back that far.
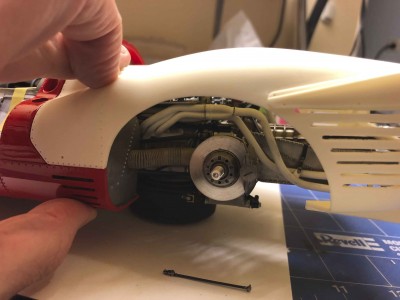
- Much better!
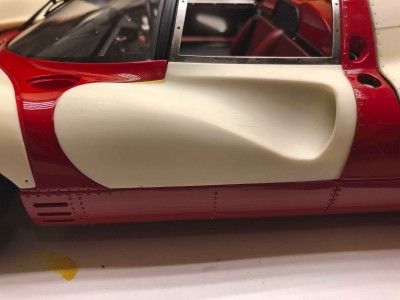
- Needs a second round of putty, but also much better
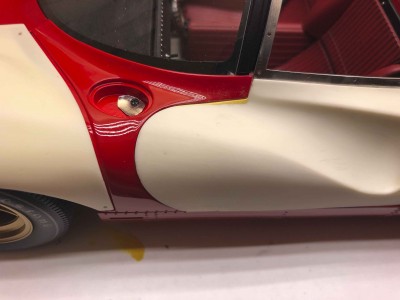
- Not perfect, but this is all I can do. This particular red part is the worst of the (my) kit. I've tried a lot, took material away, relocated the screw hole (hence the metal plate), added material to get a reasonable fit to the central red part -- this is the best I can do.
By the way, I prefer perfect fit over moveable doors. I want to be able to admire the shape of this beautiful car when finished, so all body parts must look good when closed. If this means they cannot be opened anymore, so be it.
Thanks for watching!
Marcus
Re: 1/12 Ferrari 330P4
Posted: Mon Mar 04, 2019 6:12 pm
by Eagle
I had the same issue with the rear cowling/engine cover- I chose to make this an 'exposed' chassis' model as a solution.
Re: 1/12 Ferrari 330P4
Posted: Mon Mar 04, 2019 8:16 pm
by CelicaGT
Wow, this looks amazing. Glad you're finding solutions for the body panels. Can't wait to see it all painted!
Re: 1/12 Ferrari 330P4
Posted: Tue Mar 05, 2019 12:47 pm
by pgarat
Fantastic!!
As usual!
Pascal

Re: 1/12 Ferrari 330P4
Posted: Tue Mar 05, 2019 1:07 pm
by jordan
Great job ! Respect !
Alex.
Re: 1/12 Ferrari 330P4
Posted: Tue Mar 05, 2019 1:19 pm
by jaydar
Great fixes. Has everyone experienced these problems or is it just your kit's combination of resin parts?
Joe.
Re: 1/12 Ferrari 330P4
Posted: Tue Mar 05, 2019 2:59 pm
by rasputen
I've had the same issues with the gaps between the doors and the two front cowling pieces. I've also had to re-drill the hole for the left side cowl piece like Marcus. I also heated this piece up and re-shaped it to make it fit the door and the bottom of the windshield more closely. In order to keep the doors operational, I re-cast the inner doors out of resin. These are much lighter and will not lose their shape like the soft white metal ones supplied with the kit. I also re-made the window frames out of .032 inch brass, so that they will keep their shape as well.
I was very careful when constructing the chassis, and made 100s of trial fittings to make sure the rear bodywork would line up correctly. I'll probably re-make the rear bodywork hinges out of brass as well, as I'm afraid the white metal parts will fatigue and eventually break.