OK, time to resurrect this one

Actually, I indeed had done more work than I had showed, so that´s good.
Well, we have a reasonable cockpit and sidepods now.
The thing looks like that, with plastiline nose cone and engine cover mock up.

A joint research with Cedric aka "the master of the big Renaults" (and Alfas, and Ligiers...) led us to reconsider the nose cone bulkhead. This nice pic:

Proves the need of making this section with taller shoulders. That means that the vertical lines of the sketch are meant to be straight for a bit longer, and the rounded upper shape is lower, taking less % of the part heigth.
That'll mean that some putty will be added to the conical shape of front of cockpit, where you aleady see some brown putty.
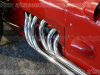
Now on with the engine cover.
I am not as brave as Cedric, and don't trust my skill to manage a double curvature plastic part. So I'll use the old system of making a "male" cast and apply a skin of epoxy on it.
But first I need to understand the shape of the engine cover. It has a really smooth curve seen from the side...
Unlike the quite round, too bulky at the rear, shape I've done!

But that's just a first approach
...and other point is how much it takes in the width of the thing.
These two pics (one is swewed to get a better understanding of cockpit shape) show how sidepods remain the same width without "invading" the area set bu the width of monocoque. That was a usual thing in that era's designs, but certainly not in the RE50 case.


For instance, see this die cast, where the edges of the engine cover laying on the sidepod surface draw a semi ellipse, while these edges are straight seen from above on the real thing.

Another thing to be noted is that the rear of the engine cover protrudes quite a lot from the sidepods end, in the length sense.
Anyway, I see I gotta build a quite solid base to build the engine cover upon. It might be a quite "physical" thing, so I need parts to be strongly and accurately placed, even if I might put them apart again later for finishing.
Also I played with the idea of leaving the sidepods an independent part to help painting, but the latter explained, plus the nature of the sidepods inlets probably leads me to bonf the three big parts together rather sooner than later... probably with a definite floor too. We'll see...