Ad blocker detected: Our website is made possible by displaying online advertisements to our visitors. Please consider supporting us by disabling your ad blocker on our website.
So this is my first wip here. I must say this is awsome site with awsome builds. I am learning a lot here from you.
Slowly I am starting to work on this lovely kit. Hakko soldering station is home and flux with solder from MFH on its way. Intention is to leave as most as possible pieces in natural metal finish. What is making me nervous are those numerous rivets around monocoque. What would you guys suggest as replacement? I am thinking of 0,4mm resin rivets, but they seem to me quite big and I didnt find any 0,3mm....
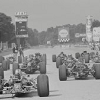
Here are few pics... nothing done at all, just mocking up
This is the place where rivets are completely gone. wouldnt look good without them
small progress on the engine made...
I am labouring what can be achieved with bare metal surface and in the meantime glued engine together and cleaned all main parts for building it.
Still not decided wheather to leave tub in bare metal or paint, but after cleaning it I found some more imperfections on it
Part fit is quite good after some adjusting
Front wing is prepared to be clearcoated and decaled. I replicated rivets with solder wire and polished the wing with various grades of sandpaper from 180 to 1000 grit. Than used steelwool and at the end polishing compounds from coarse to fine. It seems that my CA glue is old and thick. I must buy new one---
I also recieved solder and flux, so I am learning how to solder properly...Must say its no near what I saw in tutorials
What is strange to me that my hakko is probably miscalibrated, becase I must set temperature to 340C to melt solder..
Very nice start on your project and will be watching it with interest.
With regards to soldering white metal I've found it to be a bit of a non-exact science. Most of the time you will have to file and sand most solder joints.
Thank you for your reply. I like your 97 too I found out that I must use least possible ammount of solder to save me from lot of sanding
I cannot resist to decal the wing. decals are laid on gunze metal primer for better adhesion. I will clearcoat it after a few days dry. They are quite stiff BTW
few things done.... exhausts almost aligned, need to adjust them here and there. Also manage to solder tubular frames. as you can see there is noticable difference between coloring of tub and PE parts, so painting is a must.
Looking great so far!
The exhaust pipes are lined up, front suspension seems to be oké. I think the latter one, and the fragile mounting of the rear spoiler are the tricky parts of this kit.
I also started on this kit, and for me it is my first MFH to build, so a lot to learn for me. I almost finished cleaning up parts and waiting to receive my low-temp.solder.
I like what I see, you did a great job so far. Have you already decided wether or not you will paint the monocoque or leave it polished? I'm still doubting what to do for myself. The polished metal looks great, but not really aluminium. Another advantage of painting will be that you can deal with irregularities in the surface, and add the missing rivets on the left side (the same as my kit).
For proper height of the suspension: I was thinking of dryfitting the wheels to the suspension in combination with the white metal spacing frame of the kit to ensure proper alignment and height.
Finish of the spoiler is fantastic! Is it necessary to put a clear primer coat first to give the decals a snug fit to the surface?
Looking forward to see the next in progress pics of your 312T4.
Hi Hugo. Thank you for you kind words. I am biased more on painting the monocoque. I am considering to use gunze SM06 chrome silver and tone it abit here and there to crush monotone surface. In my kit missing rivets are on more places than left side of the tub. I decided to renew them by CA glue. just drop of CA with toothpick tip on a lost rivet. I think it can do the job.
I will definitely try to mount wheels and set the ride height before any painting of the suspension. I was browsing some builds and find one japaneese blog, where it seems that spacer is wrong size. I will try to find a link, anyway mine will be displayed on sawhorses...problem solved
Front wing was shot with gunze metal primer before decaling so the clear that wil go afterwards have something to stick onto