Page 25 of 41
Re: Tamiya 1:12 McLaren MP4/6 Rebuild/Upgrade
Posted: Tue Aug 02, 2016 4:56 pm
by dr_gn
Had a trip to the Donington collection today. They didn't have an MP4/6, but did have a 4/5B and a 4/7, both of which had similar carbon types in the areas I'm interested in. Looks like the wing endplates are more textured than a visible weave:
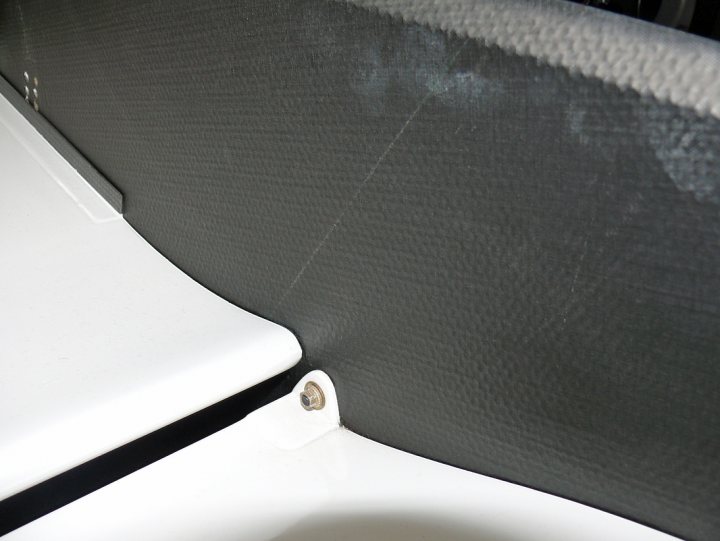
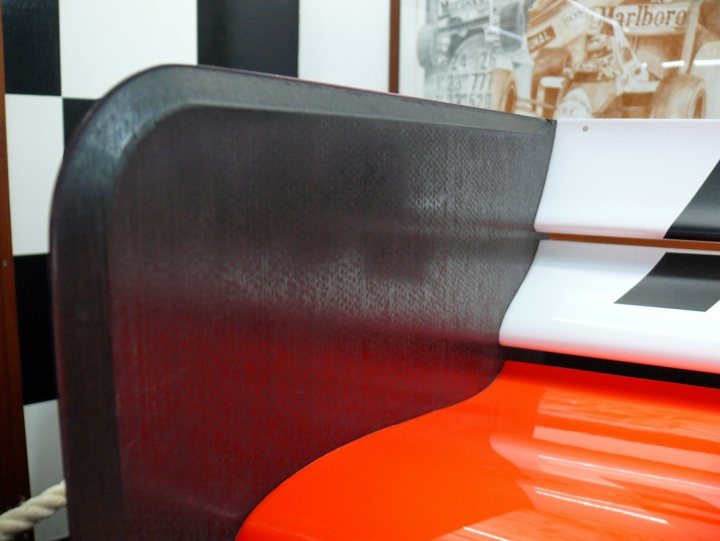
I guess the texture could be represented by twill weave carbon decal, toned down a bit, but looking at the cars from a 'scale' distance, all you see in these areas is matt or satin black.
Those endplates are pretty thick - I think even at 1:20, standard p/e would be too thin!
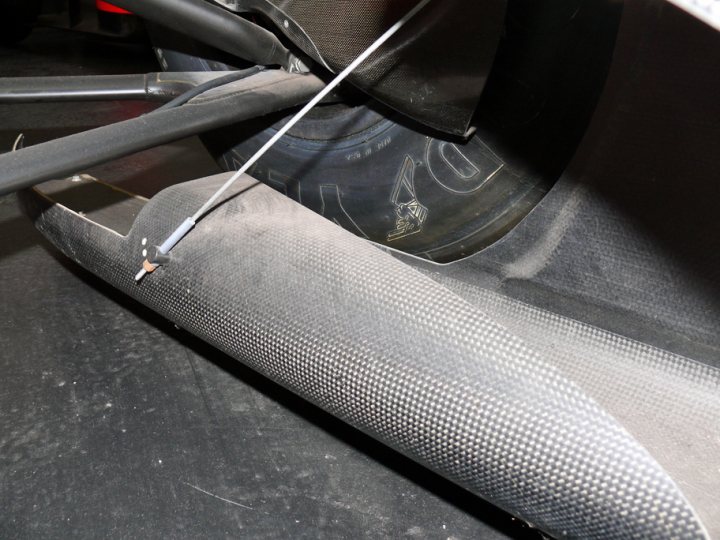
Vortex generators are more defined in terms of weave:
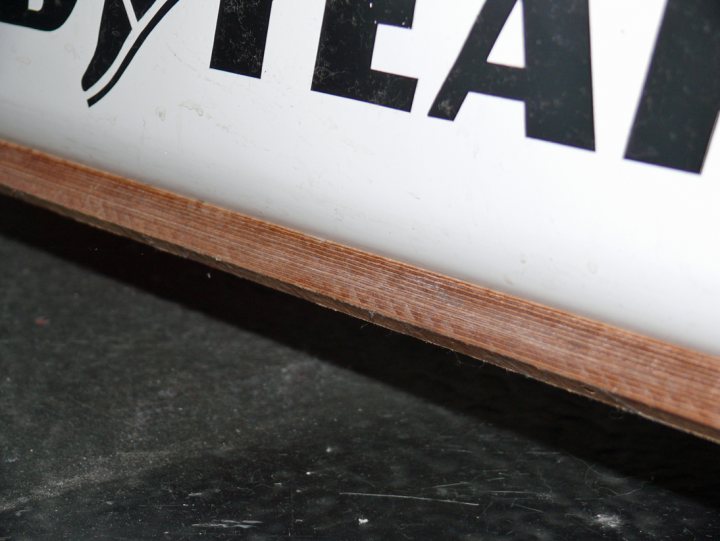
...and the front wing rubbing strips are wood:
They've gone to extreme lenghts to change the M@r!b*r* cheverons to something different IIRC on all the McLarens - these are infil stickers:
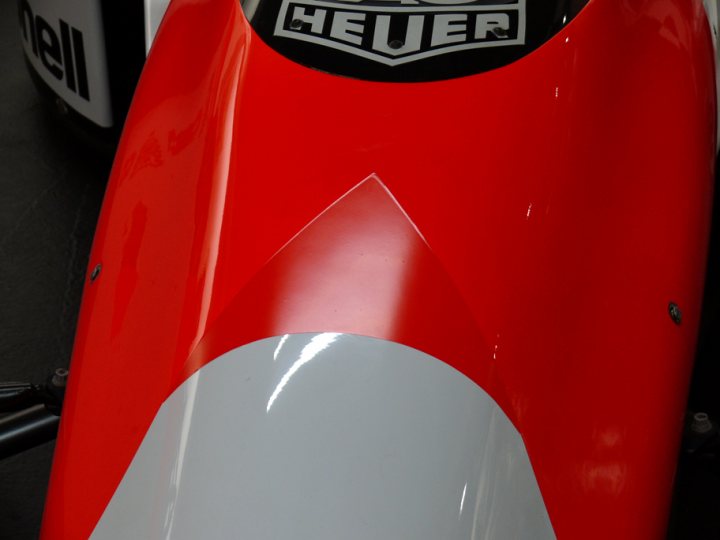
Yet the old BRM is unchanged:
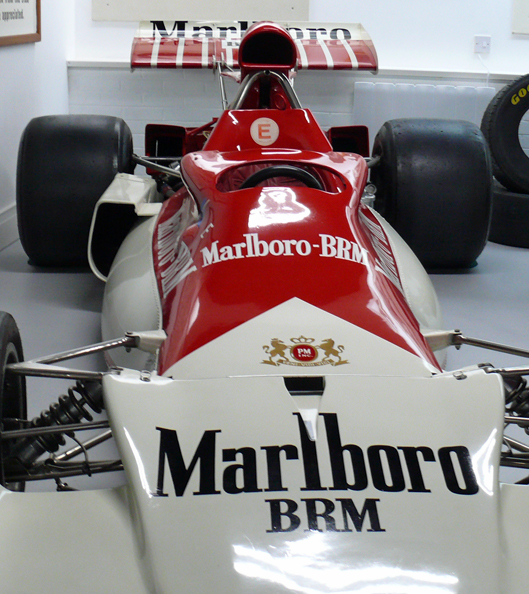
Presumably it's a McLaren thing.
Re: Tamiya 1:12 McLaren MP4/6 Rebuild/Upgrade
Posted: Tue Aug 02, 2016 4:57 pm
by dr_gn
Eagle50 wrote:What a major overhaul, and a lot of work. I admire your perseverance!!! She looks better and better, every time.
Cheers, Chris
Thanks Chris. I think I have enough reference material now, just need time!
Re: Tamiya 1:12 McLaren MP4/6 Rebuild/Upgrade
Posted: Tue Aug 02, 2016 8:39 pm
by bossy122
Worst bumper sticker ever!
Re: Tamiya 1:12 McLaren MP4/6 Rebuild/Upgrade
Posted: Wed Aug 03, 2016 2:21 am
by marlborored
bossy122 wrote:Worst bumper sticker ever!
Yup
Re: Tamiya 1:12 McLaren MP4/6 Rebuild/Upgrade
Posted: Tue Nov 15, 2016 4:25 pm
by dr_gn
Got some CNC'd front suspension components on back order from Thunder Valley today:
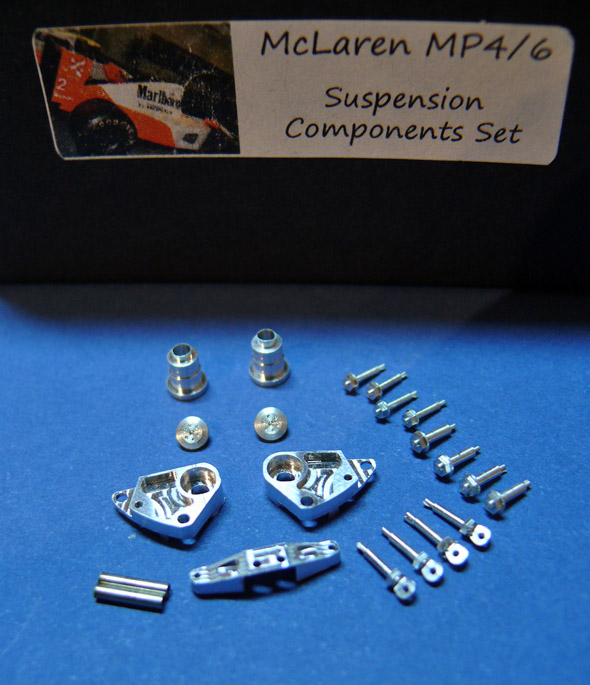
I can only describe them as exquisite. I've got the Top Studio front suspension detail kit as well, so these parts are duplicated, however, the rockers in that set are built-up from layers of photo-etch, and the roll bar lever is from folded photo-etch. Don't get me wrong - the Top Studio stuff is excellent, and incredible value, but there is no comparison with genuine CNC'd aluminium. In conjunction with the more refined TVF1 dampers, the two sets complement each other very nicely in fact.
Re: Tamiya 1:12 McLaren MP4/6 Rebuild/Upgrade
Posted: Wed Nov 16, 2016 11:39 am
by turboF1
Those light "swirl marks" in the aluminum add to the realism of the part. The PE parts can't match that small touch of realism.
Re: Tamiya 1:12 McLaren MP4/6 Rebuild/Upgrade
Posted: Fri Aug 30, 2019 2:58 pm
by dr_gn
OK as a result of my latest existential crisis, I decided to get on with this (I think that's about 6 model projects simultaneously now).
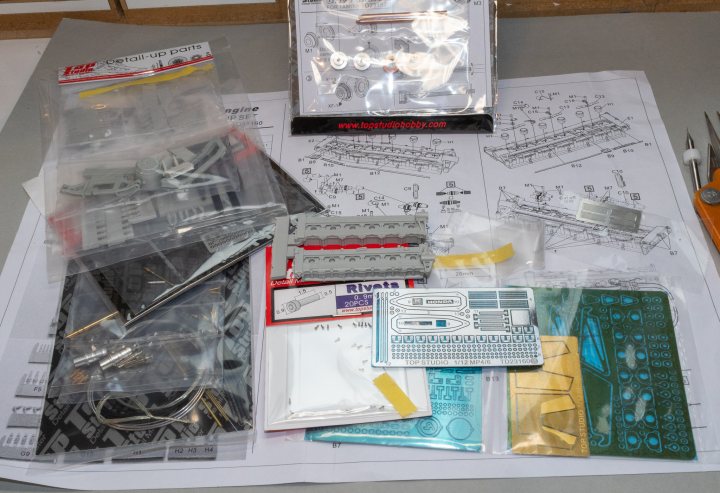
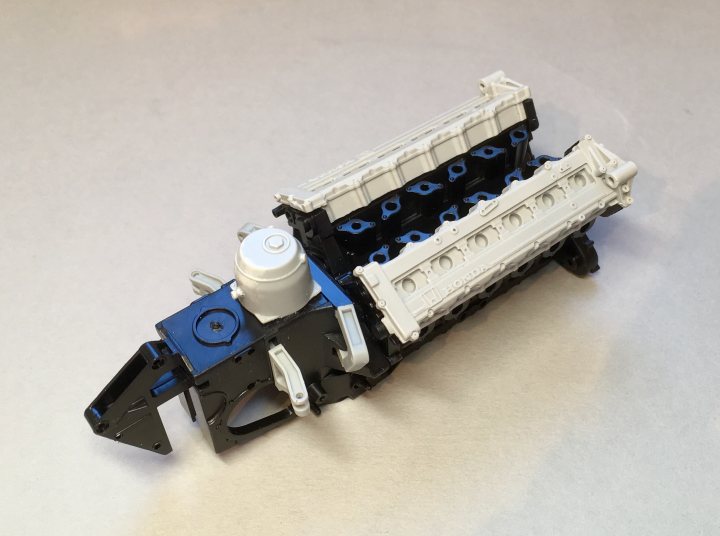
I thought I'd get on with the engine of the 'open' version, so cracked open the box of the new model:
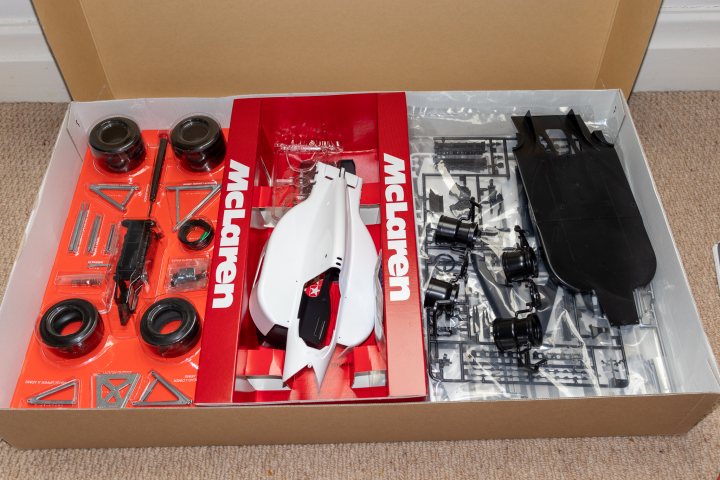
And the Top Studio detail set, with additional stuff from RB Motion and Formula Perfect in the 'States:
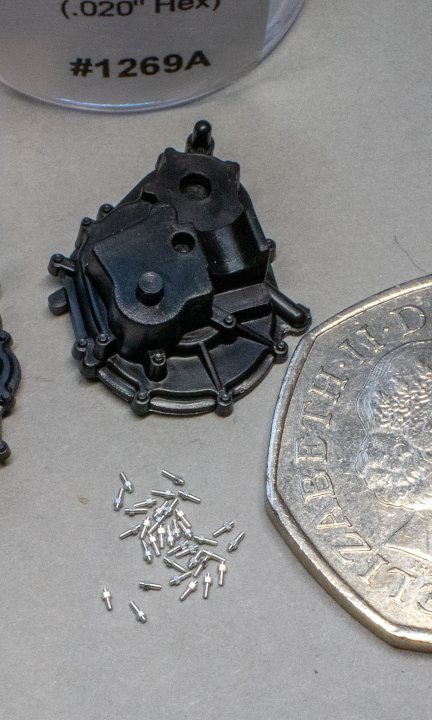
First job I fancied was replacing the moulded-in stubs with RB Motion turned stud and nuts:
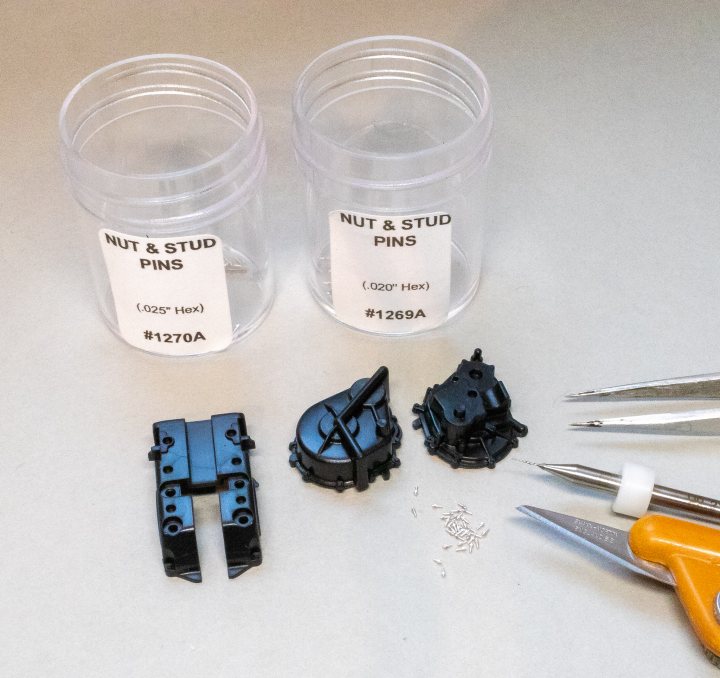
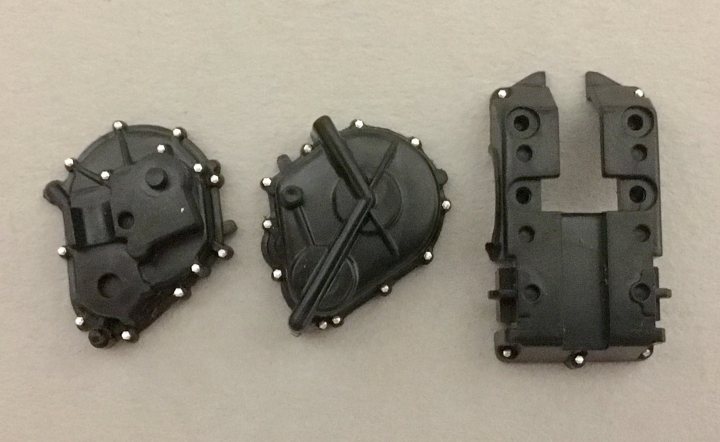
I'd previously selected the 0.025" (0.635 mm) ones for the main casings, and the 0.020" ones for the secondary casings. You just drill a hole and glue the tail of the stud into it:
So we'll see how that goes...
Re: Tamiya 1:12 McLaren MP4/6 Rebuild/Upgrade
Posted: Fri Aug 30, 2019 3:30 pm
by dr_gn
May have asked before, but what’s a good way of replicating the male-mould tub exterior surfaces at this scale? Thanks.
Re: Tamiya 1:12 McLaren MP4/6 Rebuild/Upgrade
Posted: Sat Aug 31, 2019 9:15 am
by dr_gn
That wasn’t as tricky as I thought, although I did used my 3x magnifying glasses for the first time.
Still a lot of work to do on just these assemblies, but it’s a start.
Re: Tamiya 1:12 McLaren MP4/6 Rebuild/Upgrade
Posted: Mon Sep 02, 2019 8:01 am
by dr_gn
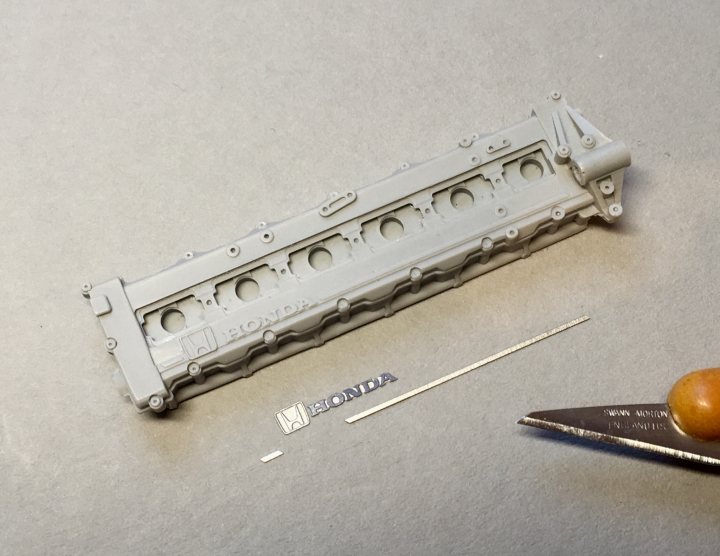
The detail kit includes several resin replacement parts that are higher fidelity than the originals:
Among these are the cam covers, which need detailing with various bits of photo-etch. I want to get the Honda logos looking like machined aluminium, so I set about Aralditing the various bits together:
The issue here is that it’s impossible to orientate all the photo-etch to reflect light identically. I therefore experimented by priming with Chaos Black, masking around the badges and flatting the raised metal with wet and dry on a Mylar backing. Eventually I got equal reflections:
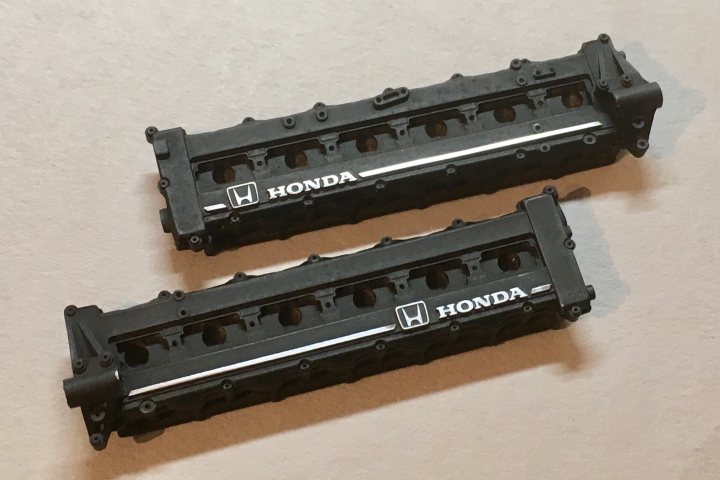
Now for a coat of Tamiya satin black, and detail painting the coil/cap recesses.