Glad that the polishing kit is working. The results shown are looking promising. Keep up the good work !!
Cheers, Paul
Sydney, Oz
Tamiya 1:12 McLaren MP4/6 Rebuild/Upgrade
-
 Paul_OFarrell
- FOTA Vice Chairman

- Posts: 1622
- Joined: Tue Jun 29, 2004 7:12 am
- Your Name: Paul O'Farrell
- Favorite F1 Team or Driver: Lotus, McLaren, Williams
- Location: Sydney Australia
- Status: Offline

-
 jmpsebring
- FOTA Vice Chairman
- Posts: 1902
- Joined: Tue Jan 08, 2008 10:35 pm
- Location: Wash DC
- Status: Offline
Re: Tamiya 1:12 McLaren MP4/6 Rebuild/Upgrade
I'm never patient enough or brave enough...but is this the 'perfect time' to shoot one more wet coat of 2k over the leveled-out polished part? Or will 2k over 2k cause major problems ?
Sure is a pretty rebuild!
Sure is a pretty rebuild!

Re: Tamiya 1:12 McLaren MP4/6 Rebuild/Upgrade
Ha ha.jmpsebring wrote: is this the 'perfect time' to shoot one more wet coat of 2k over the leveled-out polished part?
No.
It's time to accept it'll never be totally free of flaws (even if the paint was perfect, my starting point of the old body was never going to be), make the best of it and apply what I've learned to the Ferrari 641 or FW14B. At the end of the day, this model has sentimental value, so using a new body would defeat the object of the exercise to a degree.
I'm currently on "fine" Tamiya compound and it's looking pretty good fingers crossed. It will be a vast improvement over the original.
Re: Tamiya 1:12 McLaren MP4/6 Rebuild/Upgrade
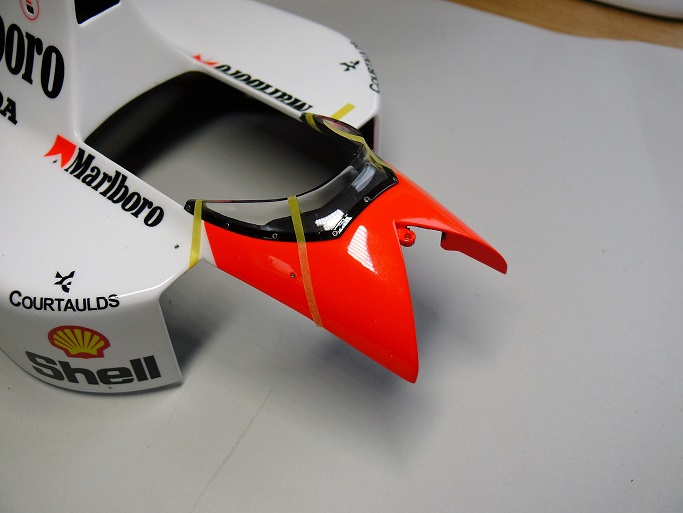
So I painted the inside of the body matt black - hand painted around the edges, then masked roughly and sprayed the remainder. Any overspray was removed with thinners and a cotton bud. I also replaced the foil heat shielding - purely to return it to original condition. I didn't fill the ejector marks since nobody will see it once it's on the "kerbside" chassis:
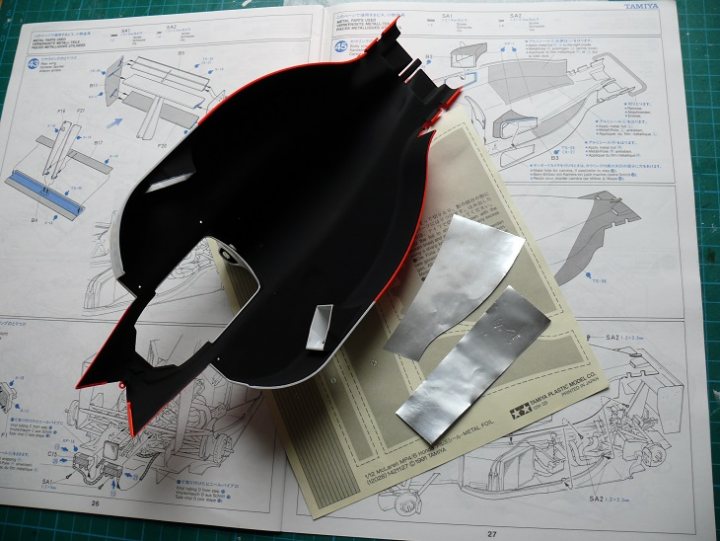
Also added some 0.9mm p/e rivets to the sidepod exhaust surrounds. I removed the pips from the red bit of the body below the windscreen and drilled a couple of holes for the missing body fasteners there, ditto the lower front and rear sidepods.
Added the windscreen with PVA:
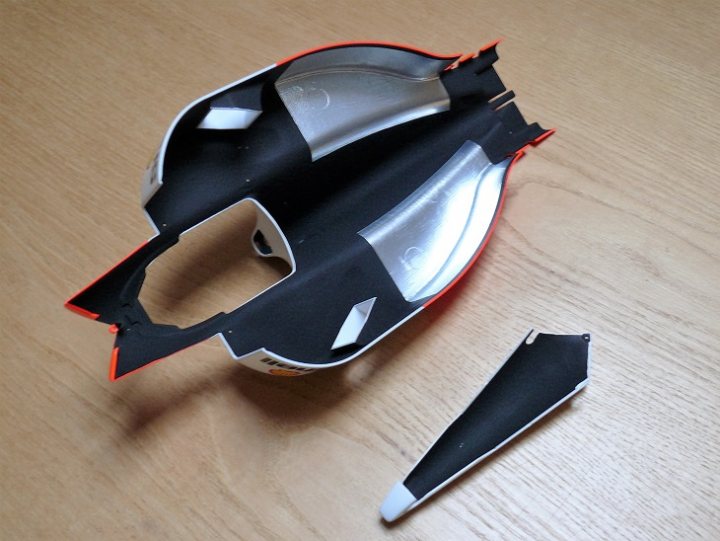
Current state after wax polishing:
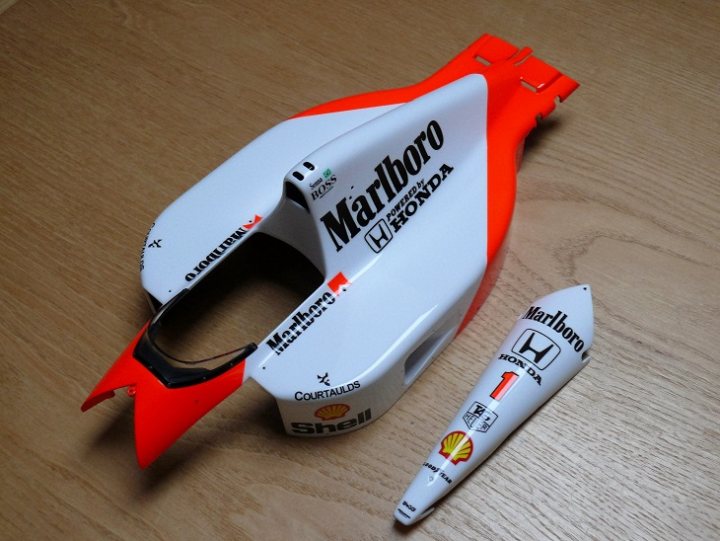
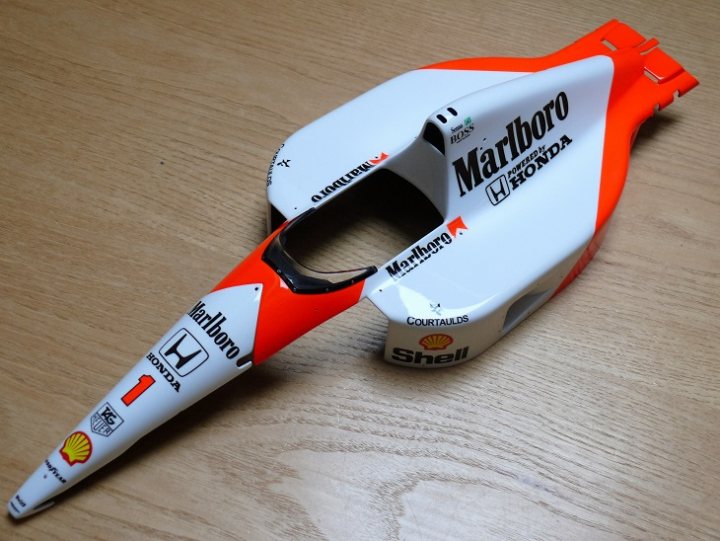
Does it stand close inspection? hmm not really. Depends how close, but there are certainly a few flaws and mistakes there. Still, it's much better than it was, and I've got another two 1:12 F1 cars still to go, so I'm happy to put this down to experience gained and move on...
Next job, repair the mirrors, which got damaged on removal. Ithink I will replace the oval stems with the earlier round stalks, rather than use my spare mirrors:
Also added some 0.9mm p/e rivets to the sidepod exhaust surrounds. I removed the pips from the red bit of the body below the windscreen and drilled a couple of holes for the missing body fasteners there, ditto the lower front and rear sidepods.
Added the windscreen with PVA:
Current state after wax polishing:
Does it stand close inspection? hmm not really. Depends how close, but there are certainly a few flaws and mistakes there. Still, it's much better than it was, and I've got another two 1:12 F1 cars still to go, so I'm happy to put this down to experience gained and move on...
Next job, repair the mirrors, which got damaged on removal. Ithink I will replace the oval stems with the earlier round stalks, rather than use my spare mirrors:
Re: Tamiya 1:12 McLaren MP4/6 Rebuild/Upgrade
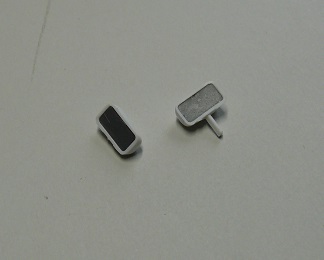
The Thunder Valley p/e mirrors (on the right) polish up nicely - still a bit more work to do on them, and they appear to be a perfect fit in the housings. The Top Studio version (on the left) is way too small for some reason.
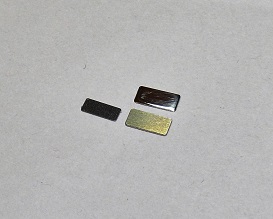
I should be able to solder the new stems together from some brass rod and some p/e washers from the Thuder Valley etch set:
I should be able to solder the new stems together from some brass rod and some p/e washers from the Thuder Valley etch set:
-
 SteveNoble
- FOTA Chairman

- Posts: 2271
- Joined: Sun Jul 30, 2006 4:27 pm
- Location: Barnsley, UK
- Status: Offline
Re: Tamiya 1:12 McLaren MP4/6 Rebuild/Upgrade
It's looking fantastic, body finish looks great..!!
Steve Noble
-
 turboF1
- FOTA Vice Chairman
- Posts: 1521
- Joined: Tue Dec 17, 2013 9:10 pm
- Favorite F1 Team or Driver: Renault Sport
- Status: Offline

Re: Tamiya 1:12 McLaren MP4/6 Rebuild/Upgrade
I think you are being too hard on yourself. That looks great. Lots of nice little details too!
-
 daveyman
- FOTA Chairman
- Posts: 4540
- Joined: Sun Jun 24, 2007 11:39 am
- Favorite F1 Team or Driver: Riccardo Patrese
- Location: Hull, England.
- Status: Offline

Re: Tamiya 1:12 McLaren MP4/6 Rebuild/Upgrade
I agree, looks very, very good. Don't be too harsh on yourself. Gonna look great when you are done.
Re: Tamiya 1:12 McLaren MP4/6 Rebuild/Upgrade
Much appreciated guys!
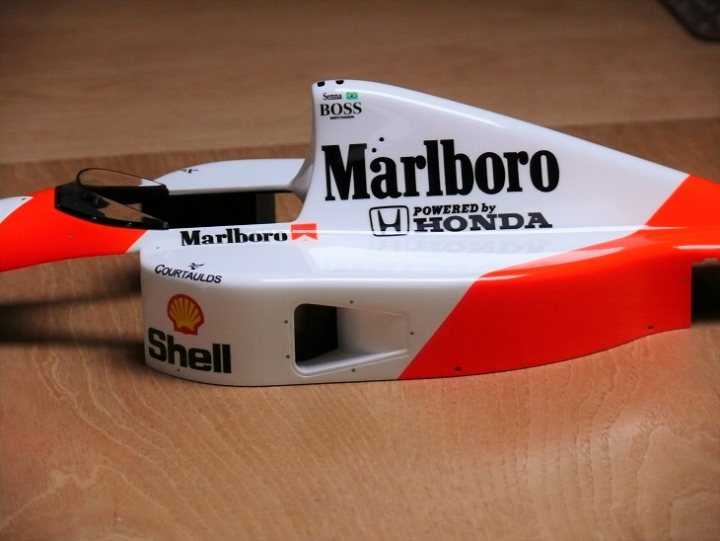
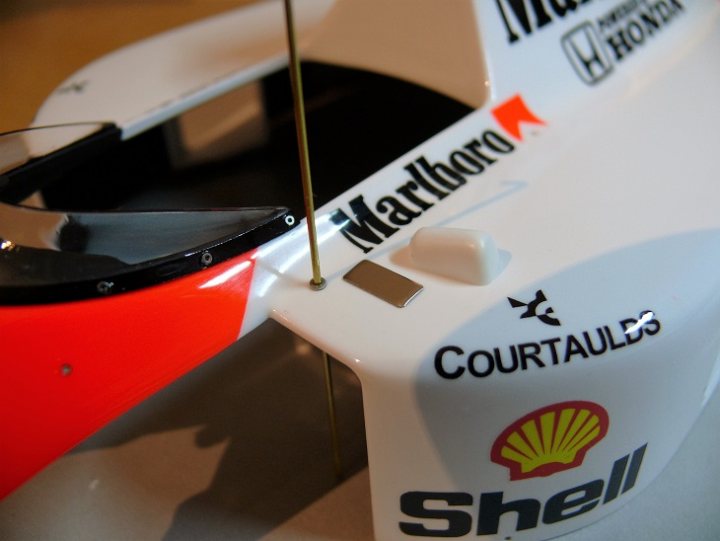
This is the most annoying thing about the finish - the bubbles (or whatever they are) under the carrier film:
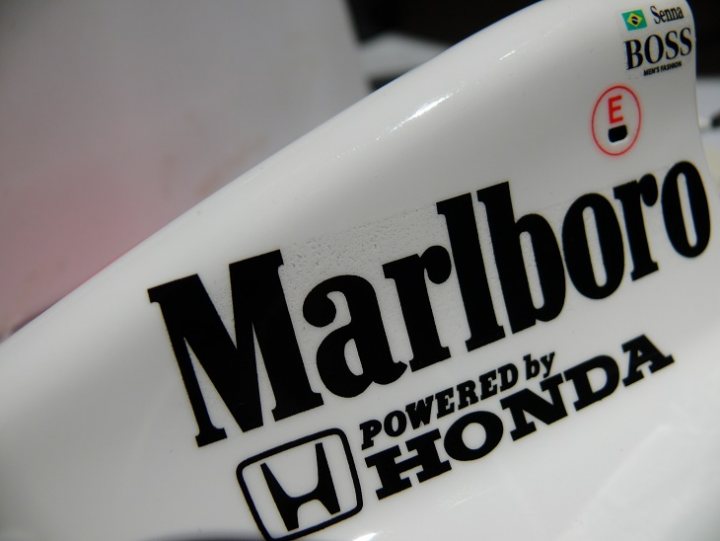
I should have removed that bit of carrier film. I didn't want to wick Klear under the decals (as I always do with aircraft models) in case it then reacted with the 2K clear.
It's most apparent under directional light - I guess when the flaws cast shadows. Pretty much invisible under most lights:
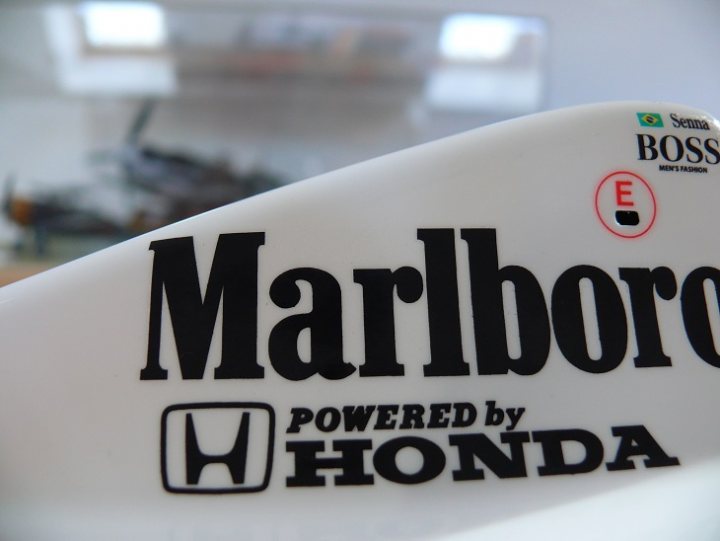
Still annoying though. Time will tell whether I can put up with it, or whether I get another set of decals and paint the spare shell.
This is the most annoying thing about the finish - the bubbles (or whatever they are) under the carrier film:
I should have removed that bit of carrier film. I didn't want to wick Klear under the decals (as I always do with aircraft models) in case it then reacted with the 2K clear.
It's most apparent under directional light - I guess when the flaws cast shadows. Pretty much invisible under most lights:
Still annoying though. Time will tell whether I can put up with it, or whether I get another set of decals and paint the spare shell.
-
SteveNoble
- FOTA Chairman
- Posts: 2271
- Joined: Sun Jul 30, 2006 4:27 pm
- Location: Barnsley, UK
- Status: Offline
Re: Tamiya 1:12 McLaren MP4/6 Rebuild/Upgrade
I've had a few decals where they have done exactly the same thing as you show above. I don't know why they leave that large area of clear film attached, maybe so that the decal doesn't fold up on itself so easily and to keep it rigid? The only way to avoid it is to prick the surface with a needle and use plenty micro-sol to flatten it down. But now you've cleared over it, that's out of the question. I know it probably niggles you a lot, but it's not so noticeable unless you really look most probably. But anyway you've learnt from it and next time you will make it perfect. I always say that the day when I produce a model that I'm 100% happy with will be the day I stop building for good, because I know I'll never reach that standard again 
Steve Noble