Tamiya 1:12 McLaren MP4/6 Rebuild/Upgrade

Models in progress... including non-F1 models.

Topic author
dr_gn
Best of the Rest
Best of the Rest
Posts: 507
Joined: Sun Apr 27, 2014 3:46 pm
Status: Offline

Re: Tamiya 1:12 McLaren MP4/6 Rebuild/Upgrade

Post by dr_gn »

daveyman wrote:Read your post on the different techniques, I like the masking tape effect but, as someone said, my worry would be the tape lifting over time. I've seen armour modelers paint liquid cement on a surface to soften it and then scuff it to represent a texture. Whether there's anything in that technique that could help you?
I like the masking tape thing too, but I’ve seen what happens to self-adhesive stuff as it ages - very dodgy. I’m thinking tacky gloss paint, with texture somehow applied, then Overcoated with matt.

Yes, the armour guys might have the answer. I think there’s some ant-magnetic coating called zimmerit or something - they have tools to apply it to model tank hulls. Not saying it’s appropriate for a carbon tub, but something not far off?

It’ll take some experimentation To get the right method though. All the faffing with various colours seems a popular pastime, but under daylight conditions it actually looked nothing like that. Flash photography and museum pieces have a lot to answer for...

Cheers!
User avatar

daveyman
FOTA Chairman
FOTA Chairman
Posts: 4540
Joined: Sun Jun 24, 2007 11:39 am
Favorite F1 Team or Driver: Riccardo Patrese
Location: Hull, England.
Status: Offline
Great Britain

Re: Tamiya 1:12 McLaren MP4/6 Rebuild/Upgrade

Post by daveyman »

When I made my Fujimi 1/20 kit I did do the various mixs of paint for certain areas. It maybe isn't accurate but I just employed some artistic licence. I've seen the tubs up close and whilst I agree with you about the colour it would certainly need some shading techniques in my opinion to avoid becoming a lifeless flat black lump. Look forward to seeing what you come up with. You've set the bar very high with your detail work so far...

Topic author
dr_gn
Best of the Rest
Best of the Rest
Posts: 507
Joined: Sun Apr 27, 2014 3:46 pm
Status: Offline

Re: Tamiya 1:12 McLaren MP4/6 Rebuild/Upgrade

Post by dr_gn »

daveyman wrote:When I made my Fujimi 1/20 kit I did do the various mixs of paint for certain areas. It maybe isn't accurate but I just employed some artistic licence. I've seen the tubs up close and whilst I agree with you about the colour it would certainly need some shading techniques in my opinion to avoid becoming a lifeless flat black lump. Look forward to seeing what you come up with. You've set the bar very high with your detail work so far...
Thanks, yes I agree completely about the shades of black, but it's the rather vivid colours that look wrong - on photos it's an effect of the translucence of the resin under flash lighting I think. It's the same with the engine parts - everything is specified as "satin black", and even reference photos show it to be the same shade. For a model though, you can easily use three or so shades of black and still be 'correct', while differentiating the parts.

Do you have a link to your Fujimi model please? Cheers.
User avatar

daveyman
FOTA Chairman
FOTA Chairman
Posts: 4540
Joined: Sun Jun 24, 2007 11:39 am
Favorite F1 Team or Driver: Riccardo Patrese
Location: Hull, England.
Status: Offline
Great Britain

Re: Tamiya 1:12 McLaren MP4/6 Rebuild/Upgrade

Post by daveyman »


Topic author
dr_gn
Best of the Rest
Best of the Rest
Posts: 507
Joined: Sun Apr 27, 2014 3:46 pm
Status: Offline

Re: Tamiya 1:12 McLaren MP4/6 Rebuild/Upgrade

Post by dr_gn »

daveyman wrote:https://www.f1m.com/forum/viewtopic.php ... top+studio

Not a patch on what you are going to achieve but I'm happy with it.

https://www.f1m.com/forum/viewtopic.php ... top+studio
TBH it looks spot-on for the scale to my eyes. Great job. Thanks for posting.
User avatar

daveyman
FOTA Chairman
FOTA Chairman
Posts: 4540
Joined: Sun Jun 24, 2007 11:39 am
Favorite F1 Team or Driver: Riccardo Patrese
Location: Hull, England.
Status: Offline
Great Britain

Re: Tamiya 1:12 McLaren MP4/6 Rebuild/Upgrade

Post by daveyman »

Thank you for your kind words, appreciate it.

Topic author
dr_gn
Best of the Rest
Best of the Rest
Posts: 507
Joined: Sun Apr 27, 2014 3:46 pm
Status: Offline

Re: Tamiya 1:12 McLaren MP4/6 Rebuild/Upgrade

Post by dr_gn »

dr_gn wrote:Thanks guys - much appreciated!

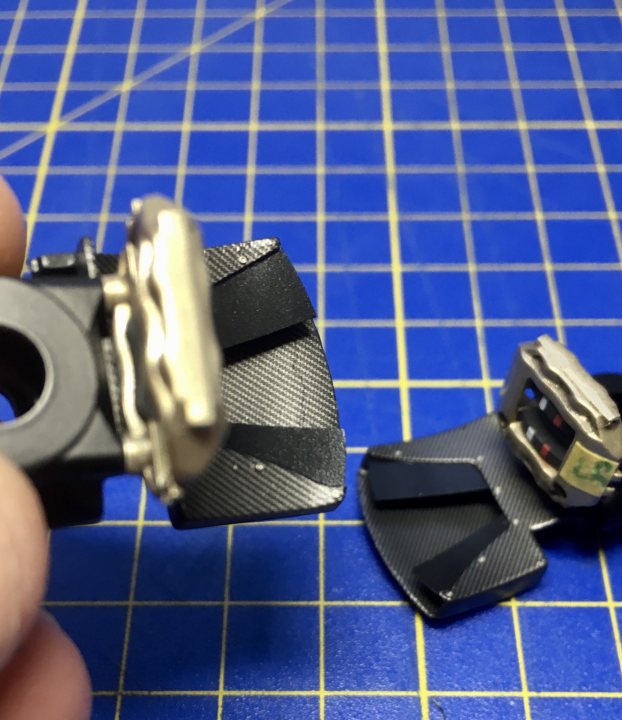
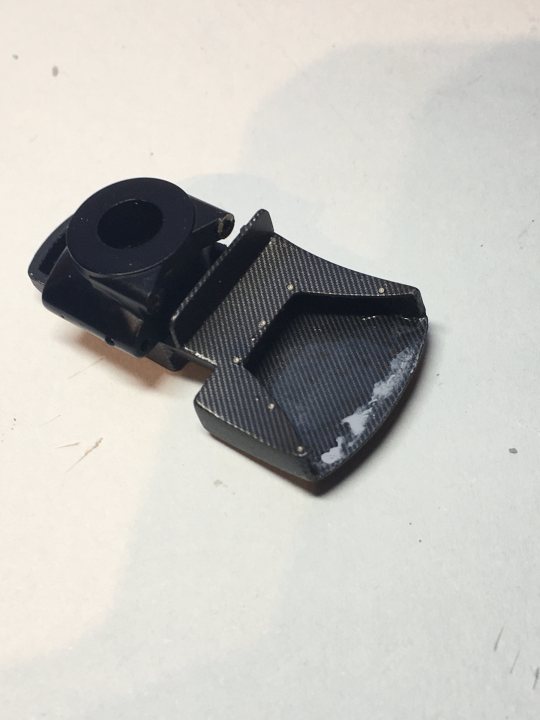
Frustrating work on the rear brake ducts. As per a previous post, I opted to scrap the p/e inners and make my own 4-piece items. This worked well, but I noticed a cracked decal in the inside of one. I tried to flat it back and told myself that putting another decal on top would be ok. I kidded myself into finishing them both before accepting that the repaired one does indeed look crap:

Image

So I’ve dis-assembled the inner plates (only secured with pva luckily), and I’ll have to think how to fill it. I really don’t want to strip the whole thing and start again. Again.
Forgot to mention - the flawed decal was filled with Mr Surfacer 1000 and flatted smooth, and another piece of decal applied. I ended up doing this to both ducts:

Image

I had my doubts because short cuts rarely work with models, but seemed to get away with it this time.

Topic author
dr_gn
Best of the Rest
Best of the Rest
Posts: 507
Joined: Sun Apr 27, 2014 3:46 pm
Status: Offline

Re: Tamiya 1:12 McLaren MP4/6 Rebuild/Upgrade

Post by dr_gn »

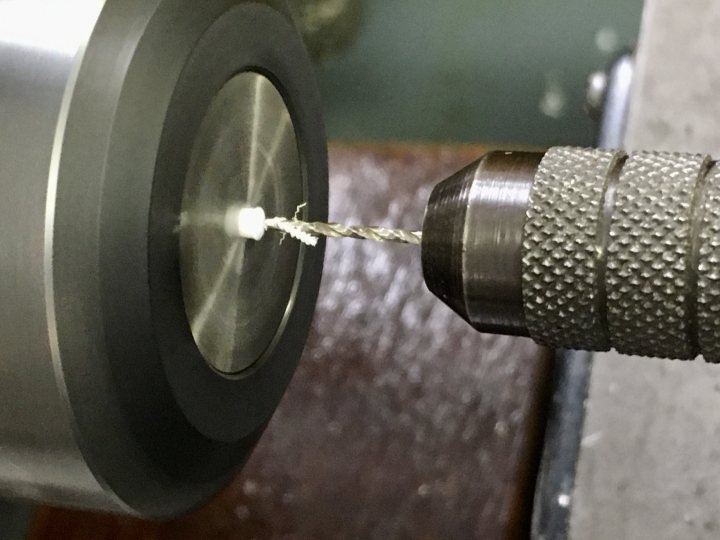
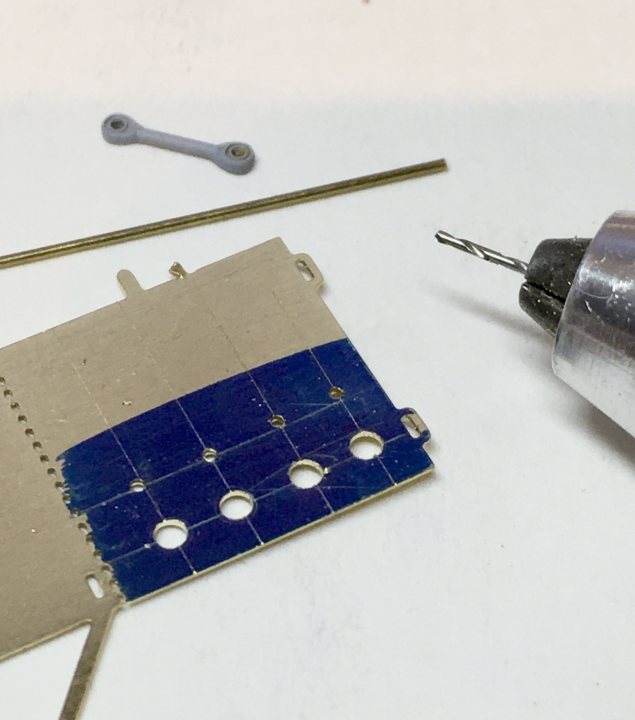
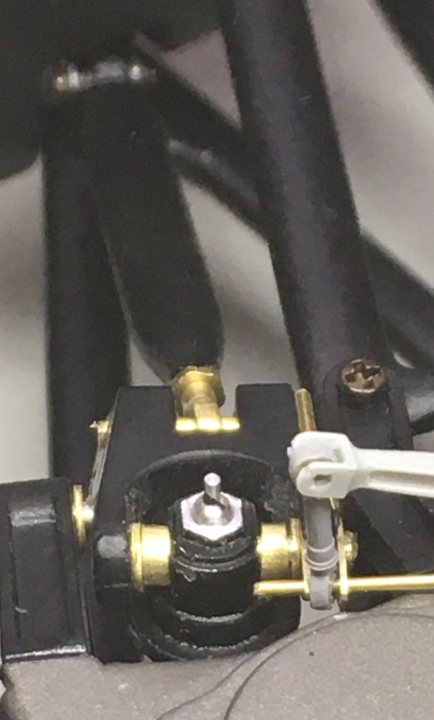
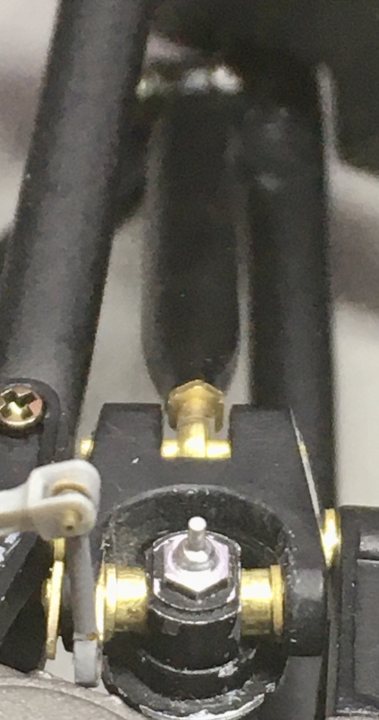
So with the outer bits of the rear suspension done, I turned my attention back to the inner bits, specifically the rockers. The originals are approximately the right size and shape, but need some refinement. For a start, the pushrod mounting fork is too wide, and I wanted to avoid the unsightly loose rattle-fit of the upper rose joint. I made some cheek plates from plastic rod, drilled out on the lathe:

Image

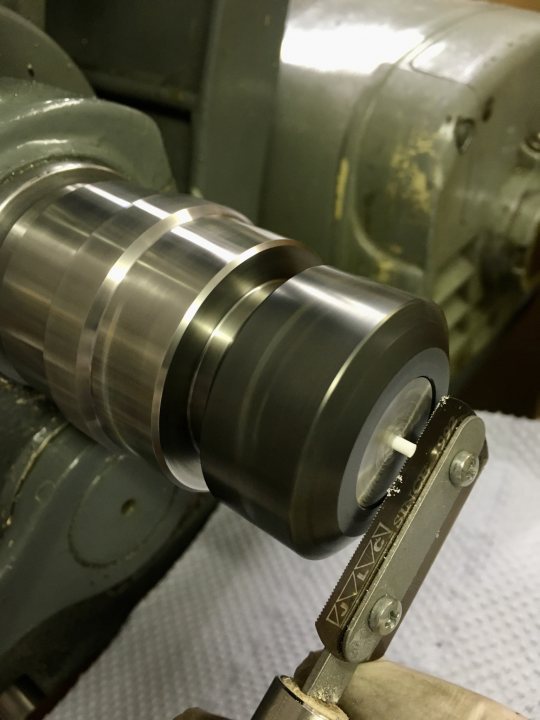
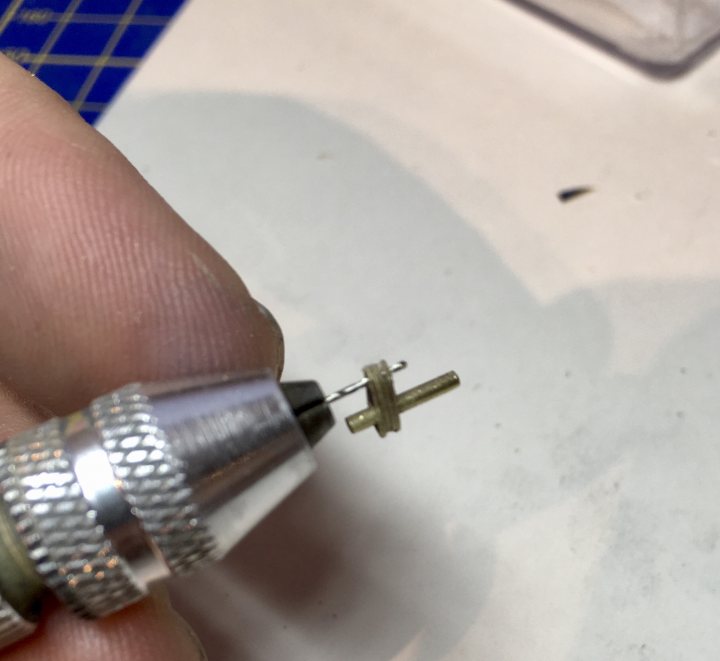
Parted off using a razor saw:

Image

These will be cemented in place before painting.

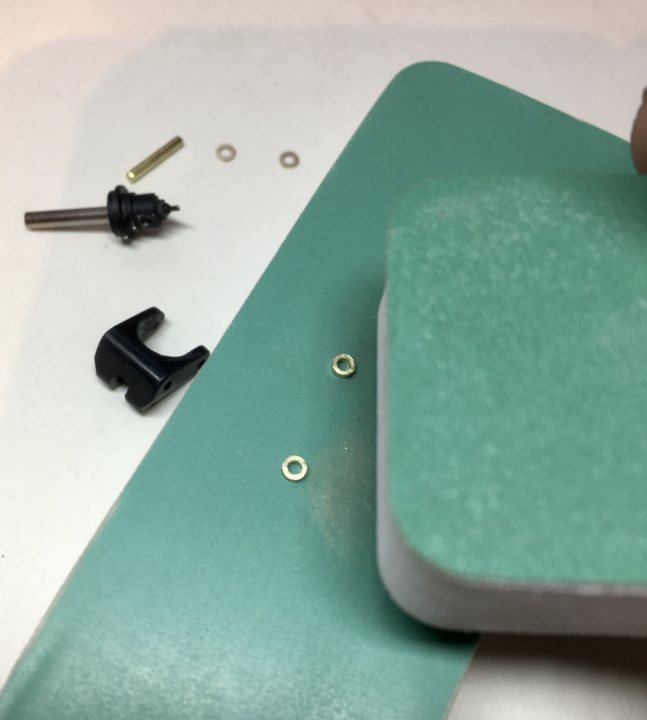
Conversely, the upper damper mounts already have oversized bosses moulded-in, whereas they should really form part of the damper cap mount. The bosses were easily removed, and the aperture sanded to a wider diameter. Replacement spacer pieces were cut from drilled-out brass tube, sanded to length between two abrasive pads:

Image

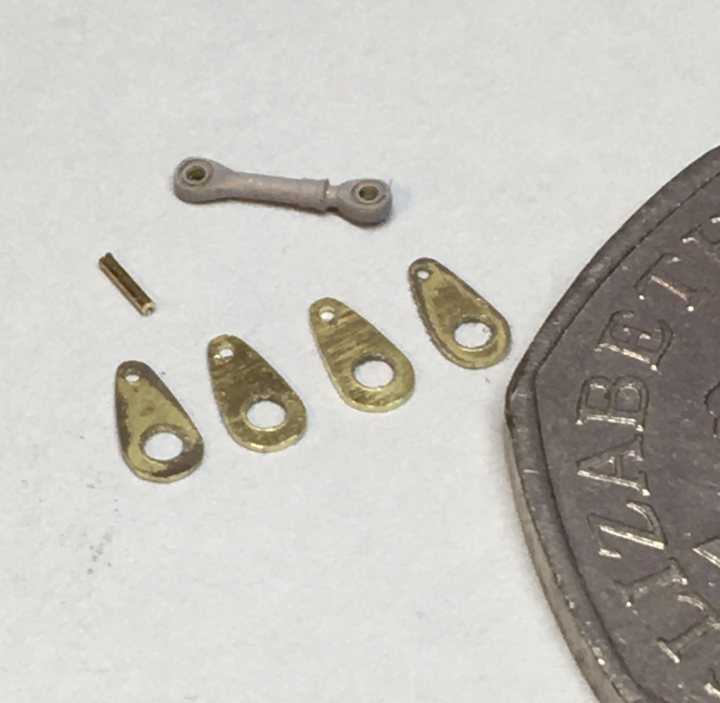
The real car had distinctive gold spacing washers at the ends of these tubes, which I made from brass photo-etch. The other major simplification on the rockers is the anti-roll bar link mount; an unsightly plastic ball joint. Even theTop Studio kit suggests a piece of rod as a replacement. This needed some work, so I represented the real method by scratching some mount plates from brass photo-etch plate (from a Westland Lysander kit I think!):

Image

Image

Image

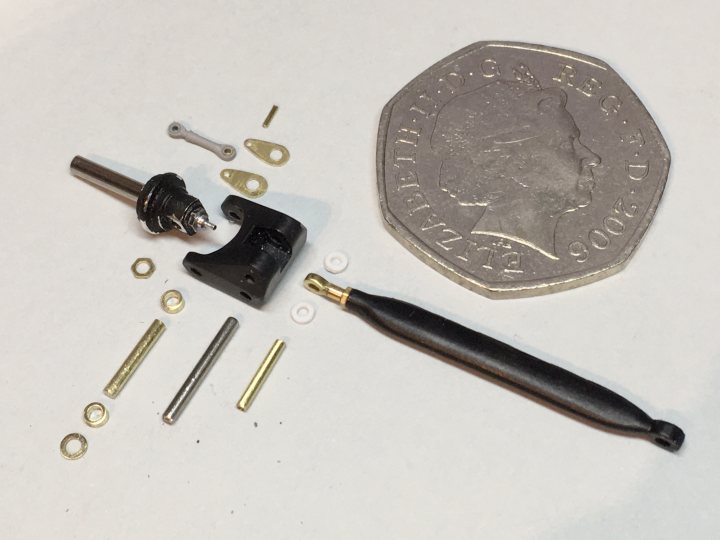
These are the parts, along with a load of other bits of rod etc:

Image

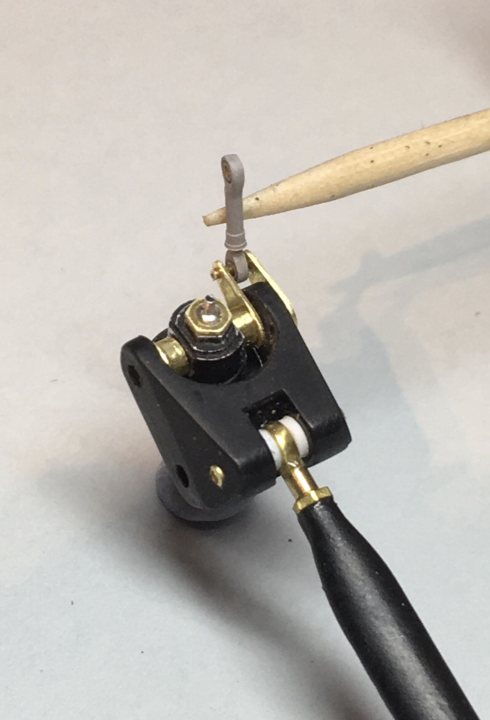
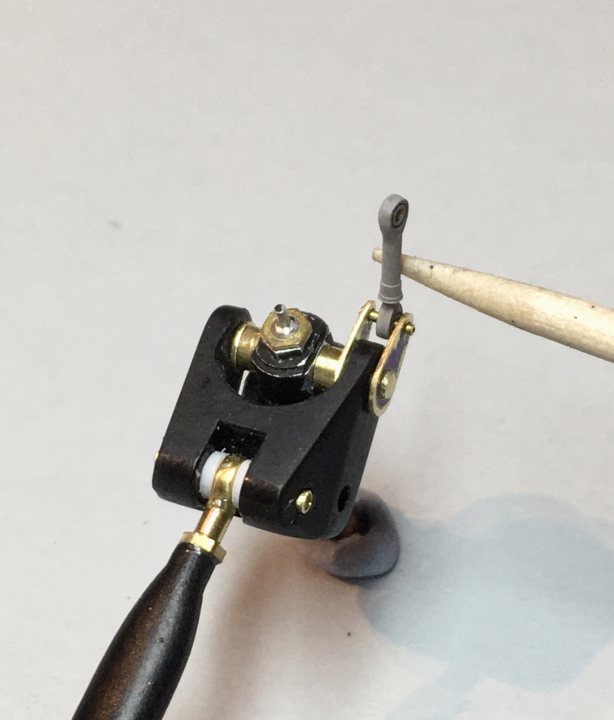
And test-assembled; the laminated Top Studio rose joints really look the part after a bit more finessing with a polishing stick - the laminations are invisible now:

Image

Image

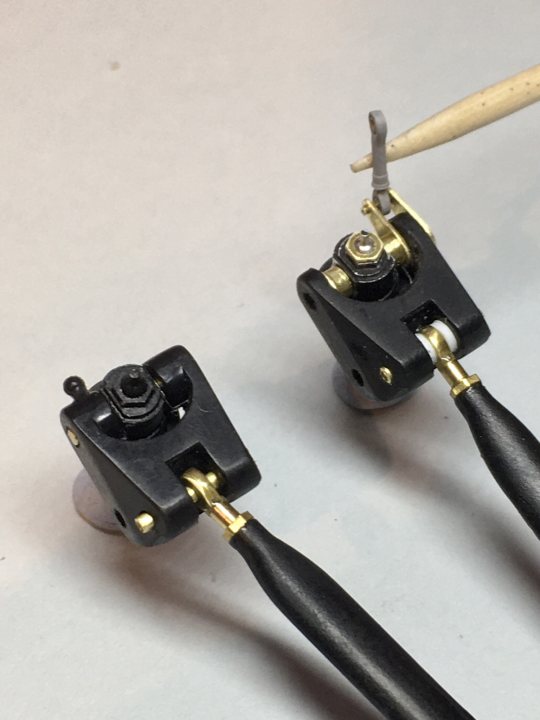
Comparison with original:

Image

It’s never going to be 100% accurate without major surgery, but when painted up, the contrasting black and brass parts should look fine. The a.r.b. mount plates might need fettling a bit to suit their upper links, but you have to start somewhere...

Topic author
dr_gn
Best of the Rest
Best of the Rest
Posts: 507
Joined: Sun Apr 27, 2014 3:46 pm
Status: Offline

Re: Tamiya 1:12 McLaren MP4/6 Rebuild/Upgrade

Post by dr_gn »

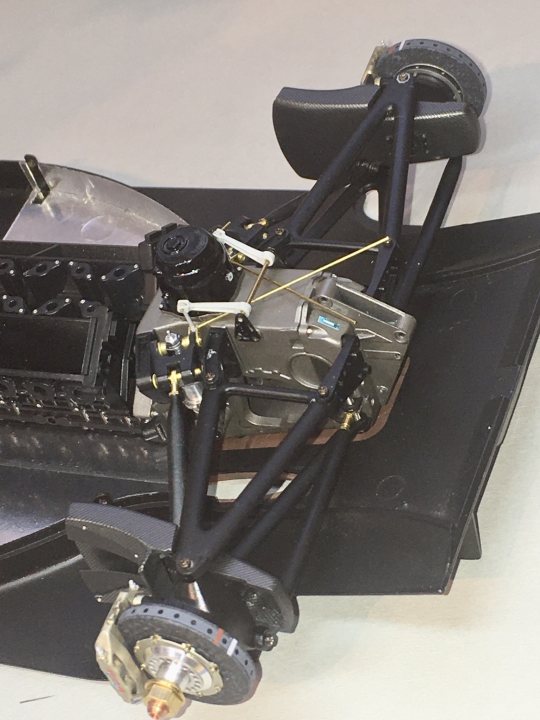
Before going much further with the rear suspension, I thought a dry-run assembly would be a good idea. Having had previous experience building this kit, I was aware of a few potential issues, so temporarily screwed the sump to the old undertray:

Image

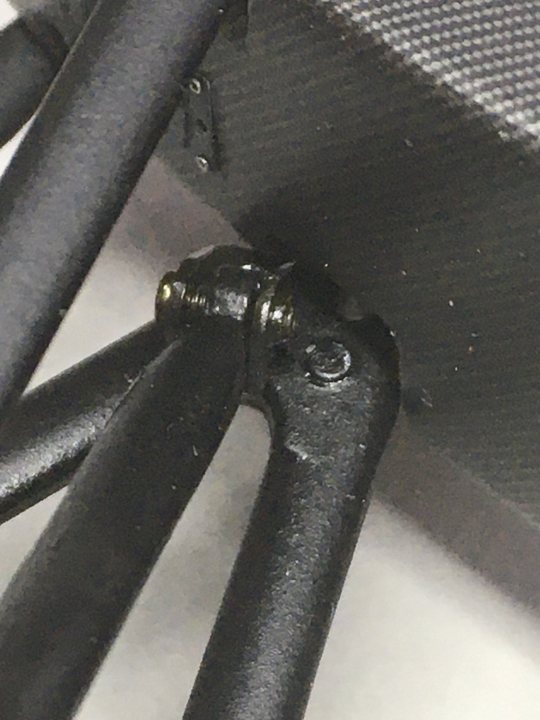
Since I’ve had to make the a.r.b. Mounts, and the Top Studio roll bar is a bit of a d.i.y. affair, I jury rigged the pieces together. It’s nearly there, but there is an issue with the pushrods. As per the kit geometry, the rods are grossly out of line with the rocker pivots - they should be normal to the axes, but as you can see, they aren’t anything like:

Image

The only realistic choice is to correct the wishbone end - or should I say re-position the pushrod mount to a more favourable position:

Image

Obviously this is just moving an error from one place to another, but at least it’s not half as obvious down there. The suspension infil bodywork pieces may need a bit of fettling to suit, but no big deal there. This results in a far more realistic geometry:

Image

I temporarily omitted the cheek plates I made for the upper pushrod rose joints, but once corrected it should all slot together quite nicely.

Next job will be to make the anti roll bar into something that looks like reality. The Top Studio method results in one that’s way too thin and a bit clunky looking.

rjfk2002
F3
F3
Posts: 17
Joined: Sat Feb 14, 2015 11:03 am
Status: Offline

Re: Tamiya 1:12 McLaren MP4/6 Rebuild/Upgrade

Post by rjfk2002 »

Stunning work. When scratching the brass mount plates how did you cut them to get the even “egg” shape?

Rich
Post Reply